Creating Flashcards on H5P

The previous blog entry showed how to make a basic accordion style review tool on H5P. This entry will teach you how to use H5P to create online flashcards. The online flashcard tool is a great way to present a large amount of study material, as long as the material requires only a brief explanation or rationale. The process is a bit more complex than the accordion style list, but the outcome is much more customizable. Below is an example flashcard set to study commonly used medical abbreviations. Most of these cards are simply text on both sides. Cards 3 and 4 give examples of how to use audio and image clues on a flashcard set.

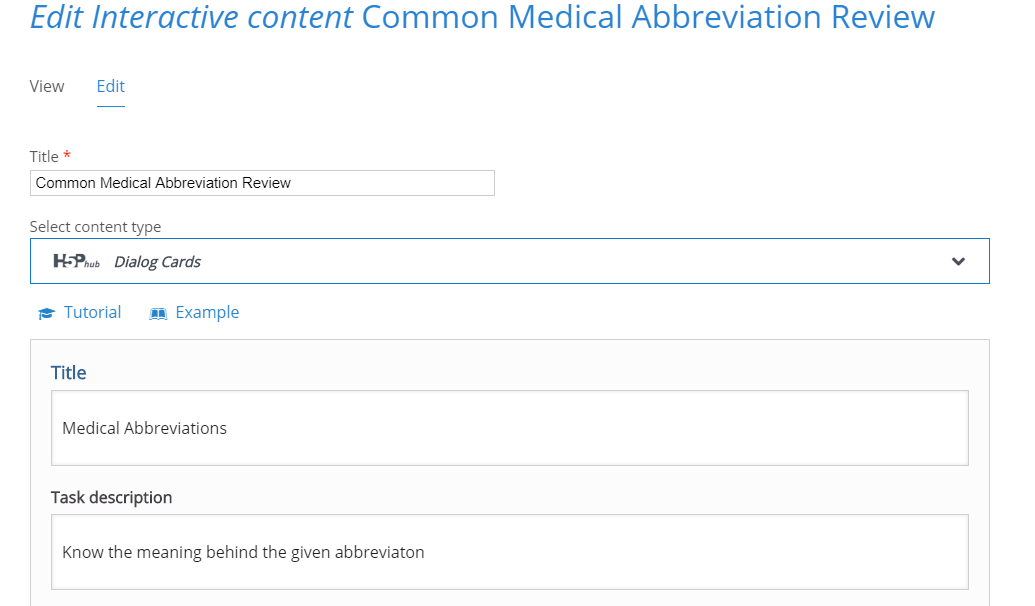
To create a flashcard set, start at the H5P content screen (you will need to create a free account) and select “dialog cards” from the drop down menu.

These first dialogue boxes will set the title for your project, the title that appears at the top of the card pile, and the general instructions for the card pile.

The first dialogue box for your card will determine what shows on the front of the card. The second dialogue box shows what will appear on the back of your card. Initially, you will only have one blank card. To add more cards, you must click the blue “add dialog” button on the left menu.

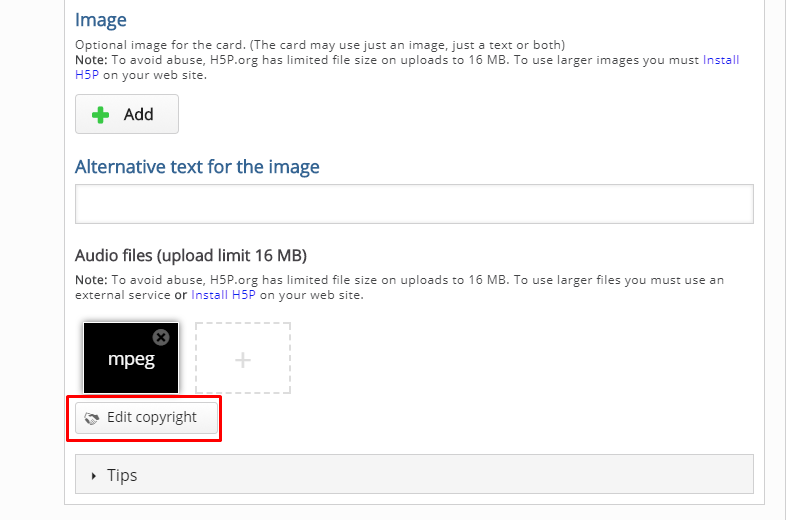
Card 3 is unique in that I added an audio clue to the card. To do this, scroll down until you see the section for “audio files” then click on the grey rectangle to upload your audio file. You can upload audio files with a URL or from uploading a saved MP3 from your computer. It’s also possible to record your own audio files to upload. It’s important to be aware of any copyrights your file may have, and to cite them properly. Citations will appear in the “Rights of Use” button on your flashcard set.

Card 4 is unique because it has a visual clue that appears on the card (images will appear on the front and back of the card). Images are uploaded just like audio files, except you will upload images under the “image” section. Just like audio files, be aware of the copyrights your image may have and cite them properly.

At the bottom of the page you will have the option to further edit actions and behaviors of the card deck. For this tutorial I left those options as default, but I encourage you to play with them and contact CON IT for any additional assistance you may need. You will also have the option of editing what buttons will appear on the final flash card deck. Once you are satisfied with your flashcard deck, click the pink “save” button. If you followed the directions posted here, you should end up with a deck identical to the one at the top of this blog post. For help configuring your deck, or assistance in implementing flashcards in your classes or study groups, please contact CON IT for additional assistance.


An Introduction to Using H5P

In this post, I will show you how to create an accordion list, one of the many tools on H5P. Below is an example I created of an accordion to review physiology. In this example, the student is presented with a question  to consider, and then the student can double check their answer by clicking on the accordion to reveal more information. One of the benefits of an accordion list is that it can organize and present broad answers with a lot of information. Accordion lists can be embedded into Carmen to condense large chunks of information and can be given to students as an assignment to complete or as a study guide. Accordion lists are especially useful in organizing long blocks of text into digestible pieces of information, as in complicated assignment instructions or longer discussion postings. Please try out the interactive accordion below:

The creation of an accordion list is quite simple. Follow this link  to get to H5P’s content creation page (you will also need to create a free account). Once there, click on the bar in the center of the page labeled “select content type,” and “accordion” will be the first choice. After selecting “accordion” and clicking the blue “use” button, you will be presented with a blank template. In the image below I have given the list the title “Physiology Review.” The current template has one blank form. To create a second blank form, you will need to hit the blue “add panel” button (circled in red).

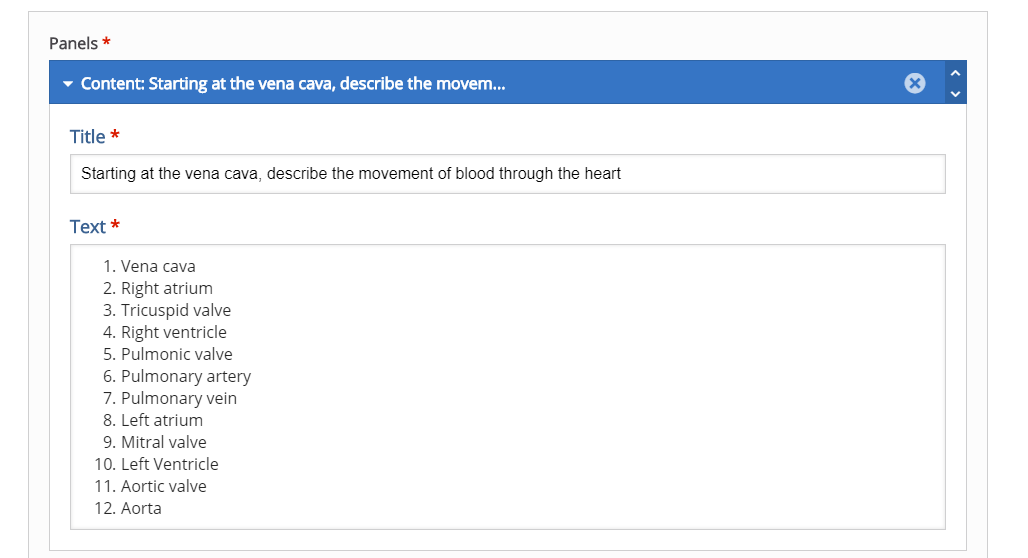
The following images shows how I filled out the forms to create the interactive example at the top of the page (click on the image for a larger view):

Following these steps will create an accordion list identical to the one you see at the top of this blog post. All that’s left is to finalize the list at the bottom of the page:


If you want to add more content, you can continue to add more panels by clicking the blue “add panel” button. If you want to edit the display buttons on your accordion list, you can do so with the check boxes. If you are finished and want to see the completed list, click the pink “save” button.

Saving will take you to a finalized version of your accordion list. If you want to make edits to your list, you can do so by clicking the “edit” button. If you want to download a copy of your list or get the embed code, you can do so by clicking the respective buttons. If you don’t want the option to have download or embed buttons, you can remove them by deselecting the check boxes on the previous screen. For assistance using the H5P accordion list in your classroom, please contact the CON IT Department for support.

Media and Your Classroom: Know Your Resources

Many instructors in the College of Nursing like to make multimedia resources available to students, whether it is through openly available online resources or password-restricted resources on the CON Nucleus server.  Some instructors may have noticed, however, that students have difficulty accessing certain resources, especially as more and more students choose to access the internet through tablets and phones.  We reached out to the Health Services Library (HSL) and the Office of Distance Education and eLearning (ODEE) to learn about what other resources may be available for instructors to use in their classes.
Nursing Education sure has changed through the years!

  • Procedures Consult: The HSL has access to procedure videos with associated text and images through ClinicalKey. You can browse the available Procedures Consult videos at the link above.
  • Films on Demand is run by the HSL and has a selection of over 3,000 videos on medicine and health topics.
  •  Adding New Purchases to HSL: When the Health Services library buys resources, physical copies will be available for checkout from the library and streaming video would be licensed for all of OSU.  If you have suggestions for resources that could be purchased and made available, you can contact Joe Payne or Kerry Dhakal.
  • ODEE Secured Media Library:  ODEE also offers a Secured Media Library where students can access and watch videos online.  To find out how to add a new title to the Secured Media Library, see the article on adding to the Secured Media Library here. To give students access to view an existing title in the Secured Media Library, an instructor must create a playlist and assign a specific video to a class for the students to have access to view it.  It’s a quick and easy procedure, but students will not have access to view videos on the Secured Media Library unless an instructor in their course (1) creates a playlist,  (2) adds a video to it, and (3) assigns a course and all of its sections to view the video.
  •  Issues with Nucleus:  If you or your students have problems watching videos on the Nucleus server, inquiries can be sent to CON-InformationTechnology@osu.edu.

Images found at the following web pages:


Having Fun with Canvas Discussion Boards

Whether you have already taught in Canvas for a semester or are transitioning now, one thing to keep in mind is that Canvas has a more robust “text entry” feature than we saw in D2L.  Text entry is often used to post replies on discussion boards, and can also be used as a way to submit assignments and write announcements in Canvas.  By learning the various options you have in Canvas, you can take your class discussions to a new level with videos, animations, and voice as well as text.

To demonstrate several features we find in Carmen Canvas, I hosted a discussion in my sandbox and encouraged my “students” to be as creative as possible with their input.  You can find this discussion here: Flaute.13 Sandbox Movie Discussion. Note: You will need to be logged into Canvas with your OSU credentials to view this page.

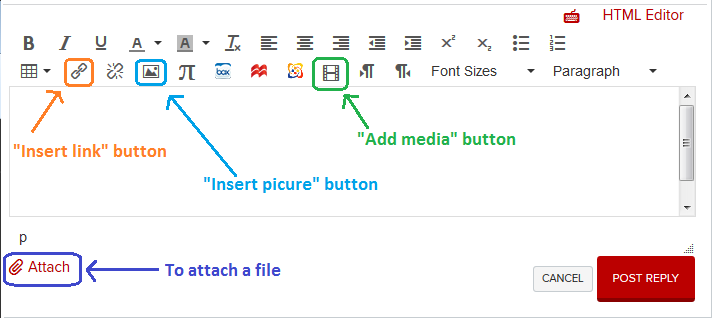
You will see on this discussion board that in addition to just typing answers, students were encouraged to submit multi-media responses to the prompt. Below we can see some of the options available to you in your discussions and other text-entry:

text_entry_1

The labeled buttons above will help you brighten up your text entry. Below is a short summary of each.

Insert link: Allows you to link to a website (e.g. a youtube video or news article). The link will appear and others will click it to re-direct to the website.

Insert picture: This allows you to add a photo to the page from your computer.

Add media: This allows you to insert a video or sound file on your computer, or to record your voice or webcam video in real time to post.

Attach a file: This allows you to attach any file to your post that other readers will then download to view.

You can also copy and paste items from online directly into your text entry box. For example, that’s how Joni was able to insert the GIF found in the entry shown here:

2017-01-04-1


With this knowledge, we encourage you to try adding some oomph to your discussion posts, announcements, and assignment submissions!


Some further resources can be found here:

Canvas Guides: Replying to a Discussion

Canvas Guides: Adding media to a submission

Canvas Guides: Adding images to a submission


Why you should take a (second) look at SoftChalk now

SoftChalk Cloud

SoftChalk Cloud is probably a better choice over the desktop version (Create). Wondering why? Read on . . .

There have been some exciting developments recently around the potential for using SoftChalk at Ohio State. Even if you’ve considered SoftChalk in the past, now is a good time to take a fresh look at what this lesson-authoring tool has to offer and how you can get the most out of it by collaborating with your colleagues on campus.

Integration with Carmen

Valerie Rake and her eLearning Support team are planning to complete integration between Carmen and SoftChalk Cloud. (This integration is specific to the Cloud version of SoftChalk.) This means that students who open your SoftChalk lessons in Carmen will not need to log in again to Cloud, and their scores on assessments within your lessons will go directly to the Carmen gradebook.

Out-of-the-box Accessibility

Ken Petri in OSU’s Web Accessibility Center said, “I know there is a lot of use of competing products, such as Articulate, Captivate, and Lectora. But none of these has the level of accessibility out of the box that SoftChalk does, and even with lots of work (and work-arounds) those products can’t be made to be as thoroughly accessible as SoftChalk. Right now, SoftChalk is simply a better option with regard to accessibility.”

Ease-of-use and Convenience in the Cloud

I have used the desktop version of SoftChalk (SoftChalk Create) for years, and after using SoftChalk Cloud, I will never go back. With Cloud, you can create your lessons in a web-based application that does everything the desktop version does, save it to the Cloud, edit it from any computer connected to the internet, share it with a collaborator who can also edit it, and publish it for your audience. You can provide students with a hyperlink, or you can embed the lesson in a web page or in Carmen. Need to edit an existing lesson? If it’s in the Cloud, you make the edits and save. No more zipping the lesson package, uploading to Carmen, unzipping, relinking, etc. Read more about SoftChalk Cloud.

New eBook Builder

This is a really impressive new feature in SoftChalk that I’ve not had a chance to explore in depth, but I want to! You can publish your lessons in ePUB3 format to be accessed by your audience online or offline in iBooks for iPads or other ePUB3-compliant eReaders. Adobe Digital Editions has worked well for me. Learn more and download a sample SoftChalk eBook.

Strength in Numbers

Because of the recent changes described above, more departments on campus are considering adopting SoftChalk as a lesson authoring tool. In fact, a group of campus partners would like to collaborate to get the volume discount on SoftChalk licenses and form a users’ group to share lesson authoring ideas and examples. The price we all pay per license for SoftChalk will depend on the number of licenses we collectively want and on the number of existing licenses we already own.

If you currently own SoftChalk licenses (either Create or Cloud), or if you would like to join your colleagues on campus in a group purchase of new licenses, please respond to our survey. Even if you already own SoftChalk licenses and don’t plan to purchase additional licenses at this time, it may be to your advantage to respond to the survey because the information we collect may affect your renewal price. We also want to include you in the collaborations that occur in the users’ group that will form around the SoftChalk creators on campus.

Need more information?

Try SoftChalk Cloud free for 30 days.  Check out the Lesson Challenge winners for examples of SoftChalk lessons, or download one of the example lessons from SoftChalk.  View their video tutorials, or download their guides (including one for students!).  Or, just send me an email (tornwall.2@osu.edu), and I’ll be happy to talk with you!

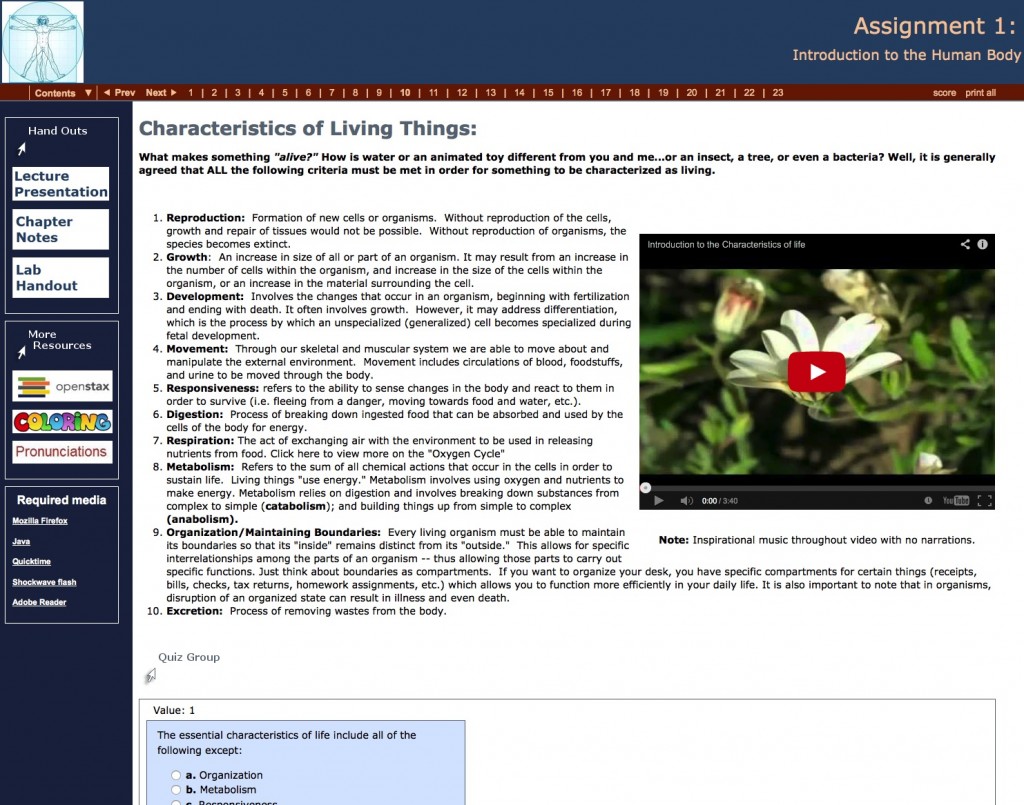
SoftChalk Lesson Challenge Winner