Nearpod is a interactive classroom presentation tool that can help students become more engaged in the classroom. Not only is this tool great for professors who want their students to experience more active learning through presentations containing polls and quizzes, but it also contains features to make the classroom setting less stressful for students.
One of these features is the note-taking component. With this component, students will be able to save all of the slides in a lecture, along with extra notes they can add to each slide, to either their email or Google Docs. This will enable students to pay more attention to what their professor is saying in lecture instead of scrambling to re-type each slide in their notes. This way, the student will have all the necessary information from the lecture slides, and have the time to type out extra notes that the professor may express verbally.
How to Capture Your Notes in Nearpod
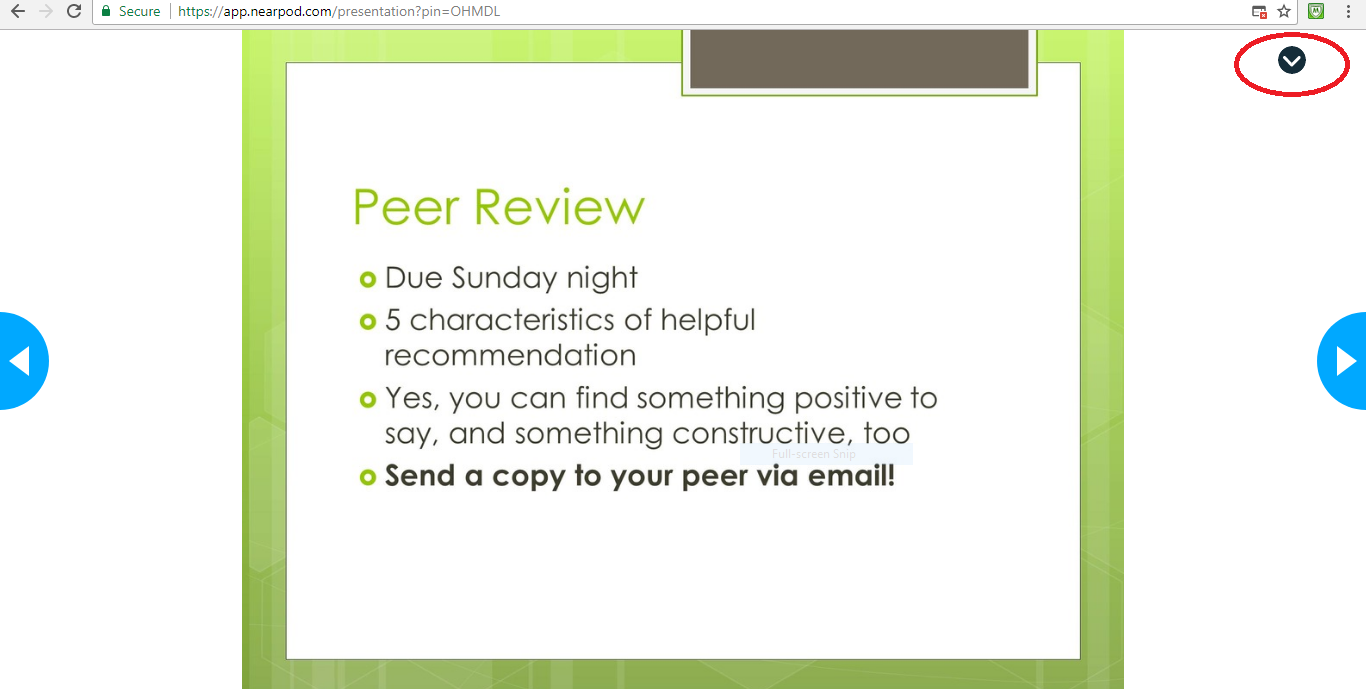
When in a Nearpod presentation, click the arrow in the upper right hand corner.

Click the option that says “Notes.”
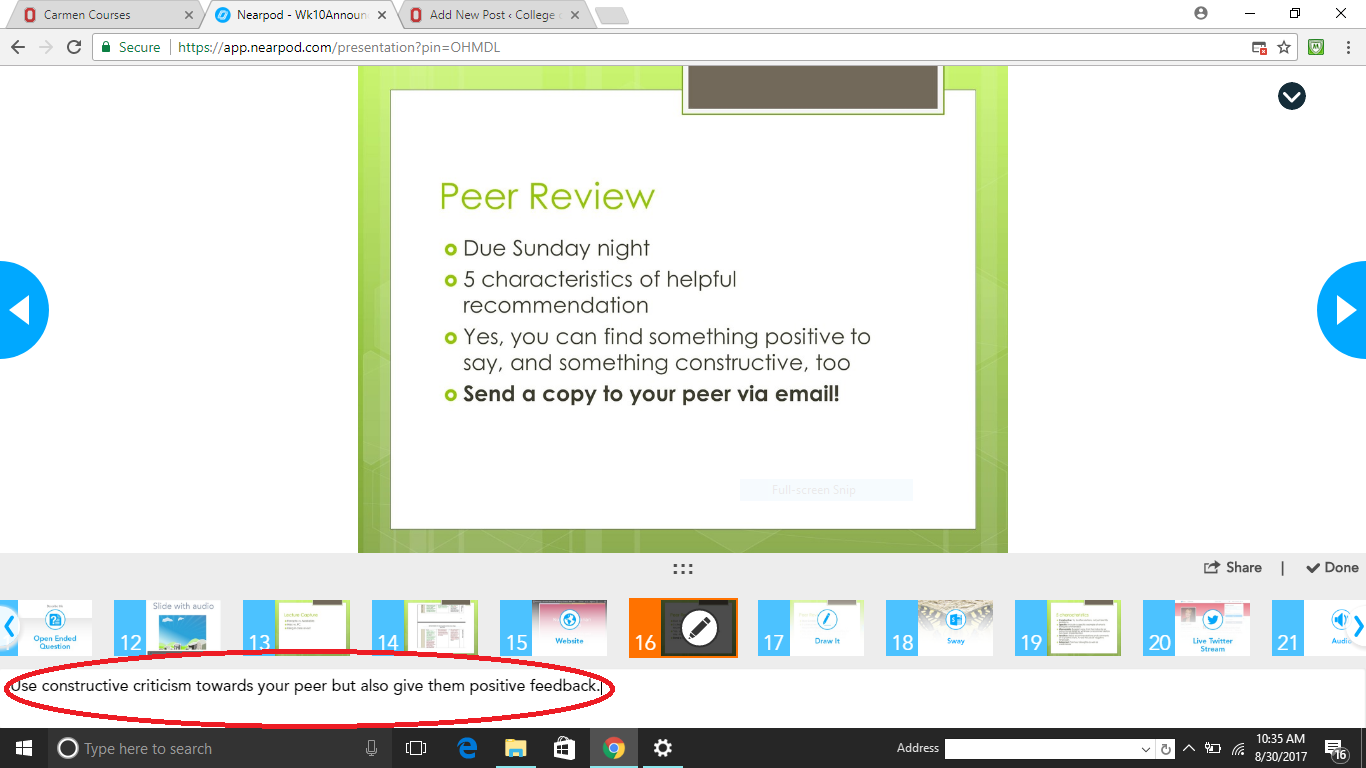
You will now be able to type extra notes in the grayed-out bar at the bottom of the screen.
This is an example of notes being typed out under the slide.
When the lecture is over, make sure to click the “Share” tab in the lower right hand corner in order to save your notes.
Now, you can either send the notes to your email or to your Google Drive.
If you send the notes to your email, it will download as a Word document. This is how your saved notes will look. They will contain all the slides, and any additional notes you added to a slide will appear under the slide.
Do you have questions about how to take notes in Nearpod? Email CON-S-help@osu.edu.