Bees are Natural Engineers

By: Meghan Thoreau, OSU Extension Educator

Scioto Valley Beekeepers
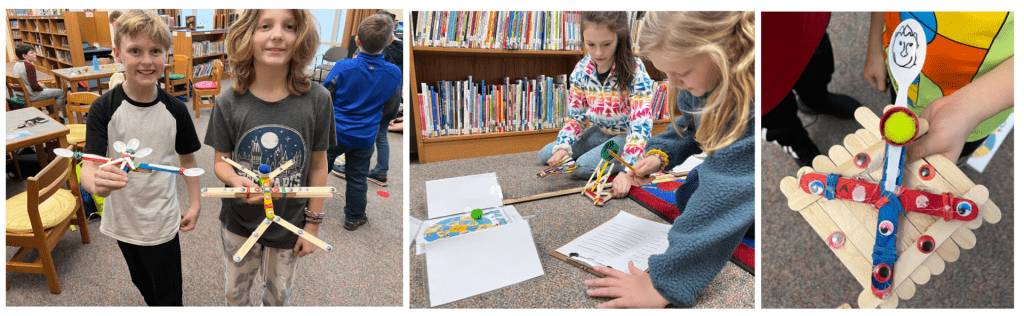
Scioto Valley Beekeepers visited STEM Club this month. The Scioto Valley Beekeepers are active and dedicated to assisting current and future beekeepers in Pickaway County and the surrounding areas in Ohio. Their mission is “to promote public awareness of the benefits, necessity, and value of the honeybee throughout human existence.” If you would like to learn more about this organization or become more involved please visit their website or attend one of their monthly meetings.

The Benefits of Bees

Bees provide essential pollination services to millions of acres of crops, improving sustainability and biodiversity. Bees are critically important to agriculture. At least a third of the human food supply from crops and plants depends on insect pollination, which is mostly done by bees! They also contribute to the complex, interconnected ecosystems that allow a diverse number of different species to co-exist. (1)

Many of our scientific and engineering projects have been inspired by bees, such as the use of hexagons in engineering. The study of bees (particularly honey bees) continues to produce an enormous amount of scientific research and these insects have become one of the most studied creatures after humans. (2)

They have also generated an array of philosophical and poetic ideas. In ancient times, bees and honey played major roles and were symbolic of ancient Greek culture. Bees have been frequently connected with ideals of knowledge, health, and power. The ancient Greeks considered bees servants of the gods and their honey was worshipped for its healing qualities and power. Artisans represented bees in jewelry, money, and statues of goddesses. (3)

Bees have much to teach humans about cooperation and industriousness.

Bee Society

An average beehive is about two square feet (or 22 inches by 16 inches), with at least a five-foot buffer around the hive for in- and outbound bee traffic. In many ways, honey bees create a well-organized mini-society in a box. Honey bees, in particular, are very social insects that have evolved into a highly cooperative or collective existence. A hive is fiercely united around the “all-for-one and one-for-all” slogan as their workforce sets out to do a variety of complex tasks that are decided by the communal collective groups that are acted on instinctually. (4)

Honey bees communicate with each other through movement and odor. They send sophisticated messages about which duties to shift to, potential dangers, intruder alerts, locations of food sources, new hive sites, and a variety of other things. (5)

With ultraviolet visions, bees see targets on flowers where the pollen and nectar are located.

Bees can see both visible and ultraviolet light and have precise olfactory receptors. They can also detect electric fields. Flowers have a slight negative charge relative to the air around them. When bumblebees are flying through the air the friction between the air and their bee bodies causes them to become positively charged, and the students learned threw our program that two electrical charges of opposite polarity attract – chemistry in motion. (6)

Infographic by Fuse Consulting Ltd.

Each colony has only one queen at a time, whose primary function is reproduction. She only mates once in her lifetime shortly after she emerges from her egg and kills her other sister queens. She leaves the hive seeking out a cloud of drone bees from another colony. When she returns to her hive, she starts laying 1,500-2,000 eggs per day, selectively fertilizing or not fertilizing the eggs in accordance with how her worker bees are collectively directing her to do. The worker bees engineer and manage each opening of their comb. A queen lives two to three years (sometimes five years) and will produce up to 250,000 eggs per year and possibly lay more than a million eggs in her lifetime.

Drone bees represent five percent of the colony’s bee population and are only present during the late spring and early summer months. The queen may have a longer abdomen for storing the sperm, but a drone is larger overall than the queen and female worker bees. Drones also do not have stingers, pollen baskets, or wax glands, because their main purpose for their colony is to fertilize a virgin queen from a neighboring colony. They die instantly upon mating. While alive drones rely solely on food gathered and processed by the workers’ groups. Drones stay in the hive for the first eight days of life and eat three times more than their sister workers. Day 9 they start leaving the hive from noon to 4:00 p.m. taking orientation flights to acquaint themselves with the surrounding territory for mating purposes. When the weather cools and food becomes scarce the surviving drones are forced out of their hive to starve. (The only exception to this ousting is if the colony is queenless.)

Workers may be the smallest in body size, but they are some of the busiest bees in the group and make up 94 percent of the colony’s population. When compared to their queen they are sexually undeveloped females who under normal hive conditions do not lay eggs (and under a queenless condition lay unfertilized eggs.) Workers have specialized anatomy such as the addition of brood food glands, scent glands, wax glands, and pollen baskets, which allow them to perform all the laborious duties the hive requires. They also clean cells, feed the brood, care for the queen, remove debris and dead bees, handle incoming nectar, engineer beeswax combs, guard the entrance, and air-condition and ventilate the hive during their first few weeks as adults. Works then advance to field duties where they forage for nectar, pollen, water, and propolis (plant sap). (7, 8, 9)

Bee Body Parts and Anatomy

 Infographic source: https://awkwardbotany.com/2015/03/14/year-of-pollination-the-anatomy-of-a-bee/

Infographic source: https://beeprofessor.com/anatomy-of-a-honey-bee-beginners-guide/


The Power of Pollinators

#BeeTheSolution

1. Plant a Bee Garden

One of the largest threats to bees is a lack of safe habitat where they can build homes and find a variety of nutritious food sources. By planting a bee garden, you can create a safe haven for bees with pollen- and nectar-rich flowers by planting a range of shapes, sizes, colors, and bloom times. You don’t need a ton of space to grow bee-friendly plants — gardens can be established across yards and in window boxes, flower pots, and mixed into vegetable gardens. Seek out locally native plants as often as possible as many bee species have coevolved to feed exclusively on native flowers and need them to survive.

2. Go Chemical-Free for Bees

Regardless of which flowers you plant, avoid using pesticides and herbicides. Synthetic pesticides, fertilizers, herbicides, and neonicotinoids are harmful to bees, wreaking havoc on their sensitive systems. A garden can thrive without these harmful chemicals — in fact, one goal of a bee-friendly garden is to build a sustainable ecosystem that keeps itself in check by fostering beneficial populations. If you must use a pesticide, choose a targeted organic product, and always avoid applying pesticides when flowers are blooming or directly to the soil.

3. Become a Community Scientist

Join a global movement to collect data on our favorite pollinators! Community science transforms the passion and interest of regular people into data-driven activities that support scientific research. By participating in a community science project, you can provide important insights and local knowledge, which can lead to more relevant and useful research outcomes. Join our “A Bee Or Not a Bee” iNaturalist project, which invites you to document and upload species on iNaturalist, collaborating with naturalists around the world to determine whether the insect buzzing by is a bee, wasp, fly, or other common bee doppelgängers.

4. Provide Trees for Bees

Did you know that bees get most of their nectar from trees? When a tree blooms, it provides hundreds — if not thousands — of blossoms to feed from. Trees are not only a great food source for bees but also an essential habitat. Tree leaves and resin provide nesting material for bees, while natural wood cavities make excellent shelters. Native trees such as maples, redbuds, and black cherry all attract and support bees. You can help bolster bee food sources and habitats by caring for and planting trees. Trees are also great at sequestering carbon, managing our watersheds, and cooling air temperatures.

5. Create a Bee Bath

Bees work up quite a thirst foraging and collecting nectar. Fill a shallow bird bath or bowl with clean water, and arrange pebbles and stones inside so that they break the water’s surface. Bees will land on the stones and pebbles to take a long, refreshing drink.

6. Protect Ground Nesting Bees

Did you know that 70% of the world’s 20,000 bees — including bumblebees — live underground? There, they build nests and house their young, who overwinter and emerge each spring. Ground nesting bees need bare, mulch-free, well-drained, protected soil in a sunny area to create and access their nests. Leave an untouched section for ground-nesting bees in your garden!

7. Leave Stems Behind

30% of bees live: in holes inside trees, logs, or hollow plant stems. Don’t cut those hollow stems, which are valuable bee habitats. A hollow stem may not seem like prime real estate to us, but to Mason and other bees, it’s a cozy home in which they may overwinter. Wait until the spring to cut back dead flower stalks, leaving stems 8 to 24 inches high to provide homes for cavity-nesting bees.

8. Teach Tomorrow’s Bee Stewards

Inspire the next generation of eco citizens with guides, lessons, and activities to get them buzzed about bees! Educators can use our collection of free resources to bring nature and ecology into the classroom — and the hearts of children everywhere.

9. Host a Fundraiser

Peer-to-Peer fundraising is a fantastic way to spread the mission of The Bee Conservancy and empower your community to help raise money for our impactful programs. With the help of tools from Fundraise Up, you can share your personal fundraising page on social media and with friends and family. It’s an easy, fun way to make a serious impact. Start your own fundraiser today!

10. Support Local Beekeepers and Organizations

Local beekeepers work hard to nurture their bees and the local community. The easiest way to show your appreciation is to buy locally-made honey and beeswax products. Many beekeepers use products from their hives to create soaps, lotions, and beeswax candles. Plus, local honey is not only delicious — it is made from local flora and may help with seasonal allergies! You can also give time, resources, and monetary donations to local beekeeping societies and environmental groups to help their programs grow. (10)


Ohio Bee Identification Guides


OhioBeeGuideFINAL


Ohio Bee Identification Guide _ Ohioline


REFERENCE
1  Medicine, C. for V. (n.d.). Helping Agriculture’s helpful honey bees. U.S. Food and Drug Administration. https://www.fda.gov/animal-veterinary/animal-health-literacy/helping-agricultures-helpful-honey-bees#:~:text=It’s%20their%20work%20as%20crop,bills%20buzzing%20over%20U.S.%20crops.
2  Why do honey bees make hexagons when building honeycombs? with video. BuzzAboutBees.net. (n.d.). https://www.buzzaboutbees.net/why-bees-use-hexagons.html
3  Out of the past. Bee Culture -. (2020, September 1). https://www.beeculture.com/out-of-the-past/#:~:text=Bees%20and%20honey%20were%20a,money%2C%20and%20statues%20of%20goddesses.
Wcislo, W., & Fewell, J. H. (n.d.). Sociality in bees (Chapter 3) – comparative social evolution. Cambridge Core. https://www.cambridge.org/core/books/comparative-social-evolution/sociality-in-bees/EDB3BC0012570CEEF1237E662563B4FD
5  The language of bees. PerfectBee. (2020, September 17). https://www.perfectbee.com/blog/the-language-of-bees#:~:text=They%20don’t%20use%20words,a%20variety%20of%20other%20things.
6  Baisas, L. (2022, October 24). A swarm of honeybees can have the same electrical charge as a storm cloud. Popular Science. https://www.popsci.com/environment/honeybees-electric-atmospheric-charge/
7  Remolina, S. C., & Hughes, K. A. (2008, September). Evolution and mechanisms of long life and high fertility in queen Honey Bees. Age (Dordrecht, Netherlands). https://www.ncbi.nlm.nih.gov/pmc/articles/PMC2527632/#:~:text= Honey%20bees%20(Apis%20mellifera)%20are,200%20days%20in%20the%20winter.
8  The colony and its organization. Mid-Atlantic Apiculture Research and Extension Consortium. (n.d.). https://canr.udel.edu/maarec/honey-bee-biology/the-colony-and-its-organization/
9  Welcome to the Hive!. Beverly Bees. (2019, January 30). https://www.beverlybees.com/home-hive/
10  10 ways to save the bees. The Bee Conservancy. (2023, April 21). https://thebeeconservancy.org/10-ways-to-save-the-bees/

Jumping Jack and Cartesian Diver Challenges

By: Meghan Thoreau, OSU Extension Educator

This month students used electromagnetism to force Jack to jump and applied the principle of buoyancy to force a cartesian diver to sink.

PHYSICS

Magnets exert a force, an invisible field, that can attract or repel magnetic metals. Students applied and controlled this magnetic force by building an electromagnetic.

Electromagnetism is found in everyday life, such as in our kitchen appliances, radio transmitters, portable electrics, computers, and much more. Electromagnetism is the physical interaction among electric charges, magnetic moments, and the electronomagenitc field. An electromagnet is not permanently magnetized. An electromagnet is only a magnet when an electric current (I) runs through its coiled copper wire. The ability to turn the magnetic field on or off makes the electromagnet very useful.

You may not realize it, but all electric cords in your home become a very weak magnet when current runs through them. When you plug in your laptop, the power chord becomes a weak magnet. The students learned that in order to strengthen the magnetic field, they would have to wrap the cord around several times, which is exactly what the students did in their Jumping Jack STEM project. Each student built their own electromagnet.

Steps. Each student:

  1. Wrapped copper wire tightly around a plastic straw piece, and called it “Jack.”
  2. Left the last 5-inches of each end of the copper wire wrapped around the straw uncoiled and accessible.
  3. Glued a small permanent magnet onto a piece of cardboard.
  4. Stuck a metallic screw vertically up onto the top of the permanent magnet to hold Jack.
  5. Tapped a AA battery onto the cardboard.
  6. Touched the two free 5-inch copper wires from Jack to the battery ends to test which direction of the current flowing through the electromagnet (Jack) to ensure Jack is repelled upward and not attracted downward.
  7. Once the right current direction was established, one copper wire end was taped to the battery end, while the other was left open to be hand-touched to the other end of the battery to make Jack jump/repel off the permanent magnet.

CHEMISTRY

The Cartesian Diver was a simple science experiment that demonstrated the principles of buoyancy and pressure. It is named after French scientist and philosopher René Descartes. A Cartesian Diver is an example of Boyle’s Law, which says that the volume and pressure of a gas (like air) have an inverse relationship. This means that when you increase one, the other decreases.

Source: https://www.milgghelch.top/ProductDetail.aspx?iid=416238716&pr=39.88

Students learned that density describes substances based on how much mass they have in a certain volume. When the students increased the pressure it caused a gas to decrease in volume while its mass stays the same. Objects that are more dense than water sink, while objects that are less dense than water float.

STEM student observing Boyle’s Law in action.

PROGRAM PARTNER

We thank and recognize the OSUs Department of Electrical and Computer Engineering for their amazing outreach programs. More specifically Dr. Betty Lise Anderson for her unwavering dedication to K-12 youth through Columbus and south into Pickaway County Schools! Thank you for all you do.

Photon Flower Lab: Part of an Atoms, Periodic Table Bingo, and Battery Build Challenges

By: Meghan Thoreau, OSU Extension Educator

Watch our club highlight video to get the best visual overview of this month’s challenges.

This March our young STEMist broke down the parts of an atom, learned about chemical elements and compounds, and how we organize elements on the period table. They also built and took home a homemade battery powered by electrolytes (lemon juice) that carried an electric charge to turn on an LED light. This expanded on what the students learned in the previous club during their hands-on chemical changes lab. During that lab, students experimented with chemical changes and molecular compounds and turned a liquid from an acid to a base and vice versa. Electrolytes are compounds that the students used to conduct electricity and power up their photon flower and turned on a LED light.

Our club focused on the basic building block of matter, an atom. Atoms combine to form pure elements, compounds, and complex forms like computers and phones. Atoms are the smallest particle of matter that cannot be further subdivided using chemical means. In order to understand how atoms interact with each other, the students put together the parts of a carbon atom.

Atoms consist of three basic particles: protons, electrons, and neutrons. The nucleus (center) of the atom contains the protons (positively charged) and the neutrons (no charge). The outermost regions of the atom are called electron shells and contain electrons (negatively charged).

We introduced different elements to the students, who discovered them, and what the element is used in. In order for students to claim their prize they had to read back the full element name and confirm how many protons each element had.

Understanding Chemical Reactions and Exploring Careers in Chemistry

By: Meghan Thoreau, OSU Extension Educator

Chemistry is a part of everyday life. This month we focused on improving our students’ understanding of the importance of chemical reactions in our lives in producing many of the things we take for granted. We also worked on improving their recognition and comprehension of what is involved in a chemical change through hands-on chemistry labs. Check out our two-minute program highlight video for a recap below:

Students learned the five signs of a chemical change firsthand:

  1. Color Change
  2. Production of an odor
  3. Change of Temperature
  4. Evolution of a gas (formation of bubbles)
  5. Precipitate (formation of a solid)

Students learned that atoms are the smallest units of elements that still retain the element’s properties. And that, atoms contain electrons, neutrons, and protons. In addition, they learned that each element is defined by the number of protons in its nucleus. Students used a periodic table handout to find the different elements we used in our hands-on chemistry labs.

Then we expanded to explain how elements can combine and form molecules. In a chemical change, the molecules in the reactants interact to form new substances.

Atom Diagram Images – Browse 13,302 Stock Photos, Vectors, and Video | Adobe Stock

Another important aspect of the program was exploring the many careers in chemistry. Take a moment and click through the Careers in Chemistry Prezi presentation with your child or use it in your classroom. The data used comes from the Bureau of Labor Statistics.

The Bureau of Labor Statistics’ Occupational Outlook Handbook (OOH) is a valuable online resource to explore and is also available through the CareerInfo app. Both Web and the App, include 300+ occupational profiles that cover about 4 out of 5 jobs in the economy. You can browse job profiles by occupational group or top lists—or find a specific job type with a simple search and learn information that will impact education and career planning decisions such as median pay, entry-level education, on-the-job training, number of new jobs projected, growth rate, and career highlight videos, on the hundreds of occupations that provide most jobs in the United States. Click on a QR code to download the CareerInfo app to your mobile devices now!


Launch into the New Year with Catapult and Creative Writing Challenges

By: Meghan Thoreau, OSU Extension Educator

This January Teays Valley elementary students learned about catapults and the engineering design process which involves problem-solving and building solutions through teamwork, designing, prototyping, testing, rebuilding, and continuing to improve and reevaluate their design solutions.


Students learned the basic catapult design concepts and components. They learned about force, accuracy, precision, and angles – and made engineering connections – engineers apply science, writing, and math concepts early into the design process and prototyping before they’re ready to build final products to meet their clients’ needs.

https://www.gettingsmart.com/2017/10/integrating-edp-and-cbl-in-stem/

They also learned how force affects the motion of a projectile, the difference between accuracy and precision, as well as learned the optimum angle for launching a projectile at the farthest distance, being at 45 degrees.

Catapults may be an old technology, but engineers still apply many design concepts to modern applications that need to store potential energy to propel a payload. Examples such as clay pigeon shooting or more complex aircraft catapult take-off for short runways.

Our catapult project was a two-part challenge: 1) apply the engineering design process to build a catapult, and 2) use the catapults in a creative writing challenge. The students worked in groups moving through target stations.

They used their catapults to hit a dynamic target that gave them points, letters, words, and images. The students had to add up their points, look up new vocabulary with the acquired letters, add the words and phrases collected, and finally handwrite a group creative writing narrative that they read out loud to their peers.

Skills Applied:

  • Engineering concepts
  • Geometry/Angles
  • Visual Motor
  • Bimanual
  • Math/Addition
  • Alphabetization
  • Handwriting
  • Creative Thinking/Storytelling
  • Team Communication
  • Oral Presentation

*Pictures from Teays Valley Elementary Students registered for the 2023 STEM Club Program.

ArtBot Robot & Holiday Card Design Challenge

By: Meghan Thoreau, OSU Extension Educator

What is cooler than a Robot that makes art? Humanizing and retooling robotic art into a personalized holiday card. 

Our young elementary STEMists at Teays Valley Local Schools have been learning about electricity, simple circuits, elements, batteries, electrons, and atoms, and how they work together in electrical and robotic systems.

This winter’s design challenge taught students how to build a simple circuit robot called, ArtBot, which connected a simple motor to a single circuit system that vibrated to create geometric art.

This is an entry-level project that explores terms and concepts of a: robot, moto, battery, circuit, and vibration. It also allowed students to work through the engineering design process and adjust certain variables in the design to change the center of gravity that impacted the geometric art design the robot produced.

Supplies per student included: AA batteries (2), AA battery holder with positive and negative wires (1), 3-volt DC motor (1), cork (1), electrical tape, double-sided tape, hobby knife, scissors, plastic cup (1), popsicle stick (1), washable markers (3), a large paper sheet, and an optional lab notebook for design, reflection, observations, and googly eyes or facial stickers to personalize robot. A short how-to video was used to give the students an idea of construction methods.

The second creative challenge came from using a piece of robotic art in making a holiday greeting card. Additional paper, glue sticks, stamps, and paper cutters were provided to allow students to get creative and personalize their cards.

A great design-build art project to end the year. More to come in 2023!

November’s Foldscope Microscope and Biology Lab Challenge

By: Meghan Thoreau, OSU Extension Educator, Community Development & STEM, Pickaway County

Program Highlight Video

A Foldscope is an ultra-affordable, paper microscope. It was designed to be extremely portable, and durable, and to give optical quality similar to conventional research microscopes (magnification of 140X and 2-micron resolution). The Foldscope brings hands-on microscopy to new places and is especially great for our young STEMist to learn and explore with.

Students learned the basic components of a microscope, built their origami microscopes (as a take-home STEM project), and engaged in a hands-on biology investigation lab.

Image source: STEM Club Foldscope Presentation, go.osu.edu/foldscope

Students also engaged in a club discussion on different research methods used in science.

QUANTITATIVE DATA collection which is in a numerical form that can be put into categories, in rank order, or measured in units of measurement. This type of data can be used to construct graphs and tables of raw data.

VS

QUALITATIVE DATA collection which is empiricalobservationssurveys, or interviews. This type of data provides insights into the problem(s), and helps to develop ideas or hypotheses for potential quantitative research. Used to uncover trends and dive deeper into the problem.

The Foldscope is a learning product that can be self-assembled and includes art through hands-on origami, photography, and drawing what is observed. Foldscope is used in classrooms in over 130 countries worldwide. You can skim through the presentation by visiting go.osu.edu/foldscope.

Electricity 101: Building Simple Circuit LED Halloween Cards!

By: Meghan Thoreau, OSU Extension Educator, Community Development & STEM, Pickaway County

Program Highlight Video

Why Understanding Simple Circuits is Important?

Basic circuit knowledge is important for many different disciplines, including engineering, physics, chemistry, and mathematics. It’s also useful knowledge around this time of year when you may need to repair a string of old holiday lights. Understanding and building simple circuits show us important concepts learned in school that can describe useful real-world systems, like devices we use every day, cell phones, light switches, Chromebooks, cars, etc.

The electric charge that flows through your house is called your electric circuit. This carries useful energy through your house that you can transform into other forms of energy to do various tasks. The US standard household circuit has an effective voltage that takes 120 volts. Volts represent the energy per unit charge. We discussed these basic building blocks of simple circuits in STEM Club this month. Our hands-on simple circuit design challenge uses 3-volt lithium batteries. Before jumping into our design challenges we’ll cover a few basic circuitry concepts and energy principles.

For the program presentation, click here.

Conservation of Energy, First Law of Thermodynamics

The conservation of energy principle was discovered and published by Julius Robert von Mayer in 1842. Mayer was a German physicianchemist, and physicist and one of the founders of thermodynamics. However, there were many others working in the field that made significant contributions, such as James Prescott JouleHermann von Helmholtz,  Alessandro Volta, and Benjamin Thomson.

The principle of conservation of energy is an effective tool in solving problems and understanding how different forms of energy directly impact our lives. There are also benefits to this principle. These include recycling of materials, lower energy costs for consumers, less pollution due to a reduction in the use of fossil fuels, and less harm to animals and the environment. We watched a short video, from Two Minute Classroom, that explained the basic concepts of how energy transforms itself into other forms and never truly disappears or is destroyed.

Below are 10 common types of energy:

Image source: https://www.thoughtco.com/main-energy-forms-and-examples-609254

Atoms and Electrons

Students learned the basic concepts of atoms and electrons, because, without the flow of electrons, we have no electric circuit to work with. They also learned the chemistry of a battery and how chemical reactions occur inside the battery that causes an imbalance or a build-up of electrons (-) on one side of the battery over the other, hence why one side or one terminal of the battery is negative (-) and the other positive (+). We also introduced the basic materials for our hands-on design challenges and explain how a battery works.

Screenshot from our virtual simple circuit presentation.

How a Battery Works

Batteries are important to everyday life. Batteries are essential to most electrical devices. They exist in our cars, cell phones, laptops, and other electronic appliances, and serve as critical backup sources of electricity in telecommunications, public transportation, and medical devices. A battery is essentially a container full of chemicals that produce electrons (-). Inside the battery itself, a chemical reaction produces electrons.

The battery is a device that stores chemical energy and converts it to electrical energy. The chemical reactions in a battery involve the flow of electrons from one material (electrode) to another, through an external circuit. The flow of electrons provides an electric current that can be used to do work. In our case, students use copper tape to build a paper circuit to create light energy with an LED. Below depicts the inner wors of a battery.

Screenshot of how a battery works from our virtual simple circuit presentation.

The students learned that a battery has three main parts: an anode (-), a cathode (+), and the electrolyte that separates the two terminal ends of the battery. We discussed the chemical reaction happening inside the battery that causes electrons (-) to build up on one side of the battery causing one end to be negatively charged (-) and the other end positively charged (+). This buildup causes an imbalance of electrons (-), that want to travel to the other side of the battery, but can’t move freely until a conductive circuit is completely looped for the electrons to travel through; in our case, the conduit is copper tape.

When a circuit is complete, or a loop created, the electrons will flow through the conductive paths racing to reach the other side of the battery terminal. When the electrons flow through the loop, the chemical energy inside the battery is transformed into electrical energy running through the circuit. When all electrons (-) make it to the other side, the battery stops working. All of the electric energy was transformed into other forms of energy.

Electrical energy allows us to do work by transforming energy into other forms. We use LEDs in our paper circuit design challenge because it’s a simple way to show how electric energy is transformed or converted into light energy. We could replace the LED with a simple motor and the motor would convert electrical energy into kinetic.

Screenshot of simple circuit components and electricity concepts from our virtual simple circuit presentation.

Image source: https://diotlabs.daraghbyrne.me/docs/controlling-outputs-motors/diodes/

A motor does not have a diode, therefore current can flow in either direction, and depending on how the motor is connected to the battery will decide what direction the motor turns left/right, or moves forwards/backward.

Image source: https://www.robotroom.com/DPDT-Bidirectional-Motor-Switch.html


Supply List

  • LED
  • Conductive copper tape
  • Plain card stock, or templates printed on card stock
  • 3-V coin cell battery
  • Tape (not included)
  • Binder Clip

Other useful items: multicolor/print card stock, glue sticks, scissors, pencils, and markers. Once you start learning the basics of paper circuit design you can explore more crafty designs to create circuit cards for all occasions and topics. A few ideas shared at our club meeting:

LED Display Build

Last month our students learned about Electrics and LED Display Circuit Systems from guest educators, Professor Betty Lise Anderson and Lecture Clayton Greenbaum, from the OSU Electrical and Computer Engineering Department. Dr. Anderson has been engaging youth in electrics for years through her community outreach STEM programming. OSU Extension is always thrilled to welcome her team over the years to bring authentic hands-on learning to our youth and an opportunity to talk directly to an OSU professor and female engineer, along with her college student mentors that often assist. It’s a great experience for students to explore careers in electrical engineering. Check out our program highlight video to get a better idea of what was shared.

Students started by learning about how to read electrical schematics which are drawings and symbols that indicate the electrical connections of a circuit.

Students also learned a few of the components they used in their LED Display Build below:

Students then applied their knowledge firsthand as they build and connected their LED Displays to a breadboard using a schematic drawing, wires, resistors, diodes, and batteries. They gained a better understanding of the parts that go into LED Displays, by understanding the parts, circuit diagram, and pin connections.

For more resources on LED Display build, instructions, presentation, and complete parts list click here.


Elementary STEM Club: Lottery Application NOW OPEN for 2022-23

THE LOTTERY APPLICATION IS CLOSED!

OSU Extension Pickaway County and Teays Valley School District have partnered to bring an after-school elementary-wide STEM Club. Club meetings are held approximately one to two times per month from 3:30-5:00 p.m. The educators rotate through the four elementary buildings each month. Application deadline: Friday, September 2, 2022! Click here to fill out the application with your child: go.osu.edu/stemclub2022-2023.

Participation will be limited to 25 students per building, open to 4th and 5th graders. Acceptance in the after-school program will be an application-based lottery. There will be a $30 fee for the year, only pay after you receive email acceptance into the program. (Financial hardship waivers are available.)

Visit our STEM Club blog https://u.osu.edu/tvstemclub/. This website will have club highlights, activity summaries, and access to the STEM Club calendar for your student’s STEM Club meetings.

The goal of the program is to promote and spark STEM interests in each of the elementary schools. This program is considered an extension of the school day. Participants will be engaged in hands-on STEM activities and learn about careers in STEM. A hand full of high school student-mentors join our club meetings to assist with club activities and gain hard and soft skills.

Students who may enjoy STEM clubs are those who enjoy being challenged and who are interested in:

  • the fields of STEM (science, technology, engineering, math)
  • the process of learning, asking questions and problem-solving
  • helping people and making a difference in the world

If your child is interested in participating in the lottery visit the STEM Club Blog site for information and complete the application. THE LAST THREE QUESTIONS are to be answered by the interested elementary student.

Applications must be submitted online by the end of the school day, Friday, September 2nd. NO LATE APPLICATIONS BECAUSE IT IS A LOTTERY! Notification of acceptance/non-acceptance will be sent by email. This is how we primarily communicate with parents throughout the year as well as posting to STEM Club Blog, u.osu.edu/tvstemclub/.

(STEM Club meeting dates are subject to change. In the event of school cancellation, the club will be canceled, NOT rescheduled.)