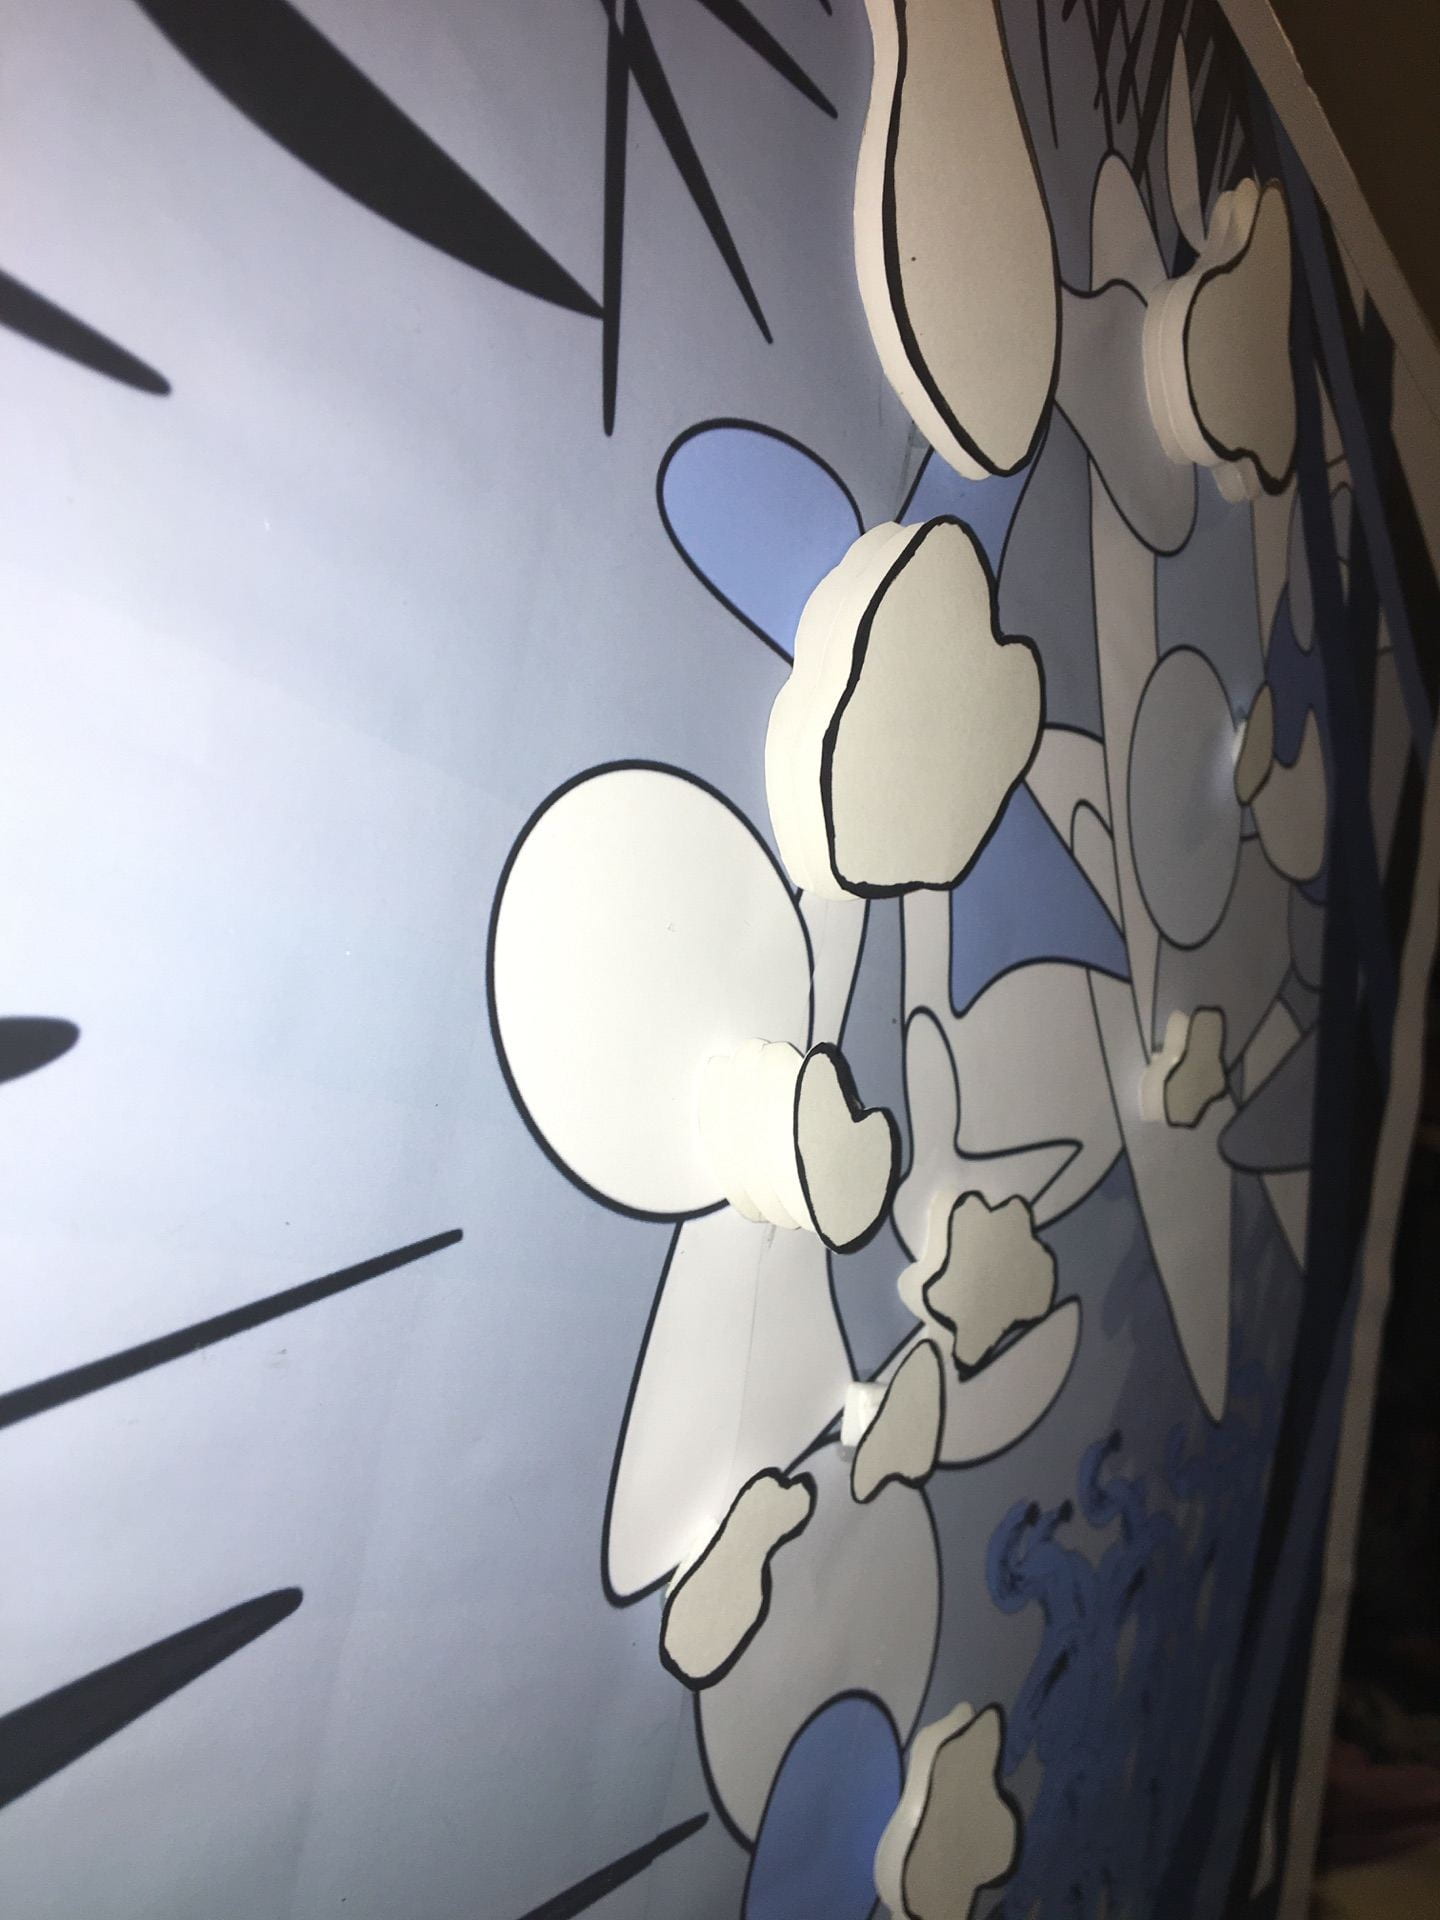
Sensory Experience 3 Dimensional Component

I used foam core board and bristle paper to elevate components of the organic shapes. I kept the shapes white and raised the to various heights. I felt that these were a focal point in the piece because they show the finished cleanliness that comes with the brushing. I wanted the white blobs to come out of the poster as way to say, “hey, look how fresh and clean we are!”.


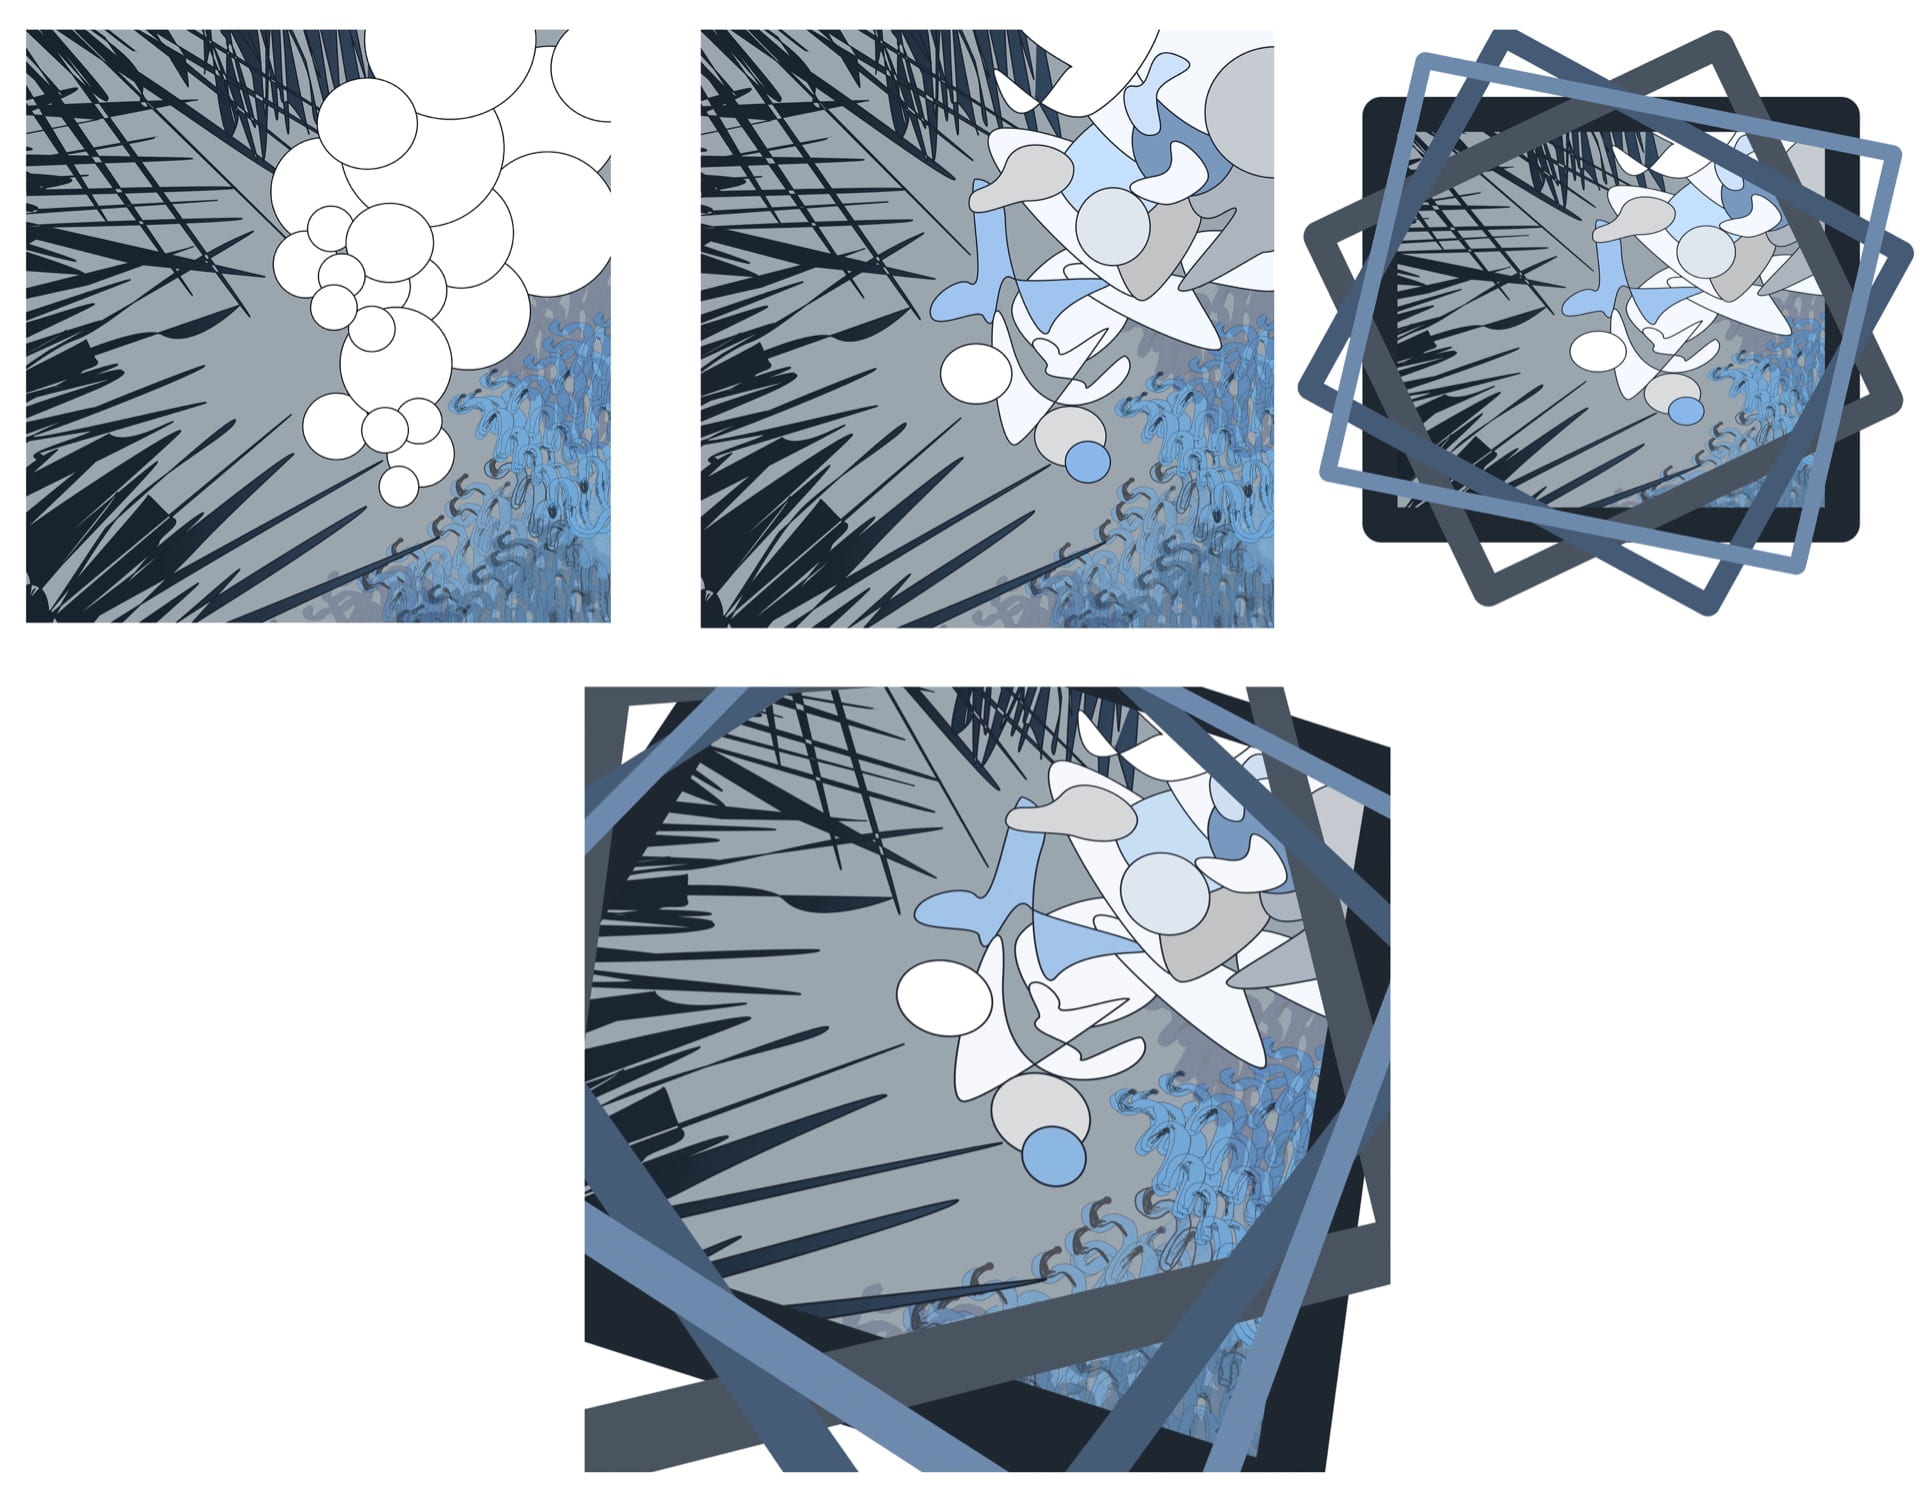
Sensory Experience Developement

I developed my prototype with the use of the blue as my only color. The blue is representational of the toothpaste; however, the different shades and tints of the same hues emphasize the transformation that from gross and dingy to light and clean. I use the darkest blue to push the sensation of the sharp mint cutting into one’s taste buds. I made the swirled shapes softer and less intense as they present the constant circular movement during the process. Lastly, the organic forms (originally plain white circles) were added into order to express the change in the tooth paste as it coats the teeth. I also included the frames to present the viewer with the message of contained chaos. Notice how the patterns circle each other- this was done to remind the audience that this is a daily process that is included in the cycle of most. The final adjustment of the perspective intent is to prevent the design from being too static. Brushing teeth is a mindless, simple act, yet the toothbrush, paste, and water involve are is constant motion and change. The perspective makes it more dynamic.
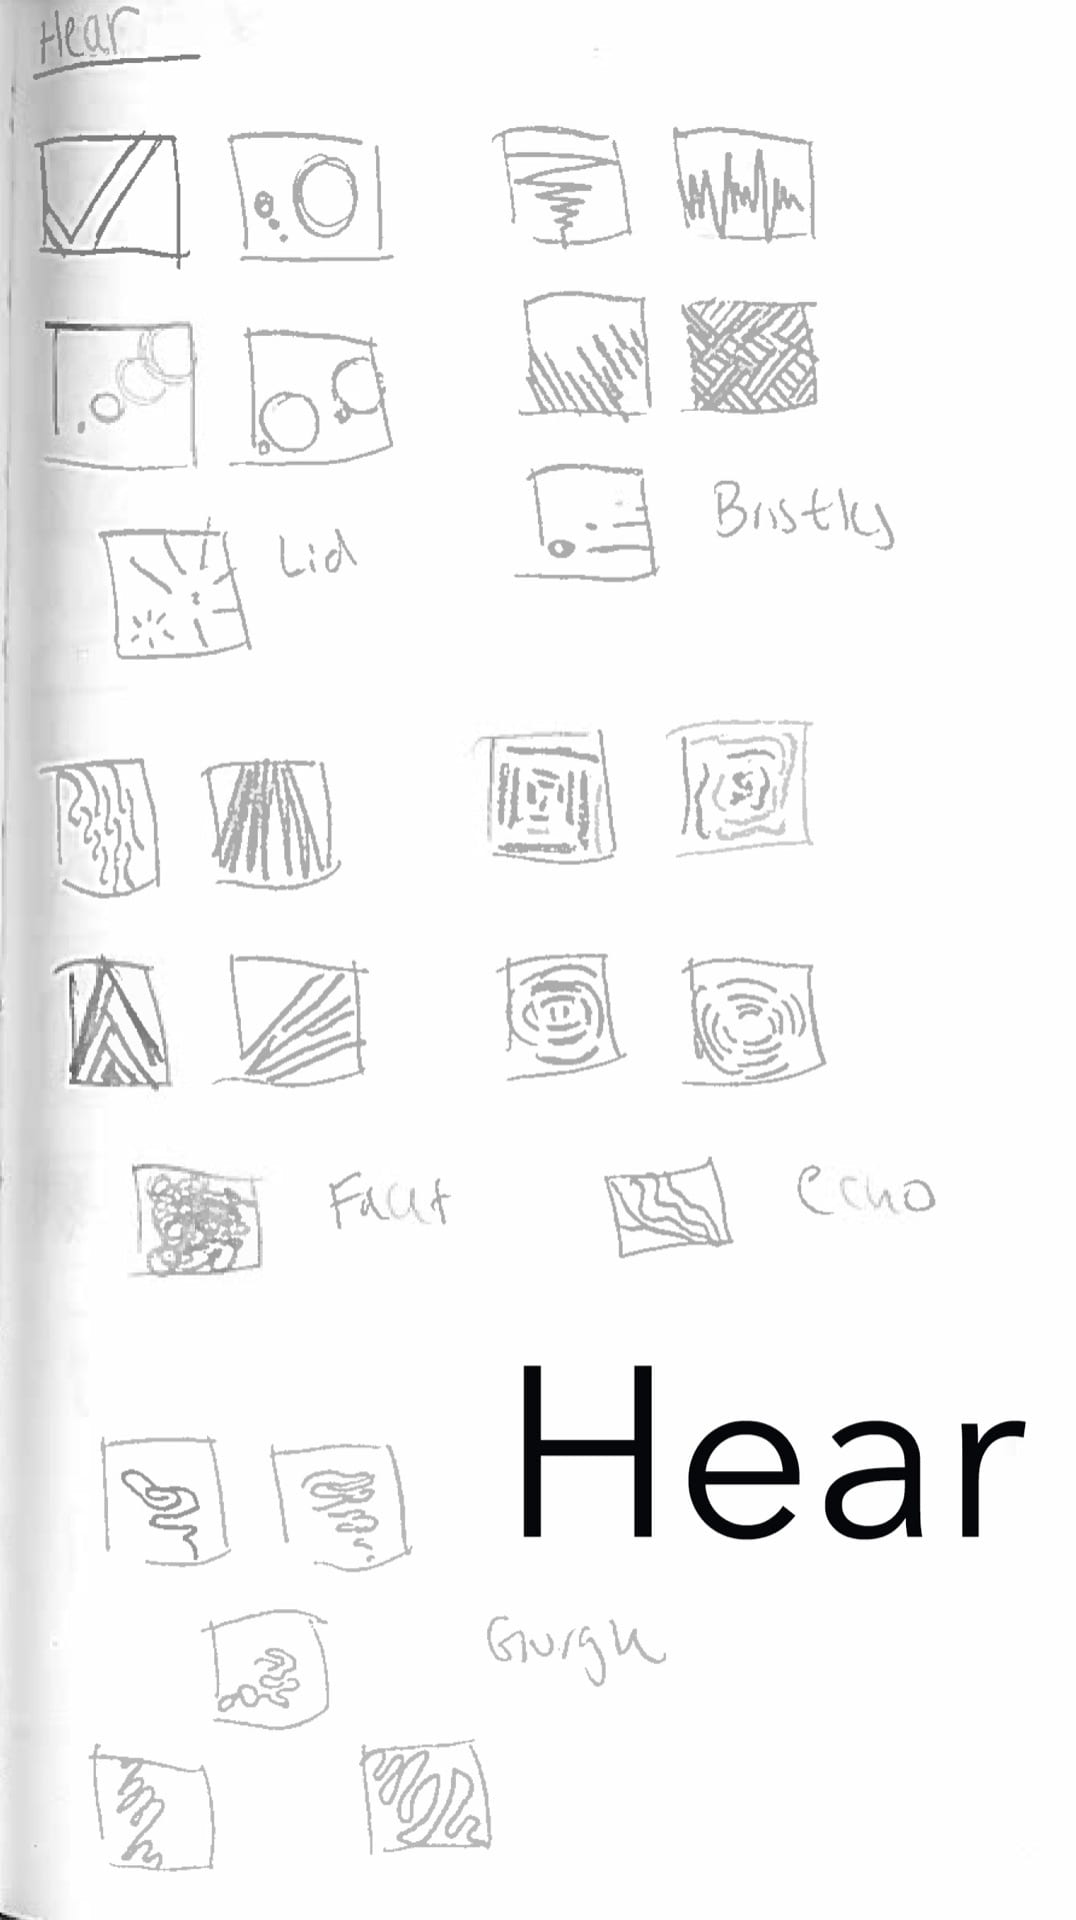
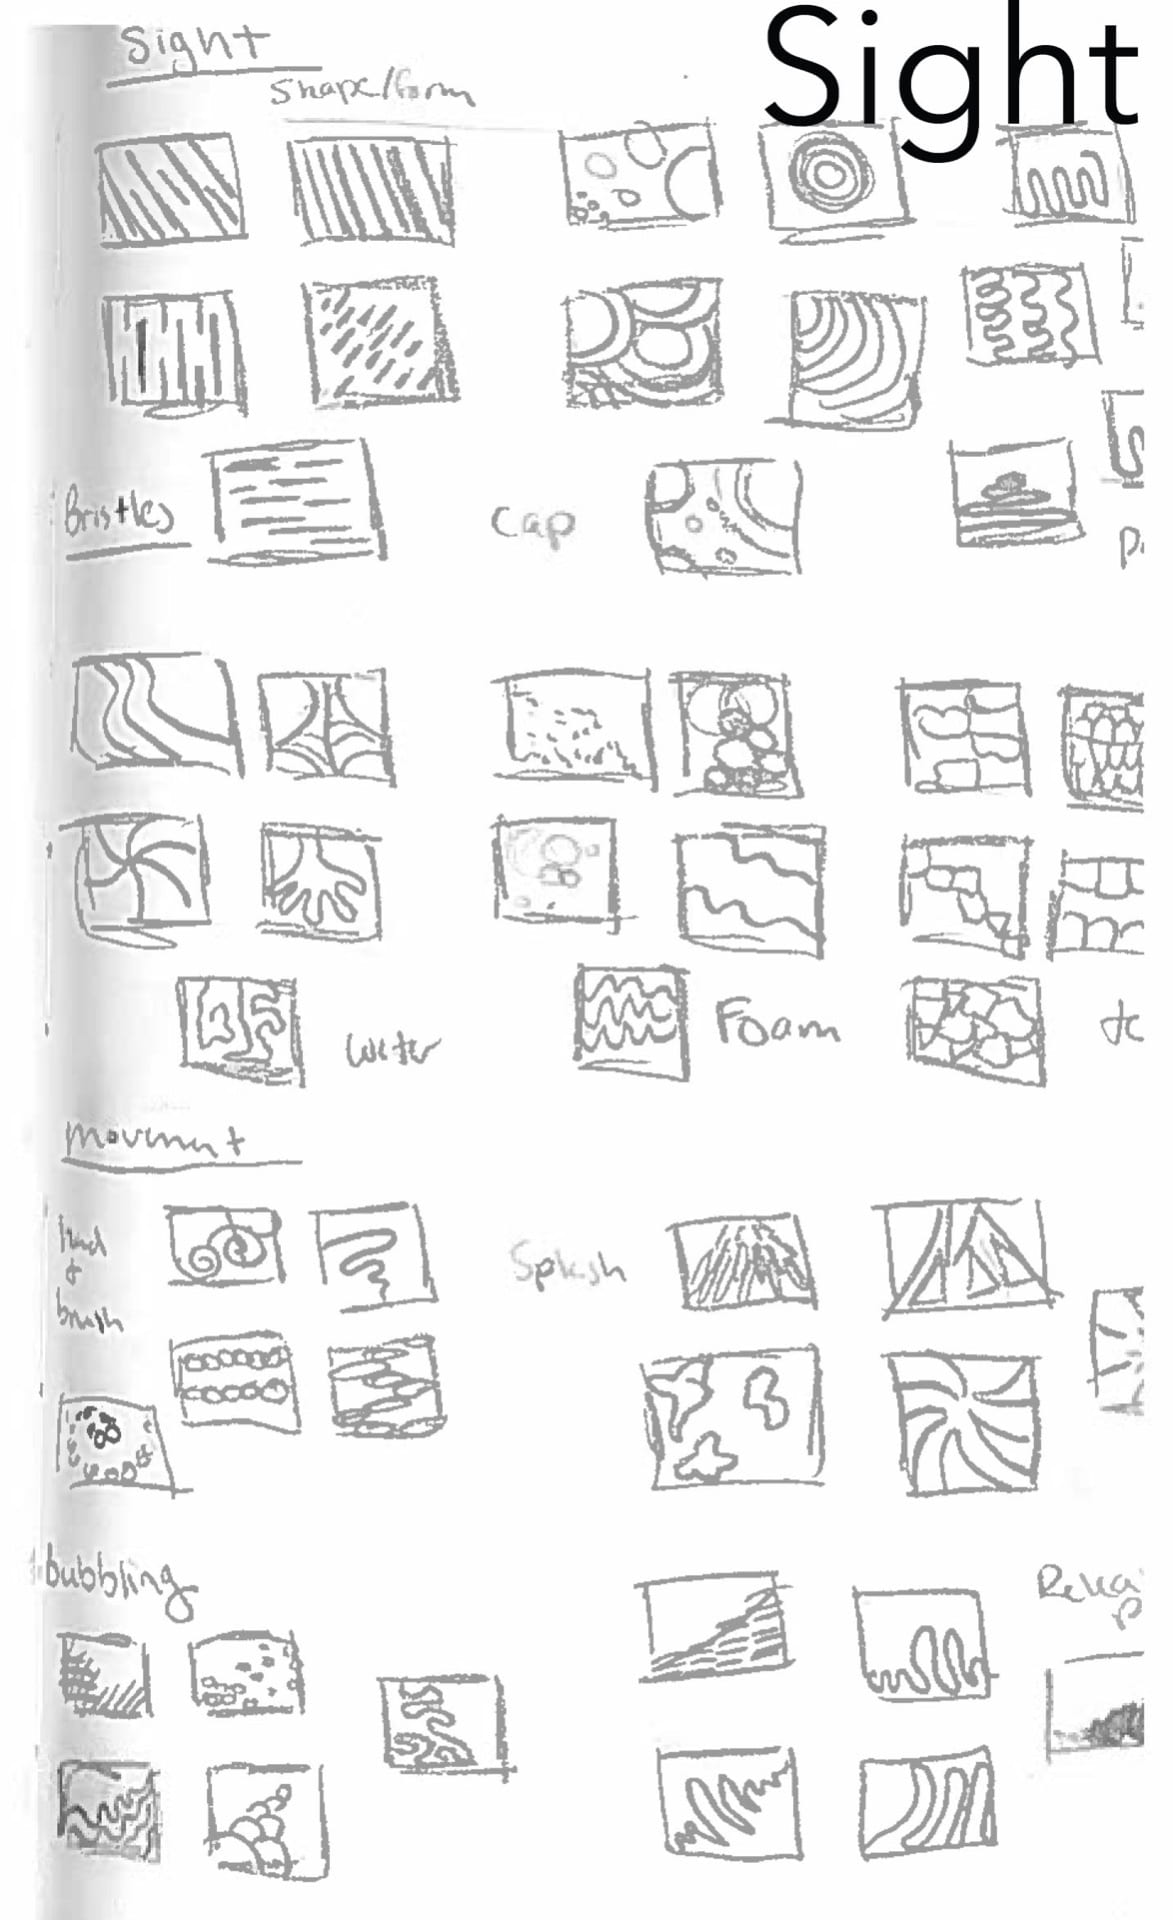
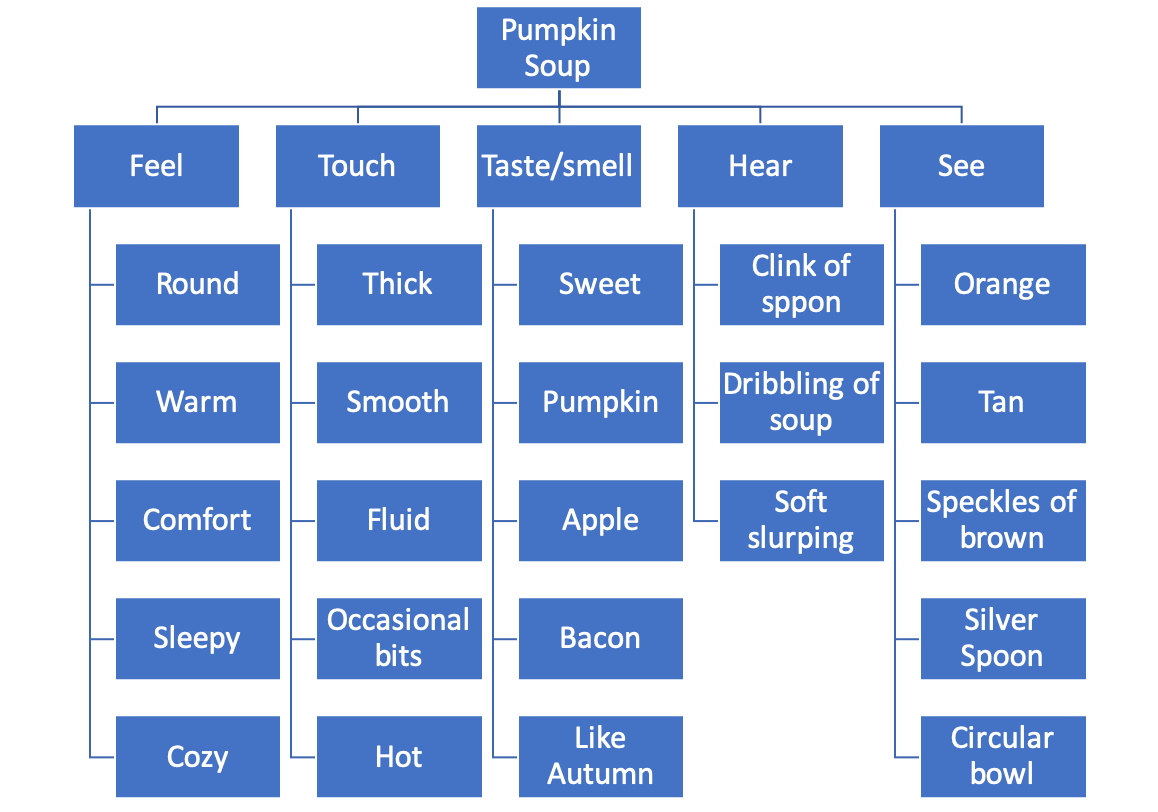
Sensory Experience Brainstorm

I decided to build my design around the sensation of brushing one’s teeth. Movement felt like one of the strongest components, so it became one of my main objectives. I also wanted to express the transformation from dirty to clean. I went on to achieve this by having a organized chaos within my design.

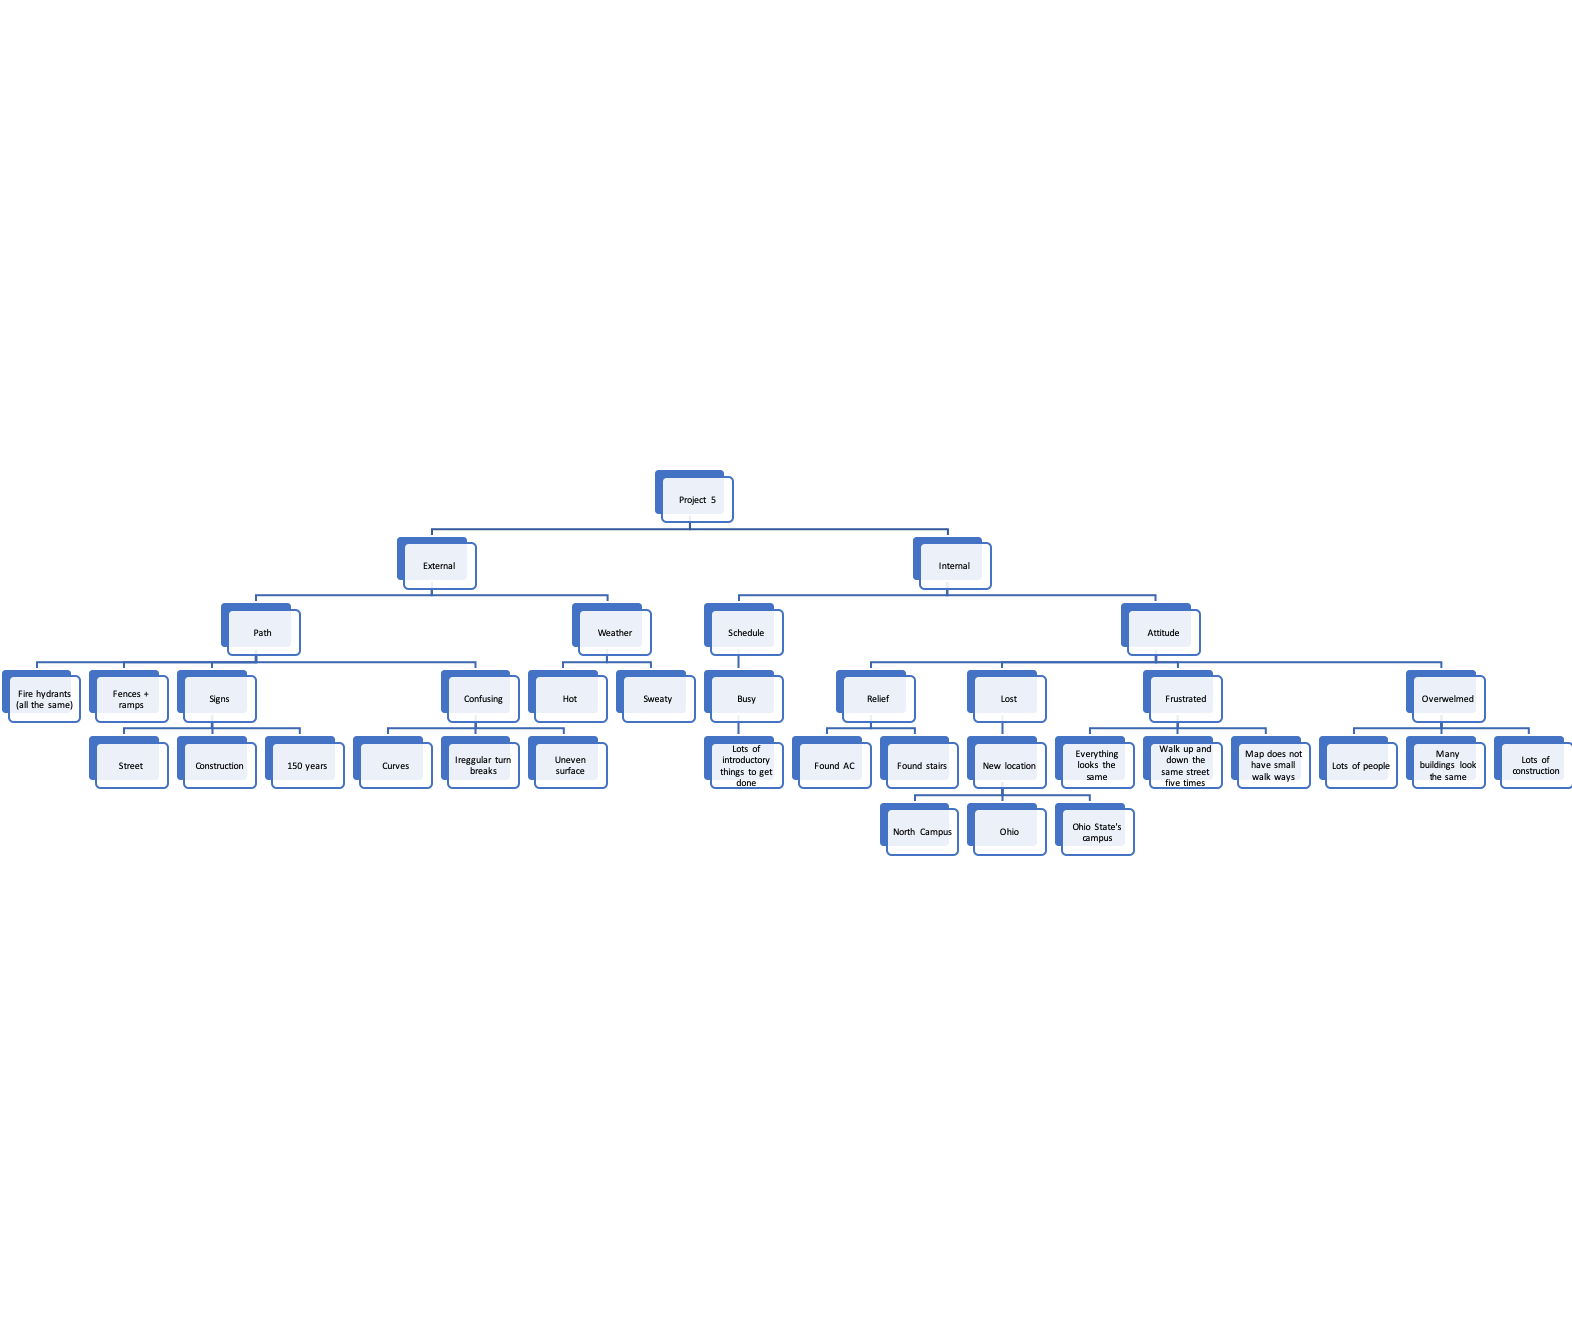
Imagined Journey Brainstorm

Initially, I knew I wanted to create some type of drawn form of my journey. I felt shoes would be the best representational character for this as it is a relatable item essential to travel. I have never animated something before, so I knew it would be a lot of experimenting with the software I have access to (mainly photoshop and iMovie). My end product changed a lot from my original plan. Overall, the essence of my journey- feeling lost but finally succeeding- stayed to the same regardless of plot.


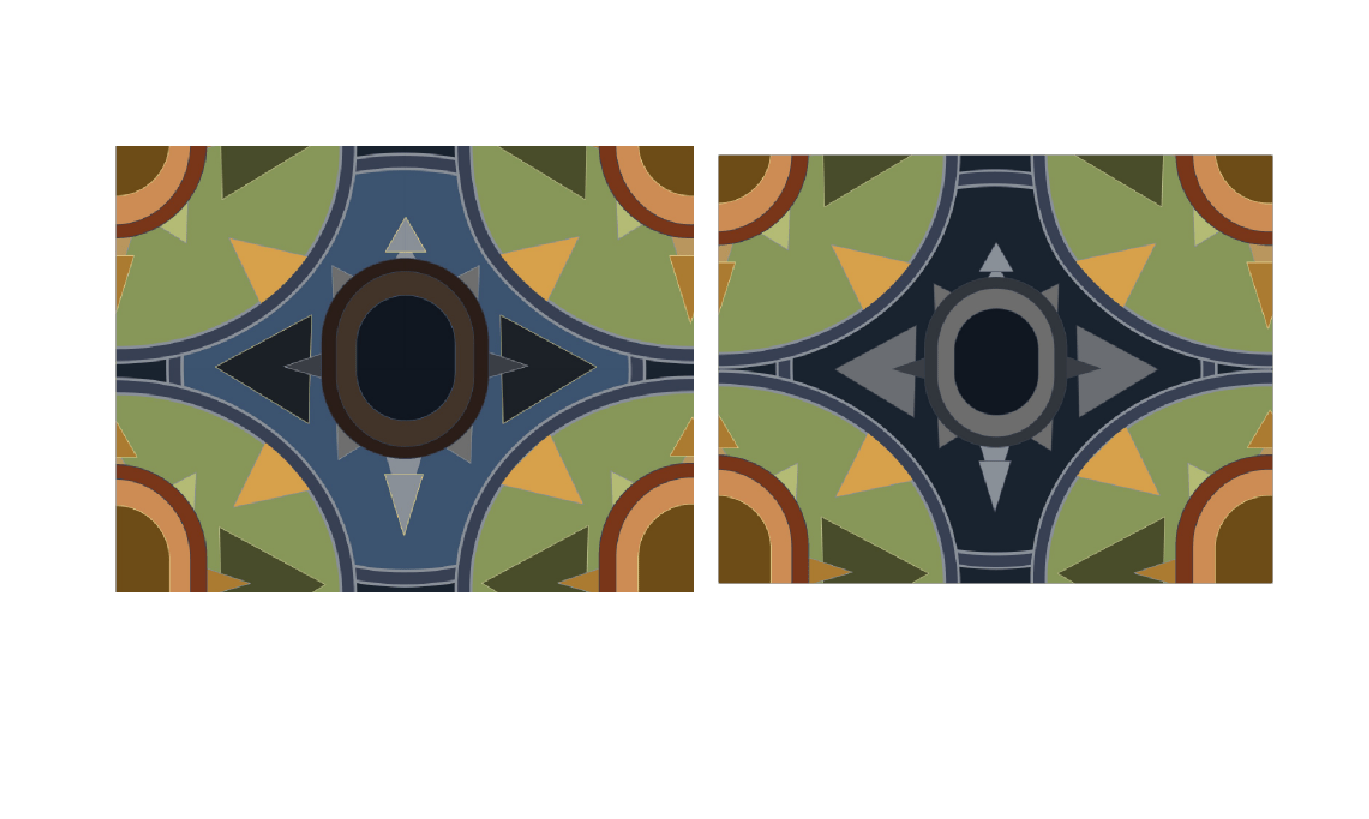
Pattern and Scale Construction

Depth

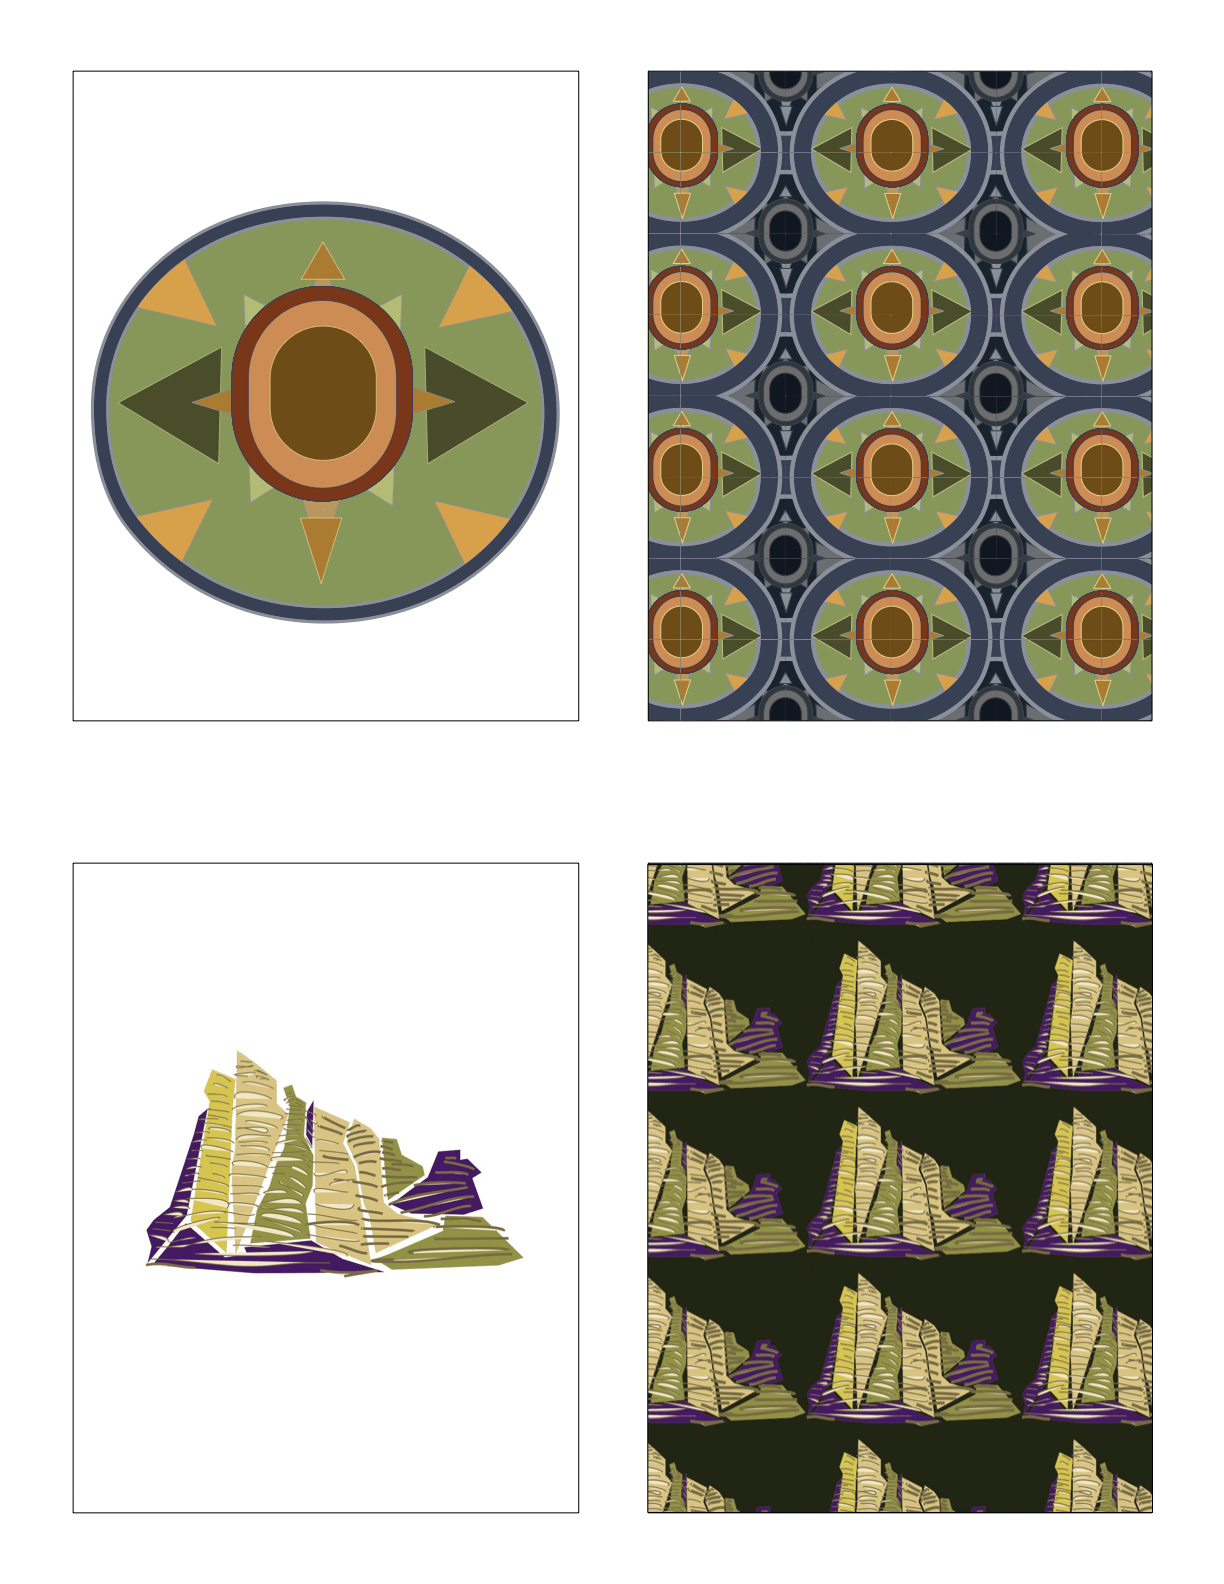
The following scans are my ideations for depth. I thought about how direction can be used to emphasize the feeling of depth. The circular build of a cone was considered throughout most of these ideations. I used this idea when creating a spiral leading downward in my depth construction. It was not necessarily a cone, yet that was the inspiration. I used a combination of parts to plan my final design. I appreciated the concentric circles as they highlighted the various scaled circles in my design, but I decided to use the sharp triangular components sparingly in my finalized build. This was done as the triangles purposes were purely decorative. The motion emanating from the spiraled circles focalizes the centered design. I used depth for this emphasized point.


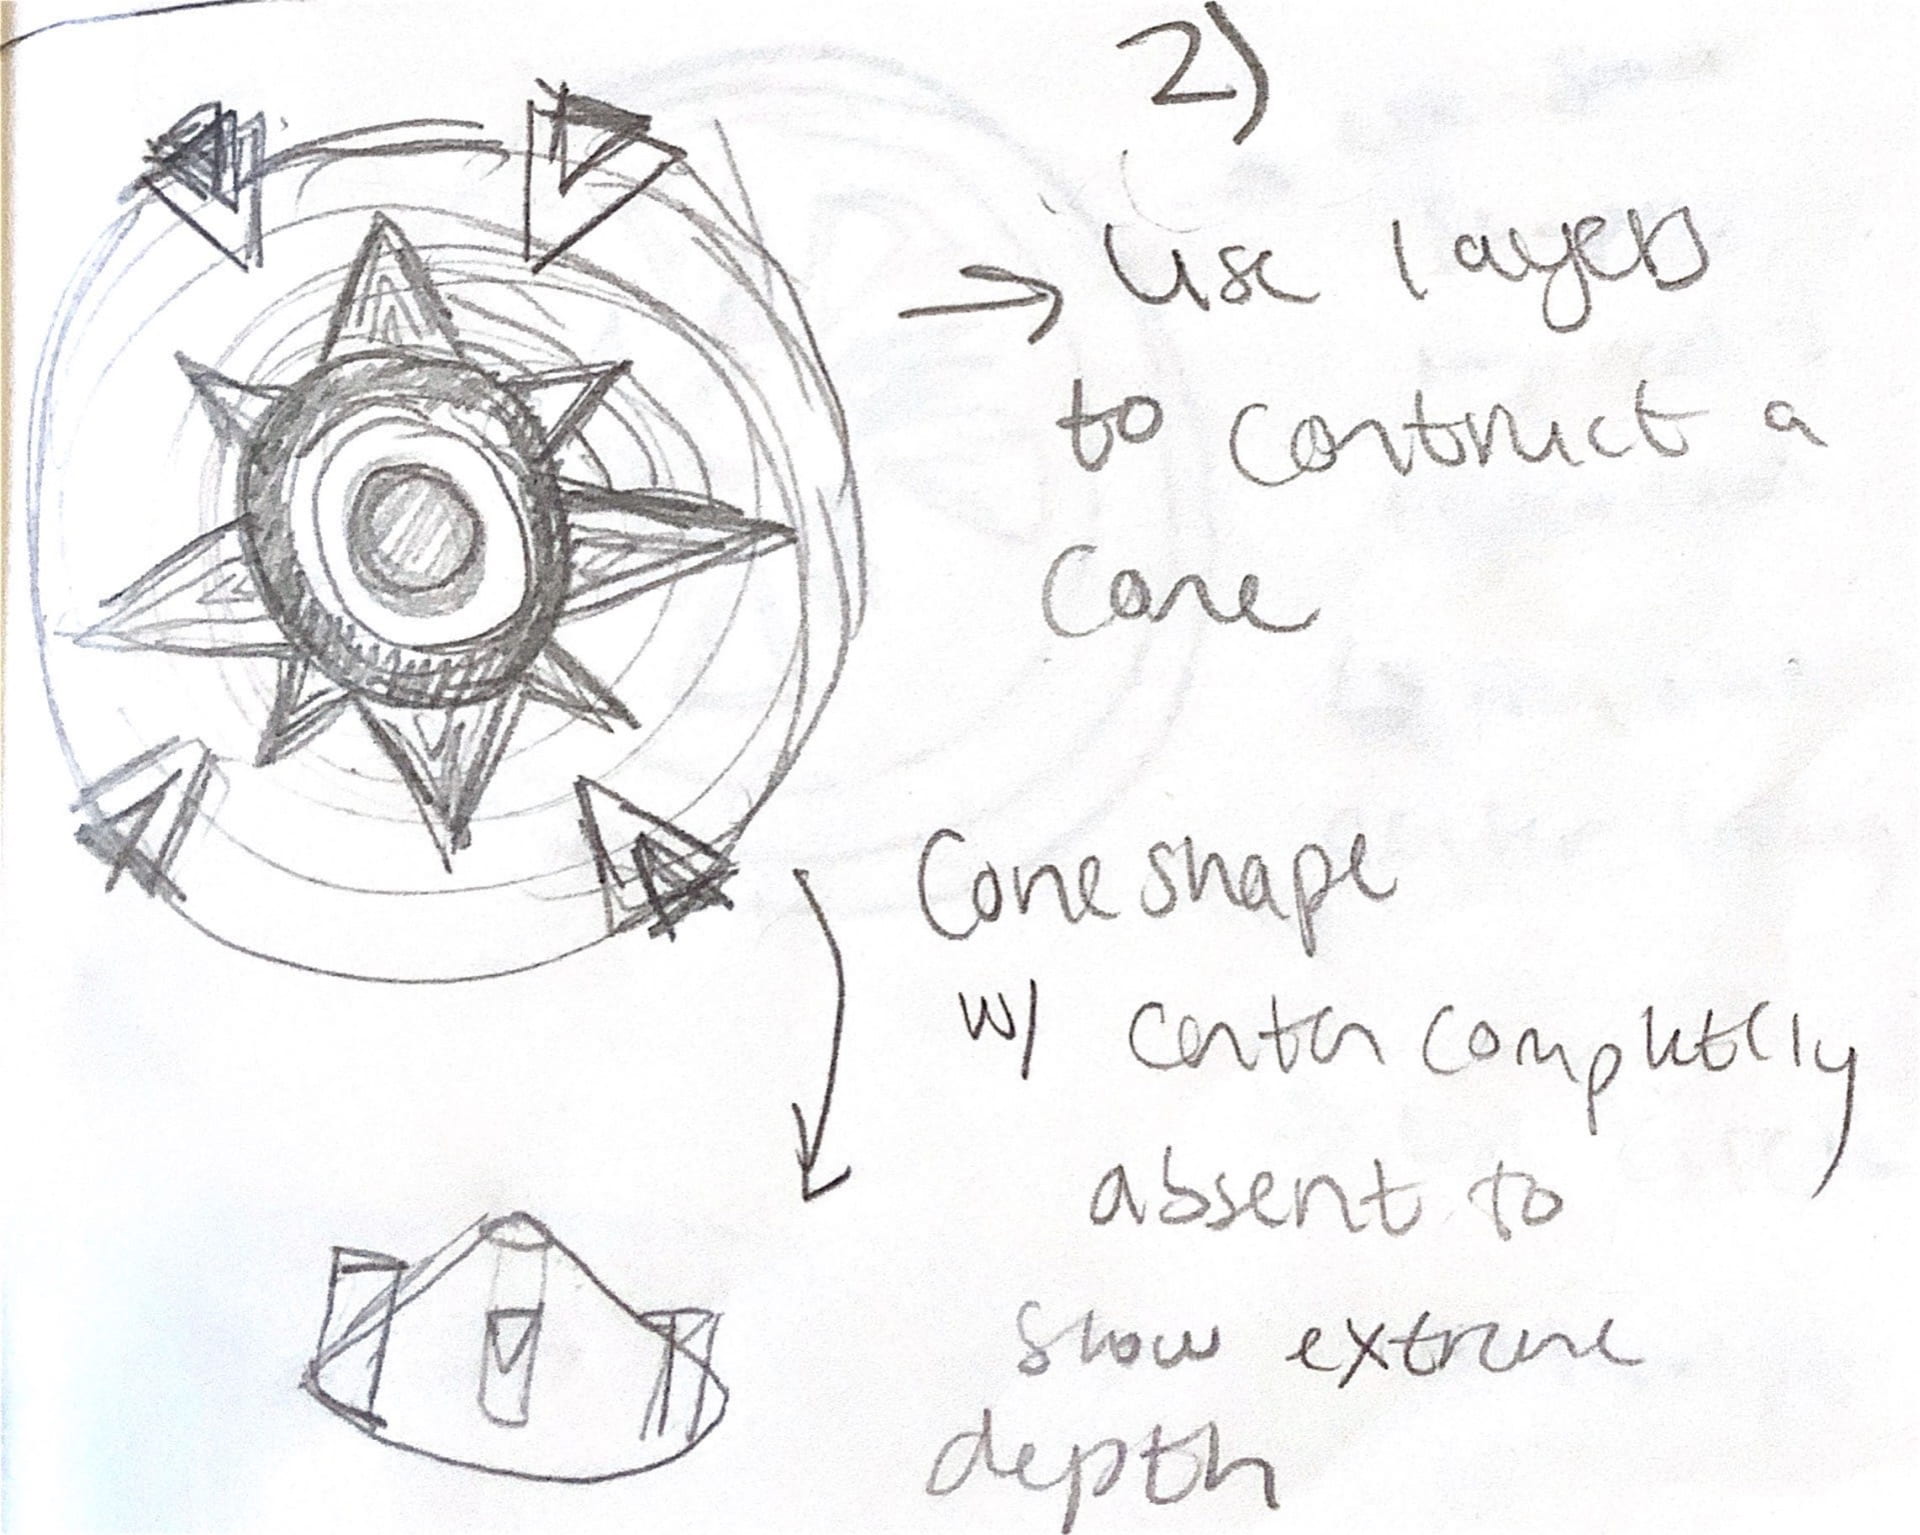
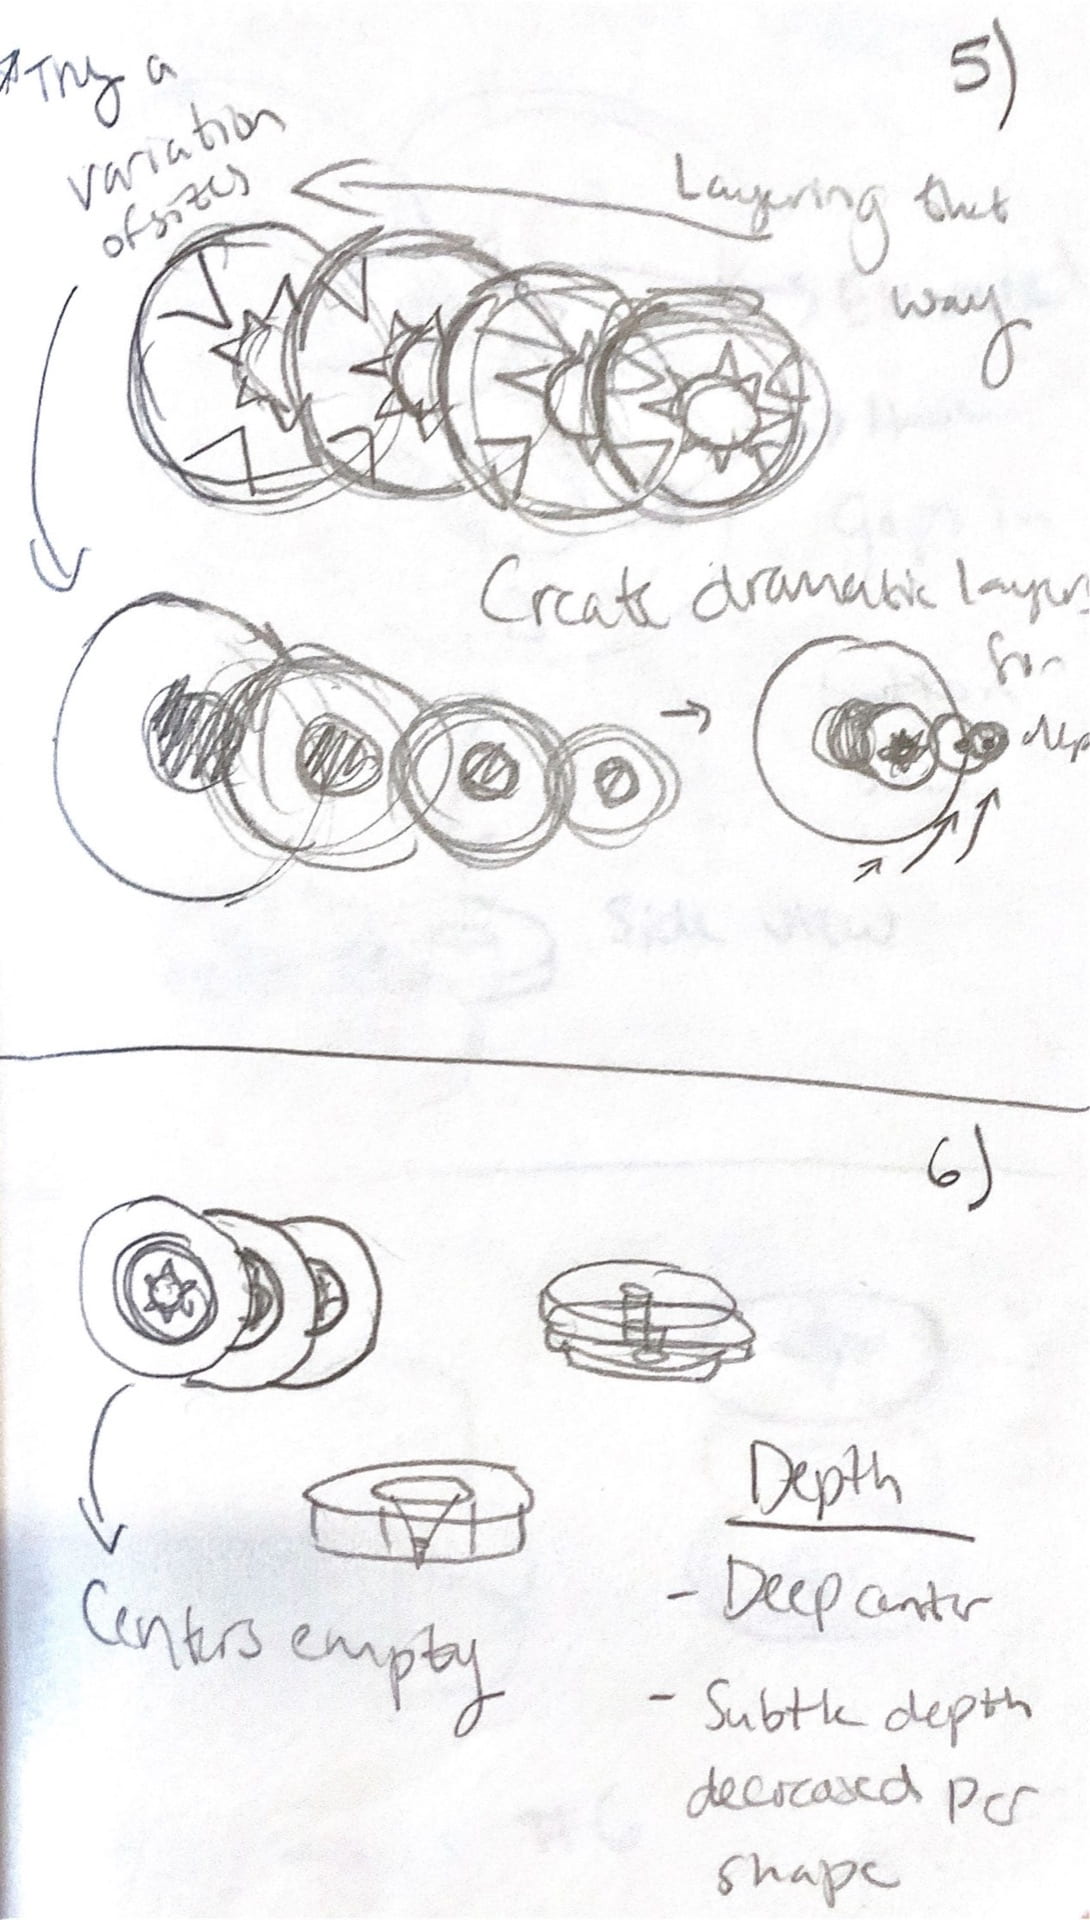
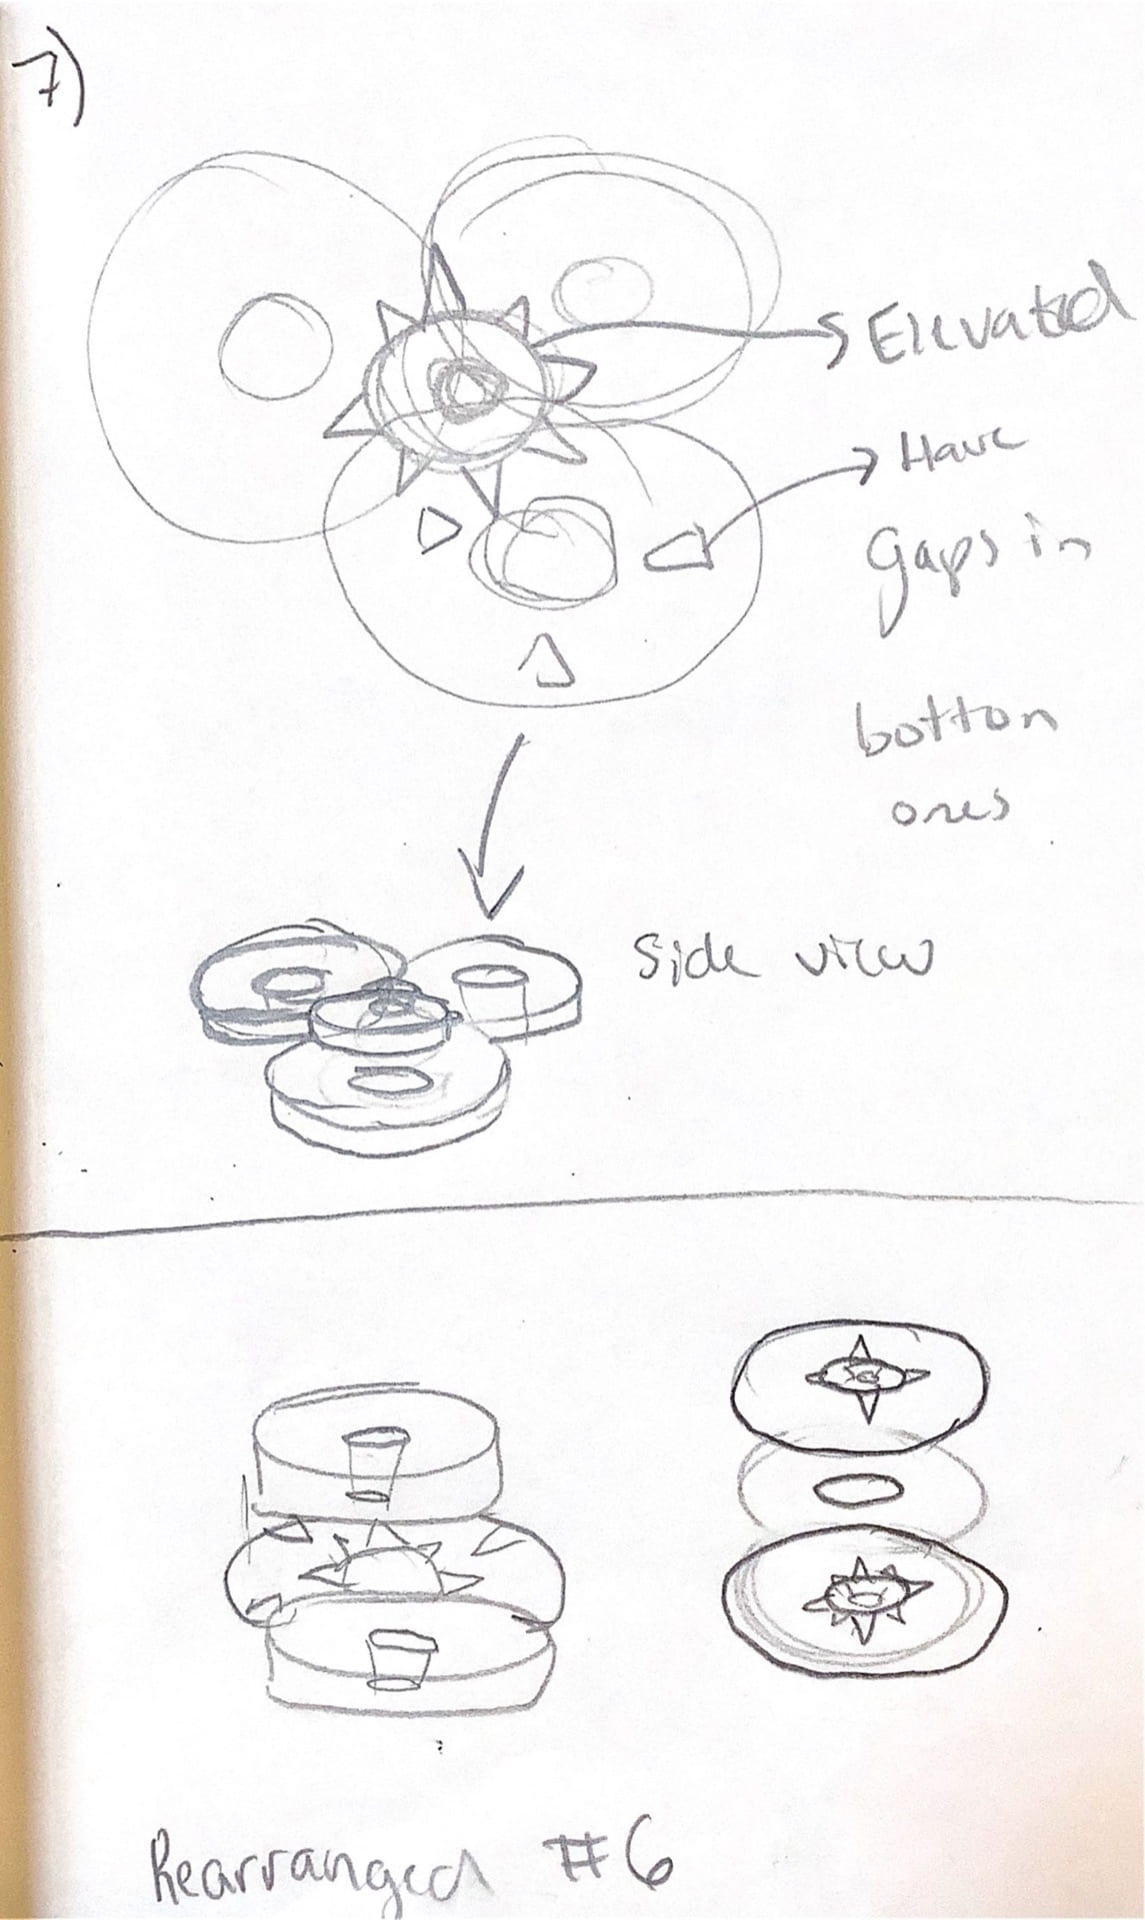
This is a demonstration of how the combination of the spiraled circles and the centered design will interact. It will grow outward to produce the polar effect of drawing the audience inward. I separated the components by keeping the triangle parts only on the center piece. The layers will be stacked using pillars of chip board and each other for support.
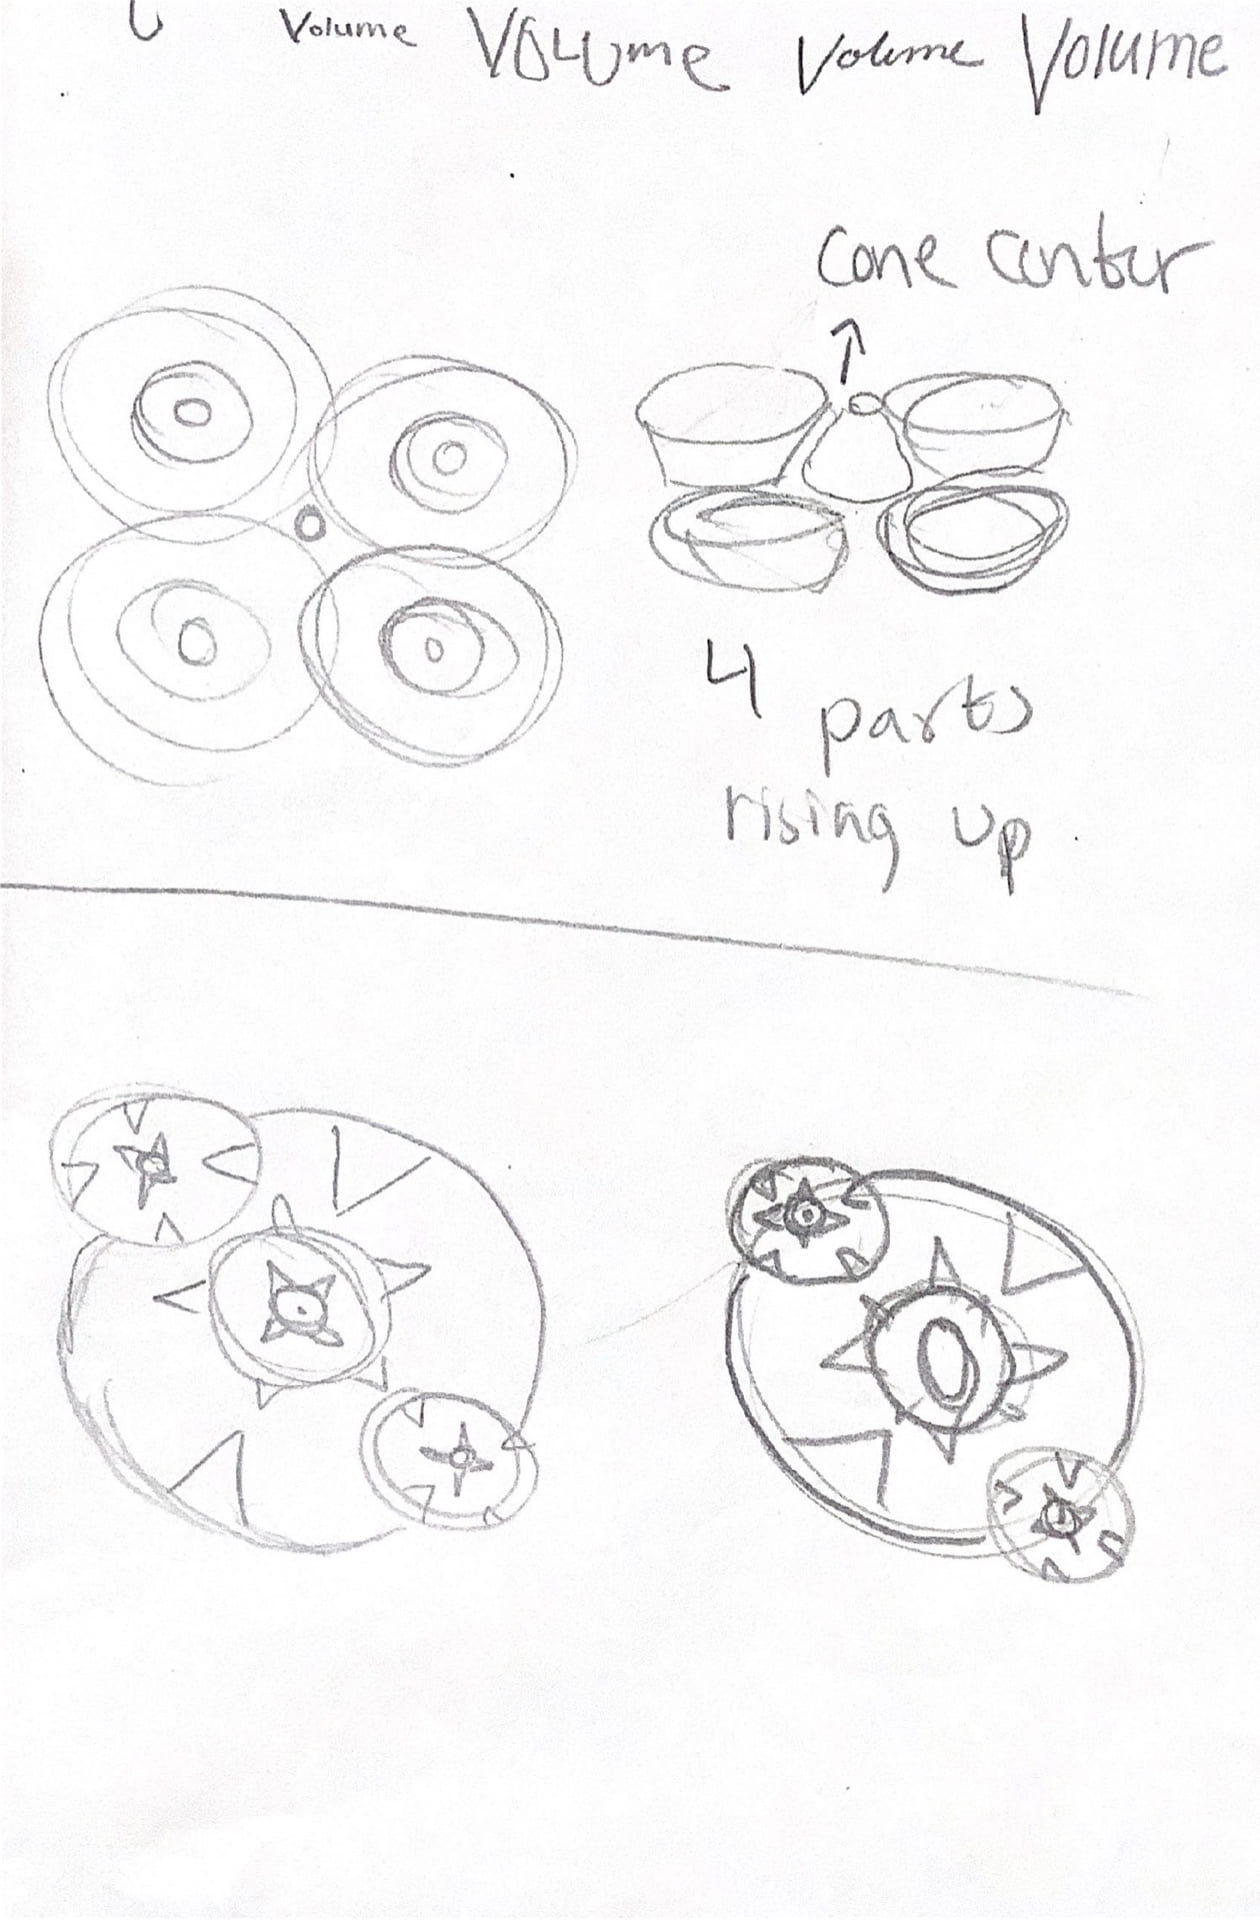
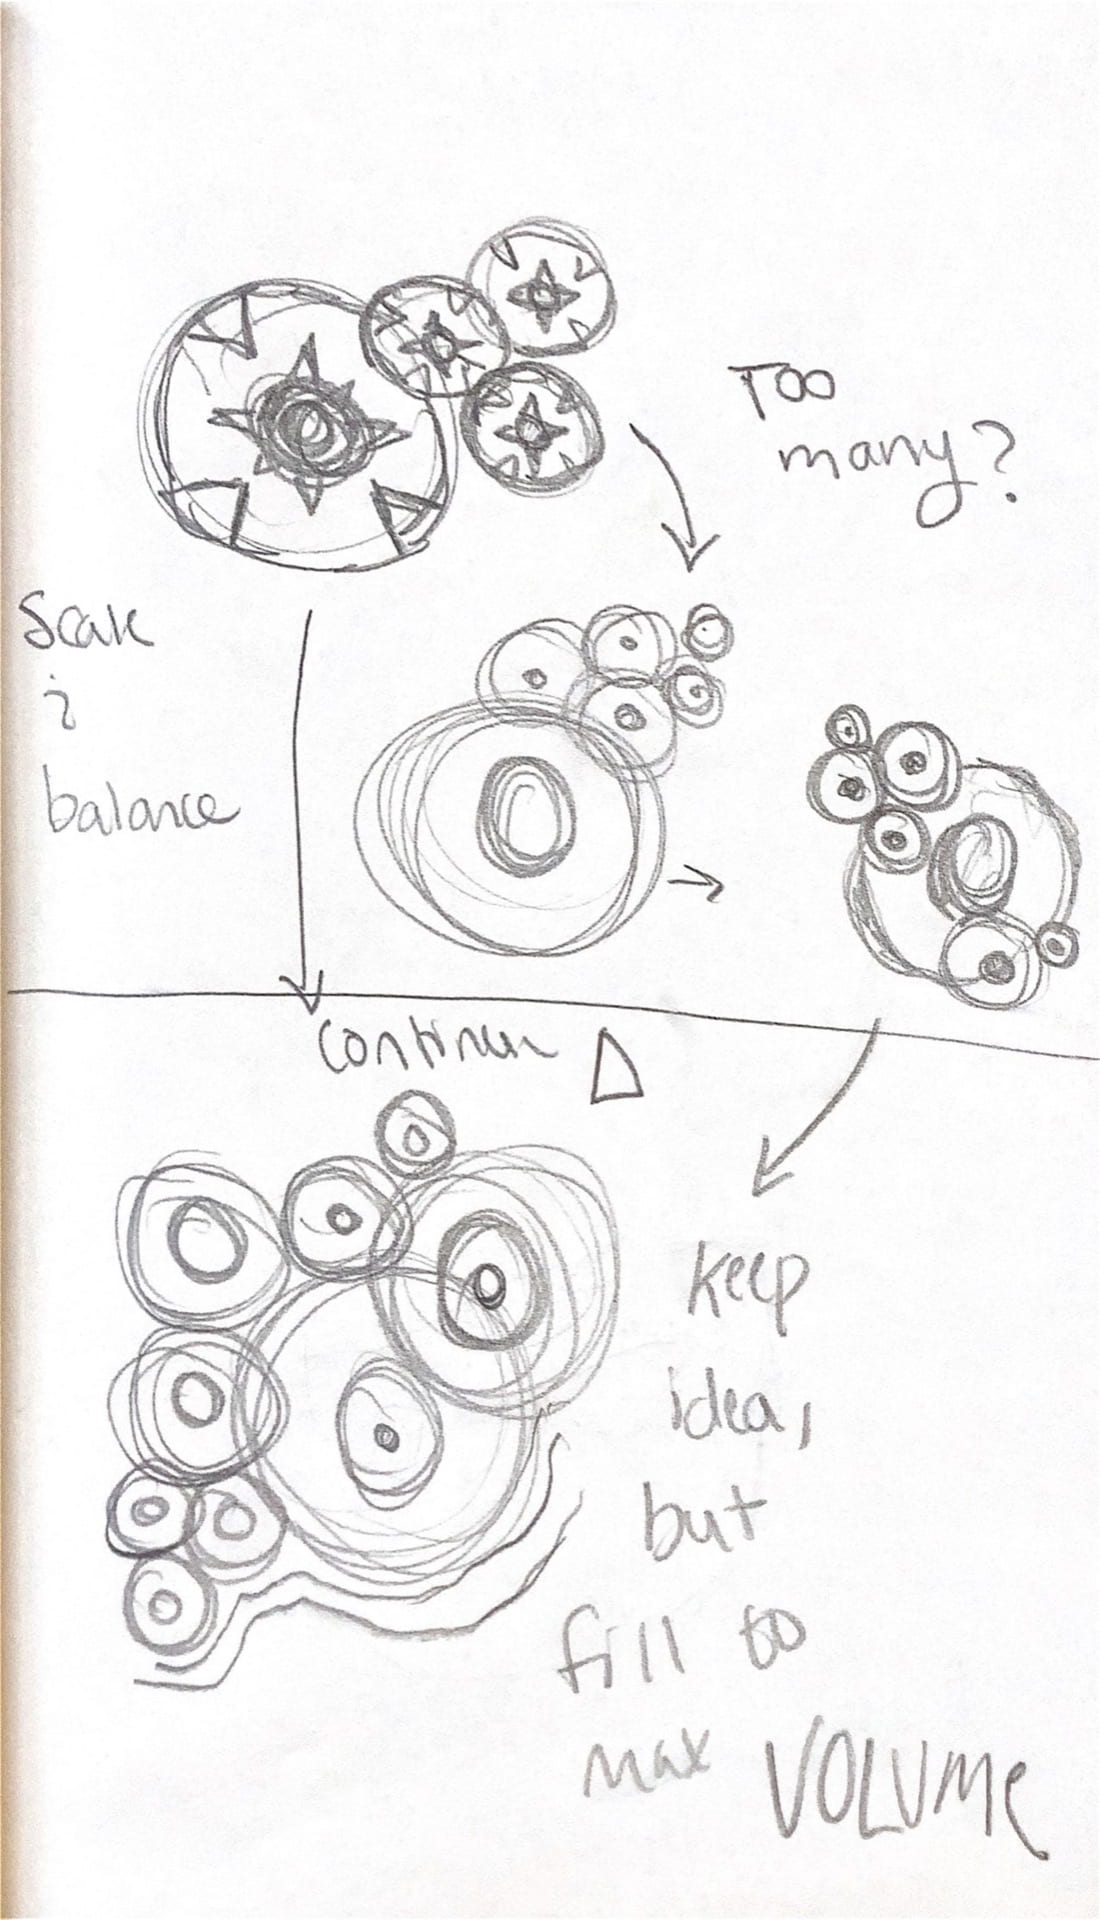


Volume

Ideation number six for volume was my initial plan for the volumetric design. I planned to fill the space with variations of my design, rooting the new construction in the individual components. I determined to create the sense of volume by building up the layers (opposite to how I broke down the circles for depth). Balance is another essential component for this design. I maintained balance in this asymmetric piece by having the focal point be the large, completed design with small partially created designs surrounding it. The variation in heights helped produce a full, voluminous design as it contrasts with the flat layers building up to it.


Plan for construction with ideas for how to layer. Unfortunately, the weight of the paper and chip board were not factor in, and so more layers had to be added accordingly. Also, to highlight the completed, large design, I ended up adding the most layers there.
Practice model made out of notecards and tape. It was not an exact plan; however, it helped guide me in understanding how to cut out and layer the rings.


Color and Pattern Finalization

My final products of both my first and second design are presented with the tile creation placed to the left and the repeated pattern placed on the right. To finalize my fist design, I focused on repeating it enough to provide context for the blue back space. When repeating this tile, I had difficulties with the application, Vectornator, used to generate the design. The stroke could not be resized to scale with the rest of the shapes; nevertheless, I did not undo this effect because I believe the oversized blue stroke around the green circles create a diamond shape that contrast nicely with the various concentric circles. In terms of finalizing my second design, I determined to use a dark green that was a shade of the green previously used. This help pull my design forward while creating an upside down figure in the negative space similar to the design.

Mountain Process

The design derived from the rocks is based on the direction projected by the layers of rock. The initial thought was to use line work to elicit movement; however, when adding color I experimented with adding filled shape. I found that by adding awkward shapes it created a more cohesive composition. Furthermore, the dynamics of the line contrasts nicely with the stability of the shapes. I looked at how the design would appear without the lines, yet it lost the movement and direction. Lastly, I attempted to remove the gaps between the individual spaces, but it came across as congested, and disorganized. Color helped this composition join as abstract components. I used varied tints and shades of green and yellow. It created a feeling of earthiness I strived for. Additionally, the yellow is accented by the sparingly used purple.
When evaluating my tile as a repeating pattern, I thought mostly about how the color of the negative space will influence the pattern. I chose to put each form close together in order to create a similar shape out of the negative space. I experimented with filling the space with the circular shape, but it looked out of place. Also, when repeated even more, the angles of the colored shapes creates a diagonal pattern throughout. In my final pattern I determined a dark green to be the right choice for the background. The darkness helps define each individual form, while not being overbearing. In addition, the shade of green present follows the color scheme as it is a deviation of the green already present.

Frog Eye Process

My initial interpretation the frog’s eye focused on it’s individual components. I decided to revise the triangular shapes within the eye, and place them in a more symmetric position. The triangles contrast the roundness of the concentric circles. As my ideas developed, I added more intricate triangles within the circle to create a fuller, more active design. Color was a major aspect in creating my final piece. I decided to follow a color scheme involving green, blue, and orange, based on my color explorations. I centered the orange/browns in order to have the eyes build through the green to the blues. I increased the contrast of colors from the second to last design as suggested during critique.

When developing my tile that was to be repeated, I focused on using the maximum amount of space, as my design is simple and not overwhelming. I initially consider using only a component of my original design to fill the center space; however, the curves that carve into the center circle created an unusual, diamond-like shape. It was to keep this new shape that caused me to choose to use the whole design. In addition, by laying my circles, I wanted to demonstrate a little bit of depth. I followed this action by evaluating color. The center to me was still back space, so I transitioned the design into different shades and tints of the blue that outlines the other circles.