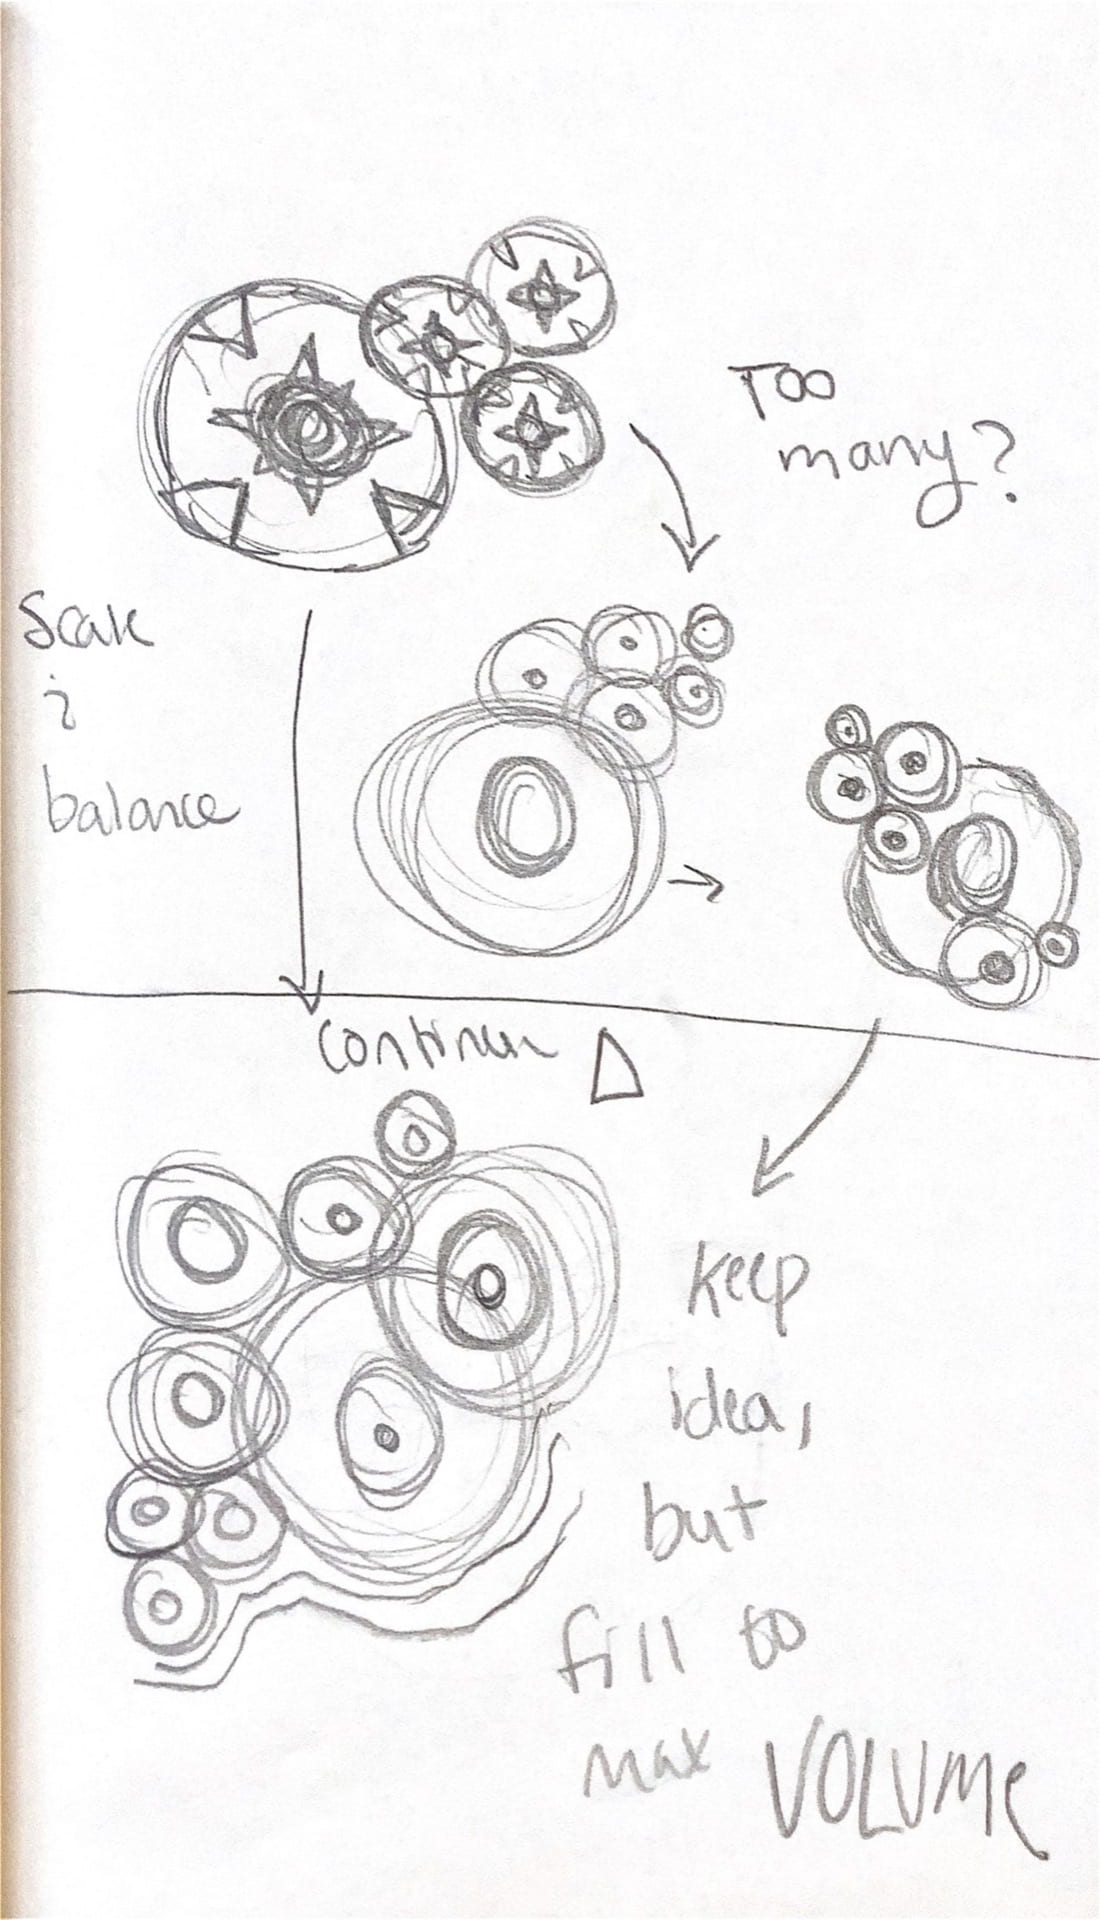
Pattern and Scale Construction

Depth

The following scans are my ideations for depth. I thought about how direction can be used to emphasize the feeling of depth. The circular build of a cone was considered throughout most of these ideations. I used this idea when creating a spiral leading downward in my depth construction. It was not necessarily a cone, yet that was the inspiration. I used a combination of parts to plan my final design. I appreciated the concentric circles as they highlighted the various scaled circles in my design, but I decided to use the sharp triangular components sparingly in my finalized build. This was done as the triangles purposes were purely decorative. The motion emanating from the spiraled circles focalizes the centered design. I used depth for this emphasized point.


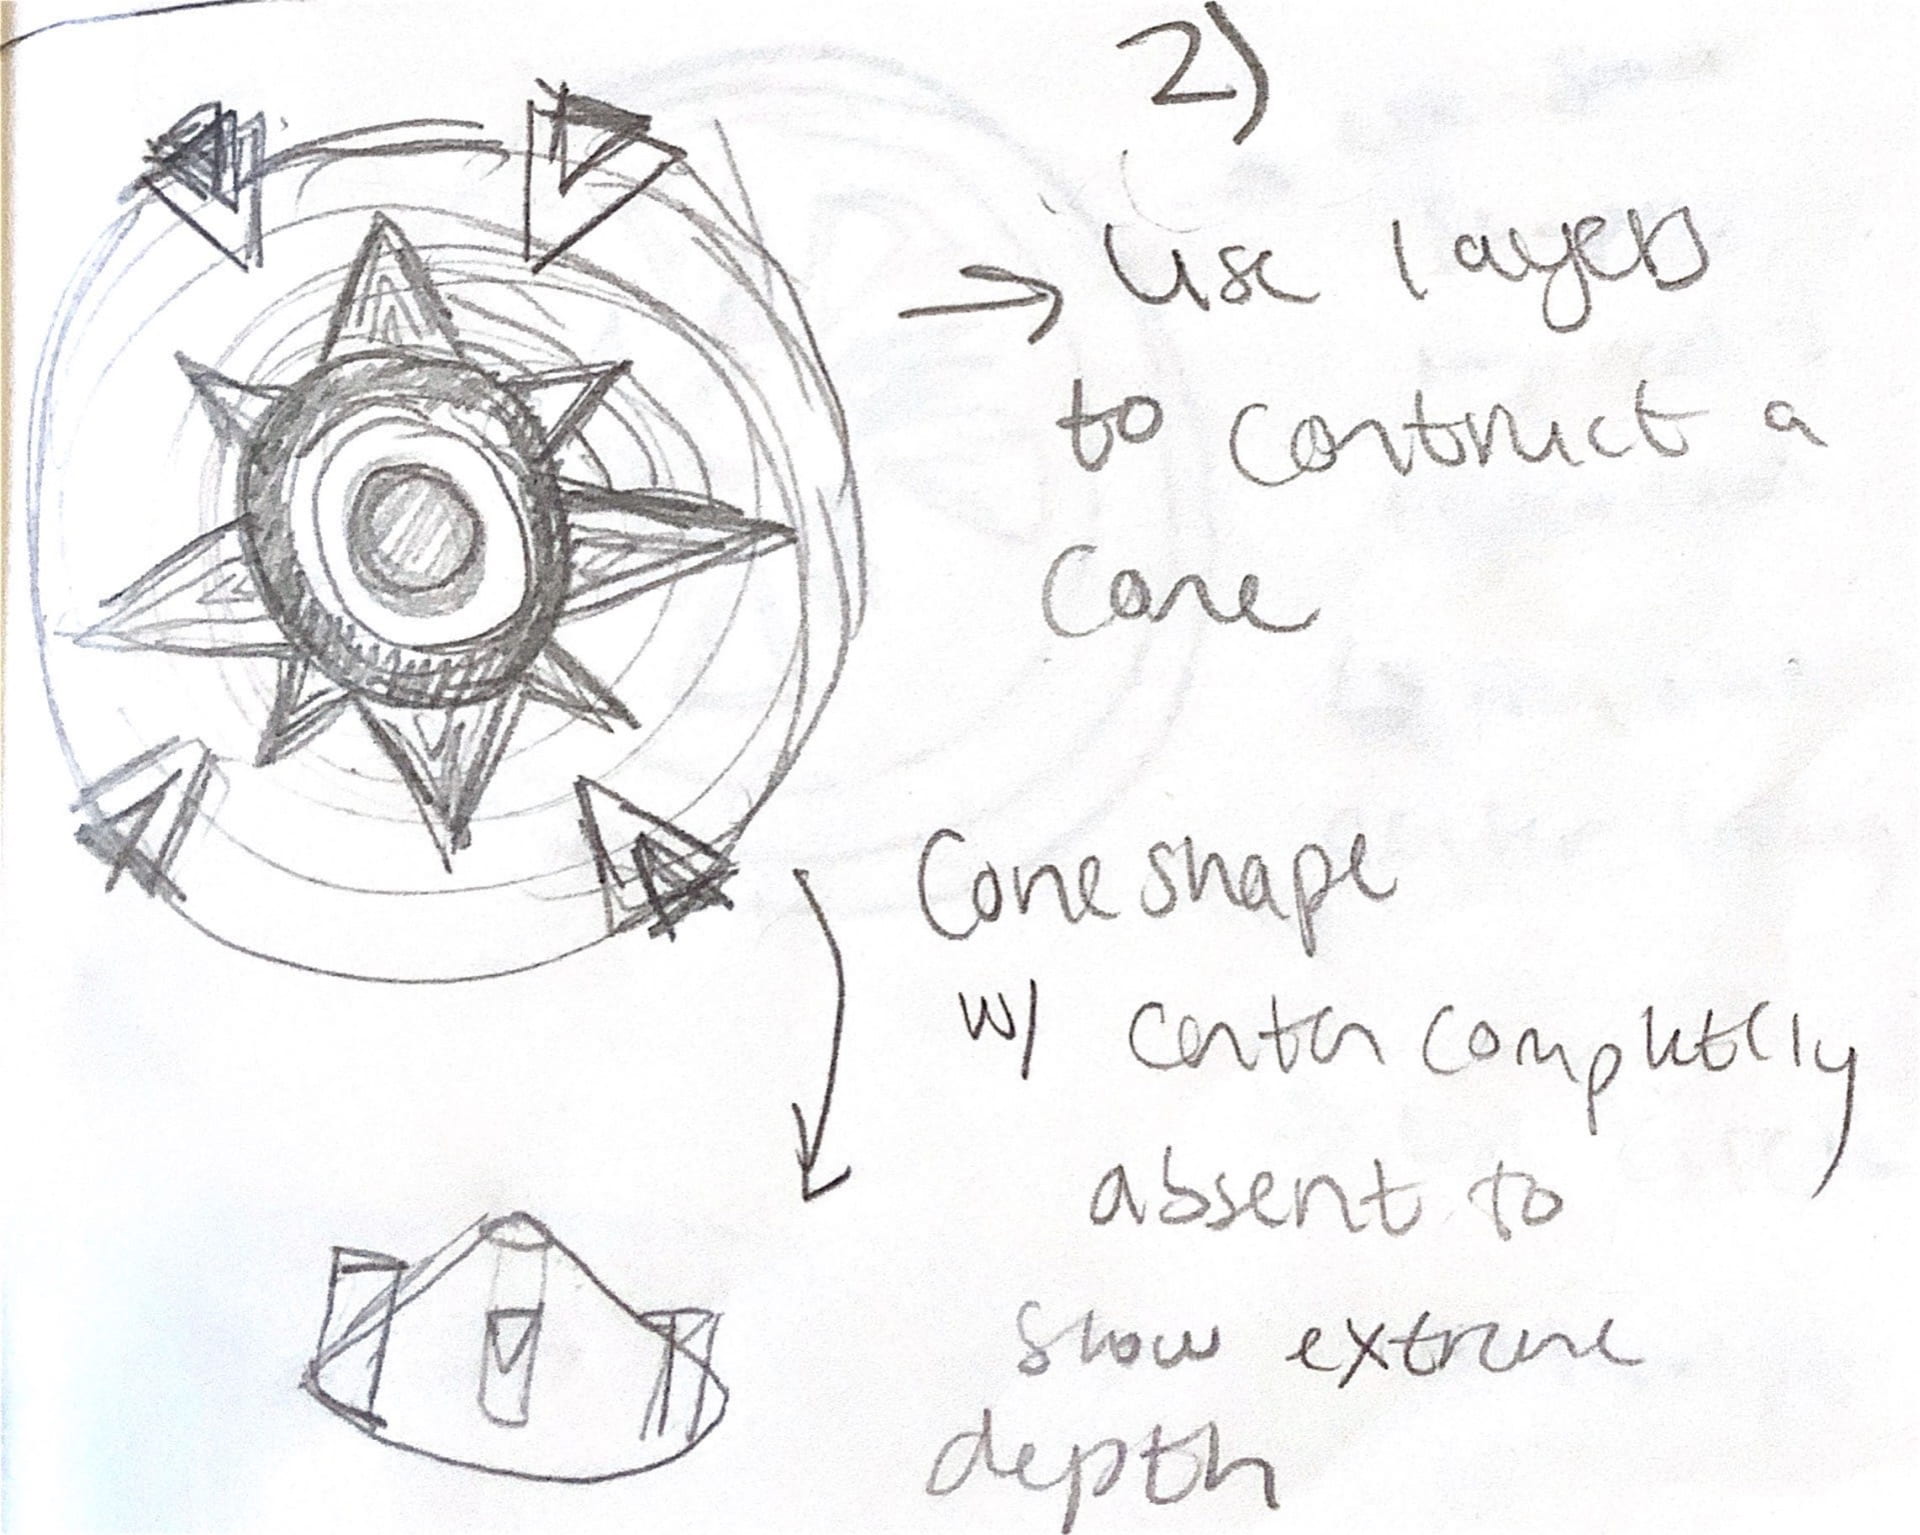
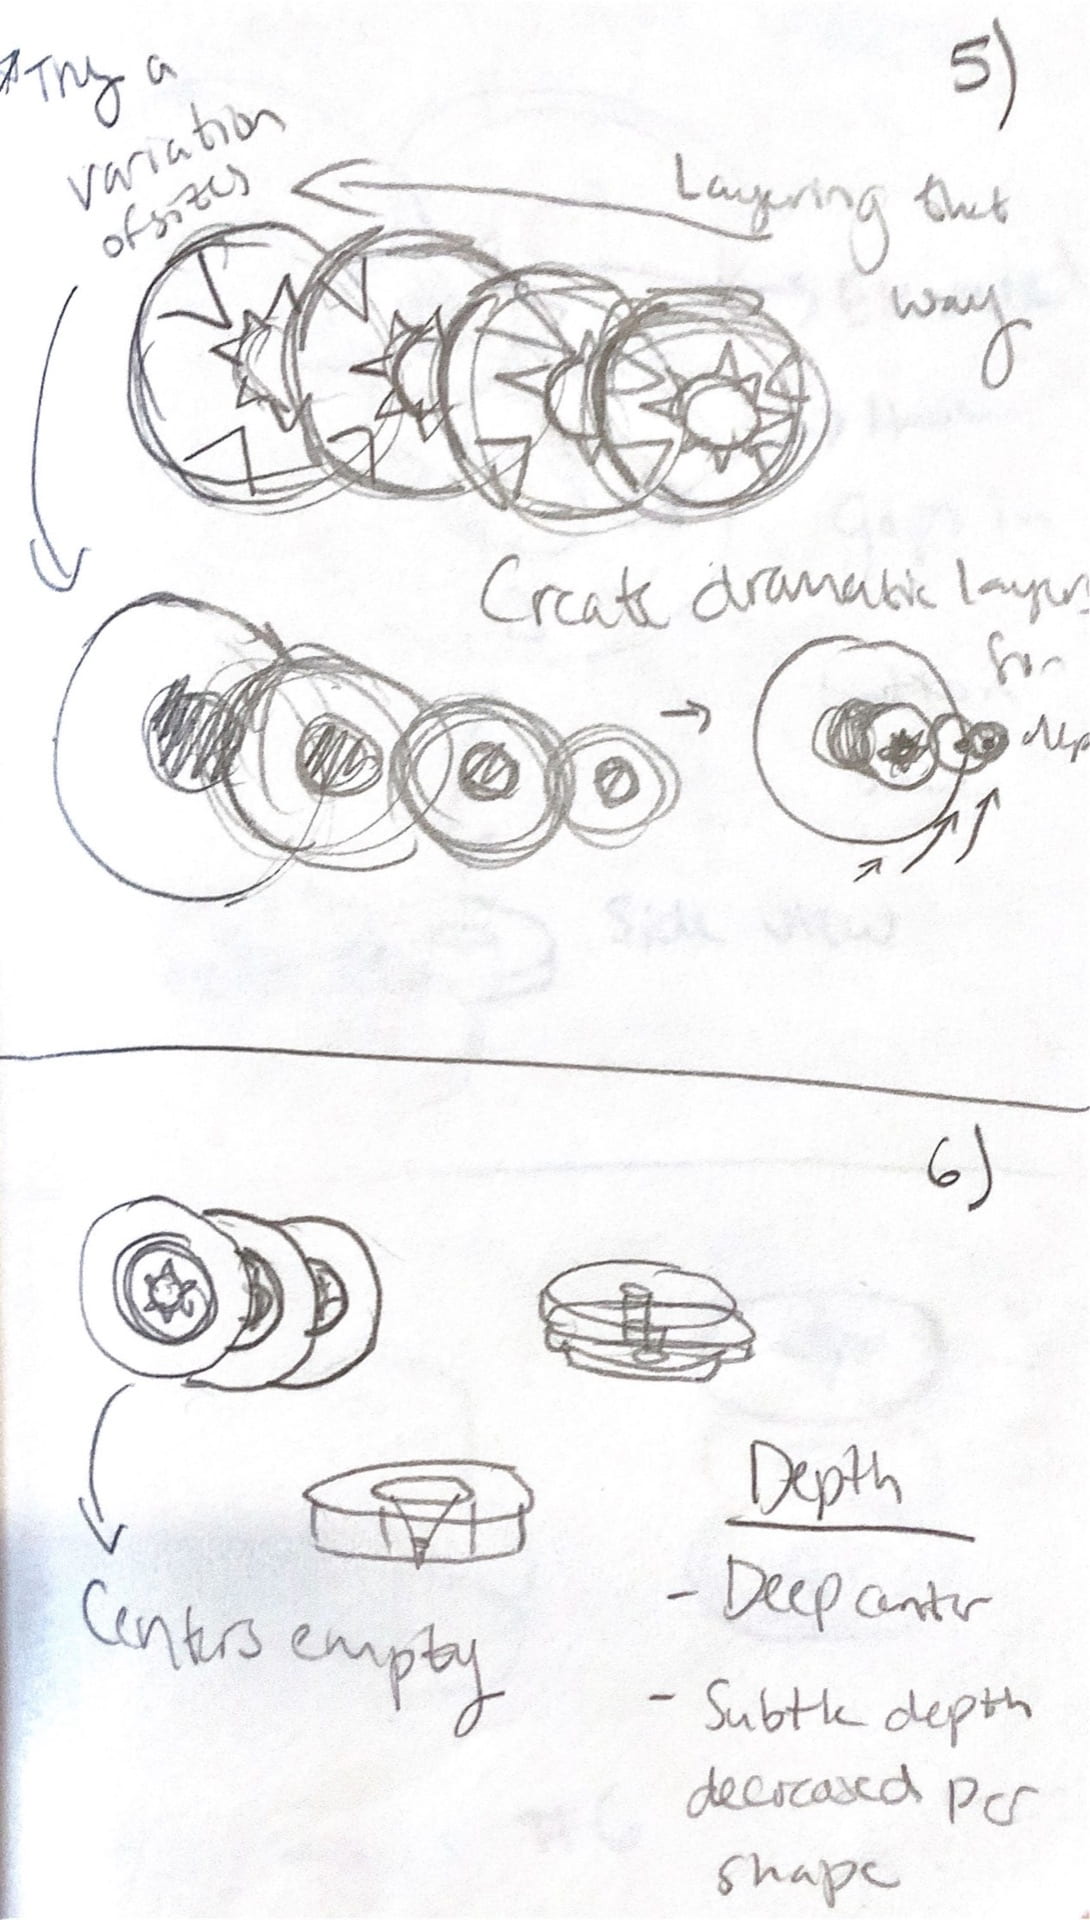
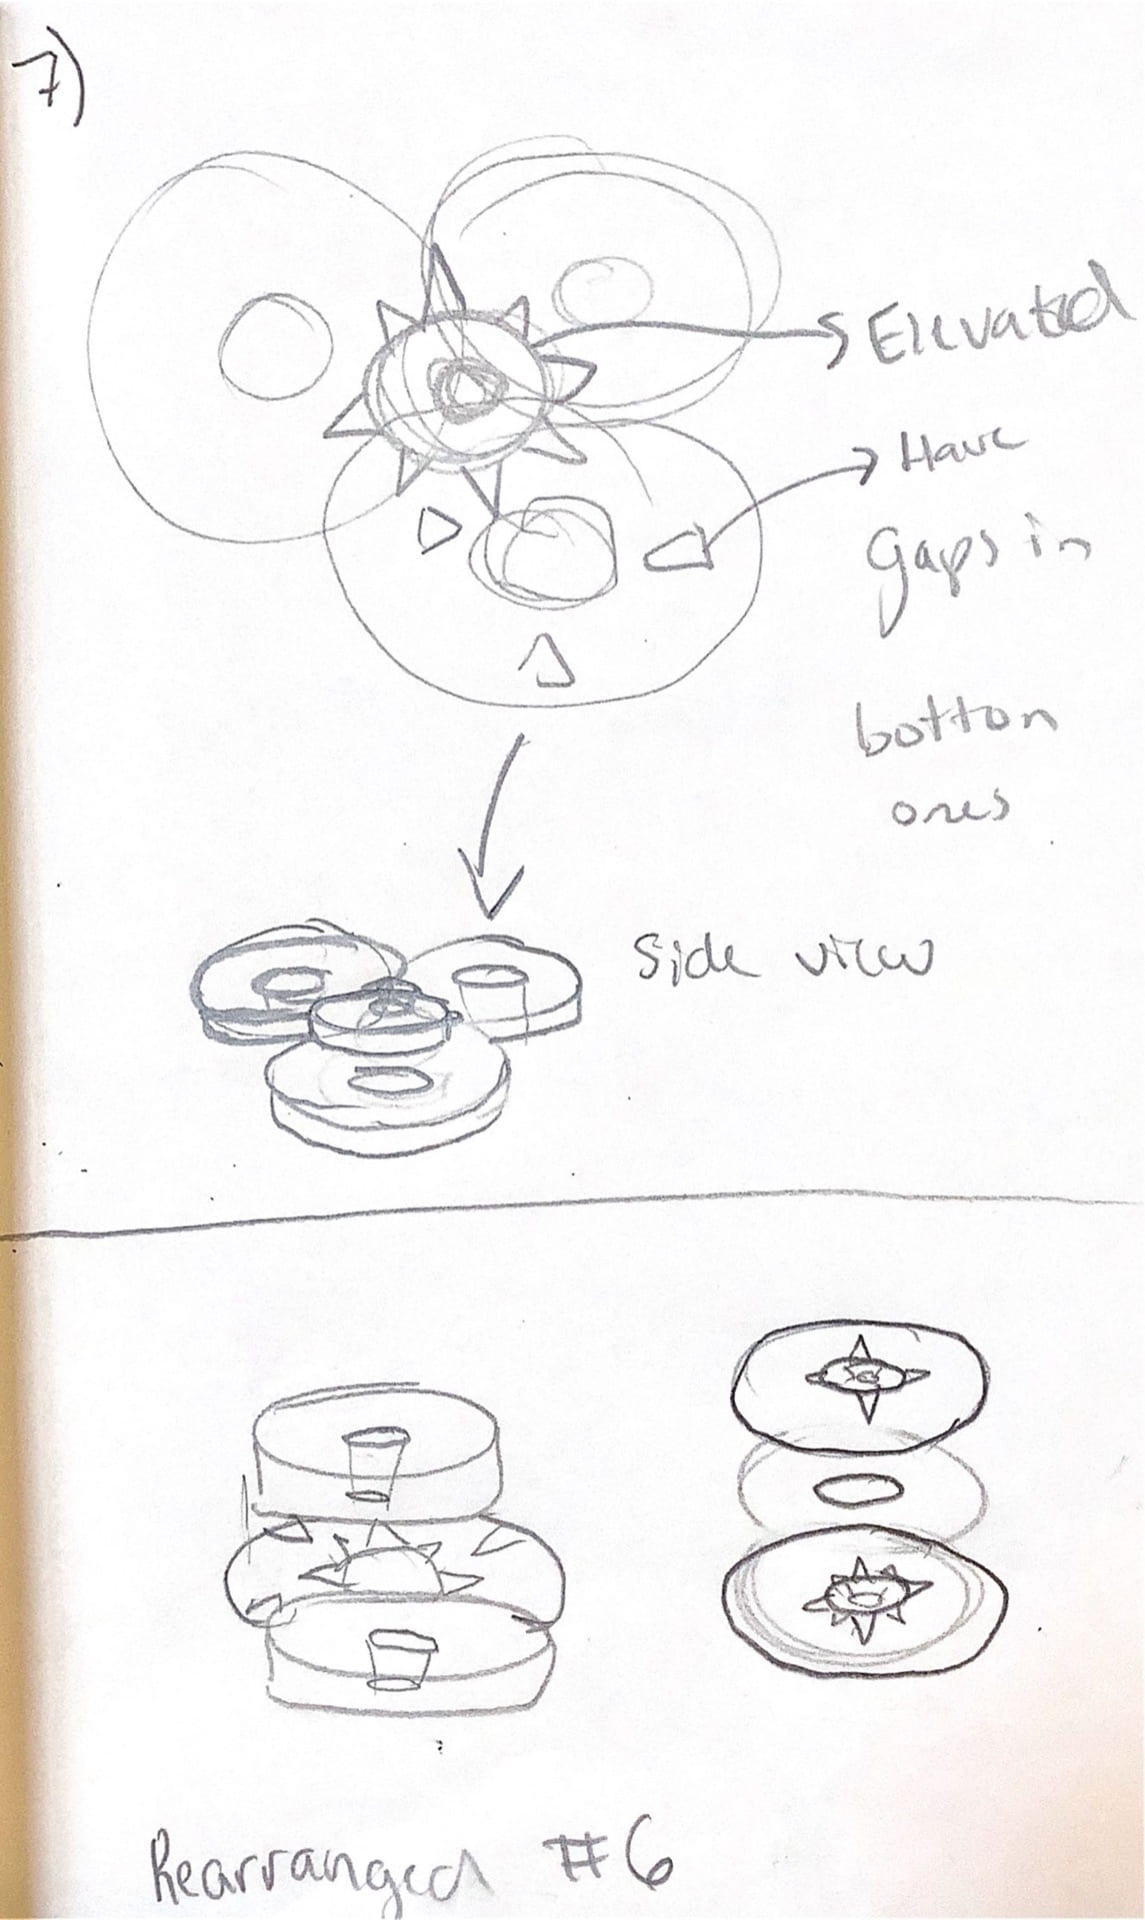
This is a demonstration of how the combination of the spiraled circles and the centered design will interact. It will grow outward to produce the polar effect of drawing the audience inward. I separated the components by keeping the triangle parts only on the center piece. The layers will be stacked using pillars of chip board and each other for support.


Volume

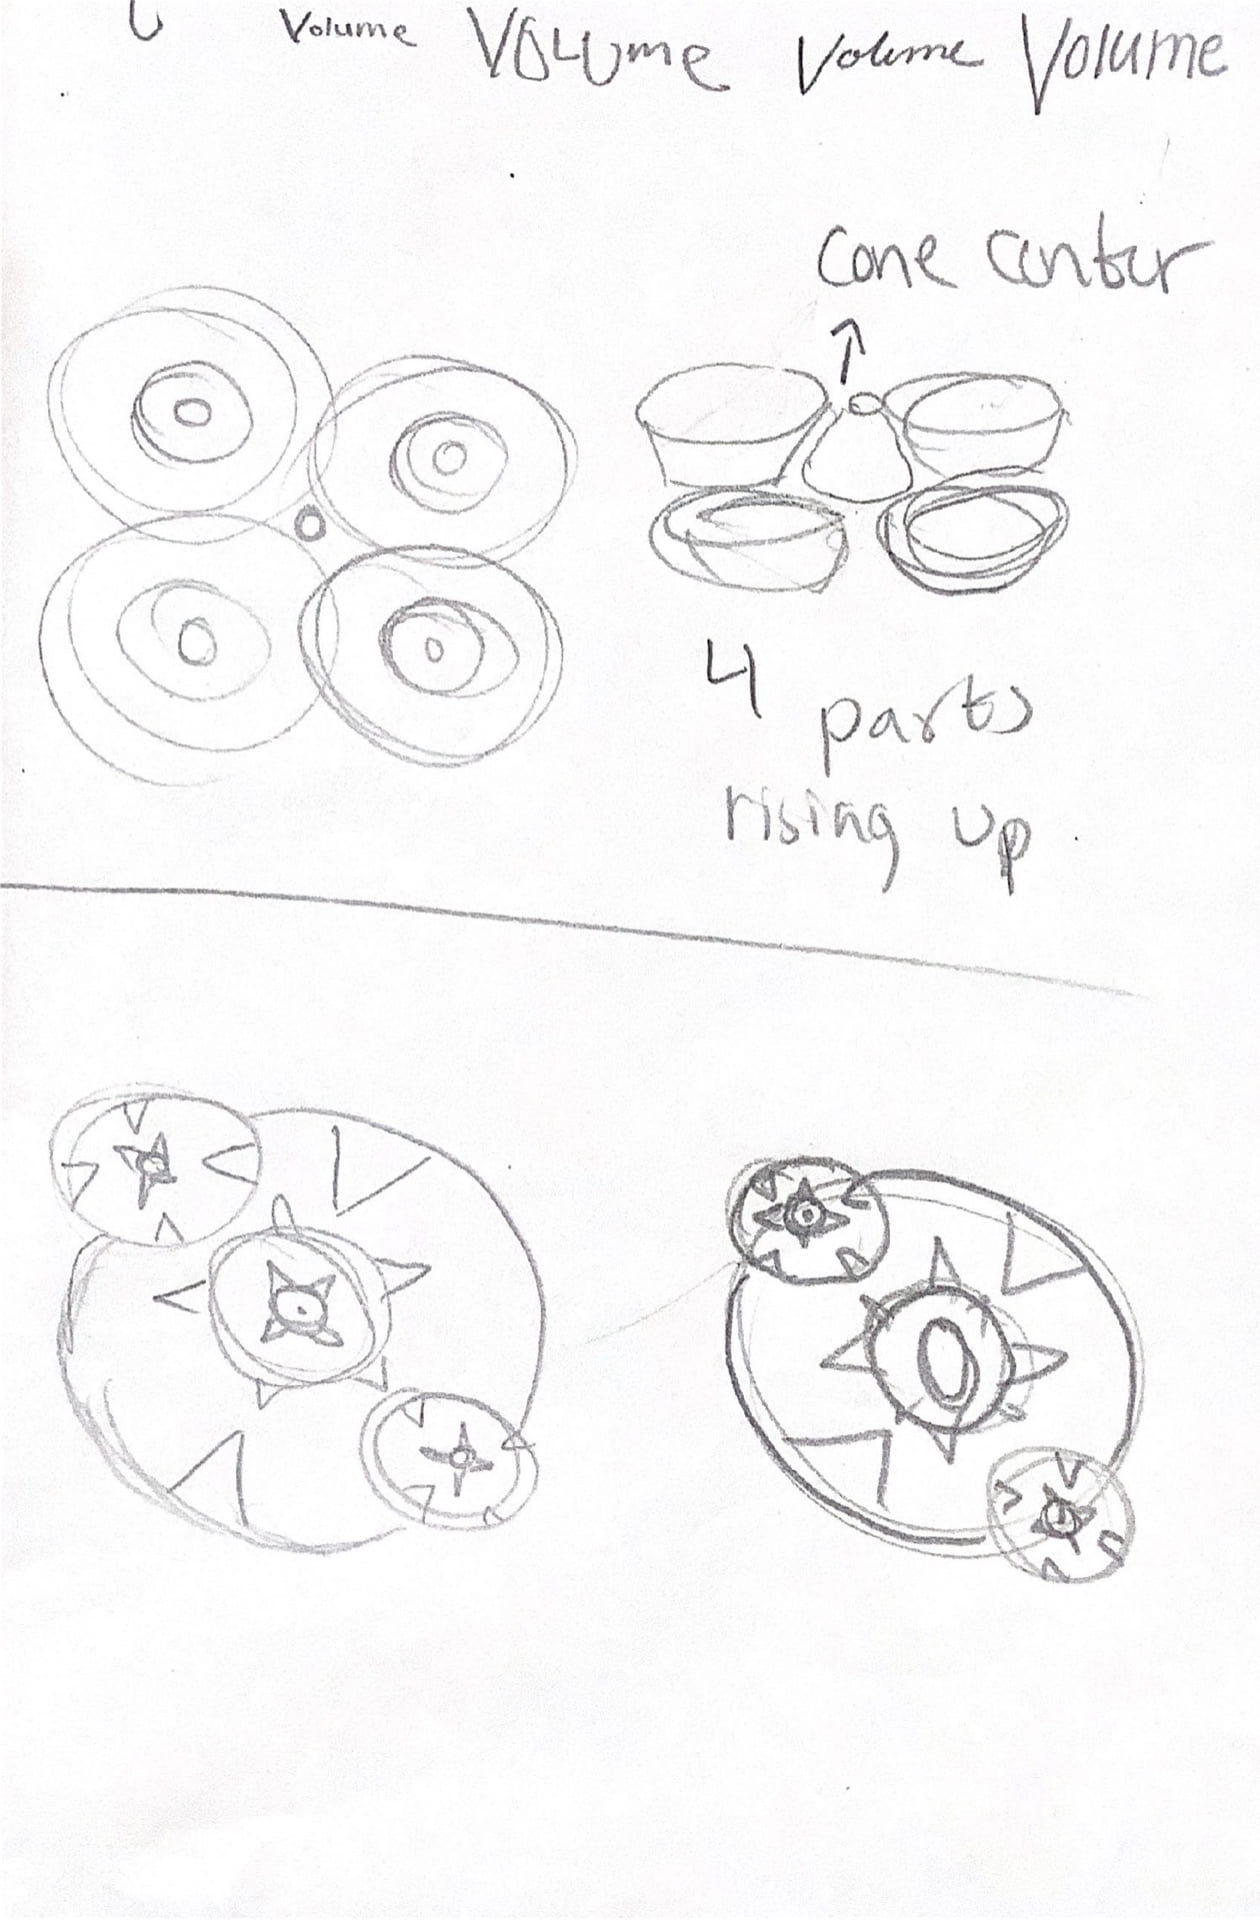
Ideation number six for volume was my initial plan for the volumetric design. I planned to fill the space with variations of my design, rooting the new construction in the individual components. I determined to create the sense of volume by building up the layers (opposite to how I broke down the circles for depth). Balance is another essential component for this design. I maintained balance in this asymmetric piece by having the focal point be the large, completed design with small partially created designs surrounding it. The variation in heights helped produce a full, voluminous design as it contrasts with the flat layers building up to it.


Plan for construction with ideas for how to layer. Unfortunately, the weight of the paper and chip board were not factor in, and so more layers had to be added accordingly. Also, to highlight the completed, large design, I ended up adding the most layers there.
Practice model made out of notecards and tape. It was not an exact plan; however, it helped guide me in understanding how to cut out and layer the rings.


Abstraction Texture Development

I experimented with different textures to distinguish the parts of the gazebo. I determined that asphalt shingles would be a realistic material choice for the roof. I contrasted the rough pattern of the roof with wooden rails and support beams. I added the fence aesthetic around the perimeter as geometric combat to the circular shape of the base structure. The flooring was considered initially, but I decided I had enough textures and it was a small portion of the area. I created a shaded floor in the final creation in order to increase the sense of depth.
The gum ball machine was created with the intention of focusing on two textures- glass and plastic. I later decided to create metal support poles as an attempt to improve on shading metal from my interpreted journey. The glass was designed based on looking at fish bowls. To create the sense that it is hollow I added gumboils to my final design. Lastly, I made my plastic glossy in oder to have reflective highlights, adding to the form.
The tub was initially created out of the leaf components, so in reference to its roots I created some test patterns based on the leaf texture. I determined the texture to be too intense for the entirety of the form; as a result, the finalized drawing poses the celled texture on the tops ledges. In this sample sketch of the tub I lacked the sense of form and depth desired, so overall it was changed later on.