Fall Maple Assessment – Get Ready for Next Season, Part II

Read the first installment of our autumn mini-series “Get Ready for the Season” here.  The first article focuses mainly on the woods, and Part II sticks to the sugarhouse.

It is perfectly natural after a long hard season to put off sugarhouse cleanup and maintenance. This can be a major mistake. Getting the sugarhouse ready for the next season starts immediately after last season has concluded.  Dirty unmaintained equipment sitting around in warm weather can promote the worst of unsanitary conditions that will surely haunt you into the upcoming season.

Let’s start with storage tanks. Not everyone can afford bright shiny stainless-steel tanks that are easy to clean. Many producers substitute more affordable plastic tanks. Unfortunately, plastic tanks have earned the reputation of lowering syrup grades due to rapid microbial growth. All of the elements for rapid growth are present. The sap supplies the food and the tanks warm quickly. Where do the microbes come from? They are hiding in the porous interior of the tank. That porosity is what makes it almost impossible to thoroughly clean a plastic tank. You may get by for two or three years but sooner or later the tanks will have to be scrapped. The cost of three or four plastic tanks over a ten-year period can add up quickly. Consider the economic value of a stainless tank that should last forever if handled and maintained properly.

Reverse osmosis (RO) has revolutionized the dynamics of the maple syrup industry. For the commercial producer, the RO has drastically slashed labor and fuel expenses. When it comes to maintenance, the most critical element is maintaining the primary filter or membrane. Membranes that are not maintained properly can be severely damaged. Damage can lead to the passing of sugar into the permeate tank. This results in a hidden loss of profits going down the drain. Always check your permeate for abnormally high sugar content. Washes of both soap and acid are used in the cleaning process followed by an extensive permeate rinse. A properly maintained membrane should last for many years. Another critical but oft overlooked issue are increased levels of chemicals being discharged from the sugarhouse. When you are using an RO, you are discharging thousands of gallons of liquid through your sugarhouse drains. You are also discharging acids and soaps through the same drain. If possible, neutralize the chemicals by bringing both acids and soaps back to a neutral 7.0 pH before you flush them down the drain. Neutralizing agents are readily available from your maple dealer.

Producers tend to overlook where and how they store there concentrate before boiling. When you concentrate sap, you are creating the perfect storm for a microbial outbreak. You are doubling, and in some cases tripling, the amount of sugar in the tank. When you run the sap through an RO you also boost the concentrated sap’s temperature by at least 20 degrees Fahrenheit. Assuming the concentrated sap is housed in a relatively warm sugarhouse, it makes no difference if you are using a stainless or plastic tank, microbial populations always explode in concentrated sap. The first line of defense is to boil the concentrate as soon as you can to prevent grade deterioration. If you only have enough money to purchase one stainless steel tank, make the purchase for your evaporator feed tank. This is doubly true if you are concentrating with reverse osmosis.

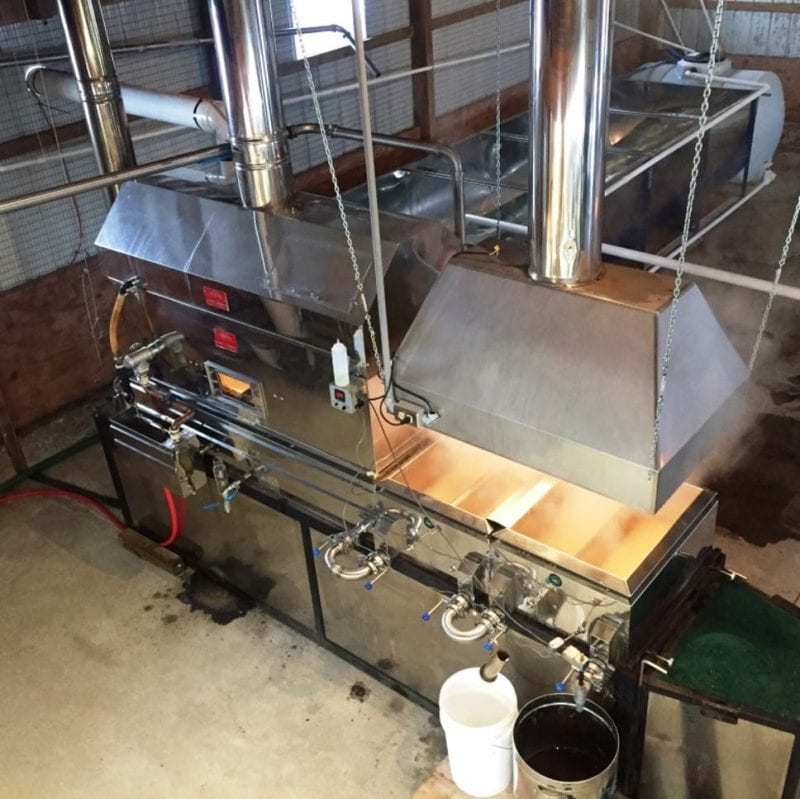
One of the best maintained pieces of equipment in any maple operation must be the evaporator. After all it is the center piece of most sugarhouses. Producers tend to take pride in how their evaporator looks inside and out. Here are a few things to consider before you start the season. Make sure all of the fittings and gaskets are functioning properly. It is good idea to do a test boil before using. You do not want to waste sap or concentrate if there is a malfunction. During the season, always start each day with clean niter-free syrup pans. Do not let niter build up. Excessive niter can cause a pan to overheat and even burn. Make sure you are using defoamer properly and in the proper place. If you are going to be shut down for a long time due to a warm spell, plan on draining your pans to prevent microbial buildup. Attempting to keep the liquid on the evaporator will only lead to contamination of fresh sap when it arrives and the production of poor-quality syrup. In a freezeout situation, make sure to inspect your pans to make sure they are not freezing solid. If they are, light a fire and thaw out your pans so they do not break. Again, emptying the pans is not a bad idea. Along with your evaporator make sure your filter press and auto-draw off are functioning properly. Improper maintenance of your evaporating and filtering equipment can result in the production of poor-quality syrup that will cost you money in the long run.

After the season, make sure everything is cleaned and stored properly. There are many ways to clean an evaporator and it comes down what works for you. Avoid using any kind of detergent in the cleaning process. Hot water and elbow grease wins out every time. At the end of the season, make sure your syrup is stored properly. There is nothing worse than opening a barrel of your top grade, only to find out it has spoiled. Syrup is best stored in a location where it stays below 70-degree Fahrenheit. Even though you hot pack your syrup it is wise to roll the drums, if possible, several times during the offseason. This agitation helps eliminate moisture condensation from collecting at the top of the drums due to temperature fluctuations.

If you are planning to upgrade your sugarhouse, keep in mind that this is the best time to make sure your facility can pass a state or federal inspection. All of the rules and regulations are available online through OSU Extension.

You have now done a comprehensive evaluation of your sugaring operation. What are your most cost-effective “low hanging fruit” items? Act now – season will be here before you know it.

When the Season Comes to an End

The season has come to an end and now you are faced with the arduous task of cleaning up you maple operation. Where do you start and what do you use? For most equipment, the answer is simple – lots of hot water and elbow grease. A good place to start is with the tanks that hold both sap and syrup. Most are stainless steel and are easy to clean with a pressure washer. We found that a tank washing nozzle that fits your pressure washer is a valuable tool. The specially-designed nozzles enable you to spray to the side and reach areas that a standard spray tip cannot reach. There is no substitute for stainless steel equipment if you can afford it.

Plastic totes and poly tanks have become popular because they are relatively inexpensive but they are harder to clean. Plastic totes, while affordable, may only last about two or three seasons if you get off your cleaning schedule. It does not take long for the plastic to become so contaminated with bacterial spores that you have to discard and replace. However, if you keep poly tanks cleaned they will last for years. Another simple tip is to clean as soon after the season ends as possible. Allowing totes and tanks to sit dormant allows bacteria to build and grow making cleaning more difficult.

Your evaporator needs to be sugared off and flushed out as soon as possible. I often flush the pans with clean water and then refill them with permeate from the RO and let them soak. If permeate is not available, use water. I will drain and refill the pans with clean water and then add the proper amount of pan cleaner following label directions. Once the pan cleaner has done its job, I drain the pans and use a high pressure washer to finish the job. Do the process correctly and your pans will look brand new. Make sure all your float boxes are clean, replace gaskets if needed. Soak your auto draw off temperature probe and your hydrometer in a 5% vinegar solution to remove any residues or films. The thermocouple in the auto draw off probe works best when there is no niter on the probe. Clean your filter press thoroughly and lubricate parts with a food grade lubricant. It is good practice to remove all extra filters from your sugarhouse and store them in your house, somewhere dry and rodent-free. If you use a filter tank, you will need to clean filters and make sure they are completely dry before story to ensure no mold will develop over the off-season. Any filters with problems, even minor, should be discarded, and you should purchase new inventory for the next season.

Reverse osmosis units (RO) should be soap washed and thoroughly rinsed immediately after the last time you use them. Make sure all of the permeate is drained out. Once you break down the RO, return your membranes to the storage vessels with a cup of permeate in each one. Once everything is clean, you should send the membranes in to your dealer for cleaning and testing. There is nothing worse than starting a season with a bad membrane that is passing sugar. Make sure your high pressure pump and your feed pump are free and fully drained. Inspect the membrane housings and get them as dry as possible. Many times with the recirculating motors and pumps on the bottom of the membrane towers, dampness can cause the pump shafts to seize and seals to deteriorate. Because evaporators and ROs require the use of chemicals that are incompatible – phosphoric acid and basic soap – keep them separate and out of reach of children. Be careful when you mix pan cleaner and always follow the directions on the label.

The most controversial portion of a maple system to clean is most certainly the tubing. It seems everyone has his or her own way of dealing with the miles of tubing stretching through the woods. I have cleaned tubing just about every way possible over the years. We have sucked water, pumped water and air, water only, air and tubing cleaner, and just plain did not clean at all. In my experience, using water and air worked well until we tried to pump up too steep of slope and had a blowout that may have had enough force to launch a satellite. Sucking water through the lines left a lot of liquid in the lines that eventually turned to green snot. The method we now use seems to work. We pull taps with the vacuum, nip off each old spout, and immediately use a Stars Company (out of Quebec) line plug to seal the drop line and maintain vacuum on the system. Done properly, the sap in the lateral line will not suck back into the drop line. We then use a paint marker to mark the old tap hole which greatly speeds up next season’s tapping process. Once all of the taps are out, we back flush the mainlines with clean water. Next we close all of the main lines and open the end of each lateral opening long enough to pull air through the lines and keep vacuum on the system. Doing this should remove 80% of the liquid from the lateral and main lines. At this stage, we successively open the ends of each main line and let air in with the vacuum on. Once the vacuum on the entire system drops to zero shut off the pump. At some point before the next season, we then install new spouts on all the drops and let the lines air out completely. This method may seem excessive but it does work. We have a small amount of green sap at the start of the season, but nothing we could not easily filter and could possibly have been avoided by flushing the system again before the season.

A word of caution when it comes to using tubing cleaners. They have to be completely flushed from the lines before the next season. Never use Isopropyl alcohol – it is illegal in the United States. Also be aware that some cleaners attract Mr. Bushy Tail and his friends – never a good thing for tubing operators.

Once your system is cleaned, bring in all releasers and clean and sanitize them thoroughly. They are made of PVC which makes a good home for bacteria. Go over the mechanism and use lubricant provided by the manufacture to lubricate all of moving parts. The last task is to care for your vacuum and transfer pumps. Change the oil or drain out the water on liquid ring pumps. On the new rotary claw pumps change the oil and fog the pump with a pump oil. You need to make sure rust does not build up. The same is true for rotary vane pumps which are more maintenance-free but putting some oil on the vanes never hurts. All gasoline motors should be drained and the gasoline replaced with SeaFoam or a similar product. Never leave gas with ethanol in the tank. Drain the crank case oil and replace it with fresh motor oil and you will be ready to go for next season. Lastly, make sure you transfer pumps are drained and stored somewhere that will not fall below freezing.

Author: Les Ober, Geauga County OSU Extension

The Most Important Time You Will Spend in Your Sugarbush

A month or two before the sap starts flowing your mind should be cranking through your to-do list to ensure your operation is in tip-top condition. Mid-December is a great time to inspect lines and to make adjustments to your tubing system. The work you do before the season will probably determine how well your system will perform during the season. Here are some things to consider and watch for as you work on your tubing system prior to tapping.

How many times have you said to yourself, this system just does not perform as well as it did when we installed it? You have to realize the first year of maple tubing system’s life will be its best year, simply because it is brand new. The spout and drops are new and everything is tight and working properly. After the first year a system’s performance will depend on how well it is maintained. Leaks will develop and those leaks can expose flaws in the system. Finding and repairing leaks is the first step to achieving high vacuum. The problem with doing work on lines prior to tapping is that you do not have the benefit of finding leaks aided by a running vacuum pump. However, with careful inspection you can spot and repair many potential trouble spots that will cause problems later.

The first step is to walk the woods making sure that all of the lines are up and running tight and straight. Inspect all the tubing that is in contact with tree trunks. These areas are where you will find the vast majority of squirrel chews. If the critters have been chewing, this should be relatively easy to spot. Make sure you not only look for chew holes but also scrapes where the little vermin start to chew and back off for whatever reason. Next you need to look for old connections on tees that have been stretched and twisted, replacing old tees where they are needed. If your system has some age, you might consider replacing all drops and spouts. Research out of the Cornell University maple program found that production can skyrocket 50% just by installing new spouts and drops in an older system. A couple of interesting side notes are that you can come very close to this by keeping the old dropline and installing a new check valve adapter every year. Many producers are finding it more convenient to replace the spout every year and the drops every third year. A helpful tip is to use a different color tubing on new drops so that you can quickly identify the drops that need to be rotated out.

Three areas to check on main lines are the saddles, boosters, and line connectors. Check for old, worn, or stretched saddles. If the loop line going to the saddle has become disconnected and is pulling hard on the saddle itself replace the saddle immediately. Once the seal on the saddle is twisted you will more than likely not be able to properly re-seat the saddle without leakage. Saddle leaks are notoriously difficult to detect and can quickly become the site of major vacuum loss. Another trouble spot are the boosters on a Wet-Dry line. Most of these are made of PVC plastic. PVC plastic was developed for indoor plumbing in buildings. It is not designed to be left in direct sunlight for long periods of time, and the result is degradation of the plastic due to ultraviolet (UV) light from the sun’s rays. The UV Light and exposure to hot and cold will also breakdown the glue in the joints. All PVC fittings should be inspected and replaced on a regular basis. If you use a PVC line from your vacuum pump to your releaser, including your moisture trap, make sure you inspect this area for loose or cracked joints as well. These areas are not only exposed to UV light but experience major vibration that can cause damage to the line over time.

Another location where vacuum leaks can occur is where lines are joined together with Cam Lock couplings. Producers need to replace the rubber gaskets on the inside of these couplers on a regular basis. Also try not to exert a lot of outward force on these connections. The work best when they couple together with little force.

Most of the above locations can be inspected without having to run the vacuum. Of course, the final inspection will need to be made once the taps are in and the vacuum is running, but you will be ahead of the game if most of the obvious and routine checks are complete ahead of time. If you can flush lines with water prior to using them, many leaks will also appear during this process. However, this may not be possible due to weather conditions. Early inspections and maintenance can offset hours of costly repairs and down time once the season starts, and disruptions at that point affect the bottom line – production.

Author: Les Ober, Geauga County OSU Extension