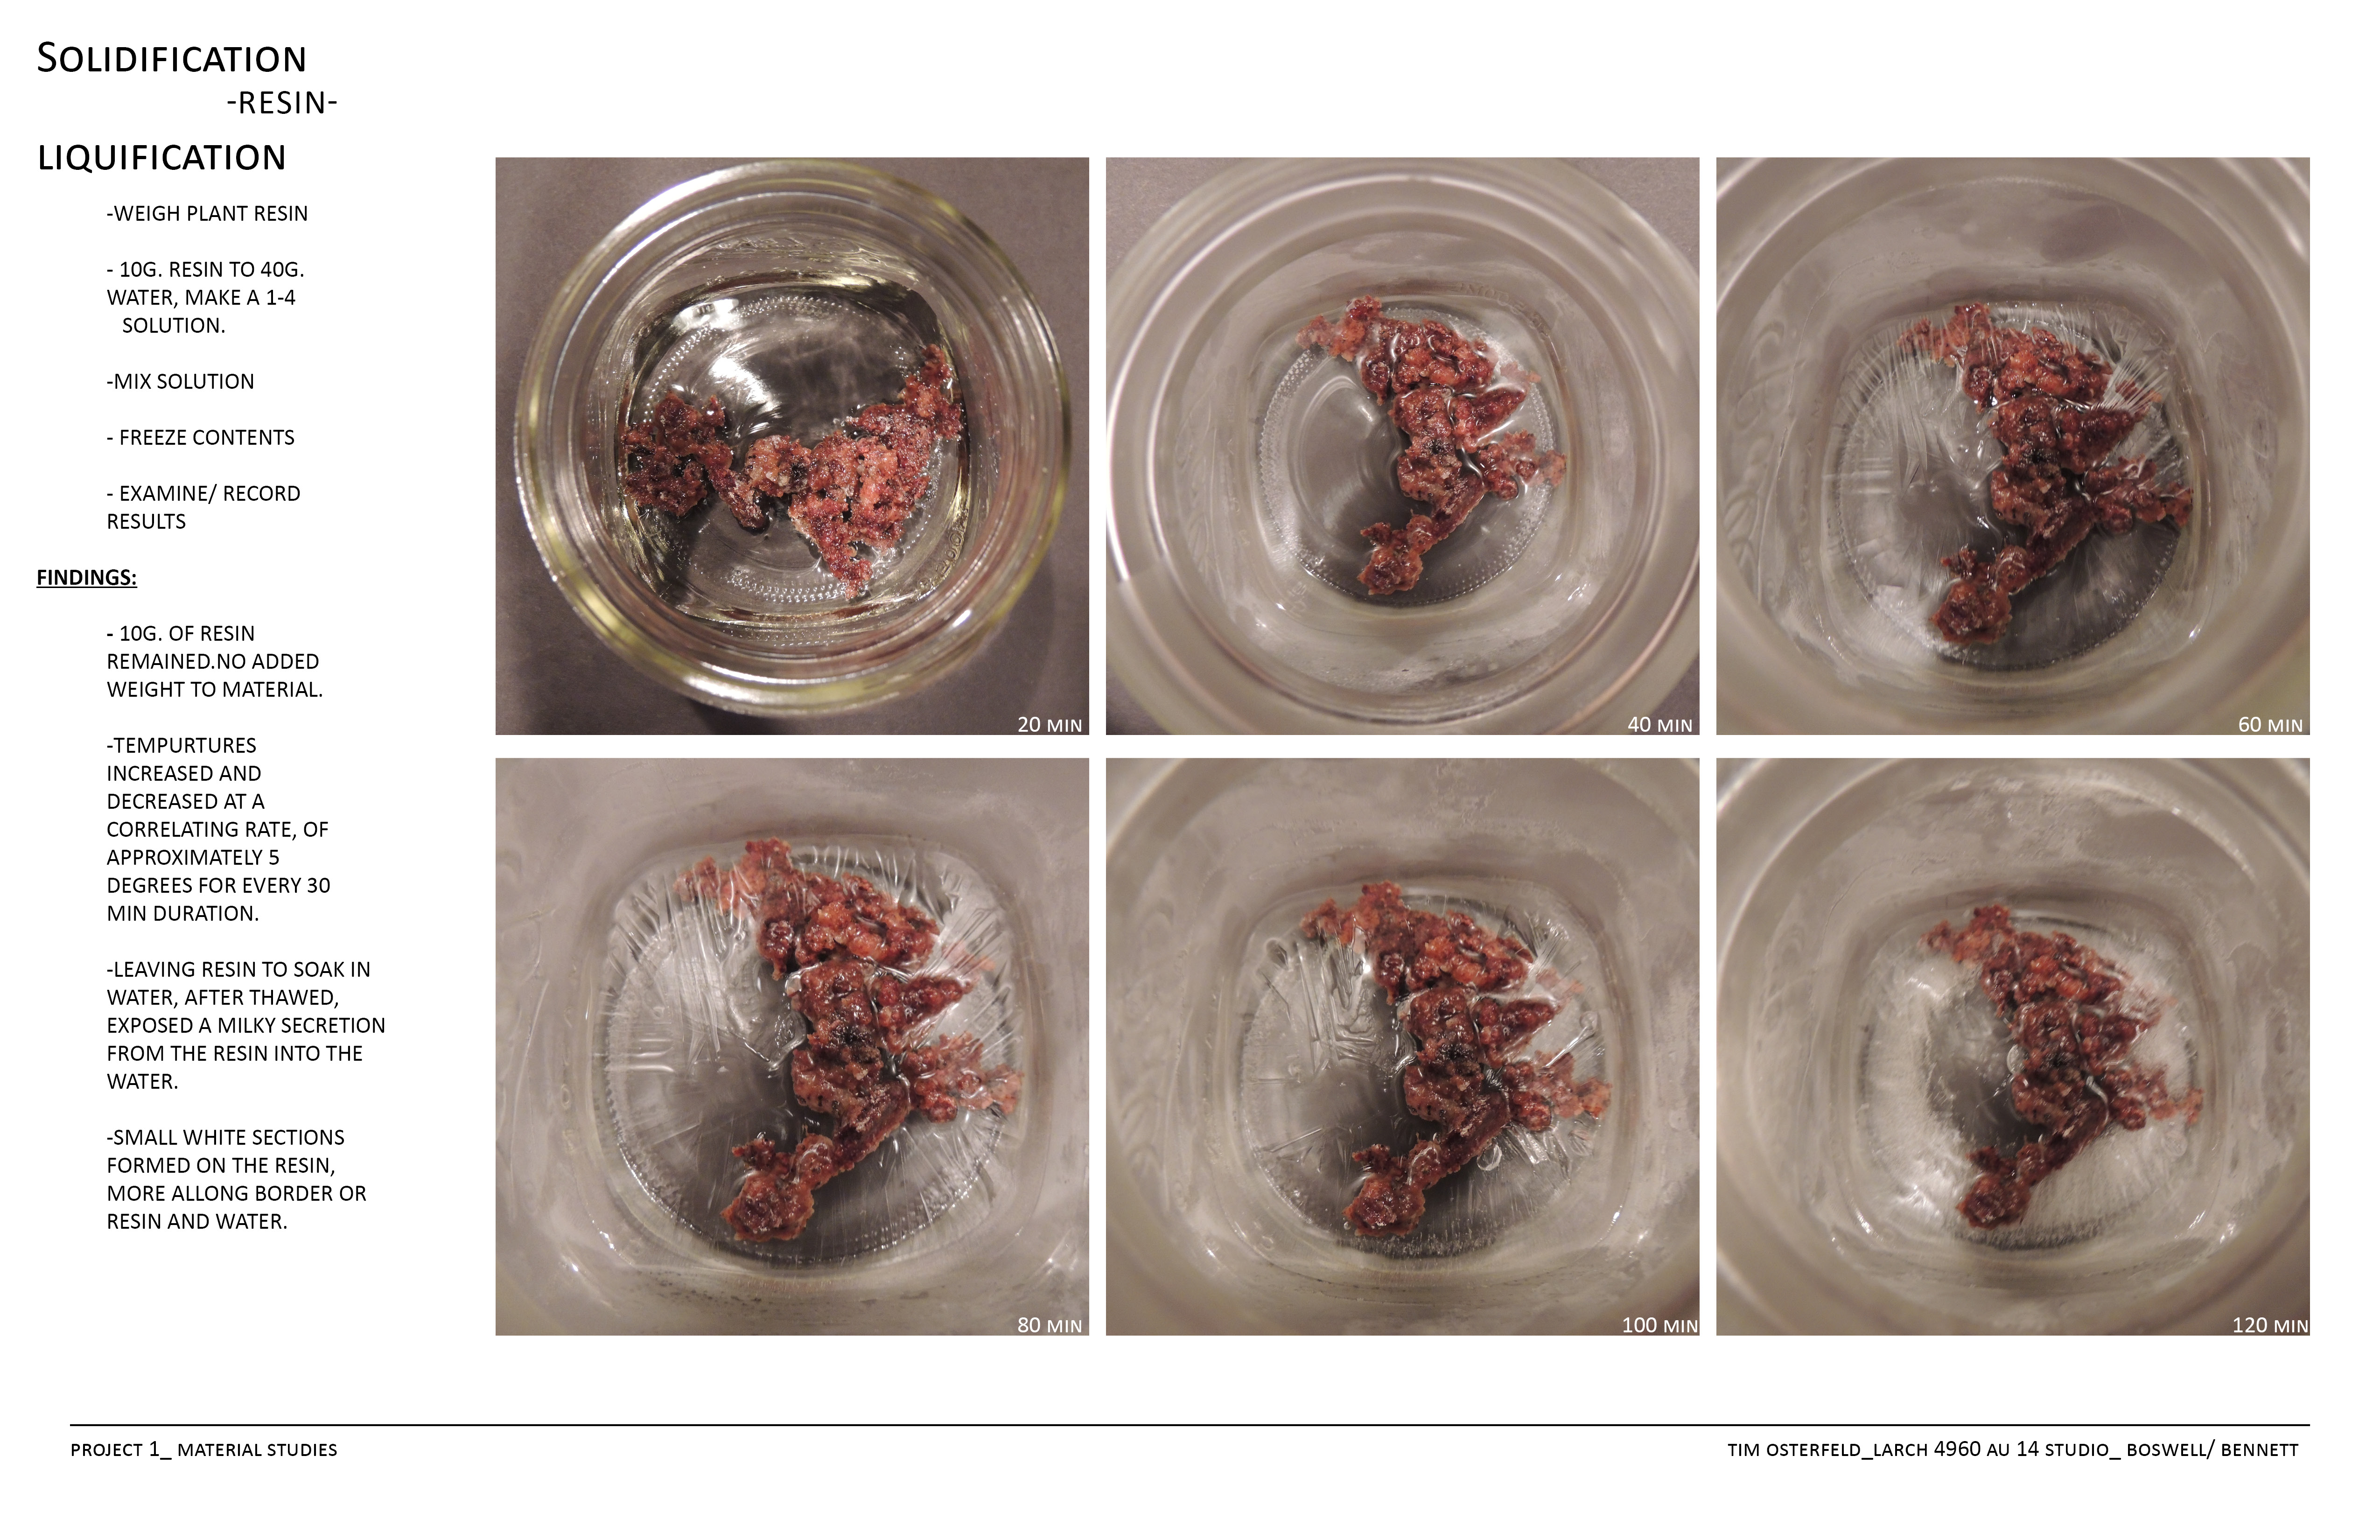


To View Project One Experiments Follow the link Below:
All Test completed on:
Mild RSBT Free Cheddar purchased at Lucky’s Market located on High Street in Columbus, Ohio
Hartzler Family Dairy Whole Pasteurized Non-homogenized Milk from Wooster,Ohio Purchased at Lucky’s Market on High Street in Columbus, Ohio
Filtered Columbus City Water
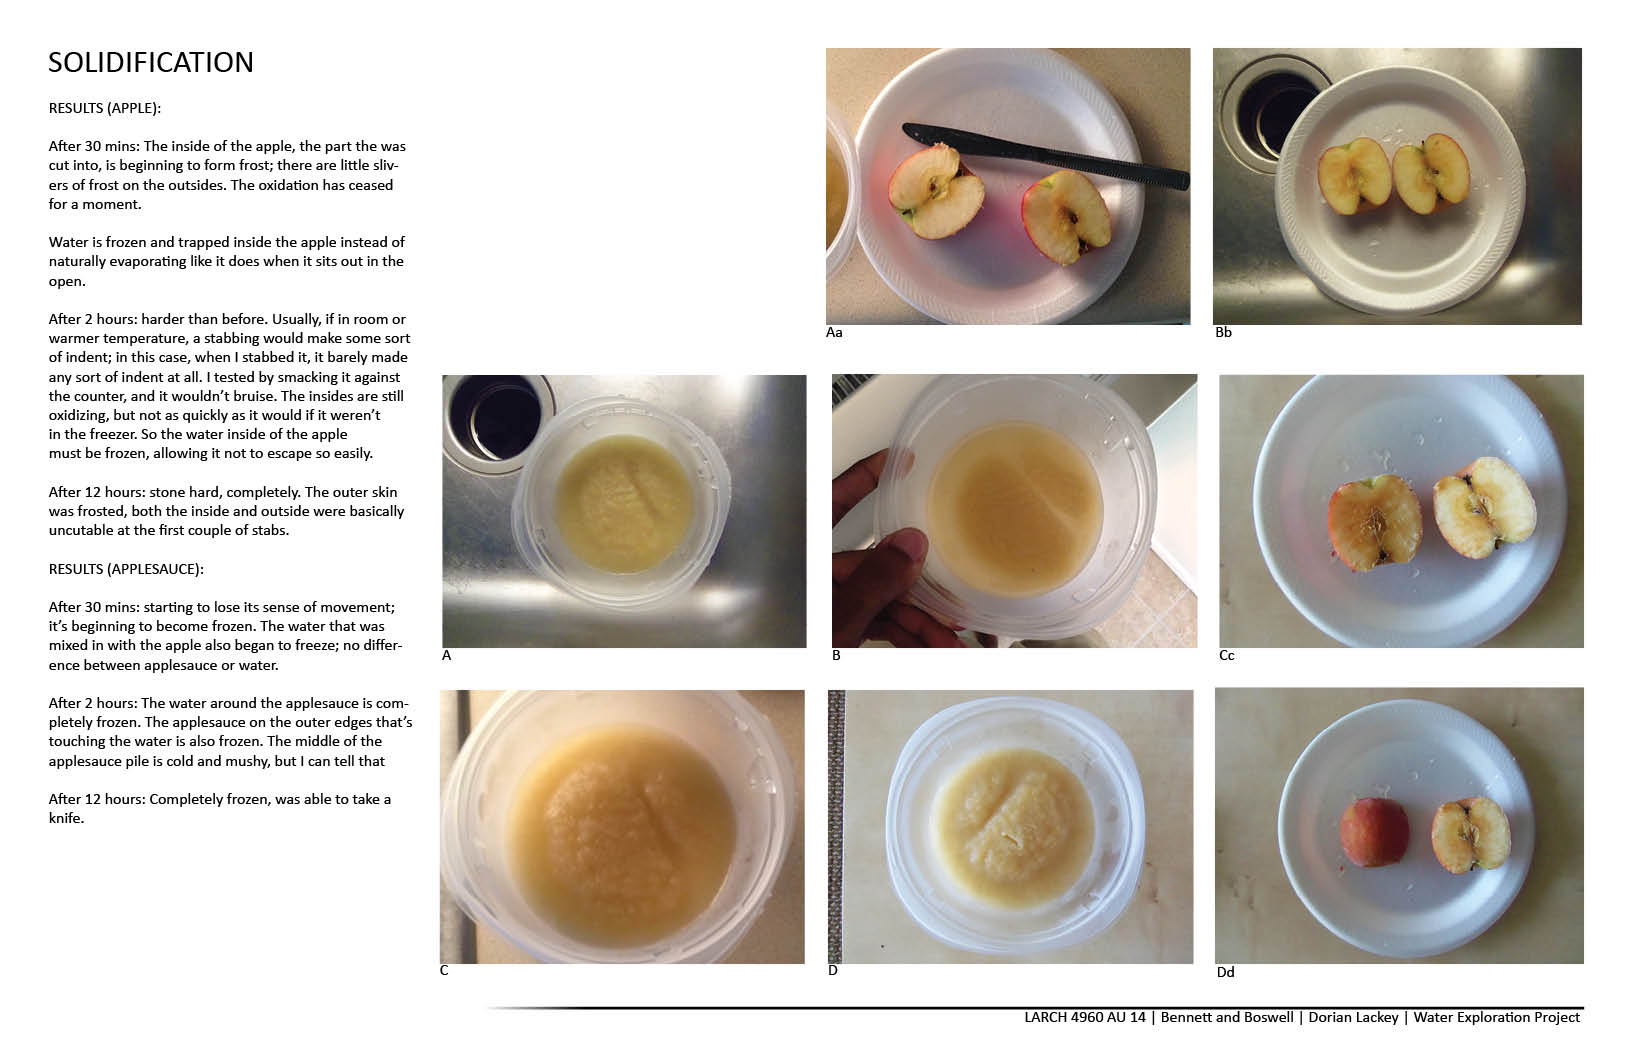
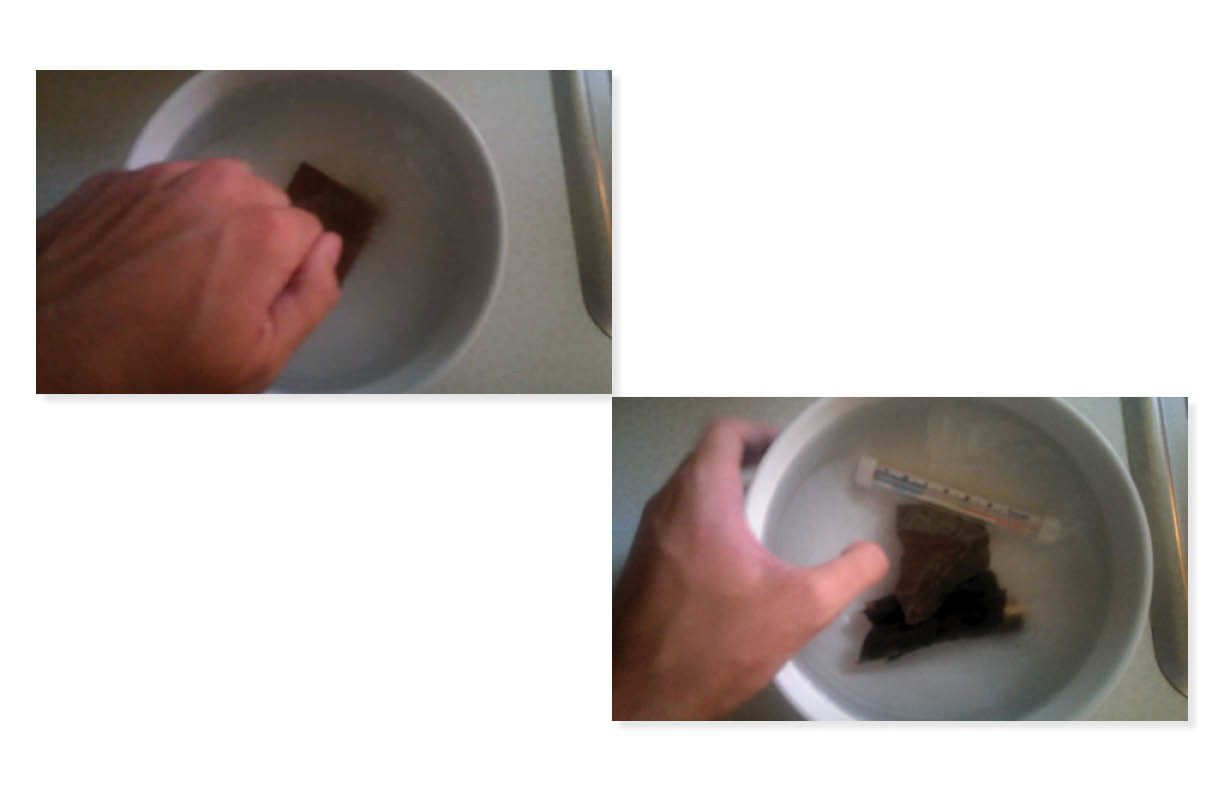
Solidification Test Notes:
Water start temperature 33 degrees and 10.5 cm in height from bottom of glass
10min noticeable freezing around rim of milk+water glass and not cheese+water glass
20min noticeable frozen film on top of both glasses
40min Frozen top layer on both glasses
60min frozen top layer and sides of glass but still liquid in the middle of glasses
110min milk appears to be solid, but cheese has 1/2 inch of ice on all sides but still liquid in the middle
150min Cheese+water becomes mostly solid
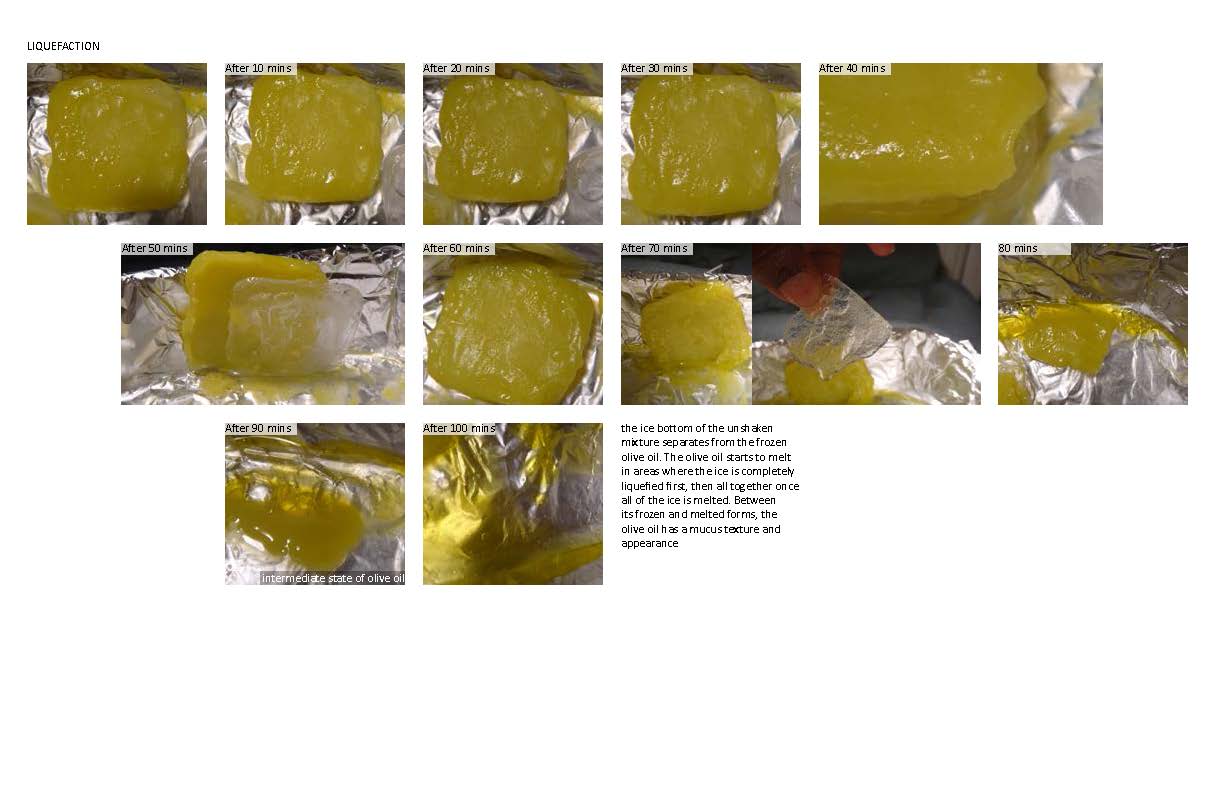
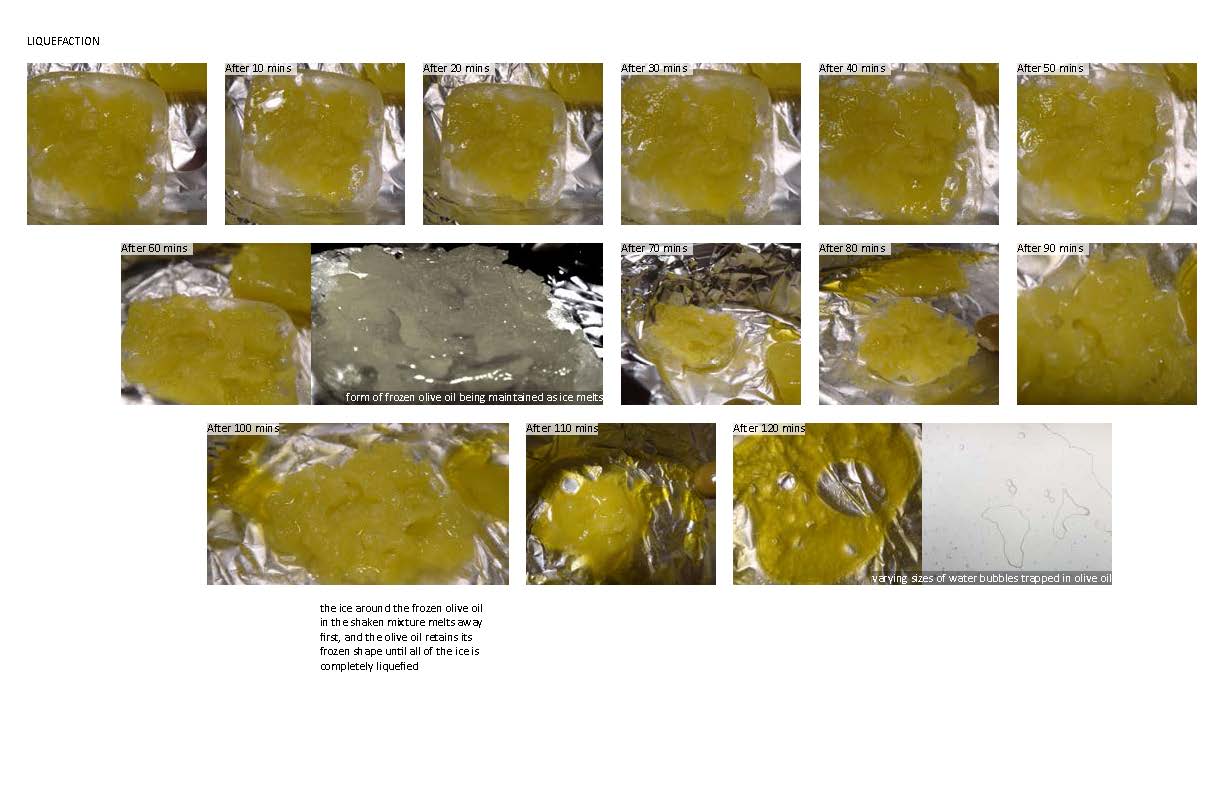
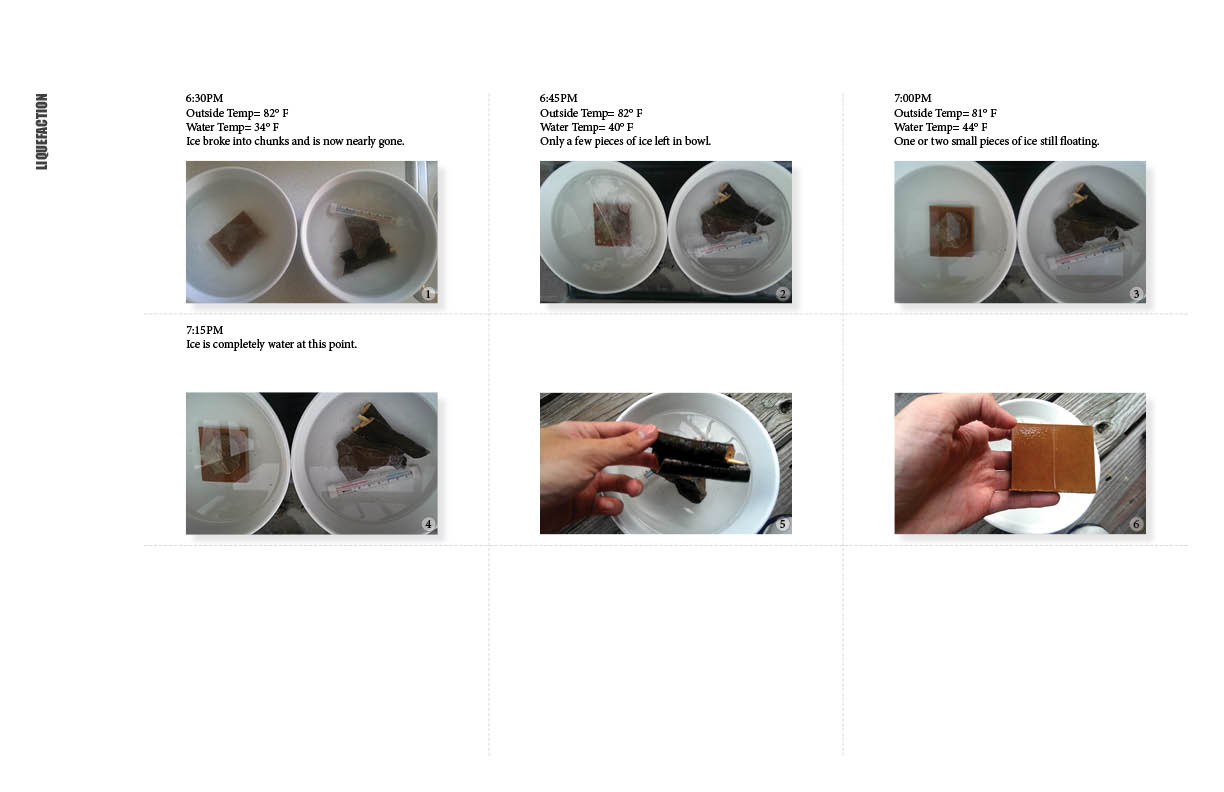
Liquefaction Test Notes:
Room Temperature: 73 Degrees
With Lighting Equipment: 79.9 Degrees
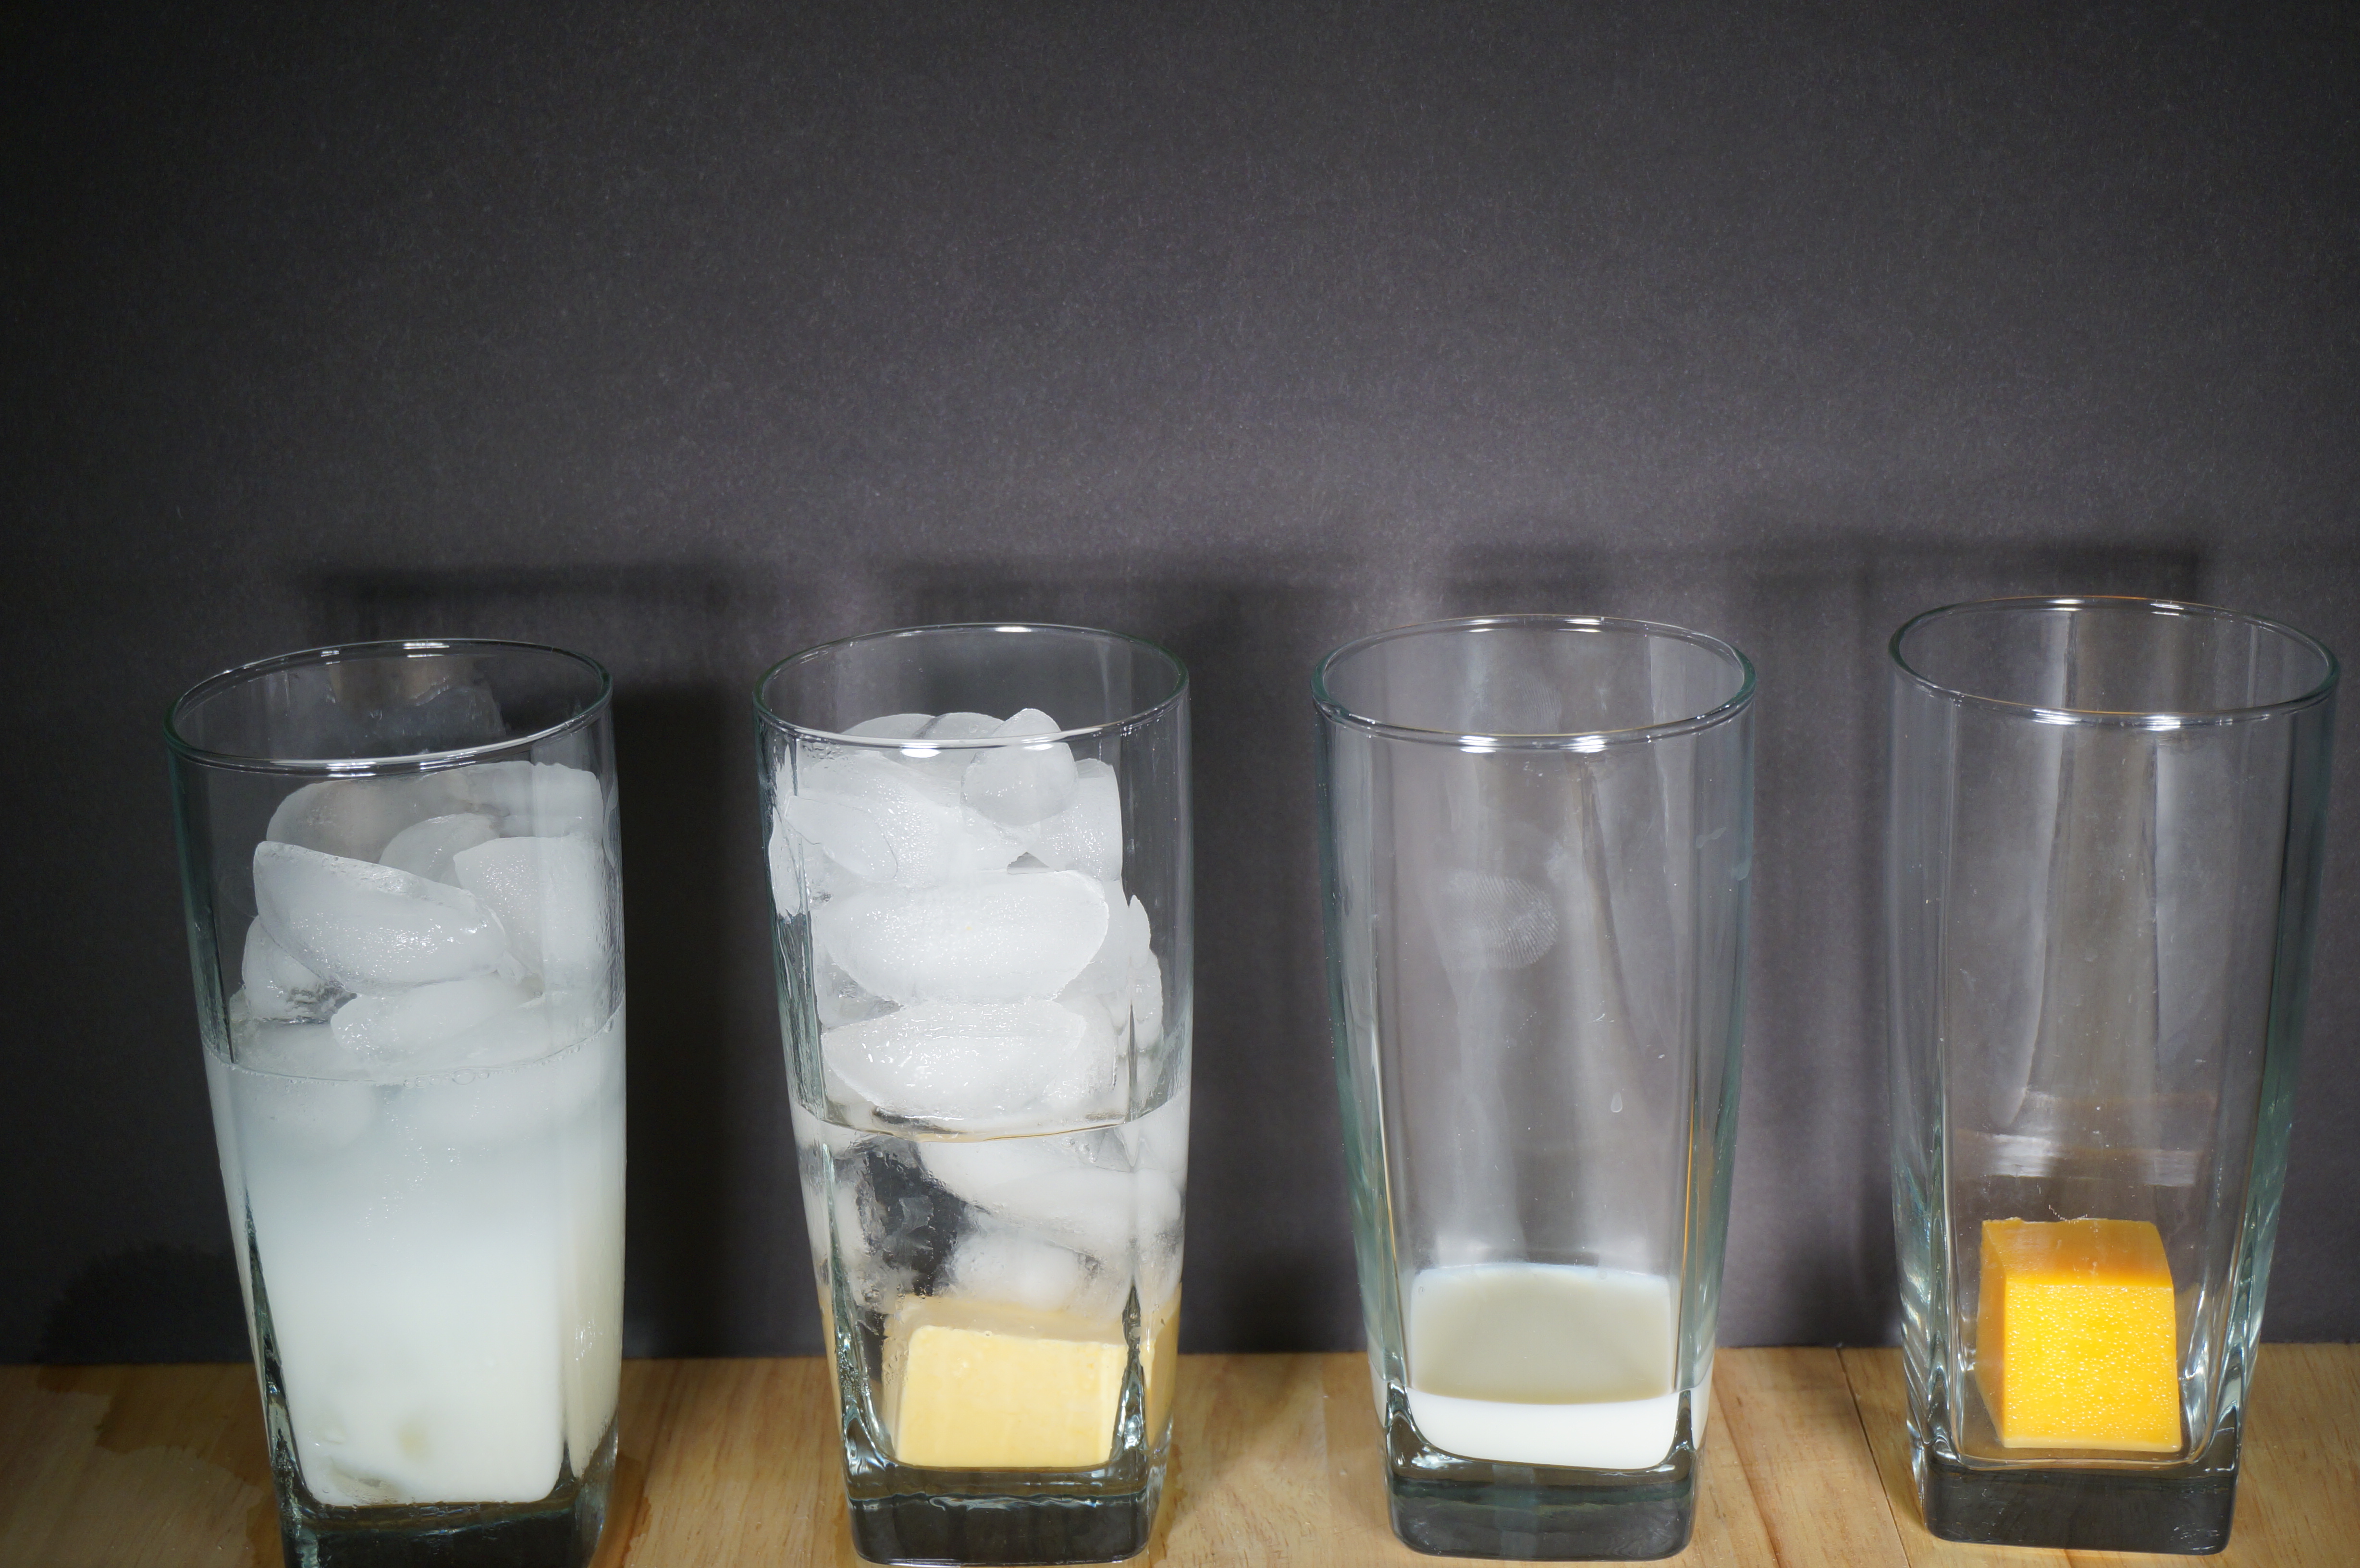
Milk+Water started out at 14cm from bottom of glass and ended at 9cm above bottom of glass in a 10% milk solution
Cheese+Water started out at 15cm above bottom of glass and ended at 9cm above bottom of glass with water surrounding the cheese
Milk started out at 1.5cm above bottom of glass and ended at 1 cm above bottom of glass
Cheese started out at 3cm above bottom of glass and ended at 3cm above bottom of glass
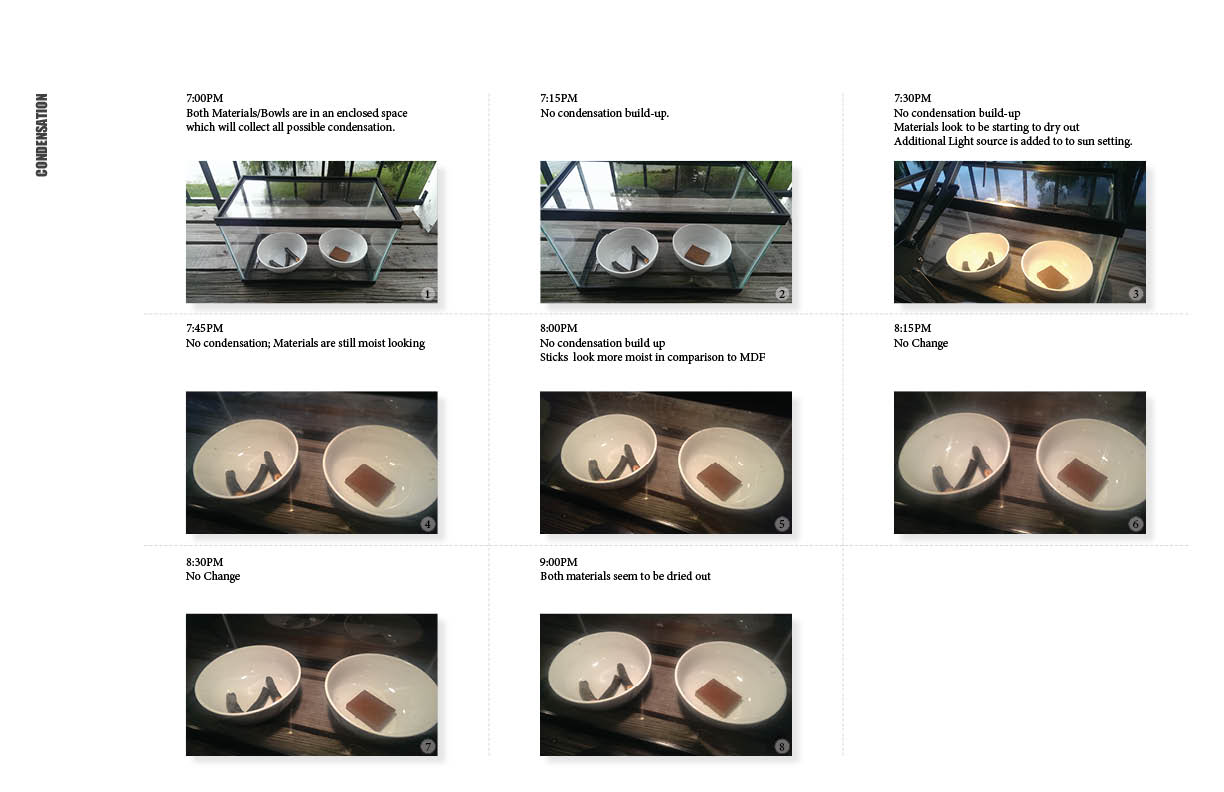
Condensation Test Notes:
Materials started from 35degree temp and water was heated to just below boiling at 206 degrees
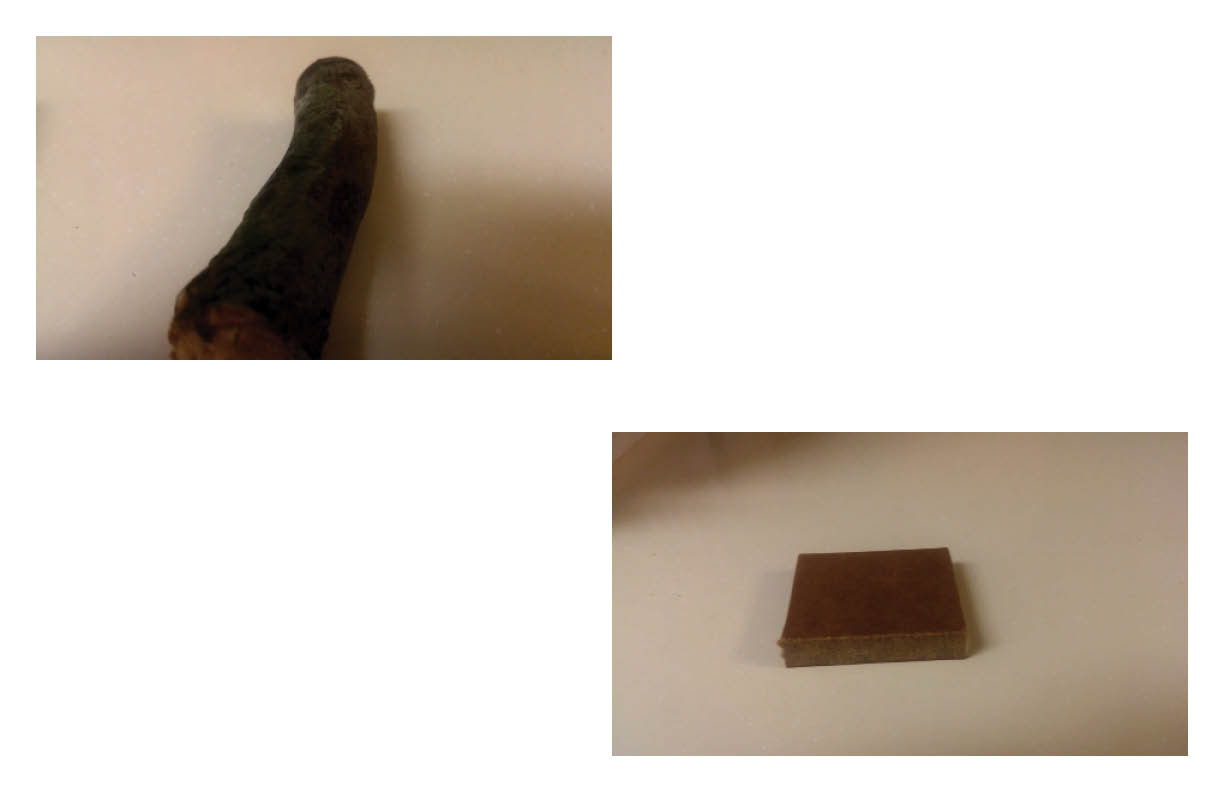
There is little visual change in the materials during the test, but upon further inspection the cheese is noticeably softer and moister to the touch and has begun to conform to the supporting rack at the bottom. Milk has gain volume and has condensed water that drip back into pan.
Vaporization Test Notes:
Cheese:
7:00min Moisture drips from cheese
9:00min Visible Melting occurs
11:00min melted drip begins to form
11:30min Melted drip reaches water surface
17:30min Cheese detaches from first ring of supporting rack
22:00min Majority of cheese hanging below rack
25:00min Entire Kitchen smells like melted cheddar
27:30min All of cheese melts into water
30:00min Test ends
Milk:
3:00min water starts to boil
6:00min water enters a rolling boil
19:00min Milk begins to oscillate in dish
27:00min Milk begins to form a skin
32:00min a second version of the skin forms
35:00min milk appears to be boiling
60:00min end test after recording various milk skins
Videos can be found with the following links:
The project was to study how water interacts with materials through processes such as, solidification, liquefaction, condensation, vaporization, and evaporation. It was important to use materials that were related to each other. One had to be in raw form and the other had to be a human-fabricated material processed from the raw material. I used three materials, the reason for this was because Rice paper is made from white rice, and the rawest form of purchasable rice in it’s rawest form is wild rice.
The process followed in my experimentation was designed to have a continuous flow from vaporization to evaporation. This allowed careful analysis of material changes. The experimentation proved that the differences in materials reacted differently with water in all the processes. White did not have many extreme effects until the evaporation phase. Wild rice showed material transformations in the vaporization phase, by the hull opening and creating different rice formations. Rice paper showed instant material changes from the moment it was removed from the packaging, proving that water had dramatic effects on it.
To see the process see the link below.
MATERIAL STUDY_Wild Rice_White Rice_Rice Paper
Check out these videos to see vaporization, solidification, and evaporation processes. The videos show water reacting with wild rice, white rice, and rice paper.
http://youtu.be/gWbBM1bkEfQ
http://youtu.be/FWtLbdVL3_U
http://youtu.be/fUflV5JxTD4
http://youtu.be/W1BrjgMhMXQ
http://youtu.be/MxPIYhQw3wM


4960_AU14_Project1_WangP without V
Those are the videos of material test, solidification, liquefaction, Evaporation, Vaporization and Condensation.
Material Test
Solidification
Liquefaction
Evaporation
Mirror Vaporization
Aluminum Vaporization
Mirror Condensation
Aluminum Condensation
In this series of experiments I explored the properties of agar powder and kelp knots in relation to water, particularly in various states.


To keep the experiments consistent, the process seen below is how I started every experiment, minus evaporation.
I started with two identical jars.
For this I wanted to look into how the water levels changed over time so I marked each jar with tape.
For each I used half a cup of water.
The water was added to the jars after measuring.
The water level was marked on each jar.
Time to start using each material.
Measuring out each material, one kelp knot and one teaspoon of agar powder.
Adding each material to it’s respective jar. Notice after the agar powder is added how it slowly sinks to the bottom of the jar.
From here we start the process of Solidification.
Solidification means to make solid; make into a hard or compact mass; change from a liquid or gaseous to a solid form.
We will start by adding the jars to the freezer.
Check after forty minutes in the freezer.
Check after an hour in the freezer.
Check after an hour and twenty minutes in the freezer.
Check after two hours in the freezer.


Check after two hours and forty minutes, resulting in completely frozen materials.
Commence Liquefaction, which means the act or process of liquefying or making liquid.
Leaving the freezer. End of solidification, and the beginning of liquefaction.
Placing Jars on Plates: Starting to melt.
First Check: The water is starting to swirl.
Second Check: the agar powder is melting faster than the kelp knots.
Third Check: Puddles are forming on plates, both liquids are taking on a yellowish tinge.
Fourth Check: the agar powder is mostly melted, an ice core remains on the kelp knots.
Fifth check: Continuing to melt.
Sixth Check: Finally both are completely melted.
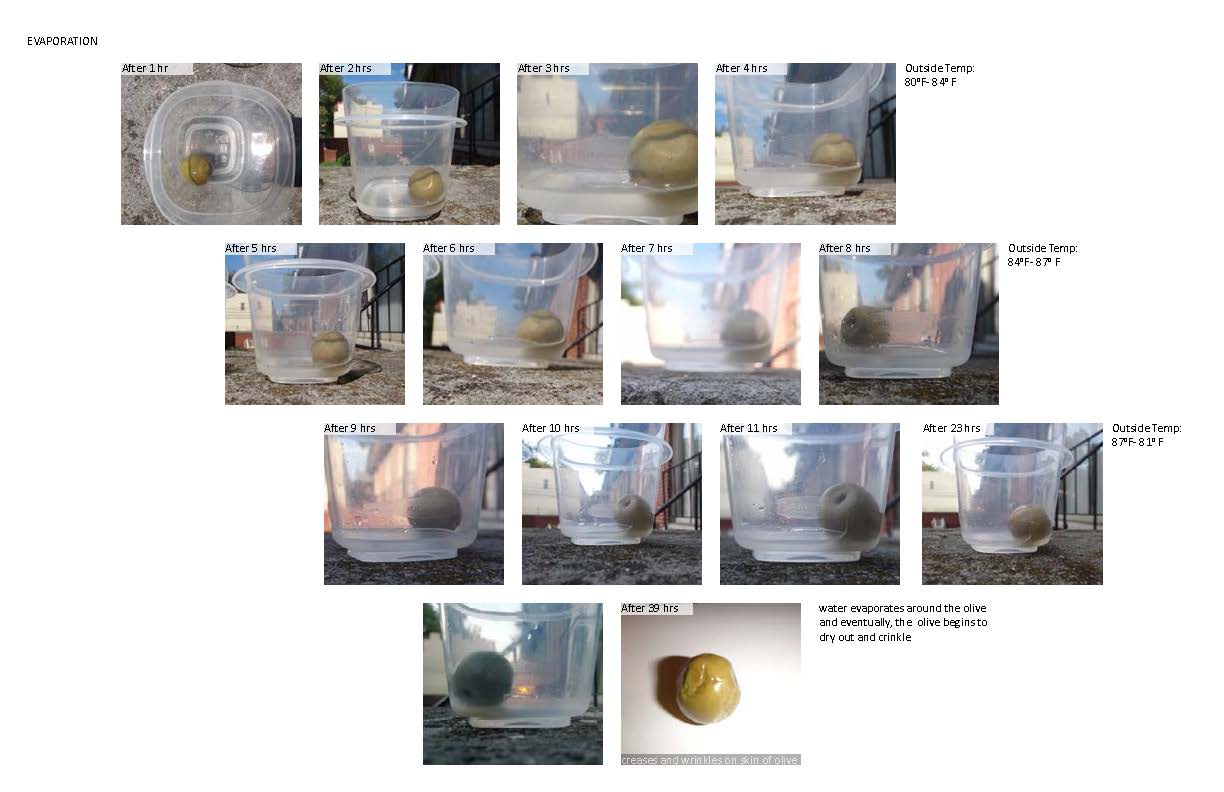
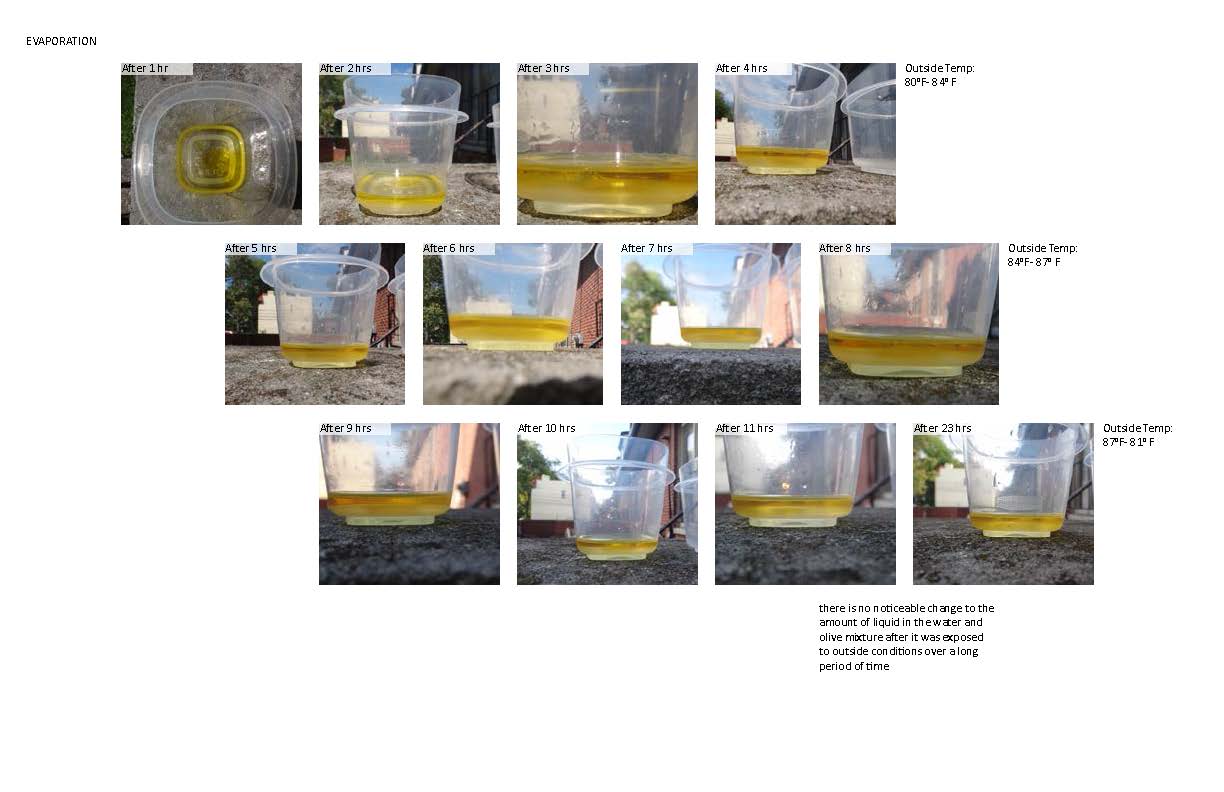
Commence Evaporation, which means the act or process of evaporating. For this experiment we will be primarily using a new set of jars that contain one tablespoon of water with either the single kelp knot or a teaspoon of agar powder. We will also continue using the jars from the previous two experiments to see how much of the original half cup of water remains after evaporation. The jars are placed on a table in the living room, the house stays at about 78 degrees Fahrenheit for the length of the experiment with the fans kicking on occasionally to help the AC. Typically the lights remained turned off. I typically checked every twelve hours, however the experiment ran for over a week so the checks below will show about ever 36-48 hours.
Creating the jars for evaporation, focusing on the new water quantity and adding the materials.
First check, nothing seems to be happening.
Second Check.
Third Check.
Fourth Check, in order to show the changes and materials better, I switched to a series of images rather than a video.
Fifth Check.
Sixth Check. The water is almost gone and the jars have started to smell.
Final check, the water has evaporated leaving the kelp knot expanded and the agar powder stuck in a dome. Both materials have grown mold of various colors.
Vaporization, which means the conversion of a solid or liquid into a vapor. For this process I started with the standard measurements and simply filmed the entire process. To show it however, the video was sped up, it was a thirty minute process.
Notes
Started with the pot half full of water. Added the two jars, each contained half a cup of water and one of the two materials. For the kelp knot, one is used per experiment. For the agar, one teaspoon is used per experiment. Turned the stove on to high heat. Boiled the water for thirty minutes, at the end of which there was no water remaining in the pot. The jars shifted inside the pot as the water boiled around them. The water inside the jars refused to boil at all. The materials in each changed primarly under the water line, but was all transformed in some way. The agar mixed with the water fairly evenly. The kelp knot expanded under the water level and became bendable to the touch above the water line. In general, there was quite a bit of vapor in the air for the length of the process.
To give you a better idea of the process I took a series of images every five minutes, so the series of stills has been collected above.
Commence Condensation, which means the act or process of condensing, or the state of being condensed.
Notes
Started with the jars directly after vaporization so the materials were still the same. Placed the pot onto a cool burner, added the jars back into the pot after examination. Filled the pot with one tray of ice cubes. Checked periodically for evidence of changes in the state. After an hour most of the ice had completely melted, and the rate of change between ice to water had slowed to a crawl. The kelp knot continued to expand primarily below the water level. The agar created a solid gelatin mass within the jar, all of the excess powder that hadn’t fully absorbed into the water was forced to the top forming a crust on the edge. The water collected primarily on the pot forming droplets everywhere above the general water line as the temperature of the pot and it’s contents went from high heat to below room temperature (74° F)
Again to show the process a little better, I took a series a stills every 5-10 minutes. The collection plays through above.
End of experiments.