Breaking News! Educational Opportunity – Learn about a plant-based diet

Ohio State University Extension’s Family and Consumer Science Educator, Shari Gallup will present a program about Nature and Nutrition on January 17, 2021 from3:00 – 4:00 p.m.   For more details, go to this link under the Cook ‘N Can It! tab.  [ https://u.osu.edu/ohiovictorygardens/cook-n-can-it/ ]


Sweet corn

Something Different – Try It!

Inside of watermelon radishes

Inside of watermelon radishes

I have been an avid vegetable gardener for many years and I love to try different vegetables along with the normal veggies in the garden.  This past season, for my fall Victory Garden, I planted watermelon radishes – I will be sure to plant them again next fall.  These are wonderful!

Turnip and watermelon radish

Turnip (left) and watermelon radish (right)

Watermelon radishes are much bigger than the normal red radishes that you find in seed packets.  I had some grow close to the size of a baseball.  The majority of them were about 2-3 inches in diameter.   The outside of the root has greenish colored shoulders and the interior flesh is a beautiful purple-rosy red.  It is an Asian heirloom and sometimes called Chinese red meat radish.  You can plant them in the very early spring, but keep in mind that they prefer cool weather.  I wait to plant them in September in central Ohio.

I harvested the last of them just before Thanksgiving and they are still in great shape, stored in my garage (cool temperatures).   They are beautiful when sliced and have a milder taste than most radishes.  Cooler temperatures and a frost actually gives them a sweeter flavor.

For Thanksgiving, I cut mine into smaller chunks and roasted them with garlic and sea salt.  They were absolutely incredible!  You can also slice them thinly or shred to add to salads.  Try them.

There are several seed companies who offer these:

Baker Heirloom Seed Co

Burpee Seeds

Gurney’s Seed and Nursery Co.

Hudson Valley Seed Co

Renee’s Garden

It’s Time to Put the Vegetable Garden to Bed

Mike Hogan
Extension Educator and Associate Professor

With winter quickly approaching, it is time to complete some final steps this season to complete the 2020 garden season.  The weather this fall has been ideal for extending the season for both warm season vegetables as well as cool season ones.  Many Ohio gardeners this year harvested tomatoes, peppers, eggplant and other warm season vegetables later into fall than is typical in Ohio, and the weather has also been ideal for planting and harvesting cool season vegetables such as lettuces and other greens, radishes, carrots, beets, and other root crops.

And while the glorious fall weather also has been ideal for working in the garden this fall without winter clothing, days are getting noticeably shorter now, soil temperatures are declining and it will not be long before we start using that dreaded four letter word—SNOW!

So take advantage of the Indian Summer weather we are experiencing in much of Ohio to complete the following tasks in the garden, which will prepare you to have a successful garden season in 2021:

  • Test your soil – fall is one of the best seasons to test soil and apply phosphorous and potassium as well as lime if ph needs to be adjusted. OSU Extension offices in most counties provide soil-testing services to assist with this task.
  • Remove dead crop residue– now is the time to remove any dead plant material or unharvested vegetables.  Pathogens can survive over winter in crop residues and can cause plant health issues in subsequent years. Crop residues which show evidence of disease should be discarded and not composted with other crop residues.
  • Control weeds – if you have a flush of winter annual weeds or perennial weeds such as dandelion or thistle in the garden, consider cultivating, pulling weeds by hand, or even the use of a contact herbicide on a warm day. Any mature weeds with seed heads in or around the garden should also be removed with care to avoid spreading seed.
  • Apply soil amendments – if you did not plant a cover crop, consider adding compost and mulch to keep the soil covered and add organic matter and a small amount of nutrients. Fallen leaves make an excellent winter mulch for garden beds. Straw and even shredded newspaper or cardboard can also be used as mulch.
  • Don’t trust your memory – be sure to make written (or electronic) notes of what was planted where in the garden, what worked well in the garden this year, and the name of that tomato variety that you simply must plant again in 2021!

Growing Garlic

Author: Carri Jagger, OSU Extension, Morrow County

If you have ever wanted to try your hand at growing garlic, now is the time to think about planting it.  Garlic should be planted between Halloween and Thanksgiving and before the ground freezes in Ohio.  Start with a good seed source from a reputable seed company or grower.  People grow garlic for many reasons: cooking, the health benefits such as antibiotic effects, antioxidant effects, and helping to reduce cholesterol and blood pressure.  And, not to mention, it keeps vampires away – BAAAA HAAAA HAAAA.  We might need that in 2020!

But in all seriousness, garlic is fun and easy to grow! If you think you might want to try it in your garden follow the steps below.


  • Prepare your area:
    • Garlic doesn’t like wet feet so make sure you are not planting it in an area that is wet all winter and spring.
    • Soil Sample: Garlic needs a pH between 6.0 and 7.0.
    • Add nutrients:
      • One half of the recommendation at planting to aid in root development.
      • Second application when growth resumes in spring and plants are 4-6 inches tall.
      • If a third application is needed do it 6 weeks after the first spring application.
    • 1 to 1.25 pounds of 19-19-19 fertilizer per 100 square feet of bed.
    • 5 to 2 pounds of 12-12-12 fertilizer per 100 square feet of bed.
    • 2 pounds of urea (which is nitrogen-only fertilizer) per 500 square feet of bed.
  • Separate cloves from the bulb when you are ready to plant your garlic,
  • Soak in 2% soap and 2% mineral oil water bath (Jepson and Putnam, 2008 – Oregon State University) then a warm bleach water solution (1 part bleach to 9 parts water) or pure alcohol for two minutes before planting.
    • Soaking in the mineral oil will kill any mites that may be on the garlic and the bleach water solution or pure alcohol will kill any pathogens that might be on the garlic.
  • Plant with the pointed part of the clove up in rows, 2” deep, 4-6” between the cloves and space the rows 12” apart.
  • Once planted cover the garlic with 2-4 inches of straw or mulched up leaves.
  • In the spring check for germination. If you mulched with straw the garlic will grow right through it, but if you mulched with leaves, make sure the garlic is penetrating through it.
  • In May watch for your garlic to start setting scapes. Once scapes start to grow and begin to curl, cut them off.  Scapes can be eaten with just about anything.
  • In July start to think about digging your garlic. You will want to dig it when ½ to ¾ of the lower leaves are brown (5-6 upper leaves should be green) This is important not to leave it in the ground to long as the skins will deteriorate.
  • Once dug, trim off the leaves leaving about 8-10” of stem and hang or lay in a cool dark-shaded area that gets plenty of air movement this is critical for proper curing. Leave it cure for about a month and then sort through it trimming the stems off to an inch and rubbing off any excess dirt and lose skin.
  • You can eat your garlic fresh or once it has cured – it’s good both ways!

  • If you have questions please reach out to me. Carri Jagger Agriculture and Natural Resources Extension Educator OSU Extension Morrow County Jagger.6@osu.edu.


Photo credits:  Carri Jagger


Limited Edition !!!

When you have a limited amount of space, gardening seems almost impossible. You want to have a garden, but the task doesn’t seem worth the headache of getting it figured out. It might seem daunting, but you aren’t alone. In fact, many before you have felt the same way and many have come up with easy ways to remove the dread and create a beautiful and bountiful space.

If you have a small balcony or a small patio with a roof overhang but you aren’t allowed to drill into the walls or railings etc., a tension rod shower caddy might just do the trick for a vertical planter! A pallet with a few boards added can be propped up against a wall or a door that doesn’t slide open, or even right beside your front door.

By Palettenprojektideen


Don’t have much of a back yard and only a small patio spot? Patio furniture can be multipurpose, a table for your drinks with a planter in the middle, a privacy wall laid out with pots for plants throughout.

By cat garden studio

If you have a corner or just a single window, a shower caddy or even a hanging up shower caddy could still be utilized to provide you space for plants. Whenever you have plants inside, you will want some plastic liners (wouldn’t want water all over the floor now would we…?!) Plastic liners can be bought, or plastic lids, pie pans, or plates could be re-purposed for the occasion.

By Jj K Inspirations

Only have one square foot to work with?? No problem! Someone has already come up with an idea for that as well so no need to reinvent the wheel, as the saying goes.

Whatever the space, there is always a way to transform that space into a garden. The possibilities are endless 😉

Still stumped on what you can do with those small tight spaces? Leave a comment describing the area/location you have to work with, and we will try to give you a few ideas!

Toss the FROST!

It’s that time of year, folks, when the temps start to drop, the mornings are crisp, the days are just right and the nights so cold you could catch a chill. We are potentially going to have a frost soon. But just because there is a killing frost on the horizon doesn’t mean its game over for your garden!

You may be wondering why frosts are so bad for your garden in the first place. When the temps get down to freezing levels (32 degrees and below,) the moisture in the air and in the plants freezes. Like with anything that gets cold and then warm (think metal,) they expand and retract. It’s the same with plant cells; plant cells freeze and when the sun hits them, they warm up, expanding and the cells potentially explode, killing the plant.

But, with the right steps and plants, you can extend that growing season for a little while longer.

Step 1:

If you can plan a week or two in advance (next year try it,) in the last few weeks before a frost, keep your grass clippings and leaves. These can act as a natural blanket to protect your plants when the frost hits, then, when spring comes you can just mix it into the soil!

Step 2:

Potted and tropical plants need to be brought indoors, or at least onto a covered porch attached to the house. Plants in the ground or plants that cannot be brought inside can be covered shortly before the sun goes down with burlap or cloth sheets. DO NOT use plastic, as the plastic  doesn’t breathe and can cause more damage to the plants. It also heats up quickly in the morning sun, and if forgotten, can burn foliage as well as adhere to the plants, potentially tearing the plant up when removed. Raked up leaves and grass clippings can be used to entirely cover small plants and are a great insulator.

NOTE: If you are unable to cover your plants with a fabric, get up before the sun touches your plants and water them. This helps the plants recover from the frost.

Step 3:

Not all plants need to be covered, but it doesn’t hurt to cover them all. There are a great many plants for your garden that are frost tolerant: Spinach, Turnips, Parsnips, Broccoli, Cabbage, Summer annuals, or plants that originate in tropical areas, like impatiens, are the most sensitive to cold. Many of our native flowers can tolerate frost and even freezing temps long into the Fall.

Step 4:

Here are some plants that you can plant in the fall for a spring or summer harvest:  Garlic, Spring Onions, Onions and Shallots, Asparagus (however this guy takes 2 years before you can harvest him!)  and some varieties of broad beans.


If you have some other method or a fun idea for protecting your plants from a frost, we would love for you to share them with us!!!!

Making Your Very Own Homemade Pot!

It is incredible the number of items in your home that you would normally just toss away (or recycle!) that could be repurposed into a cute and functional pot for your plants. Whether you plant something from your Victory Gardens seed packet or seeds that you might just have laying around, this fun project can be ready in no time!

Tip: Gloves are always a good idea to wear to help avoid injuries.

 Idea #1: Tin Can Pots

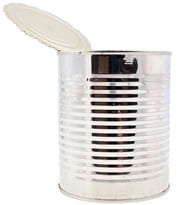
  1. A tin can from either a canned veggie, soup, pasta, fruit, etc.
  2. A can opener(preferably this style)
  3. Large nail and hammer

Tip: Some cans might leave a sharp lip, so be very careful when handling and planting! You can fix this by angling the can opener closer to the outer edge and cutting it off. Check out the video below to see how.

Idea #2: Milk Jug Pots

  1. A milk jug or a 2-liter pop bottle or juice bottle
  2. Scissors/utility knife

Tip: Some bottles have handles, leave them on for easy mobility!

For any homemade pots, you need to make sure they have drain holes of some sort. No drain holes could cause root issues to occur.

Now all you need for both is a little bit of soil and a few seeds!

So You’ve Decided to Garden….

Welcome Gardeners! Are you here to learn about the Ohio Victory Gardens program, have an interest in gardening or just plain curious about the talk of reviving a U.S tradition? No matter the reason, you are in the right place!

The purpose, of a Victory Garden, is to help in times of need. This could mean providing food or lifting our morale, creating bonds with one another and nature, or just to bring some fun in your life!

Here, folks from all garden walks of life, hope to share with you their insights, tips and ideas based on what they have learned from their successes, mistakes and others. Our hope is that we can help you learn to create a garden of any size in any place.

The seed giveaway through OSU Extension offices will help anyone get started! There is no time like the present to plant a fall garden. The seed packet contains a few different kinds of produce that will grow well this time of year – whether it’s full grown plants or even microgreens!

And if nothing else, we’re hoping gardening can give you a good hearty laugh and bring a little sunshine to your day.  Plants aren’t the only ones who need sunshine and a good environment to thrive.

Keep an eye on our blog, but also dig up our other pages that are full of “how to’s” and tons of resources that will help get your garden to where you want it to be!

Let’s get growing!

Colette Gabriel
Laboratory Scientist
ODA Division of Plant Health