TOC
- How to select a table in InDesign and adjust options?
- How to add a row to a table in InDesign?
- How to delete a row to a table in InDesign?
- To export your PDF document with accessibility features
- What’s the result in Acrobat tags of including a header row in a data table?
- Resources about InDesign and accessibility
There are a couple things to check to be able to export accessible data tables from InDesign:
- Make sure your table has a header row at the top. You can check if it has a header row in the Table Setup options.
- Ensure that you export your document as a ‘tagged PDF’.
Also, keep in mind that InDesign can only markup basic tables with column header cells in a top header row. If you need to do a more complex table that also includes row header cells on the left side, you’ll need to add the row header cell markup in Adobe Acrobat Pro.
To create a data table in InDesign:
- Click in a text where you want the table to go.
- Select Table > Create Table.
This brings up a dialog that asks how many rows and columns you want in the table. The important part for accessibility is that it asks you to designate one or more header rows. A typical basic table has one header row.

How to select a table in InDesign and adjust options?
- Click in the table that you want to adjust.
- Go to the Table menu in InDesign.
- Choose Table Options > Table Setup.
A dialog box of table settings comes up where you can adjust settings like the number of rows and you’ll also have the ability to add a header row if your table doesn’t already have one.

How to add a row to a table in InDesign?
- Click in the row where you want the new row to go above or below.
- Go to the Table menu in InDesign.
- Choose Insert > Row.
- Choose if you want the new row to go above or below the current row and hit ‘Ok’.
The new row appears above or below the current row you were in.

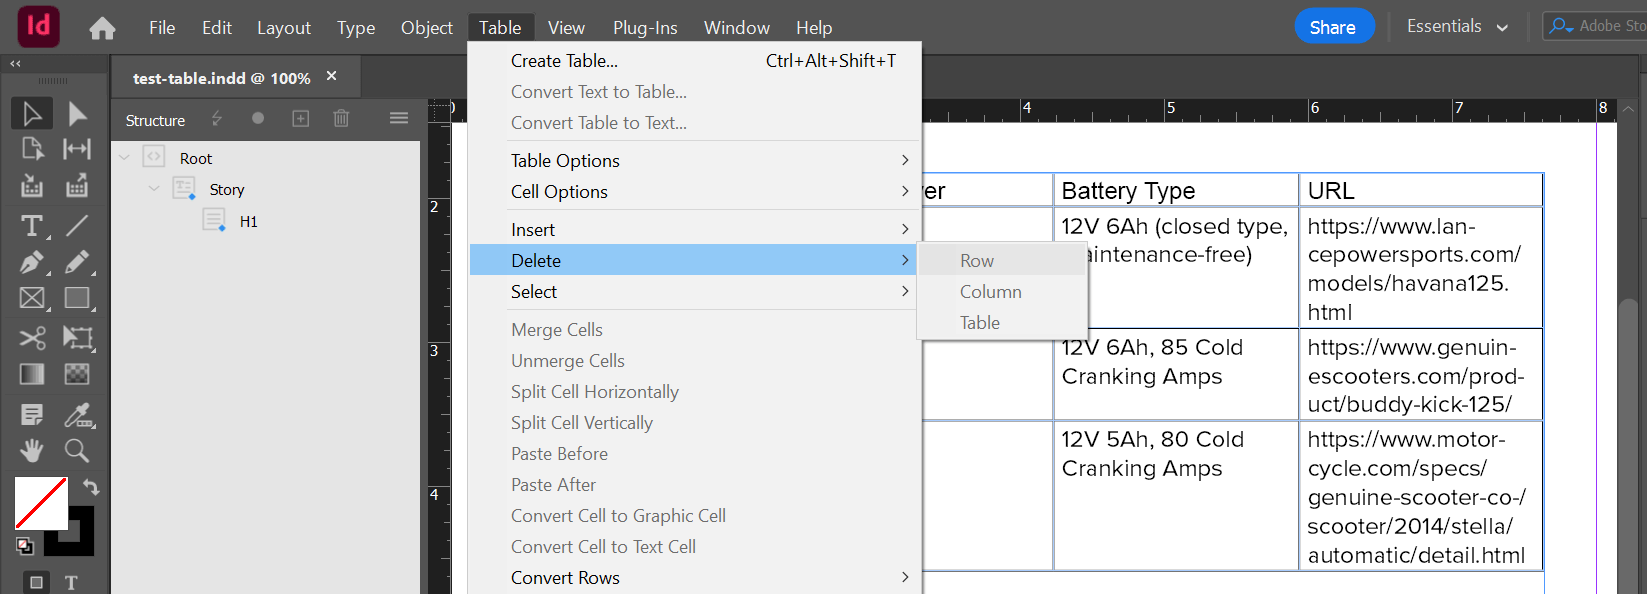
How to delete a row in a table in InDesign?
- Click in the row that you want to delete.
- Go to the Table menu in InDesign.
- Choose Delete > Row.
The current row is deleted.
To export your PDF document with accessibility features:
- Go to File > Export and choose PDF format.
- Hit Save and in the options that come up make sure ‘Tagged PDF’ is checked. This will ensure the tag structure for accessibility is included in the document.
- Click Export and your tagged PDF is saved ready to review in Acrobat.

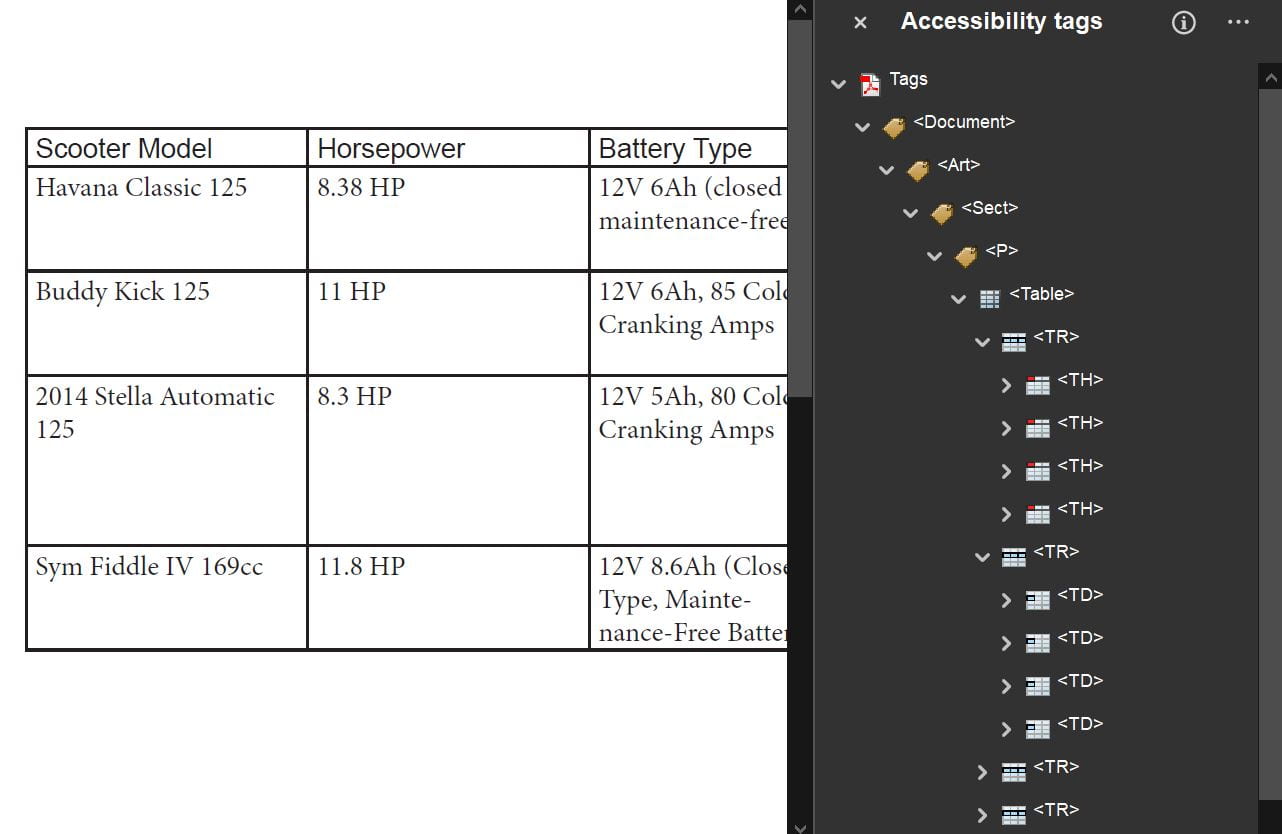
What’s the result in Acrobat tags of including a header row in a data table?
If you want to check that the header row exported made it into your PDF successfully you can:
- Open the document in Adobe Acrobat Pro and find the table in the Tags panel.
- Then open the <TR> rows of the table and verify that the first row uses true <TH> header cells instead of regular <TD> header cells.
Running the accessibility checker in Adobe Acrobat will also tell you if there’s a problem with your data tables.
To run an accessibility test in Acrobat Pro:
- Find ‘Prepare for accessibility’ under ‘All Tools’
- Click ‘Accessibility Check’, accept the default settings, and click ‘Start Checking’.
The test runs and the results pop up. Any table issues can be found under the Tables section.

Resources about InDesign and accessibility
Videos about InDesign and accessibility
Other data tables in InDesign resources and tutorials:
- InDesign Document Accessibility BuckeyeLearn course – a course from Deque Systems covering all aspects of InDesign document accessibility.
- Tables with InDesign video from LinkedIn Learning – from the creating accessible PDFs LinkedIn Learning course.
- InDesign tables tutorial from Olde Miss University.
More information about InDesign and accessibility:
- Setting up a heading structure in InDesign for accessibility — from 2022
- Steps to better structure an InDesign document to promote accessibility — from 2017