Posts

Ada Twist, Scientist – A Cloverbud Reading Adventures Activity

The Ohio 4-H Cloverbud Reading Adventures Series incorporates literature, crafts, games, and snacks into a fun-filled program for children in grades K-2.  In Ada Twist, Scientist, we meet a precocious second grader who looks at the world through a sense of discovery.  Her need to explore and understand everything around her began with her first word at the age of three – “WHY?”.  From that time forward we are drawn into the amazing journey of this young scientist as she pokes, smells, sees, tests, tries, puzzles, and quests to learn “how it ALL works”.

The book is beautifully illustrated with experiments and materials that Ada used in her research.  To determine the cause of a pungent odor, Ada Marie conducted several investigations.  Your Cloverbuds can do their own explorations by using the “How Smart is Your Nose?” activity from The Big Book of 4-H Cloverbud Activities.  Place different “identifiable aromas” in sandwich bags.  Blindfold the children and ask them to sniff the contents of the bags.  Have them ask questions to figure out the scents.

Ada also dropped tablets into 2-liter bottles which caused an explosion of colorful soda.  Although this may be a fun messy outside activity, another less messy inside experiment can also be conducted using clear carbonated water or soda, a clear plastic cup, and raisins.  Pour liquid into the cup.  Add a few raisins.  Wait for it – the raisins will begin to rise and fall as if doing a dance.  Why?  Carbon dioxide bubbles are released from the carbonated beverage.  They attach to the rough surface of the raisins and cause the raisins to float to the surface of the liquid.  Once the bubbles pop and the gas is released, they return to the bottom of the cup.  This up and down movement will continue until the soda is “flat”.  Try other foods such as pasta, corn, or candy.  How do they perform?

For an edible science snack, make fruit sorbet in a bag.  Pour one cup of fruit juice in a quart-size zip-close bag.  Seal the bag.  Place that bag into another bag the same size.  Seal the second bag.  In a gallon size zip-close bag, place 4 cups of ice and 3 tablespoons of coarse ice cream salt.  Put the small sealed bags in the larger bag and close tightly.  Have Cloverbuds shake the bags for about 5 minutes while wearing winter gloves.  Take the inner bag out and pour into cups.  Enjoy!  Why did the mixture freeze?  Salt added to ice lowers the freezing point.  The melting ice absorbs heat making the mixture cooler which causes it to freeze (Source: Science Fun with Kitchen Chemistry).

Have Cloverbuds make a picture journal of what they learned.  Encourage them to find out more about other children who sought solutions to challenges by raising questions and developing better ways to make things work in the book, Kids Who Are Changing the World.  May you never lose the wonder of “WHY”.

Teaching Cloverbuds to Identify and Manage Anger

Anger is an emotion that all people experience from birth to death.  When an infant is upset or frustrated, the only tool they have to communicate those feelings is crying.  As we age, we develop the ability to communicate our emotions to others by using words and behaviors.  Oftentimes, adults expect young children who are dealing with anger to use coping tools that are not fully developed, such as “using their words” instead of crying.

Helping our children understand anger and develop skills to communicate that emotion can alleviate frustration for both child and adult.  Here is a simple plan to use with your club to begin the process:

Opening Discussion – Have a short discussion with members using these questions:

  • When is a time that you felt angry?
  • How can you tell if a person is angry?
  • What do you do when you are angry?

Read a story – There are many great children’s books about dealing with anger. Try one of these:

  • When Sophia Gets Angry, Really, Really Angry by Molly Bang
  • When I am Angry by Michael Gordon
  • When I Feel Angry by Cornelia Maude Spelman

Debrief the Story – Reviewing what happened will help members identify what to do and not do when they experience anger.

  • Ask what happened to make the character(s) mad.
  • Ask what the character did to calm down.

Make a Calm Down Bottle – This simple craft is easy to make and is a tool that members can take home to practice coping with anger.

Supplies:

  • Water bottle for each member
  • Corn syrup
  • Funnel
  • Tablespoon
  • Glitter
  • Hot glue gun (optional)

Steps:

  1. Give each member a water bottle and have them drink or dump so that it is halfway full.
  2. Using the funnel, have each member add a 2-3 tablespoons of glitter to their bottle.
  3. Add corn syrup to the bottle until it is full.
  4. Hot glue the lid on (parents will appreciate this step!)
  5. SHAKE the bottle and watch the glitter swirl.

Teach each member to use their calm down bottle.  Discuss that this is a tool for them to use when they feel angry.  They just need to shake the bottle and then sit quietly and watch as the glitter settles to the bottom.  If they still feel angry when the glitter has settled, they can shake it again for a longer cool down period.  Challenge your members to use their bottle instead of yelling or crying when they feel mad.

1-20-20 – Make it a Day of Service for Cloverbuds

The Martin Luther King Jr. holiday on January 20, 2020, marks the 25th anniversary of the day of service that celebrates the Civil Rights leader’s life and legacy. Observed each year on the third Monday in January as “a day on, not a day off,” MLK Day is the only federal holiday designated as a national day of service to encourage all Americans to volunteer to improve their communities.

Community service is a big deal in the 4-H program and what a great way to help our younger members focus on giving back to others. Service is a life-long skill that is taught by experience. Much like everything we do in 4-H we like to tag it as experiential learning or learn by doing. So let’s start our 4-H Cloverbud members with a small community service project that will have big impact on their lives and the lives of others in our communities.

Here are links to help you with community service ideas:

Waiting Room Busy Bags is an idea where you can add some 4-H flavor to double as community service and 4-H promotion.

  • Help a child waiting to visit the doctor or local clinic by making Waiting Room Busy Bags. This project was adapted from the St. Jude’s Children’s Research Hospital. Just fill a zippered plastic bag with fun things a child would enjoy doing. The child is encouraged to keep the bag and take it with them.
  • Ideas to include – crayons, markers, colored pencils, paper, coloring books, stickers, sticker books, resealable plastic bags.
  • 4-H items – enrollment information, how to join 4-H, local volunteer opportunities for parents, how to start a 4-H SPIN (SPecial INterest) Club, 4-H stickers, 4-H pencils, make some 4-H coloring pages (4-H flag, 4-H Clover, etc.) Checkout https://shop4-h.org for other Clover branded items.

If you are looking for a children’s book to introduce community service, read on these:

  • “Kiki’s Hats: Our Gifts of Love Live On and On” by Warren Hanson
  • “The Lemonade Club” by Patricia Polacco

Celebrate the Snow!

It’s the perfect time of year to celebrate the snow.  A fun, simple craft that your Cloverbuds can complete is making a snow globe.

Let’s get started:

Collect the following simple supplies:

  • A small jar for each child. This can be a baby food jar, a pickle jar or a mason jar.
  • Glitter in silver, white, blue or a combination of all. You can add the reflective snowflake confetti if you like.
  • Water resistant glue and distilled water. Using distilled water ensures that all the minerals and bacteria are removed making sure that you don’t end up with water that can get cloudy.
  • Something to put in your globe. Choose something simple like a small figurine or a toy.  I like collecting items from outside.  Small pine cones, acorns, pretty rocks are all good too (and free!).

What to Do:

  1. Fill the bottom of the jar with glitter.  Be generous, but not overwhelming.  About ¼ of the way full is a good guideline.
  2. Glue the figurine to the bottom of the lid making sure you keep them centered.
  3. Fill the jar with the water leaving approximately ¾ of an inch of air space at the top.
  4. Run the glue around the perimeter of the inside of the lid to form a waterproof seal when you screw the lid in place. Allow to dry for a bit so your glitter doesn’t stick to the glue.

Turn it upside down and enjoy!

Creating Holiday Cards for Community Service

This time of year is often known for being the season of giving!  So, why not take this opportunity to teach your Cloverbuds about giving by helping them create their own holiday cards to give to others.  For example, cards can be taken and distributed to residents of a local nursing home or tucked into a local food bank’s distribution boxes before delivery!

Supplies Needed:

  • Cardstock and/or construction paper
  • Markers, colored pencils and/or crayons
  • Glue sticks
  • Scissors
  • Ribbon
  • Stickers
  • Old magazine or cards
  • Stencils
  • Glitter

Steps:

  1. Fold the cardstock or construction paper into the desired card size.
  1. Encourage members to use their creativity to decorate the cards by drawing and coloring a picture, tracing a picture with a stencil, cutting pictures out of old magazines or old cards. Add a little something extra with ribbon, glitter or other decorating items you have around.
  1. Have some sample phrases written out and available for members to use on or in their card such as “Merry Christmas”, “Happy Holidays”, “Seasons Greeting”, “Happy New Year” or another greeting of your choice. Some members may still be learning to spell and this might help them.
  1. Be sure your Cloverbud signs their name to their card.

This activity can be fun for the members creating the cards and fun for the individual receiving the cards.  It is a great way for young members to realize that their kindness may bring cheer to someone else!

Explore STEM with Cloverbuds

Science, Technology, Engineering and Math (STEM) education at an early age fosters growth in the curiosity and creativity of young minds. These young minds are the basis for the next big discovery and the world depends on STEM innovations. STEM exploration includes interactive and hands-on activities, and let’s be honest, learning through play is more fun! It is never too early to start building the skills that youth will need for their careers and future success as adults. I encourage you to take the opportunity to allow Cloverbuds to “explore” through “doing” and spark the thought process that leads young minds to understand there is “more than one way to complete a task successfully”. To get you started here is an activity to use at your next meeting to explore STEM.

Rain Cloud in a Jar

A great way to demonstrate how rain arrives to us through clouds.

You will need a few supplies:

– food coloring

– water

– clear jar (pint or quart)

– shaving cream

– plastic pipettes or eye droppers

– small glass

  1. Mix a few drops of food coloring into water in the small glass and set aside.
  2. Fill the glass jar ¾ of way with cool water.
  3. Fill the glass jar the rest of the way with shaving cream creating your “cloud”.
  4. Now we are ready to make it rain!
  5. Kids can now use the pipettes to squirt the colored water into the top of the shaving cream.
  6. Once the cloud gets heavier with liquid, colored rain will make its way through the cloud and start falling onto the ground (bottom of the jar).

Clouds are formed from billions of water droplets. When those droplets get heavy enough, gravity pulls them down as rain.

Source: Activity retrieved August 29, 2019 from thestemlabratory.com

Reduce, Reuse, Recycle

Fall is a wonderful time of year with the cooler temperatures and leaves changing colors, but it also means there is more time spent indoors. For Cloverbud members, it’s important to find fun and educational activities to keep them busy so you don’t hear those dreaded words…. “I’m bored!”

Have you considered the 3 Rs (Reduce, Reuse, Recycle) as a topic for a meeting?

Here are some ideas to get you started:

  • Read a story – There are many books about preventing litter or recycling. A favorite is: The Wartville Wizard by Dan Madden
  • Invite a guest speaker from your Community Action group or local Recycling Facility to talk about the importance of recycling and reducing waste
  • Make a craft out of items that can’t be recycled, for example Tops or Light Catchers made from old CDs. Search for other ideas or make your own! Creativity is part of the fun.

Craft 1: CD Spinning Top

Supplies Needed:

  • Old CDs
  • Plastic Bottle Caps
  • Marble
  • Markers
  • Stickers
  • Hot Glue Gun

Directions:

  1. Decorate the top of your CD, allow kids to use markers and stickers to make it as creative as they want.
  2. Turn the decorated CD over and use a hot glue gun to glue a marble into the center hole of the CD. This step is best done by an adult when working with younger kids.
  3. Turn the CD right side up and glue a plastic cap to the top of the CD. This step also needs to be done by an adult when working with younger kids.
  4. Allow the top to dry! Then use the plastic cap to spin your top.

Craft 2: Light Catchers

Supplies Needed:

  • Old CDs
  • Ribbon
  • Hot Glue Gun
  • Tacky glue
  • Decorations –Silk Flowers, Markers, Stickers

Directions:

  1. Decorate the top of your CD, allows kids to use markers, stickers, or glue on sequins. Remember that the back will be attached to ribbon, so they don’t need to decorate that side.
  2. If silk flowers are being used, use a hot glue gun to glue the flower into the center hole of the CD. This step is best done by an adult when working with younger kids. Allow the glue to dry before attaching to the ribbon.
  3. After the CDs are all decorated, use hot glue to attach the backside side of the CD to the ribbon. Leave some space at the beginning and end of the CD strand and between each CD.
  4. Hang the ribbon in a spot where it can catch light or in an area that needs brightening up!

Working with Food Allergies in the 4-H Club Meeting

Food allergies can be very serious, especially among children. With so many young children being diagnosed with food allergies, it is very important that all understand what to look for.  According to the Food Allergy Research and Education (FARE), one in every 13 children is being diagnosed with a food allergy and every three minutes, a food allergy sends someone to the emergency room.

FARE states that there are eight major food allergens which causean estimated 90% of all allergens.  These foods include: egg, milk, peanut, tree nuts(almonds, cashews, pecans, walnuts, hazelnuts, and pistachios), soy, fish, wheat, crustacean shellfish(crab, lobster, crayfish, and shrimp).  These are the allergens which typically cause the most serious food allergy reactions but there are more than 170 foods known to cause allergic reactions.

If your county utilizes online enrollment, please encourage 4-H parents to put any kind of health consideration into 4-H Online when completing their child’s enrollment.  Health forms for camp must also be fully completed.  This is the first, and sometimes only, way to find out this information. Volunteers need to be aware of any food allergies which put children at risk.

Think about club meetings and snacks.  Make sure all parents know of any foods that must be avoided.  This needs to be enforced at the club meetings so there is never a chance of an allergic reaction.

A great option would be to serve fruits or vegetables at the meeting.  Typically, these are not common allergens among children.  This would also promote healthier eating at club meetings.  Cloverbuds love to help make food. What are some snacks that are appropriate for them to help prepare?  Some fun ideas include a relish tray, fruit tray, hummus, ants on a log, guacamole, or animals made out of fruit/vegetables.  Have fun and be creative.  Don’t know where to begin?  Check the library or do a search on line.  And be mindful of serving healthy drinks as well such as water, 100% juice, or unsweetened tea.

For more information on food allergies, please visit www.foodallergy.org.

It’s Time to Talk

As a 4-H Educator and an uncle, I often get to interact with Cloverbuds. Just this past year I had one niece graduate Cloverbuds to start her first year in 4-H project age, and three nieces and nephews start their first year as Cloverbuds. One thing I often hear about and engage with is how much Cloverbuds love to talk. They love to share and tell stories. However, I often catch myself wondering how myself and others are modeling talking and having meaningful conversations?

In today’s world we see youth somehow shift from being extremely social and talkative to being closed off teens or young adults, struggling with social skills and not being able to have meaningful conversation with others. We also see adults who can’t even get through a conversation about religion, politics, beliefs, or even different thoughts without getting upset and ending the conversation or turning from constructive to toxic. What changes? How do we shift from being excited to talk to others and tell stories to having social anxiety or not being willing to talk to others, even when they think differently than us?

As a 4-H professional or volunteer we have to be conscious of not just what we talk to our Cloverbuds about, but how we model having positive and meaningful conversations. Here are some tips for having positive conservation with Cloverbuds:

  1. Take time to have one-on-one conversations with each Cloverbud (even if it’s a 2-minute interaction) every time you have a meeting. This shows them that it’s important to take time out of your life to chat with people and hear about their lives.
  2. Share information about yourself to model how they can talk about themselves and then ask questions that encourage them to share information. (example: I really like cows, they’re probably my favorite animal. What’s your favorite animal?)
  3. When they do share information about themselves, always give them positive reinforcement by saying things like:
    • Really?
    • Wow, that’s so cool!
    • No kidding!
    • Tell me more!
  4. Challenge Put-Downs or Hurtful Comments. At a very early age youth begin to put down themselves and others. It is important that we begin shutting down the negative comments youth make. When a Cloverbud says they don’t like someone or themselves, start pointing out that was it the other kid or themselves they don’t like but what they or the other kid did/said.
  5. Get on their level when talking with them. If you can, crouch or sit down to be at the same eye level as them and look them in the eyes. Have them focus on you when speaking.

At the end of the day, it’s our goal to model positive behavior and that also means discussion. So make sure that even when you are speaking to Cloverbud’s parents or other adults that you are trying to reflect positive conversation skills so they learn. Take time in a meeting to actually setup a time for Cloverbuds to just talk to each other and ask each other questions about their lives. This way, as they get older, they naturally have a curiosity to get to know the people around them.

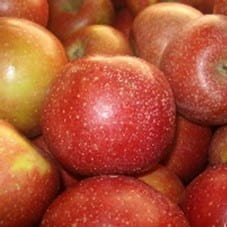
Cooking with Cloverbuds: Apples, Apples, and More Apples!

Everyone loves apples!  And fall is a great time to check out all the varieties of apples available.  Cloverbuds will have their favorite but bring in different kinds of apples for a tasting party.  Before you show them the apples read the story The Little Red House with No Doors and No Window and a Star Inside. Here is a link to the story: https://www.ncagr.gov/agscool/commodities/redhouse.htm

See if they can guess the answer to the riddle before you finish the story.  After you show them the star inside the apple, let your Cloverbuds taste the other varieties of apples you brought and let them decide which kind is their favorite by making an apple graph.

Below are some other apples activities and recipes to enjoy.

Activity 1:  Apple Science

When apples are exposed to air they start to turn brown. Try experimenting with kitchen ingredients and see which items will work so apples do not turn brown.

You will need: milk, baking soda mixed with water, vinegar, lemon juice, 6 small bowls, knife for cutting the apples and of course apples.  In small bowls put each of the ingredients and leave one bowl with nothing.

Cut up your apples and place them in the bowls. Pour each ingredient over the apples and wait and see what happens. (While waiting you could read a story about How Apples Grow by Betsy Maestro or choose any book about apples.) Check on your apples and see which item worked best. Discuss with your Cloverbuds why they think one worked better than another.

Activity 2: Apple Art

Use your apple star and dip in paint to have Cloverbuds make apples creatures. You will need paint, construction paper, markers, paper towels for clean-up, and plastic bag paint shirts to protect clothes.

Activity 3: Apple Snacks

  • Apples sandwiches – Cut apple in round slices so you can see the star. Cut out the middle with the seeds. Spread with peanut butter, hazelnut spread or cream cheese. Fill with raisins, chocolate chips, coconut or whatever snack you would like.
  • Apple Pie in a Cup – Layer in a cup diced apples, graham cracker, and whipped topping. Don’t forget the caramel topping.
  • Yogurt Delight –Layer apples in a cup and top with yogurt. You can add sprinkles too.

Let the fun begin as you explore the world of apples with your Cloverbuds!