Research:


To begin this project, I started off mind mapping about possible ideas and ways to approach my sketchbook. I brainstormed different possible concepts/themes, different materials, images, and tones. As I stepped backed and looked at all I had wrote, I was drawn to the idea to create something fun, full of color, and bright.


I knew fro the start I wanted to use acrylic as my front cover. I liked how the material looked and felt, I just had to duo research on how it would perform in the laser cutter.


I explored different possible materials I could use throughout the sketchbook.

My first go and idea for the cover was to create a collage of all my favorite things with some fun detailed elements as shown above. However, after exploring that I kept thinking abut how I could incorporate one of my favorite designs, shown below.

Exercises:


Exercise 1: Design and construct a mini sketchbook (or mini zine).
We had to use the mind mapping process to document a solution to a given problem. The question I answered was how to achieve word peace. This exercise allowed me to get a better grasp as to what mind mapping is and how I can incorporate it in my own person design process.
Iterations:


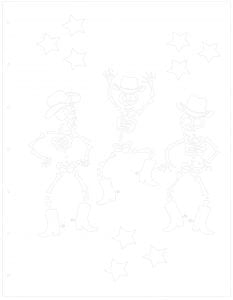
To start off my designing of the cover, I wanted to create an image of skeletons dancing, having fun, while dressed in a cowboy hat and boots. I drew each element separately in Sketchbook app. I traced over that once more on sketchbook before I took the image into illustrator. In illustrator, I then created a vector image of the design.


One part that I wanted to incorporate into my design was vellum paper. I wanted the translucent effect but wanted to add a pink tint to it so I tried using a dye. I used a red dye and dipped to vellum into the dye.


I let it dry over the span of two days, the vellum picked up the color but the dye was still rubbing off. I then tried to seal it with Mod Podge. It worked and created a look I like; however, when folded or creased to seal would crack and peel right off.


I thought of other ways to save the vellum paper that was dyed. I took an old party Pom Pom decor piece and took that apart. I tried glueing that over top of vellum but the glue underneath would not dry. I ultimately came to the decision to find another material I could use in place of the vellum paper to act as a dividing agent in the sketchbook.
Production:


I used the Laser Cutter to cut out my designed image into a piece of neon pink acrylic.


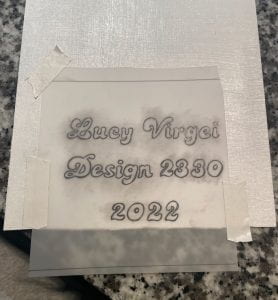
For the back design, I painted a piece of 8.5×11 cardboard white. I selected a font in the Cricut app that I liked and rendered my text on my iPad. I then took a piece of vellum paper to trace over the text on my iPad with pencil. Taking the drawn on vellum I then rubbed the lead onto the back cover to transfer the text. Once transferred, I used a neon pink sharpie to outline and fill in the text. I also used the cut out acrylic stars from the front and glued them to the back to create a consecutive feel.


Instead of the dyed vellum, I used pink construction paper and glitter card stock to act as a dividing element. I cut all those pages to 8.5×11. Then used a hammered and nail to created to holes in order to bind it.

I used elastic plastic string and a coptic like stitch to bind the two covers and pages together.
Final Sketchbook:


Front and back cover.


Inside Sketchbook.
Portfolio Project
View final project at Sketchbook Project