This page will guide you through creating and cloning a GitHub repository. There are four parts to this tutorial:
- Getting Started
- Setting up a Repository
- Cloning Your Repository
- Adding the Proteus Template to Your Repository
Getting Started
First verify that you have Git installed on your device. Git is automatically installed on the classroom computers in Hitchcock and if you ran the Proteus Dependency file from Canvas, it should be installed on your personal computer already. To verify that Git is on your computer, you can open a terminal or Command Prompt on your device and type the command git --version.
Create an account on GitHub if you do not already have one:
Create a GitHub Account
- Navigate to GitHub and create an account – https://github.com/join
- Follow steps 1-9 of this tutorial to create a personal access token – https://docs.github.com/en/authentication/keeping-your-account-and-data-secure/creating-a-personal-access-token
- This token is now required by GitHub for security purposes
Setting up a Repository
Now that you have installed Git and created a GitHub account, you can start a new project in Git. You’ll first want to create your remote repository on GitHub. Once you’ve logged in, click New repository. Make sure to initialize it with a README and to add a VisualStudio .gitignore, as shown in Figure 1 BEFORE creating the repository. To add the .gitignore, click “Add .gitignore” and search for VisualStudio. Additionally, you should make any of your repositories you make for school private.
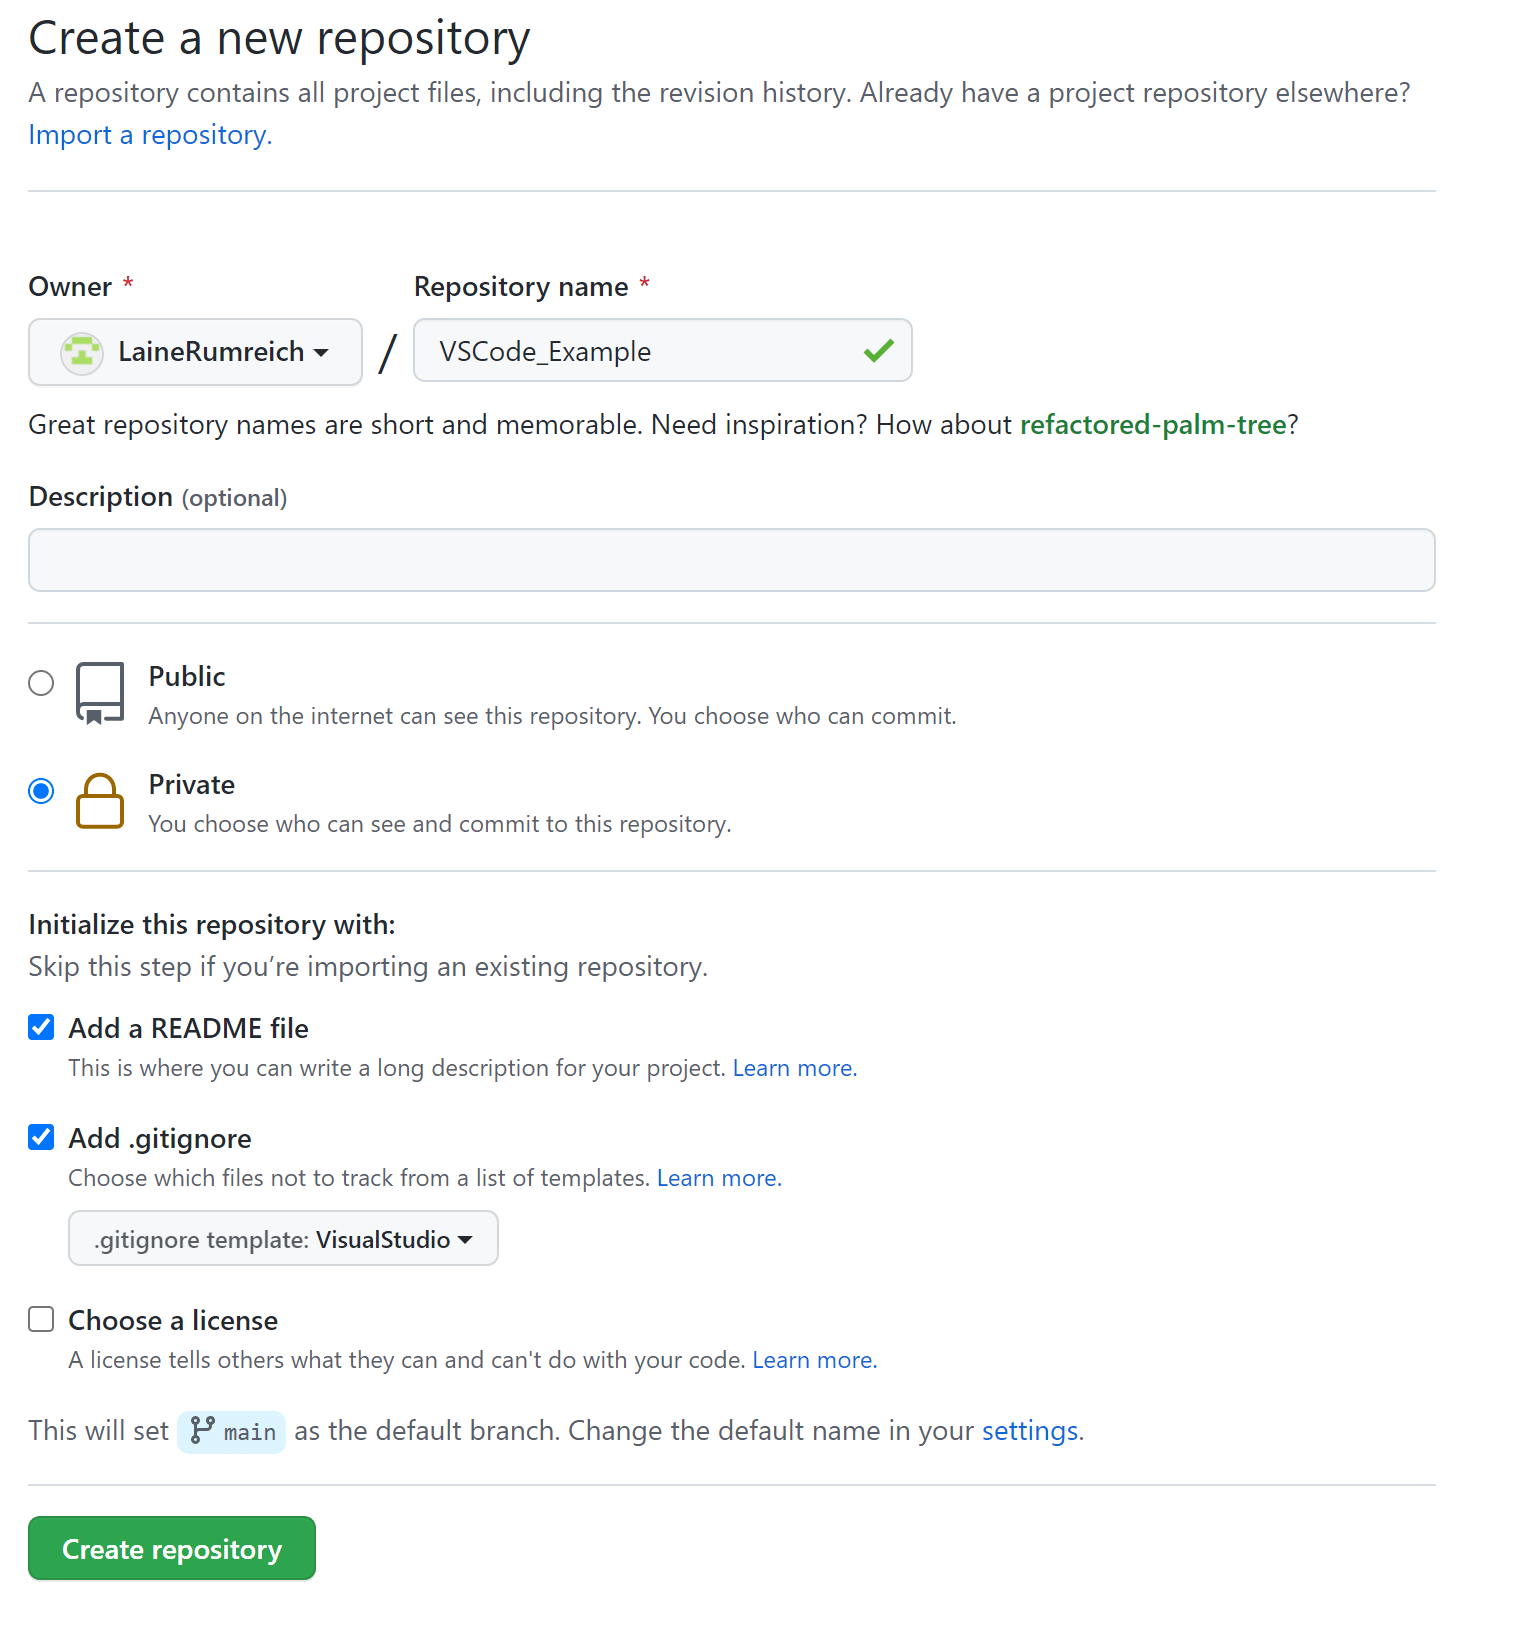
Figure 1: Creating a New Repository in GitHub
Your repository should now look like Figure 2.
Figure 2: Empty Repository.
To add collaborators to your repository, navigate to Settings -> Manage access. Select Add people and input the usernames or emails of any collaborators for your project.
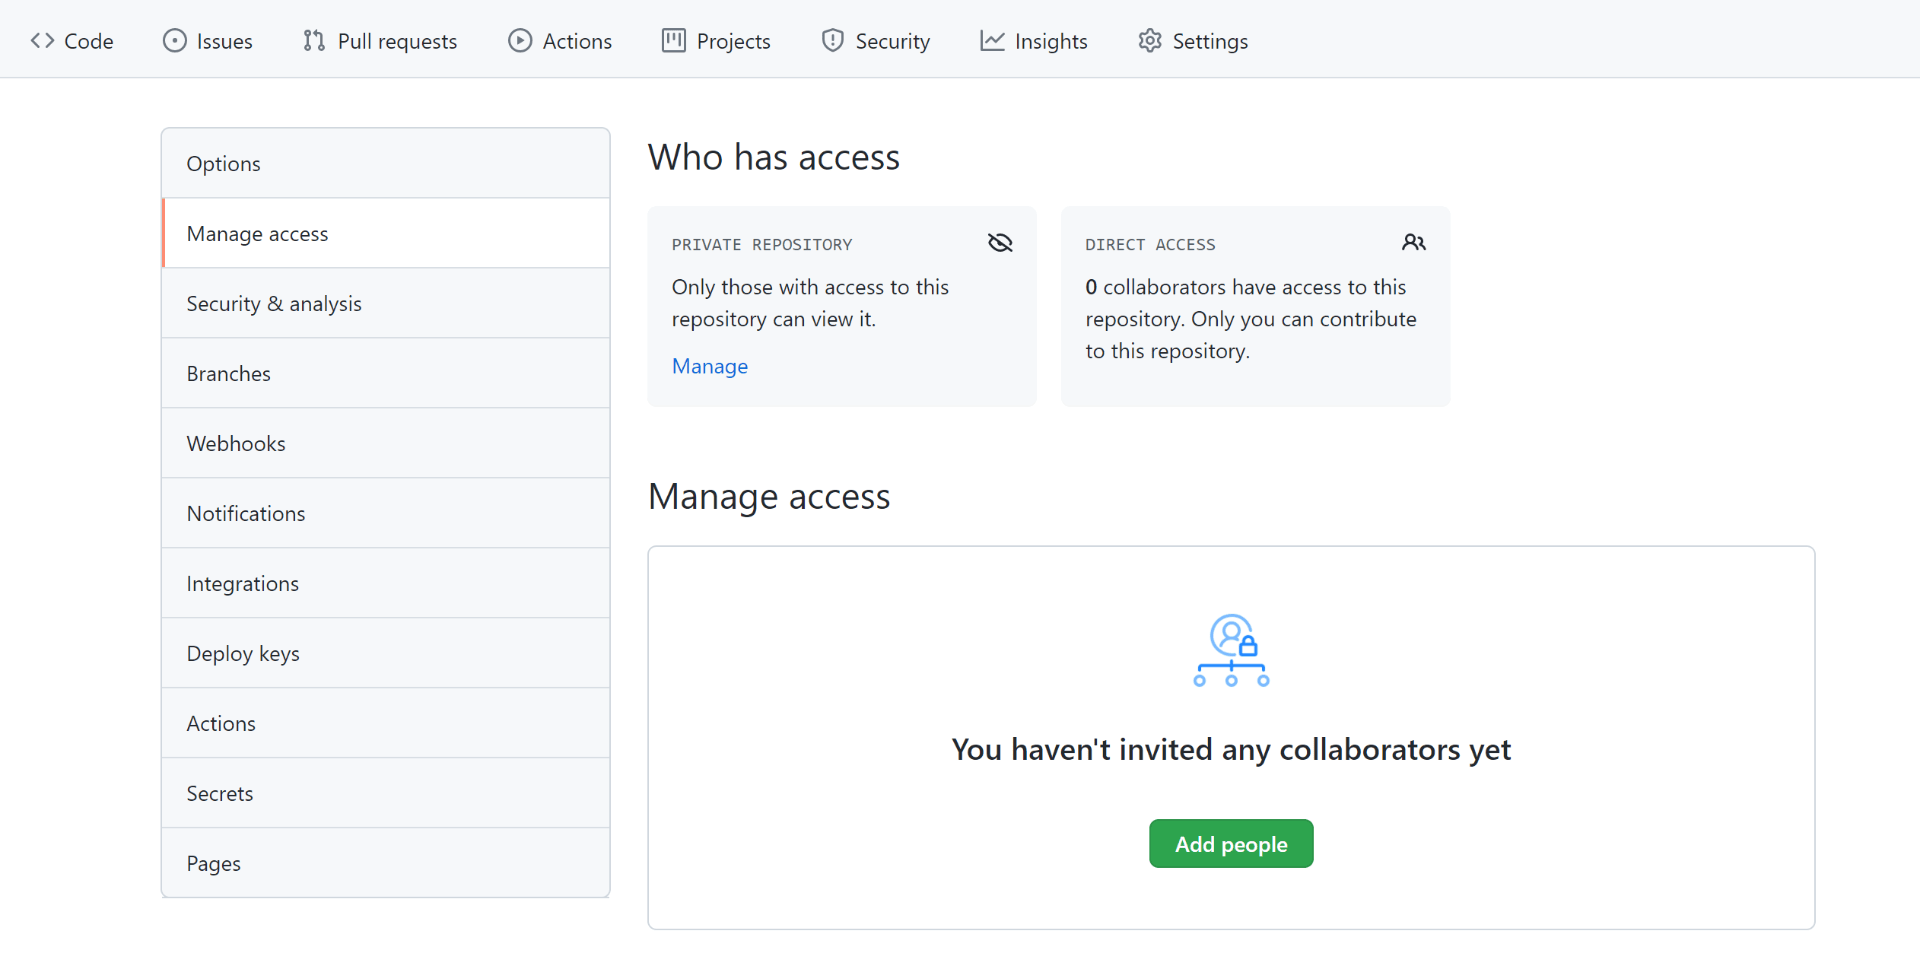
Figure 3: Add Git Collaborators
Cloning Your Repository
Start by copying the URL of your GitHub repository. Select the Code dropdown menu and copy the HTTPS URL.

Figure 4: Get the URL to Clone
There are two methods of cloning a remote GitHub repository into a local repository (your device). These methods are (1) through the command line and (2) through Visual Studio Code.
Option 1: Command Line
A note: When you see the $ symbol, this indicates that what follows is a terminal command. You should not include the $ symbol in the actual command you type. Any values in square brackets, such as [filename], should be replaced by the user with a value corresponding to their repo (and should not include the brackets).
- Once you’ve created your repository, you’ll need to clone it to your computer. To do this, open a terminal in VS Code (or on your computer if you have Git Bash or are a Mac OS user).
- Navigate to the directory you would like to keep your local repo. Common git CLI navigation commands :
$ ls # list the files in the current directory$ cd [directory] # change directory$ cd .. # go up one directory
- Clone the repository using the following command, replacing
[URL]with the URL you copied from GitHub$ git clone [URL] # clone the repo at the specified url into the current local directory
- Open Visual Studio Code, select Add Folder to Workspace, and select the folder you just cloned onto your device
Option 2: Visual Studio Code
- Open Visual Studio Code
- You can search for and clone a repository from GitHub using the Git: Clone command in the Command Palette (Ctrl+Shift+P), shown in Figure 5, or by using the Clone Repository button in the Source Control view (available when you have no folder open), shown in Figure 6.

Figure 5: Command Palette Command “Git: Clone”

Figure 6: Clone from Empty Workspace
- Provide the repository URL from GitHub
- Add the repository to your workspace

Figure 7: Add the Repository to Your Workspace


Adding the Proteus Template to Your Repository
To run a Proteus program, you should now copy the files from a Proteus Template into your repository. It is easier to do this from a File Explorer rather than from Visual Studio Code. The files you need to copy will depend on whether your project is for the physical Proteus or the Proteus Simulator. Select the appropriate template from the page Compiling and Running a Project, unzip the template, and copy and paste the files in it (other than .git and .gitignore) into your new repository. Any time you make changes to your repository, you can commit and push your changes to your GitHub project and collaborate with your teammates. The following page will step through how to do that.