1. Research
To start the project, I picked the bounded shape from previous project’s composition. I chose the corner one instead of the hexagon in the middle. (Part of the reason is that hexagon is too troublesome to draw)
Exercise
-
PerfectCube
During class, I used template to built the basic form, cube, to get a sense of how 2D turn into 3D form. It seems easy, but it is hard to get a perfect cube: the alignment, pencil marks, excess glue.

-
Skyline Construction and Isometric Drawing
After finished the cube, I experimented more complex form with provided template. It was still hard to get perfect while doing the sketch and the order of connection of each part.


2. Iteration
First, I built the form and created the template by using chosen shape as base. I used it as prototype and sketched few possible from meanwhile keep the plain view the same. I was thinking how about cutting some parts of the form and what will look like.


Moreover, I tried to make them into 3D forms.
Model 1


model 2


Model 3


First 2 model was originated from the sketch by simply cutting part of the form. Th last was built from the chosen shape as base and randomly put on pieces and explore what form could come out.
3. Production
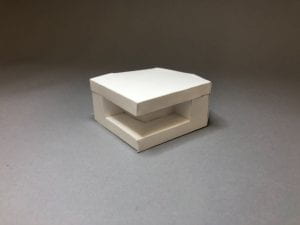
I chose model 1 as prototype and made some modifications: lower height and longer cut out part. The process was smooth while having the model reference. I teared of the tape and expand the form to visualize the template. I did one try out before doing the final one. However, the form is successfully made. There are still some problems: the taps on the upper part cannot connect the part it supposed to be.


Final Form


Although the form is made, there are still some problems such as the taps on the upper part cannot connect the part it supposed to be. The total length of upper part and lower part is longer the target length due to the paper thickness. There must be better template option if doing more experimenting.
Option 3: Comparison
For the second part of the project, I chose to a variation of the form. Stead of cutting the part in the middle front, how about cutting out space around the form? With this in mind, I started to sketch out the idea.

And then, I started to build the form by using small pieces. I tried out multiple times in order to get one paper template. During the process, I made some changes from initial idea to get higher feasibility.


Final Form


Overall, I think the comparison is successful, but it stills have defect including hollow and alignment . Some places turn out well while some places are still off. Making the template was really challenging and took a lot of time. Overall project lets me realize the design process: start at a point, keep developing, keep trying until it works.