Yosemite National Park

It took two months but plans finally came together to take on a trip to Yosemite. Determined to visit before returning to Ohio I worked on setting up plans with my other friends who were interested in going as well. The plan originally was to try camp but it was determined that it would be easier to take on the whole trip in a single day. Therefore, we woke up around 5 am and were ready to head out by 6:30. It takes at least 3 and a half hours to reach Yosemite from San Jose so we wanted to make sure we had as much time as possible at Yosemite before returning in the evening.

We traveled for a few hours without problems until we saw an overlook that we later found out was called the “Rim of the World Vista Point”. The viewpoint looked over hundreds of acres of burned forest. This was caused from the “Rim Fire” back in August of 2013. What was once probably a pleasant view was now a bleak and burnt landscape that definitely stood as a reminder about how destructive wild fires are. Needless to say, this stop stands as a pretty memorial part of the trip that had me pretty deep in thought. We continued on however since we couldn’t stop now so close to Yosemite.

Soon afterwards we made it to the park and started making our way to Yosemite Valley to begin our hike up Mist Trail. After driving in a heavily wooded area for about 5 minutes, we broke from the trees and saw what Yosemite was all about: tall mountains, water falls, and some of the most magnificent views I have ever seen. Once we arrived to Yosemite Valley, we stopped before the start of our trail to take some pictures and relax for a moment.

At this spot we witnessed a deer come within about 20 feet of us after walking through a stream.

Photo credit: Tom Winget (https://www.facebook.com/ThomasDorianPhotography)


IMAG0880

I personally already loved Yosemite and I hadn’t even done any hiking yet. We decided we should start our hike though and therefore went to the trailhead for Mist Trail. Mist trail is about a 3 mile hike one way and involves the climbing of both Vernal Fall and Nevada Fall. Here’s the journey up the trail:

The hike began near the bottom of the large stream due to Vernal Fall.
IMAG0905

Some of the wildlife let you get so close you could touch them. The beginning of the hike was already a bit much for this squirrel.
IMAG0909

Is was a pretty consistent hike uphill so it wasn’t long before we could look out over we where we had just came from.
IMAG0914

We finally reached Vernal Fall! I didn’t wait long to get a close look and drenched by the spray from the waterfall.
IMAG0916
IMAG0927

Once we climbed Vernal Fall, we thought it would be really good location to stop and have lunch. The best kind of PB&J sandwich is one you can eat on the edge of a waterfall looking out over a valley.
IMAG0939
IMAG0941

Wasn’t long before the squirrels came to steal my food and eat it right in front of me.
IMAG0936

In reality we weren’t even that high up! One day I plan on heading back and taking on a new trail that reaches the peak of one of these mountains.
IMAG0945

Finally not much more hiking we reached Nevada Fall. To finish the hike, we now had to climb it as well. After about 20 feet from the top, we noticed a storm started rolling in. We realized we had to push on though and finish the hike before turning back no matter what weather hit and how soon.

Photo credit: Tom Winget


IMAG0953
IMAG0962

We made it to the top of Nevada Fall and were glad we pushed on regardless of the incoming storm. The lightning was close so we knew to get a move on and start heading back. We took an alternative route back which turned out being the right decision since it started raining now long after and this trail had a more gradual decline. It was a bit less steep going down but my gym shoes didn’t help me out much once the trails became muddy. Going down in the rain though was just as enjoyable as climbing to the top of the trail though. It was refreshing and made the experience much more authentic for me.

Needless to say I made it back down in one piece and now have a memory and story I’m not sure I could ever forget. If you ever have a chance to visit Yosemite, go and do at least one of the hikes. They have hikes for all experience levels and no matter which trail you go on, there will be a view you will never forget. If I ever am near Yosemite again, I know I will be back to tackle on another trail.

Pikes Peak International Hill Climb

I’m quite late on this blog post but it’s been a huge and unexpected part of my STEP experience so I can’t pass up writing about it. A little over two weeks ago, I was given the chance to travel with two of my team mates on Buckeye Current to help the Honda Racing team out at Pikes Peak for the yearly hill climb. In exchange, we were given pit crew passes, a free place to crash at night, and a chance to obtain race data from other teams which could possibly help us build an electric race motorcycle for the course in the future. Here’s the rundown of the experience:

The PPIHC (Pikes Peak International Hill Climb) is a week long event which starts with inspections on Monday, continues with practices Tuesday through Friday, and then finishes on Sunday with the actual race. Since the event takes place on the only road leading to the top of Pikes Peak, the practices must happen very early in order for the road to open up to the public before noon. The two other members and myself ended up flying in Thursday and staying until Monday when all of PPIHC was finally over. By the time we reached the hotel, it was already pretty late in the day Thursday and we were told that we would need to be up and ready to go by 2:30 AM in order to set up the race vehicles at the bottom of the track for Friday’s practice. As expected, we didn’t get much sleep. Up we were though Friday morning and off we went to the bottom of Pikes Peak.

Arriving around 3:00 to 3:30 AM, we helped unload Zach Jacob’s race motorcycle off the trailer to get it set up for the day’s practice. After doing what we could, the Buckeye Current crew headed over to talk to one of the electric motorcycle teams nearby. Their bike, the “Brutus V2 Rocket”, and the crew that built it were quite interesting to speak to since we build electric race motorcycles with the rest of Buckeye Current like them. We must have sat and spoke with them for a while since we didn’t actually leave until the motorcyclists starting preparing to start their practice laps. At that point, all that there was to do was watch the motorcycles fly by. We decided to hang near the side of the road a couple of turns up to watch the bikes blast by. It was already a pretty awesome experience and it wasn’t even race day.

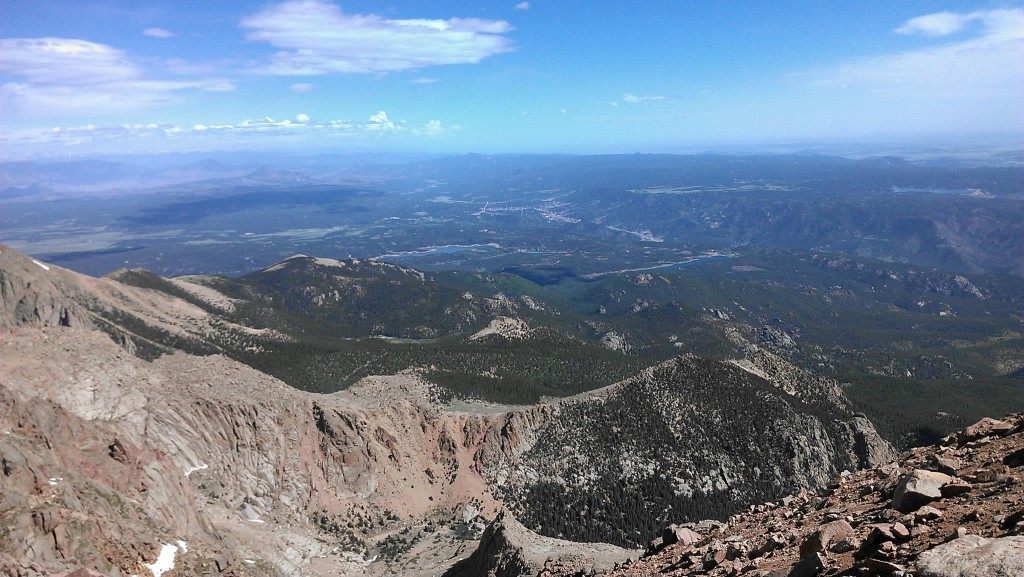
After practices wrapped up and we helped Honda pack up, we were offered a ride to the top of Pikes Peak which is over 14,000 ft above sea level. The ride up was pretty amazing in itself but the top was even better. We decided to climb down the rocks to reach one of the cliff edges and look out over everything below us.
10479036_10203638924287999_3048591850995442594_o
I think we would have been up there all day if we could have helped it. Something interesting to note about the top is the lack of oxygen available compared to the bottom. Pikes Peak actually provides oxygen tanks to the riders on race day since all racers have to wait at the top until everyone has made it to the top. If you are the first racer to reach the top, you could be up there for 6+ hours.

Leaving Pikes Peak for the day, we prepared for the Fan Fest that PPIHC puts on every year. For the event, most teams bring at least one of their race vehicles to showcase. Fans can then walk around and check out the race cars and bikes close up and also talk to the teams for each. Right in the middle of the event and downtown Colorado Springs is also a stunt show that takes place where motocross riders hit the ramps to pull off tricks 3 to 4 stories up in the air.

Here’s an image of the electric car “Monster” Tajima raced this year.10457710_10203638925128020_6867114719697319883_o

Saturday is actually a day of rest before the race. But in reality, not many teams end up resting since most are out at the bottom of Pikes Peak setting up their pits. We helped Honda set up those for most of the morning and were asked to help set up air fences around the dangerous corners of the course. The air fences were a new addition this year and were due to a large part by Honda and PPIHC. We had no problem helping since we all knew they could definitely save a motorcyclist’s life if he fell off mid-corner. Right as we were about to head up, we had a chance to talk to Hollywood Electrics (a electric motorcycle shop in LA which sells “Zero” bikes). We already had made contact with them the day before but they sweetened the deal by giving us rides up the hill to the air fences on their electric bikes.

After practicing what we would have to do on race day to get the air fences set up, we went back to the hotel to try and get some rest before the race day. Personally, I didn’t sleep.

Race day (Sunday) had arrived and with it was the requirement to be ready to go by 1:30 AM. I was quite ready myself. After setting up the Honda motorcycle and cars, we went to grab some food and talk to the Honda team. Fast forward to the sun starting to rise and it was time for us to take our positions on the hill to manage the air fences. One of the benefits of working the air fences was that we could avoid the spectator areas for a few hours before we were told to move. Here’s a view of the corner we worked at:
10380526_10203638925408027_4500919327636310749_o
Note: The cars usually head in the other direction and UP the hill!

From our position on the hill though we were able to see plenty of fast cars and motorcycles. Actually so many that it never seemed to end. I think we watched cars and motorcycles go by for at least 6 hours. It was quite a long day. Even though some people couldn’t stand watching a racing event for 6 hours, I’m glad I was there and could experience it.

Here’s the car that holds the current record for fastest electric up the track:
10454505_10203638923967991_5078129879776033221_o

To finish this blog post off, the Buckeye Current team has actually decided to make this the event we race at for the 2015. It’s exciting to know I’ll be back in Colorado in a year and on one of the teams racing instead of only spectating.

Surprise Trip Opportunity

In less than one day, I’ve been invited and have decided to head to Pikes Peak starting next Thursday to visit all the action happening at Pikes Peak International Hill Climb this year. My adventure will end the following Monday once the races are over. A blog post over the event will be hitting not long after so keep an eye out to see what the big deal about Pikes Peak is.

Until then or my next spontaneous decision, check out their website: Pikes Peak International Hill Climb

Mount Diablo

IMAG0729

This weekend included a trip to the one and only Mount Diablo. There’s plenty of history with this mountain which can be found on the way up to the summit. Information about wildlife, the age of rocks during parts of the hike, and what the mountain has been used for can all be found. This is another hike I highly suggest since it can be as difficult or as easy as you would like. There are multiple points on the way to top to park and start the hike up. If you are not the hiking type, you can even drive all the way to the summit and get an amazing view of everything. Our group decided to start from the very bottom a mile away from the beginning of the trail and hike all the way to the summit.

During the start of the hike we were very poorly prepared. A few days before the hike, I did some research on the length of the hike and thought that the hike was 3 to 5 miles round trip. How wrong this was. It actually ended up being a 7 mile hike one way! Combine this with very small amounts of food and water and we ended up in a fairly bad situation about half way up once we realized the trail was much longer than we suspected. Also since the area is in a major drought, most of the water fountains were shutoff making water even more scarce. All of this however did not stop us since we knew we had to push on to reach the summit no matter how hard it ended up being. I enjoy a good challenge anyways.

Hike_path

One thing that made Mount Diablo different from Mission Peak was how the trails were actually trails rather than a fire road. In my opinion, this made the experience much more enjoyable since I actually felt like I was hiking. There was lots of variety as well. We went hiked through narrow paths which swept under masses of trees, climbed rocks, walked through areas that were completely burned from a fire, and strolled through fields of high grass.

IMAG0733

Although the road that lead up to the summit had some good views of the surrounding area, I think the trail had a lot more views that were unique and can’t be seen when driving up or down the mountain. By hiking up, you also don’t have to pay attention to the bicyclists going up and down the mountain and can instead focus on the what’s around you.

IMAG0750

The hike really started to increase in difficulty at around this point into it. We were all pretty dehydrated to the point where we were no longer sweating. I wasn’t sure when the next water point would be so I made sure I conserved my water for the moment I really needed it. In my opinion, it was the lack of food and nutrients that ended up making the hike pretty rough near the end. Once we were 5 minutes from the summit at a small camp, we actually ran into a group of people having a picnic. We seriously debated over seeing if we could buy their watermelon! We however pushed on for the last 5 minutes and we finally reached the summit!

IMAG0788

After reaching the top, we seriously debated whether we could all hike back down without someone passing out so we decided to call an Uber to come and pick us up and drive us to the bottom where our car awaited. It was well worth the fee since we were able to see what the experience was like by car. It wasn’t as pleasant since we were all pretty car sick from all the swerving and weaving to narrowly miss cars. I’m sure being dehydrated played a part but it wasn’t fun leaving the control up to a driver who constantly crossed the middle line separating the traffic going up and down!

Here’s some other interesting pictures from the hike:

Back to planning once again. Along with some other hikes and visits to national parks, I already have planned to visit Laguna Seca Mazada Raceway to watch the FIM Superbike World Championship races during mid July. It should be an exciting time watching a live motorcycle race for the first time!

Mission Peak

This weekend was another successful adventure..

Instead of exploring a city or heading to the beach for a day, I decided to do some exploring by hiking. Last weekend I visited the Santa Cruz beach again for a work held event and ended up meeting a new friend that also goes to Ohio State. It’s true when they say you can find a Buckeye anywhere. We however started talking and I found out he actually grew up in the California Bay Area. After talking about Ohio State a bit, I asked for his opinion on places I should visit while I’m in California. He stated there was a pretty good hike to the top of Mission Peak that a lot of people take. After finding out he had actually never done the hike before, I decided to set up a group to hike up the trail the following weekend to see what Mission Peak was all about.

We ended up leaving at approximately 6pm on Saturday in hopes that we could reach the peak during sunset. After arriving at around 6:30, we proceeded to start the hike up. From the bottom, the peak is approximately 4 miles away with a 2100 foot elevation change. At the beginning, there wasn’t much to see other than a few cows wandering on the path. We however continued our way up in hopes of reaching a good scenic view point. After hiking up about 1/4th of the way, I turned around and was able to slightly see out above the San Jose area. I told the others to turn around to take a look and we ended up stopping to take our first pictures.

IMAG0588

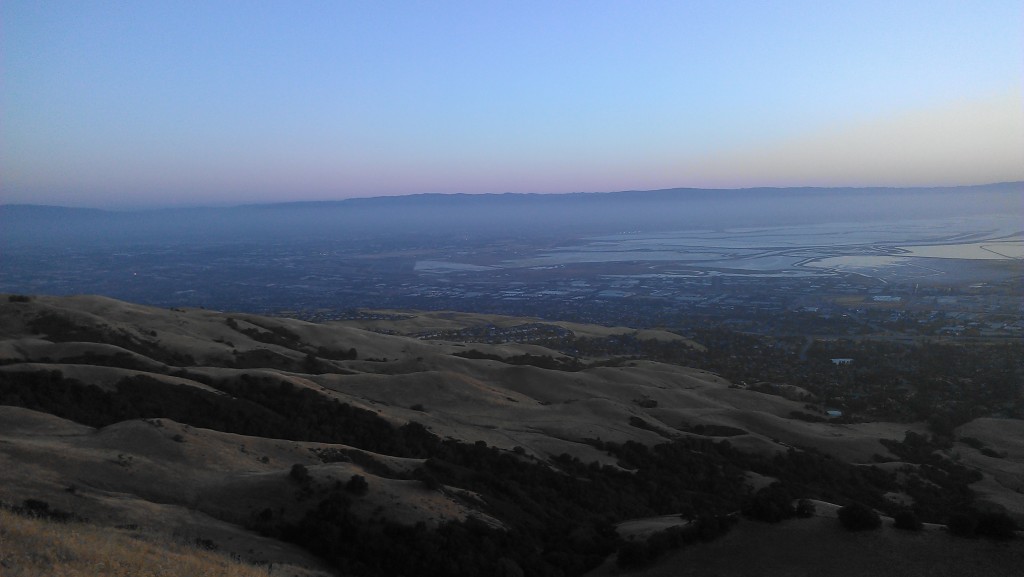
We continued up for another 20 minutes until we arrived at a small rest point that looks out over the path we just travelled. It was at this point you could really start seeing a large portion of the Bay Area.

IMAG0600

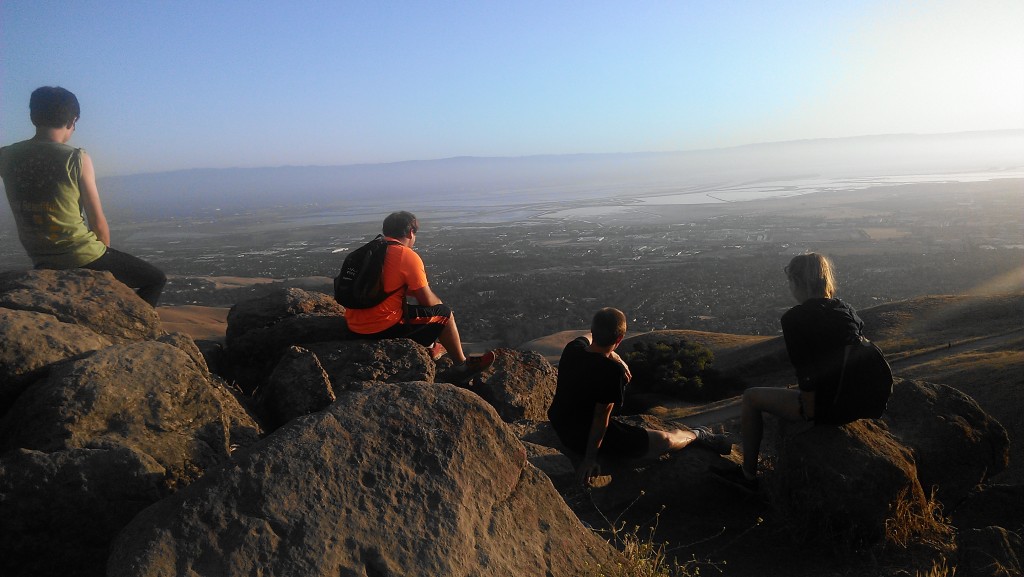
About halfway up, we reached a group of rocks that we found made a nice viewpoint. The team decided to take a seat on the rocks and enjoy the view. This turned out to be one of my favorite pictures from the day.

IMAG0616

The trail continued to snake up the mountain almost endlessly. For awhile, I wasn’t sure we would be able to reach the peak before sunset. I knew I would continue regardless though to reach the peak even if it was pitch dark. We however picked up the pace and reached the end of the well defined trail.

IMAG0631

We were finally not far from the peak. We could actually just barely see the people gathered at the top. We continued on our way for another 10 minutes until we finally reached the top. I must say the view from the top is absolutely stunning during sunset. My phone was unable to capture the true scale and view we had. Here’s some of the pictures I did take at the top though. At the view top of the Mission Peak is a totem pole that people get a picture with to show they made it to the top.

IMAG0639

IMAG0642

IMAG0645

IMAG0678

IMAG0679

After waiting until the sun fell behind hills we finally decided to should start our hike down past the more technical part of the trail before it started getting really dark. It ended up taking us a little over two hours to walk up and only a single hour to walk down. All in all, it was completely worth it and I would recommend the trail to anyone that is in the Bay Area. It is definitely one of the better hikes I’ve been on!

I’ve already started exploring what other hikes are around the Bay Area and found another mountain by the name of Mount Diablo. It supposedly has the second largest viewshed in the world! I will be taking pictures and documenting my experience up as usual. Until then, back to work!

A Day at the Santa Cruz Beach

With today being Memorial Day, I had an entire day off of work. The roommates and I decided to make the best of our time and head to Santa Cruz to explore the nearby beach. Needless to say, the weekend has been a blast after it first started with a trip to San Francisco. Here’s my day of exploration (and relaxing) at the beach.

Traffic is notorious into Santa Cruz so we decided to leave early in the day to avoid the traffic and the crowd. It turned out to be worth getting up early since we were able to find a parking spot fairly easily which didn’t seem so easy by the time we left. The beach area is large and has more to see and do than we could manage in one day. There was an exploration center, an amusement park, surfing rental, kayak rentals, enough shops to make most people happy, plenty of food, and of course a beach with everything that has to offer.

After initially arriving at the beach and relaxing a bit to admire the environment, I decided it was time to knock an item off my bucket list: swim in the Pacific Ocean. And when I mean swim, I don’t mean putting my feet into the ocean; I mean completely submerged and swimming at least a short distance. I convince the others to join in as well even though they know that the water will be extremely cold without a wetsuit. As we approach the water, we notice the part of the beach and shoreline we are at is completely filled with seaweed. We decide to therefore grab our gear and move down to another part of the shore that we see is a bit more water than mostly seaweed. On the water to another part of the shore, we run across some pretty awesome sand art.

IMAG0525

I was pretty impressed and grabbed a picture of the great work of some unknown individual right before a kid accidentally ran over a portion of the art. Here’s the damage moments after I took the picture above.

IMAG0527

I felt bad for the others beside us that were unable to get a picture of the art before it was somewhat destroyed. Even though I don’t use my art abilities often, I thought this was the perfect moment to put them to use so that a few more people could get pictures with the art before it was damaged or destroyed again. I went down to the now broken M and E and started to build the letters again. I first completely fill the broken section with sand and patted it down before I start to carve out the M and E again. After 10 minutes or so, I was able to get the general appearance back to how it was originally. Not wanting to keep people waiting to get a picture, I did some quick last minute smoothing and got out of the way. I think I did a decent job since people said some kind words to me afterwards.

Here’s the result after I fixed the M and E letters.

IMAG0531

I continued on and met with my roommates to continue our original plan of getting into the Pacific Ocean. Originally, I was the only one who planned on actually swimming but I convinced the others that they had to at least fully submerge themselves for a moment. After some hesitation they agreed and we headed to the water line. The ocean was so cold that the air temperature by the water line was significantly lower than the temperature 20 feet away. We slowly started walking into the water and we were all physically shocked as the water hit us. Slowly walking into the water probably made the experience much worse. I think most people would probably turn back and head to dry land immediately after feeling how cold the water is. We finally made it far out enough to where the water was at our chests and we counted down to 0 before we all went underwater for a few moments. It was freezing but as soon as we came back up to the surface, it felt pretty good. After a few more minutes of lingering in the water, we headed back to the shore to warm up and dry off.

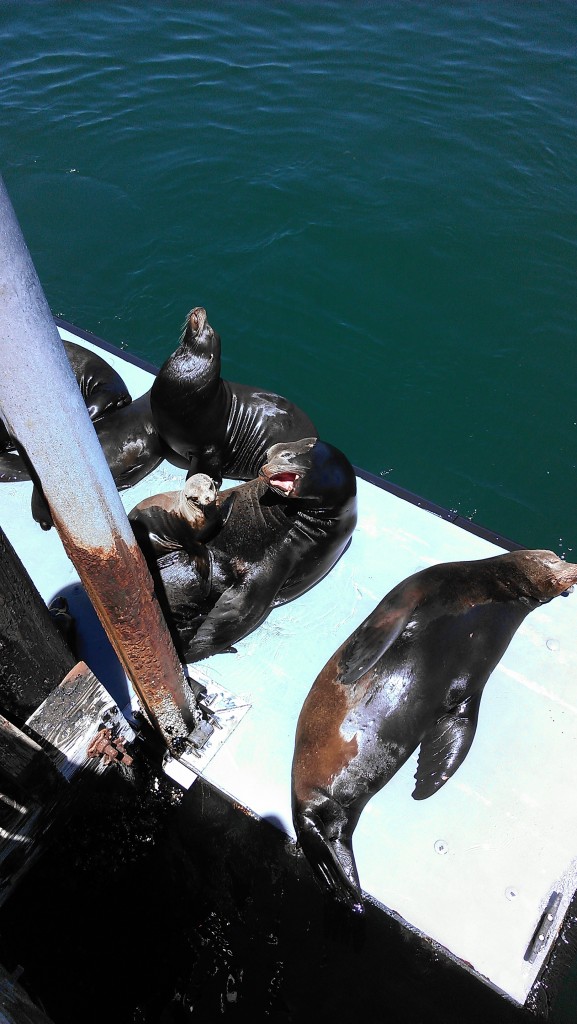
Next, we decided to walk out on the pier nearby since we heard the barking of sea lions coming from that direction and were interested in seeing where they were located. After walking about half way down the pier, we saw a flight of stairs that led down to a platform that a lot of sea lions were laying on. We found them and it was enjoyable watching them bark at each other and swim around in the water. There was even a baby sea lion that used all the other sea lions as walking path to transverse the platform.

IMAG0564

After viewing the sea lions for a bit, we decided to continue down the pier since one of the group members was determined to find a restaurant that served fish tacos. After we finally found a suitable restaurant, I continued to the very end of the pier to see the surrounding area. Here’s two panoramas I took on each side of the pier.

IMAG0569

IMAG0579

We decided to head back to the area we set up on beach to relax and have a true contest. It would be a race to run and swim out to a certain point and then back. The other guys were less enthused with this idea than I was but I was once again able to convince them (or most of them). It was us three and just as we had determined the race, one roommate decided to immediately start the race gaining a hard start on us. I was quickly on his heels though and we ran full speed into the freezing Pacific. However, running in water is hard and we both ending up tripping and stumbling multiple times before we resorted to swimming. The end result: I lost. However I learned that running full speed into freezing water is easier than easing into it slowly. So next time you are faced with a situation where you have to swim in cold water, just jump in completely and get the shock over with quicker.

That pretty much sums up my day off from work. I did get a chance right before I left the beach to meet the artist who made the original sand art before I fixed it. It seemed like this art was something he did often since he stated he was planning on making a new piece of sand art that said “Santa Cruz Beach”. I was unable to see the end result but I’m sure it turned out great.

Here’s one last picture of the shoreline:
IMAG0542

The Trip to San Francisco

Although San Jose is a fantastic area that I have just barely begun to explore, I’ve been interested in exploring other nearby cities and locations for awhile now. One place I knew I had to explore no matter what was San Francisco. And therefore I decided to take the plunge and knock out that bucket item upfront this weekend.

Coming back from work Friday after my first week at Cisco. I instantly decided it was time to really start exploring. I started looking into my transportation options and determined the trip was fairly doable using public transportation from San Jose. It would require a 10 minute walk to a light-rail train, a 40 minute to the “Caltrain”, and lastly a 1:20 hour train ride on the Caltrain before I arrived in San Francisco. I invited my roommates and one of them decided to accompany me on my trip. We sat down and worked out the remaining details and went to sleep to rest up for the great adventure the following day.

travel_map

Leaving our apartment at 10am, we expected to arrive around 12:45pm. After walking to to the first train station, we realize our next transportation arrival time was off. We could do nothing but wait and hope it wouldn’t cause us to miss the Caltrain and change our destination to something even later. Although the light-rail ended up arriving 10 minutes late, the amount of stops were minimized and we were able to arrive at the next station in for the Caltrain. And that’s when we saw the train Caltrain pull up.

IMAG0347

We didn’t expect an actual passenger train with two floors. It was quite the experience just in itself. To sweeten the deal, the ticket were fairly inexpensive costing me only $14 for a round trip to SF and back. However, the time of a trip increases drastically since it’s a train and therefore has to stop more times than I can count between San Jose and San Francisco alone. We however made it to SF at approximately 12:45pm as expected.

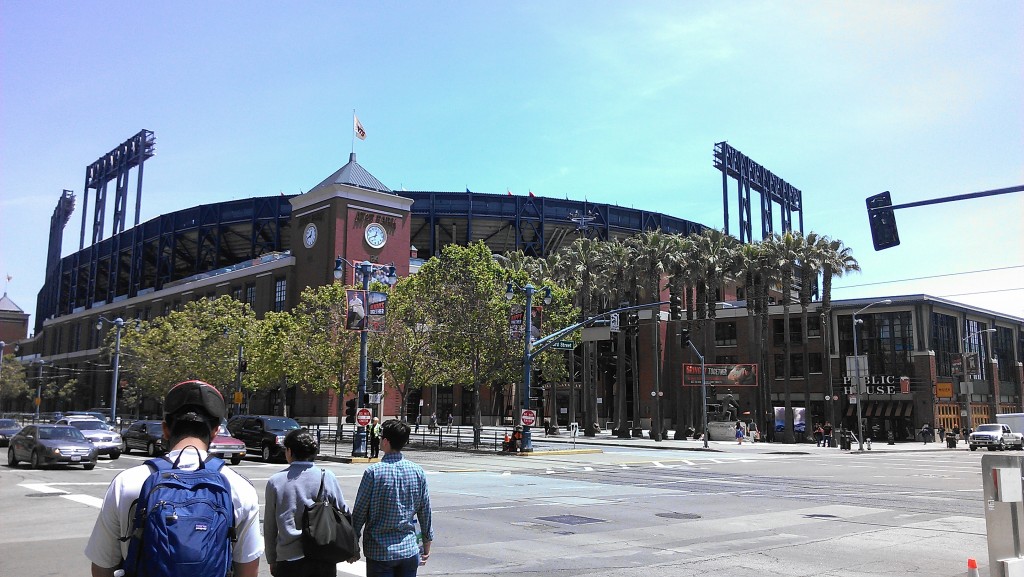
We first headed to AT&T Park. However, due to us not being able to get in, we quickly took a picture and then moved on.
IMAG0368

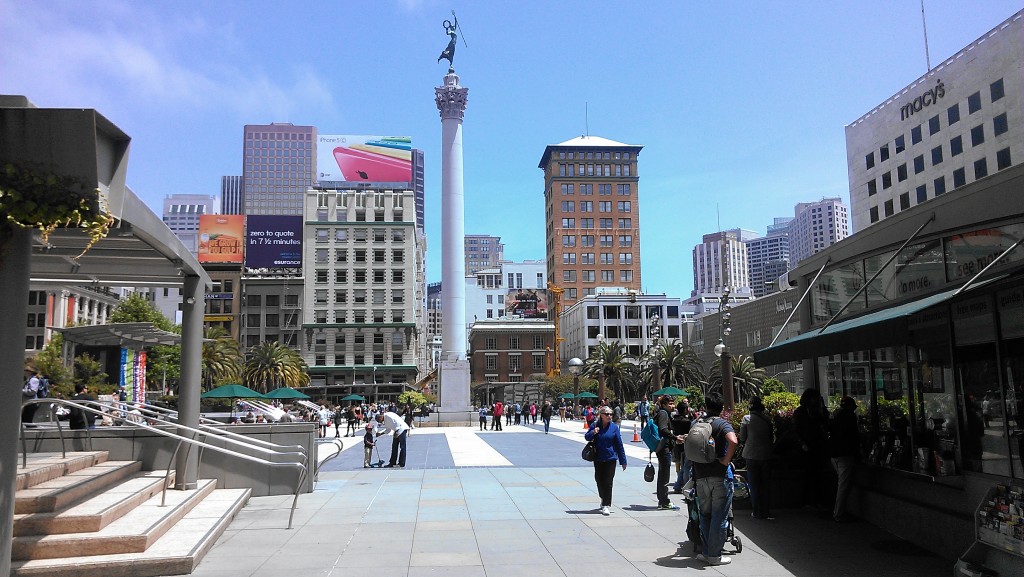
Next on our list was Union Square. As we walking to the square, we came upon a protest involving GMOs. It was neat seeing police quickly shut down intersections and direct traffic as the group made it’s march down 3rd St. We continued on our way and saw some trolleys for the first time until we eventually were able to find Union Square Park. It was fairly laid back area with many people sitting around and chatting. In the middle of Union Square was the Dewey Memorial stretching up into the sky. Directly where we came from was a large Macy’s. We then saw the some more trolleys and the hills of San Francisco for the first time. I then realized San Francisco really wasn’t that flat at all.

IMAG0391IMAG0397IMAG0400

Our next destination was the Chinatown district. We start climbing the hills and when we finally reach the top, we turn around and are amazed to see the bottom of where we had just started not long before.

IMAG0414

After taking a few pictures, we continue on to Chinatown. As we start slowly reaching the markets, we stubble upon a Chinese Museum. Admission was free so we decided to take a few minutes to look around. There was some neat pieces and enough history to have you there for an hour. After looking around a bit, we continue our walk through Chinatown. We decided to get lunch and stopped in at Chinese restaurant to grab lunch.

IMAG0430

At this point, we decided to should put our main priority (seeing the Golden Gate bridge) ahead of everything else we would like to do in case we don’t have enough time to do it all. Checking our maps, the Golden Gate bridge was a fairly far walking distance away so we decided to take a bus to the gate and then back after we were finished. After almost missing the bus due to us having troubles with finding the correct bus stop, we were on our way to the Golden Gate. Once we arrive and start piling out, I’m instantly amazed by the scale of the bridge. Sometimes seeing something in person is very different from seeing it in a picture or video and that held true in this case.

IMAG0442

This however was not good enough for me. I knew I had to walk across the bridge. And so we started the 1.7 mile walk across the bridge. The wind was intense and made it feel like it was only 50 degrees out. However, the experience became unbelievable when starring at the top of the bridge from the deck and also looking out into the bay.

IMAG0493

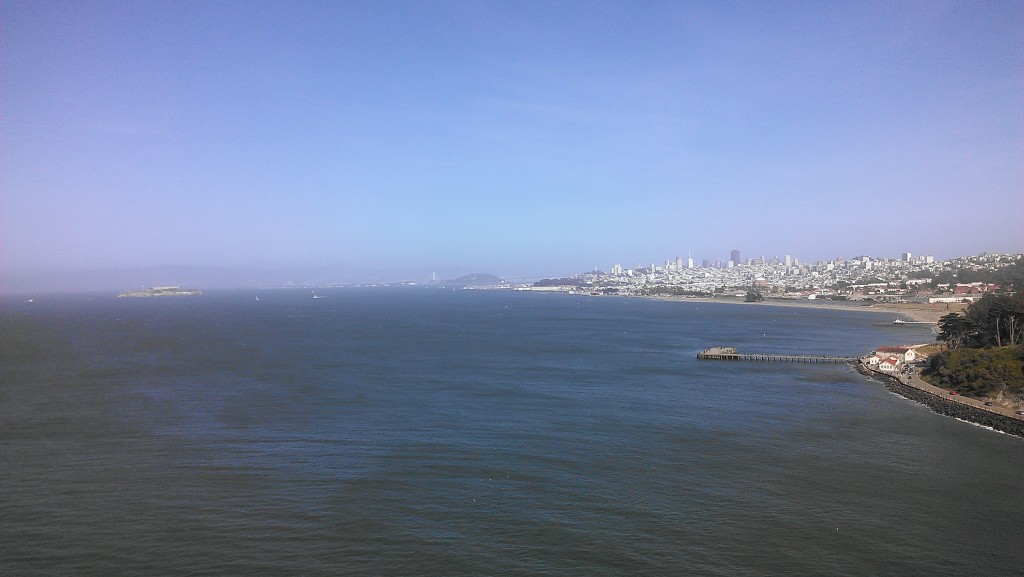
Everything could be seen from the bridge: Alcatraz, Angel Island, the route 80 bridge, and even San Francisco itself. The view of San Francisco from the bridge was pretty astonishing in person.

IMAG0456

We continued walking across the bridge and soaking in the experience. I realized I’m even more glad I walked across the bridge because there is no way to fully appreciate the bridge when travelling across it in less than 5 minutes at 45 MPH. Therefore, I am recommending now to walk across the bridge if you are ever able to visit the bridge in person.
After walking the 1.7 bridge, we finally arrived at the other side. I looked for a way up to one of the cliffs that overlooks the bridge but was unable to find a short path on foot. Therefore, we went to another lookout and admired the view from the other side of the bridge.

IMAG0491

It was now time to walk across the bridge for the second time to return back from where we came. Yes, I walked the bridge twice instead of catching a bus on the other side. The view back was just as stunning.

After finally reaching the San Francisco side of the bridge, we caught a bus and made our way back to the Caltrain to end our day. After a 7 hour trip, we finally were on our way back. Although we were unable to fit in time to see other attractions such as Fisherman’s Wharf and Alcatraz up close, I wouldn’t be surprised if I make another trip up to SF before I return to Ohio at the end of the summer.

All I can say is that I’m glad I took the chance to visit San Francisco early so I’m even more eager to explore all that Northern California has to offer. Here’s a gallery of the rest of the photos I took during my visit to San Francisco.

Week 1

When I arrived this last weekend, my first task was to shop for some food. I quickly realize that the closest grocery store was 30 minutes away though. Without any vehicle or bike, I considered my options. Coming from Ohio State, a 30 minute walk was not a problem. However, I considered how I would get back with more groceries than I could carry. My roommates at this point suggested an app called . I was curious so I figured I would give it a shot. So after walking to the grocery store and checking out, I opened up the app and requested a driver. The app let’s me know my driver and how he’s 13 minutes away. Neat! So as I wait, the time until pickup isn’t decreasing. I debated cancelling once I started see the time until arrival start decreasing but I decided to stick it out. After 30 minutes, the driver finally arrived. He was nice and explained the situation about why he was late and I said it was no problem. The rest of the ride was pretty uneventful but the driver was kind the entire time. Overall I enjoyed the experience even though it took longer than expected to get back.

Passed the headquarters of many big companies on my walk to the grocery store
IMAG0336

In other updates, work has officially started and my time to write has drastically decreased. Although the week has been mostly orientation and becoming introduced to my workspace and co-workers, it’s been fairly exciting up to this point. I’ve learned the work culture out in San Jose is very different compared to Ohio. Instead of the work day starting at 7 or 8 am, the day here starts around 10 am. The work time though is extremely flexible. I’m able to show up when I want and pretty much leave when I want as long as I get my work done and am able to attend meetings over the web when needed. Dress code is as casual as you can get as well. I was specifically told that I can show up in shorts and a t-shirt and that would be appropriate work dress. The environment doesn’t quite feel like work!

So my observation of the week is that nocal is extremely laid back. This will take some getting used to.

The Trip Begins

Today is the day I begin my summer long experience in San Jose, California. As I narrowly got past TSA security after accidentally bringing an prohibited tool that I forgot was in my backpack, I headed to my terminal to get on my first flight for the day. Note to travellers: Don’t forget to double check bags that you think are empty before packing stuff into them. Security doesn’t like it when you tell them you don’t have a sharp object and then they find one! Honest mistake on my part.

Flying out of Dayton, OH means you are pretty much bound to get placed on a small plane. I never expect a large plane when flying domestically but I keep looking forward to the day I can experience flying in a Boeing 747 or Airbus A380. Here’s some photos from my flight so far.

30,000 ft up!
IMAG0324

Lake Michigan
IMAG0325

I’m now in Saint Paul with a large amount of wait ahead of me. Sadly, my flights were modified after purchasing my tickets which introduced a 5 hour gap between one connection and added an addition flight that I have only 40 minutes to catch. I’m however not stressing over the flights since I know I’ll be in California within 24 hours regardless of a missed connection. This airport is also pretty nice which makes the wait more bearable. It’s pretty large, has plenty of food options, and even has a small/medium sized mall! If you have to wait a while to catch another flight, this isn’t a bad airport to be stuck at.

IMAG0328

All I can say now is the trip has started off well. I’m looking forward to continuing the adventure, learning new and exciting things from my internship, and exploring all that there is to offer out in California!

Script Ohio Project

IMAG0047_resize

Overview
Last summer (2013) I tried occupying my time by working on a personal project. Up to that point in time, I had done a lot of programming in various languages but had never worked with electronics and hardware which make the software possible. For that reason, I started searching for a cool project that would teach me the basics of circuits. After searching the internet for potential ideas, I discovered something called electroluminescent wire (also known as EL wire). EL wire is a fairly unique source of lightning due to it’s ability to flex, bend, and be shaped in just about any way you want just like regular wire. The entire strand of EL wire is mostly a copper wire coated in a phosphor that lights up with AC current flows through it. I decided to make this the basis of my project since I really liked the projects I saw online involving lights such as LEDs.

IMAG0007

So as I’m looking more into EL wire and how it’s currently used, it hit me. Before the summer was my freshman year at Ohio State and I made it a goal with my friend to go to every Ohio State home football game that year. And so I did believe it or not. Although I loved watching the actual game, my favorite part of home games was Script Ohio. A project was born. I decided I would use EL wire to create a Script Ohio sign that is identical to the march formation performed by the Best Damn Band in the Land. However, I knew I had to integrate in some cool features so it wasn’t just an art project.

Before this point, I had seen a couple of projects that focused on sound reactive lighting. As music played in the background, the lights would pulse to the beat. I knew this is where I wanted to go. A sound reactive Script Ohio sign to hang on my wall. The project was set and now it was time to research ways into how I could accomplish my goals. Due to never this being my first electrical project, I was very uncertain on how to begin. Therefore, I started pulling ideas from others using EL wire and sound to make their own projects. I quickly learned that many people were using an Arduino to help process the background sound and turn that into a signal for triggering their lights. So I slowly gathered a list of supplies I thought I would need, and started sketching out how I envisioned the circuit.

The Circuit
IMAG0035_resize
Since I only had software experience at the time, I figured the best chance I had at making the project a success was by using a microcontroller I could program to do the hard portions of the circuit for me. Using this is at the starting point of the circuit, I decided I needed the following components:

  • 1 DC Plug Female
  • 1 5V Power supply
  • 1 Flip Toggle Switch
  • 1 Push button switch
  • 10K Ohm pot
  • SSR 8A
  • Various resistors
  • EL wire inverter
  • ~10 feet of EL wire
  • Analog Sound Sensor

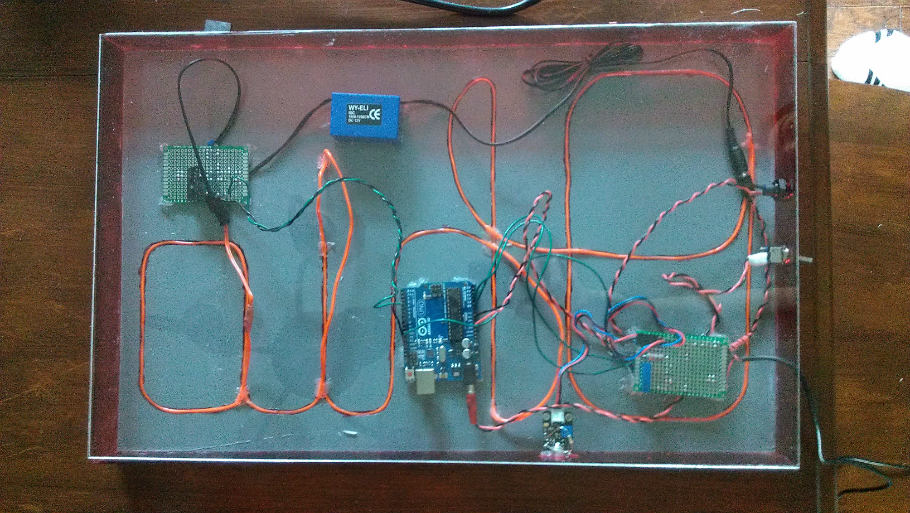
You can see overall circuit layout on the back of the sign. To protect it from anything that might accidentally short circuit or damage the circuit, I decided to enclose the entire back and sides of the sign by using acrylic plastic sheets cut to size. There are four main components to the circuit. The first major component is the Arduino which can be found in the middle of the board. Next, is the prototype board located on the left side of the board. This board was responsible for taking in an input signal by the Arduino and either closing or opening the circuit that the EL wire was on. Since EL wire is ran using AC and the rest of my circuit uses DC power, the circuits had to be isolated. This is where the SSR and the inverter (blue box) came into play. The inverter takes in 5v DC and converts this to 120V AC. I then cut the output wire of the inverter and passed it through the SSR. Now, when the Arduino was told to send a small voltage to the SSR, the SSR gate would close, and the EL wire circuit would also close causing the EL wire to light up.

The green wire is the gate input which triggers the SSR to close

The green wire is the gate input which triggers the SSR to close

But before the EL wire circuitry could work, I had to determine a way of supplying 5V. To complicate things a bit more, I also had to power the Arduino off the same 5V power supply and I also wanted to introduce a few switches in order turn the sign on and off without having to disconnect the power supply manually. Therefore, I needed another prototype board to help mount the last few components and to help split the 5V input off into various lines. In order to split the power supply into multiple parallel lines, I weaved 2 copper wires in a straight line on the circuit board to act as a 5V and ground line. This then allowed me to directly solder the other power inputs directly onto these lines. I however had to be careful not to allow any copper to accidentally fall across the two lines and short the circuit. I had a little bit more room on the board so I decided to also store my potentiometer on this board. This 10K pot is an analog input for the Arduino. Depending on the how the turn knob on the pot is positioned, a voltage will be sent to the Arduino which is then converted to an integer between 0 and 255. 0 being that the pot is completely closed and there is no voltage coming through, and 255 meaning there is 5V coming through the line. This integer is then used in software to determine how to scale the sound coming in from the sound sensor.

Side view

Side view


The other side of the second board which splits the 5V input into various outputs and holds the pot responsible for controlling the sensitivity of the sound sensor

The other side of the second board which splits the 5V input into various outputs and holds the pot responsible for controlling the sensitivity of the sound sensor

Connected to this board was also two switches. The flip switch as seen in the above image was used to turn the entire sign on and off. The other switch was used to switch “modes”. Although I thought a sound reactive board would be neat, I wanted to have the ability for the board to light up in a quiet room. Therefore, I programmed the Arduino to have two modes. One mode was sound mode and the other was the default mode. When the sign first was turned on, the Arduino was programmed to constantly power the EL wire so that it always lit up. Then, if the button switch was hit, the Arduino would switch to “sound mode” which would only turn on the EL wire when it detected a sound above a certain level. These switches were mounted to the side panels of the sign for easily access at all times.

The Sign
Once the circuit was tested and I determined it was truly working, it was time to focus on how I was going to contain all of these into a sign. I also had to consider what I wanted the sign to look like. To start, I wanted to hide all the components and the wire out of sight. Also, since the layout of Script Ohio is not entirely continuous without overlaps, I had to determine a way of hiding portions of the wire. First, I start laying out the wire in the best Script Ohio shape I could achieve.
IMAG0012
Once I was happy with the overall layout, I focused on hiding the parts of the wire that I didn’t want others to see. Since acrylic is clear, I decided I would have to paint over the sections of the front that I didn’t want light coming through. Therefore, I went out and bought some gray spray paint and went over one side a few times until the light no longer was able to pass through. At this point, I decided to carve out the sections of paint that I wanted the light to shine through. This became very trial and error as I cracked and destroyed multiple pieces of acrylic sheets trying to do so. After taking my time, I was finally able to carve out the sections I wanted. In went the wire and silicon was used to temporary glue components to the back as needed. Now I had to focus on the side pieces. I simply drilled out holes for the switches and painted the sides with a transparent red paint. This didn’t turn out looking that sharp but I was quickly running out of funds for the project so I decided to use them anyways. I glued the the side pieces on and the final cover that goes on the actual back of the sign.

It was complete and I was content with how it turned out.
IMAG0040

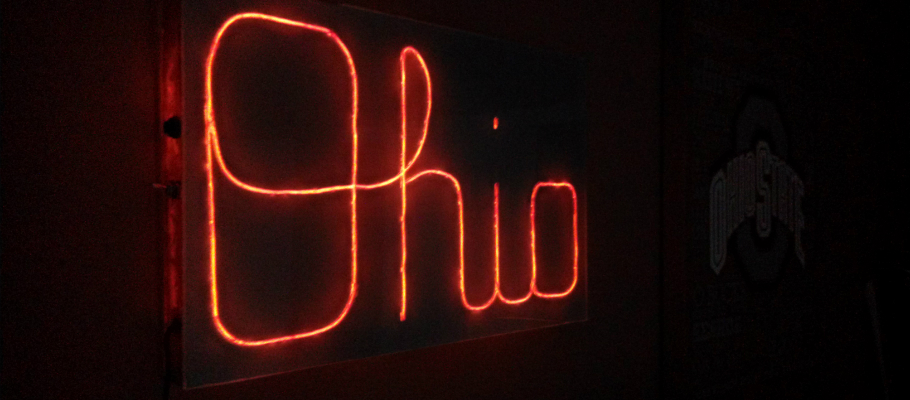
Check out this video to how it performs. I apologize for the poor video quality and sound. The EL wire has a quicker toggle rate than the camera I was using so it’s visually not the same on video.

Disaster
For months after, the sign worked properly and hung in my room. However, one day when I went to show a friend how it worked, it didn’t properly power up when I hit the switch. A bit confused, I figure a connection somewhere had came loose and that I wouldn’t be able to fix it at that moment. I put the sign down and forgot to turn off the power. As I’m having a conversation with my friend, we both realize we smell something burning. We start looking around but can’t determine where the source of the smell is coming from. I then turn around and see smoke coming from the rear of the sign. I grab the sign and see that the inverter is burning so I promptly disconnect the power. It however was too late since the inverter had already fried and in the process burnt a hole through the paint. Therefore, the circuit not only became nonfunctional but the enclosure was damaged as well.

I decided it was a good project nonetheless while it still worked and therefore decided I wasn’t going to try to fix it since I had used the entire budget I had for the project. So for the meantime, there is no longer a Script Ohio Sign. However, I plan to make the Script Ohio Sign v2 that will address all the parts of the final build that I was not satisfied with. Until then, I’m looking forward to doing more projects like this!