Step-By-Step Tutorial:
This tutorial will show you how to photoshop yourself and/or others into a certain setting to create a scene of your choosing.
Step 1: Select your setting. Choose the background photo for the picture! This can be any photo you have taken, or any one you found online. Make sure the photo is big! I would recommend using a photo that is at least 1280 X 720, as we are going to be adding small elements to the picture, so it has to be big. Also make sure to check the quality of the photo so it isn’t grainy as we zoom in.


Step 2: Collect your photos to add into the background. In this tutorial, I used staged photos taken of me to add certain poses into the picture. These photos can be of you, others or anything else you would like to add into the scene. You can select any amount of pictures to add depending on the kind of scene you want to create.
Step 3: Insert your background photo into Photoshop. This can be done by simply dragging and dropping the photo in the work-space, or by selecting File-Open and then selecting the image to insert.


Step 4: Now that the background is inserted, it’s time to add you into the scene! To add another image, simply drag and drop the image on top of the background image. Do not use the File-Open technique, it is much easier to drag and drop the file. Press Enter after inserting the file to place it. Use Command+ or Command- to zoom in and out of the picture.

Step 5: It is now time to cut out the photo so we can put it in the background. First, right click on the image layer and select Rasterize layer. This allows us to freely move and edit the image.

Step 6: It’s time to cut out the picture. Select the Magnetic lasso tool from the left toolbar by right-clicking on the lasso icon. Using this tool, slowly trace the outline of the part of the image you want in the picture. If at any point you mess up or outline wrong, press Enter to finish the outline and type Command-D to clear your selection and start over.

Step 7: Now that the outline we want is selected, press Enter to finish the selection. In order to just select this part of the image, choose Select-Inverse from the menu, and press Delete. This leaves us with only the selected part of the image.


Step 8: It’s common for the cut out image to have some unwanted parts to it. To clear these, we use the Quick-Selection tool, which is found by right clicking the paint brush icon right below the lasso tool we used before. Using this, we can select parts of the image and press Delete to remove them and clean up the outline. Once again, if the wrong part of the image is selected, press Command-D to clear your selection.

Step 9: Once the image has been cleaned up, it needs to be resized and moved around the image. Make sure the layer is selected in the layer menu, then press Command-T to move and resize the object. Simply click and drag the image to move it. To resize the image, select the corners and resize. Hold Shift while resizing to preserve the dimension ratio of the image.
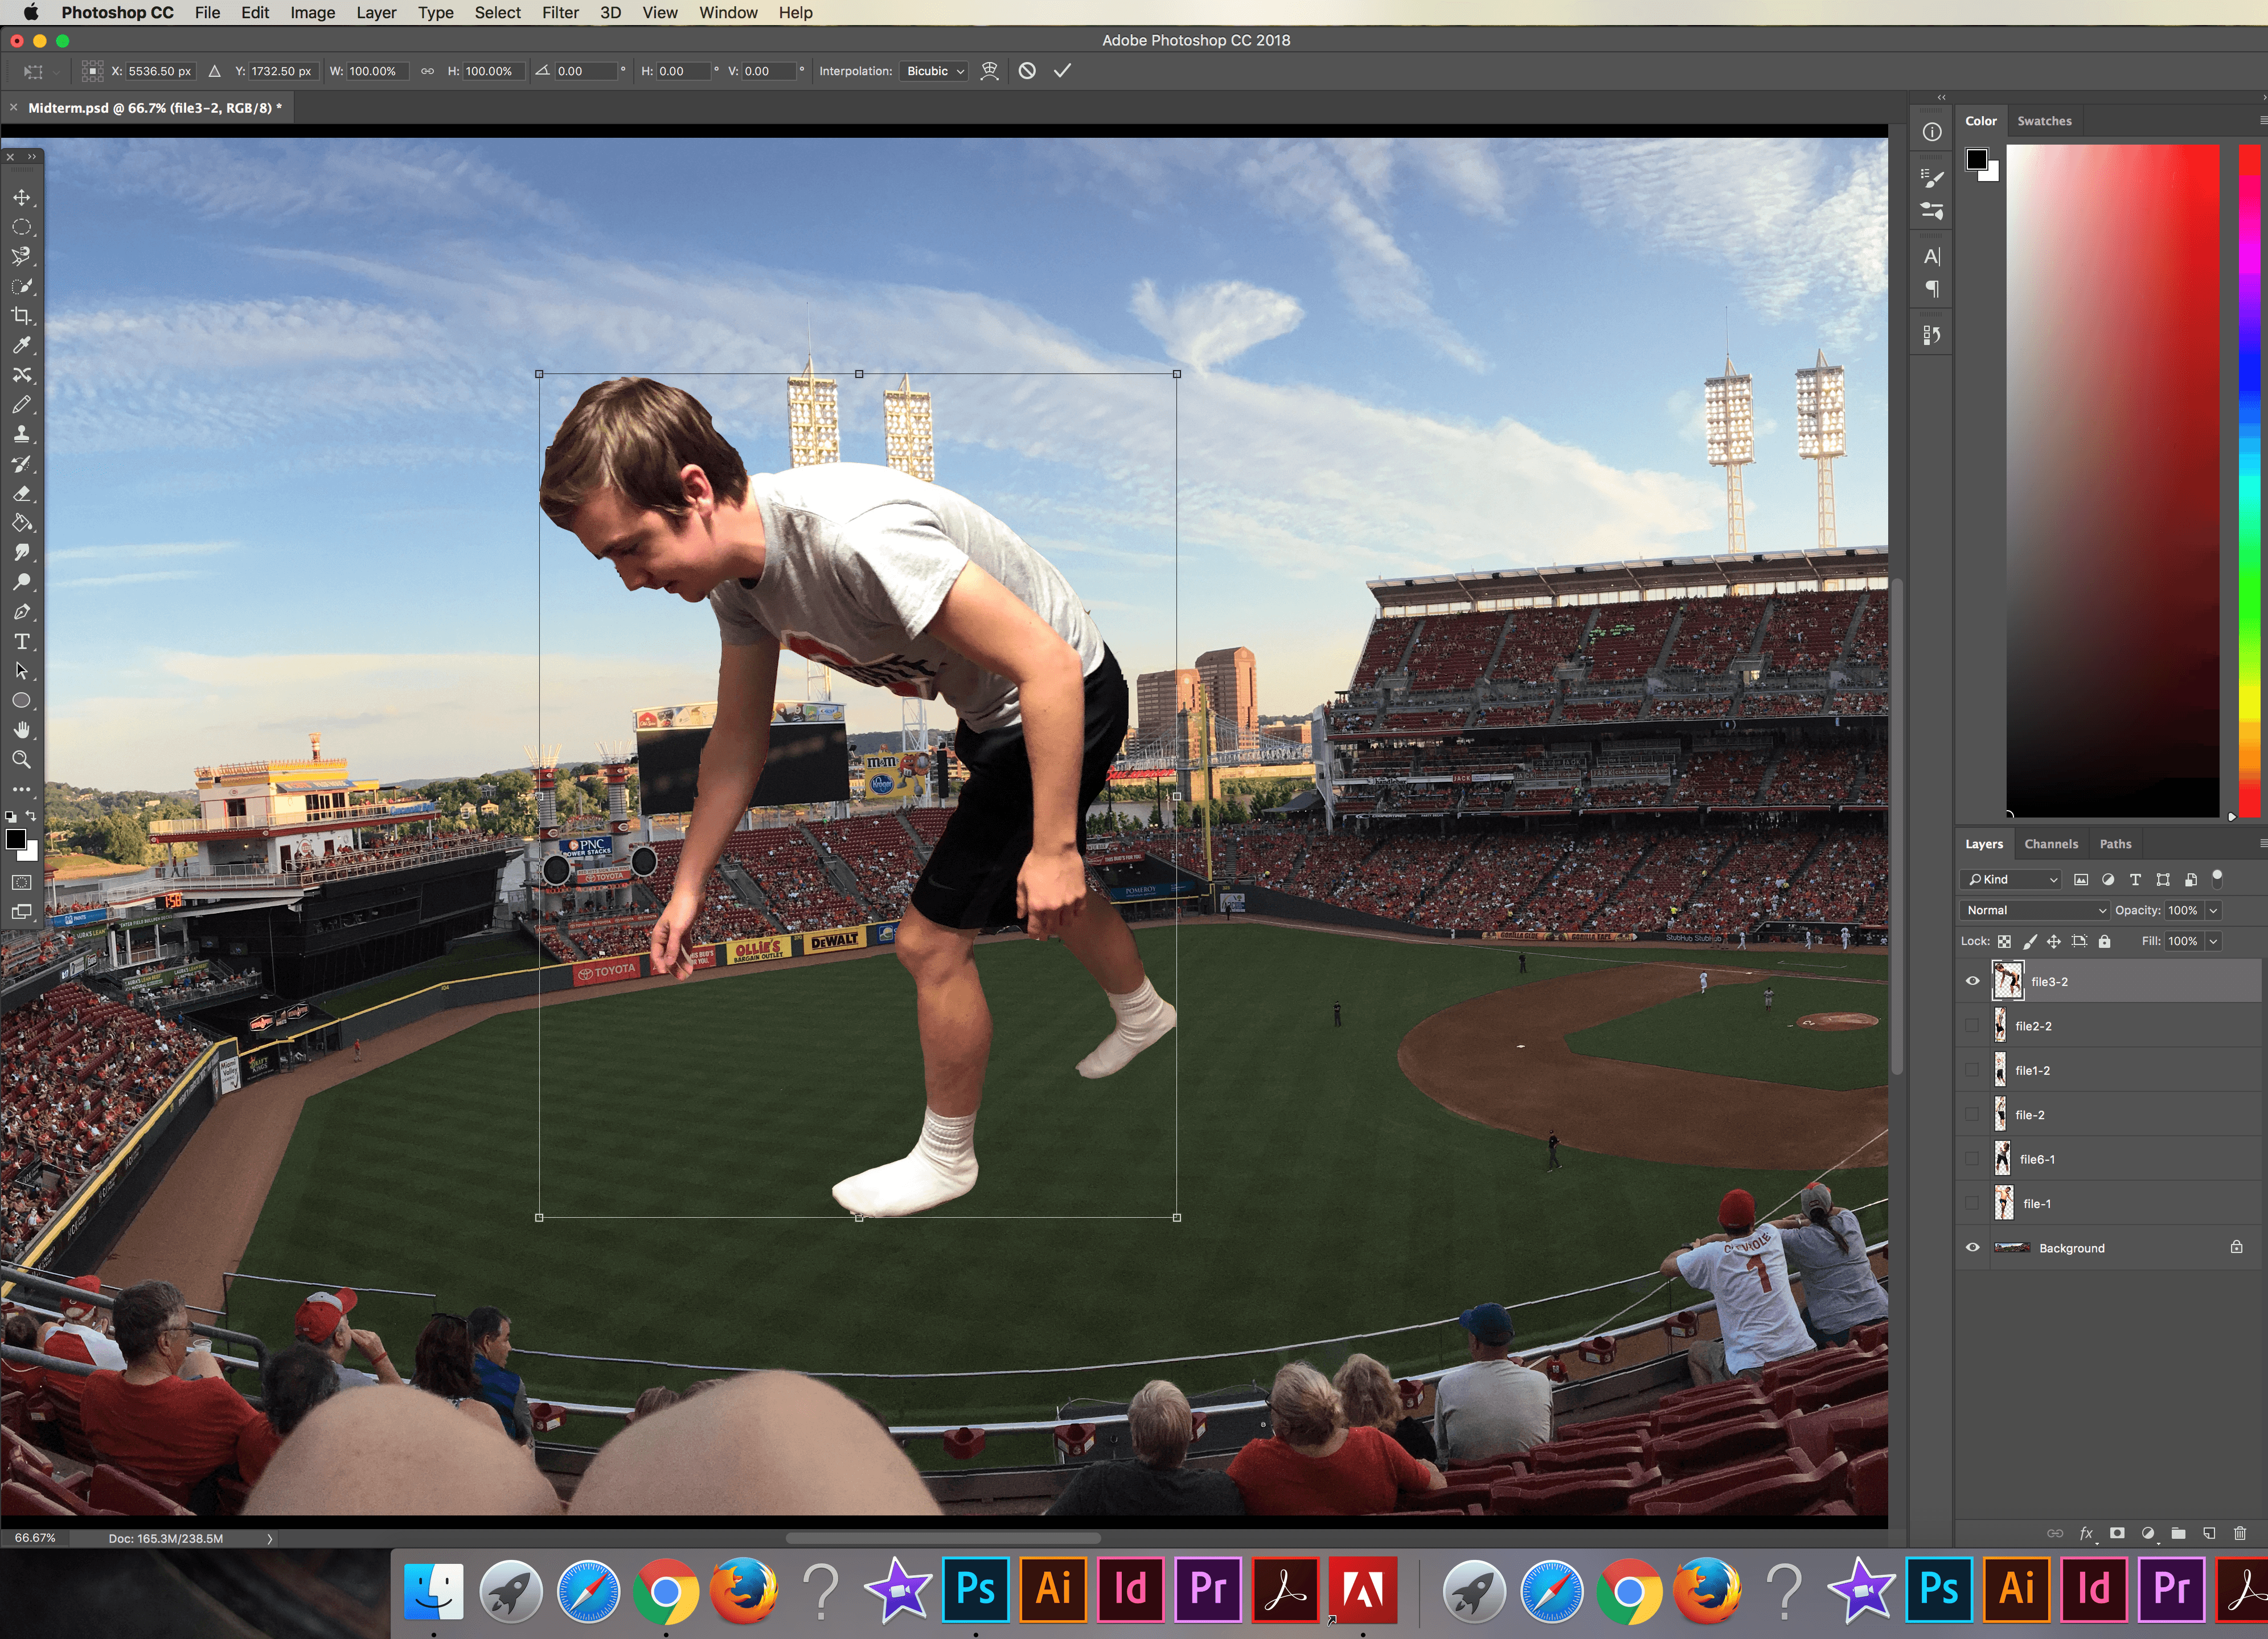
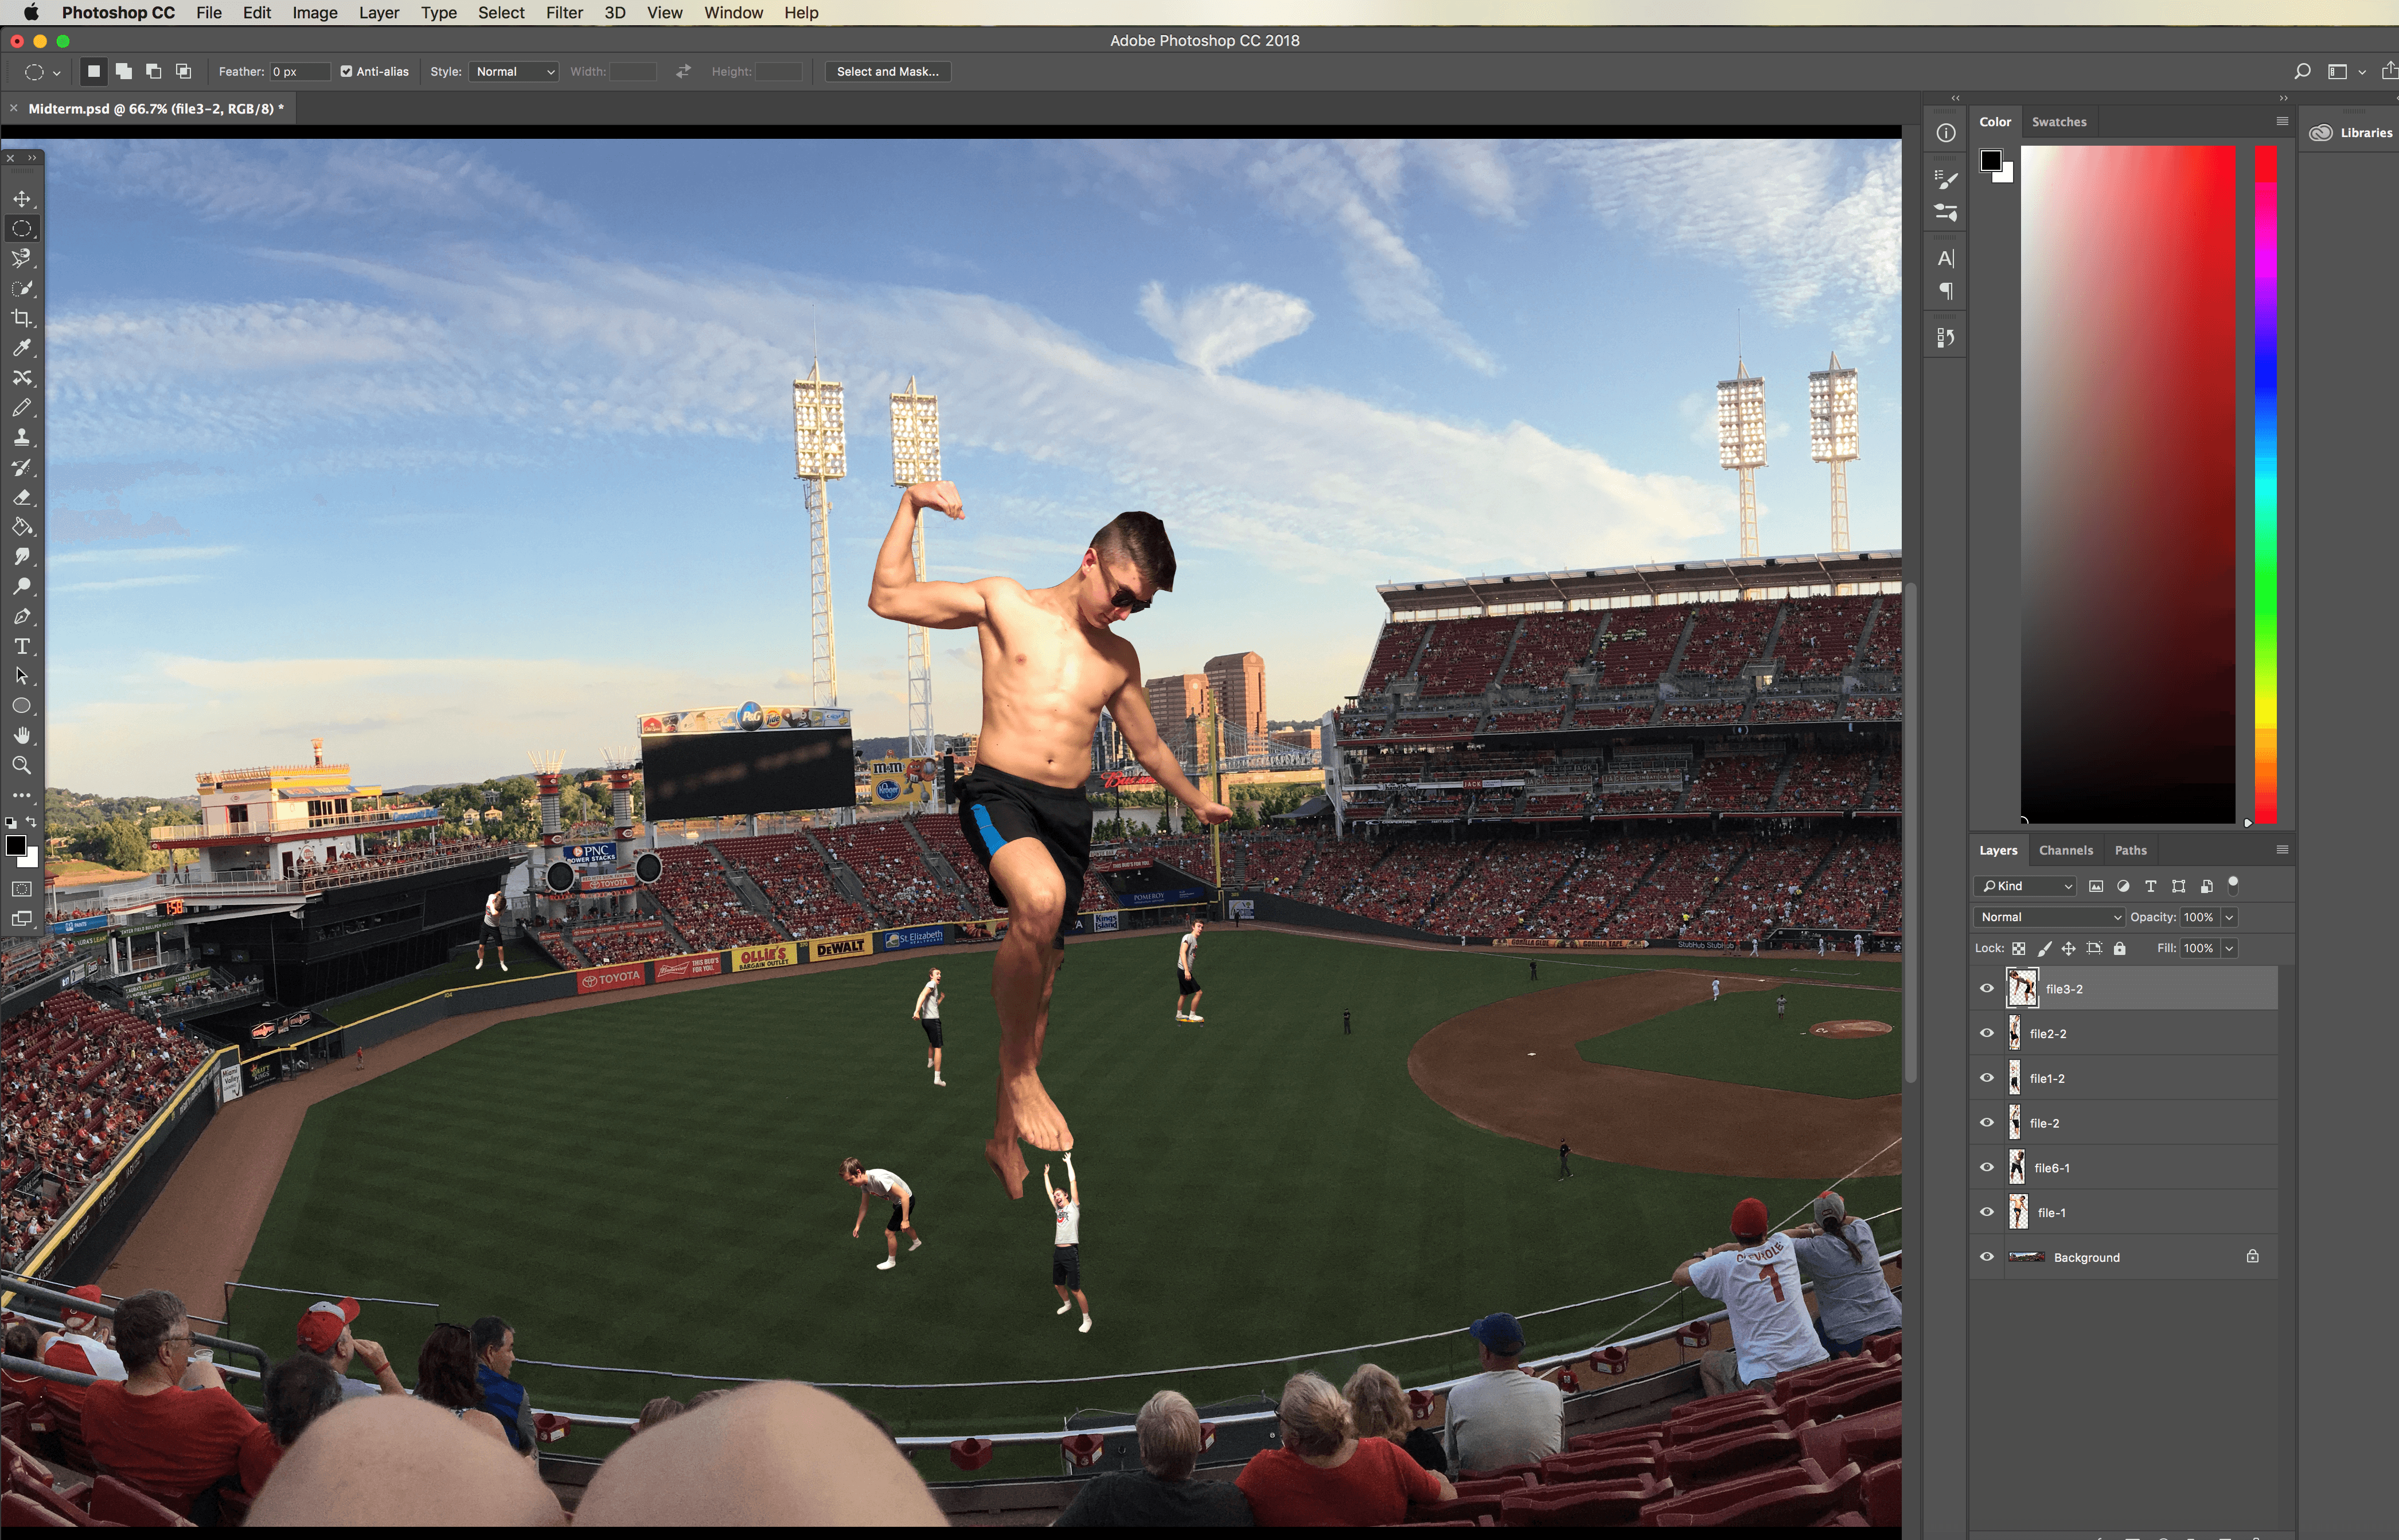
Step 10: Once the image is resized, move it wherever you want in your image! Move the images to create whatever scene you choose, such as the gladiator scene I have created. To add more images into the scene, repeat steps 3-9. Do this with as many images as you want. Another useful tool for resizing images is Edit-Transform-Distort, which allows you to distort the images to add depth effects.

Step 11: You are done! Add as many pictures and move them to where you want them to be!

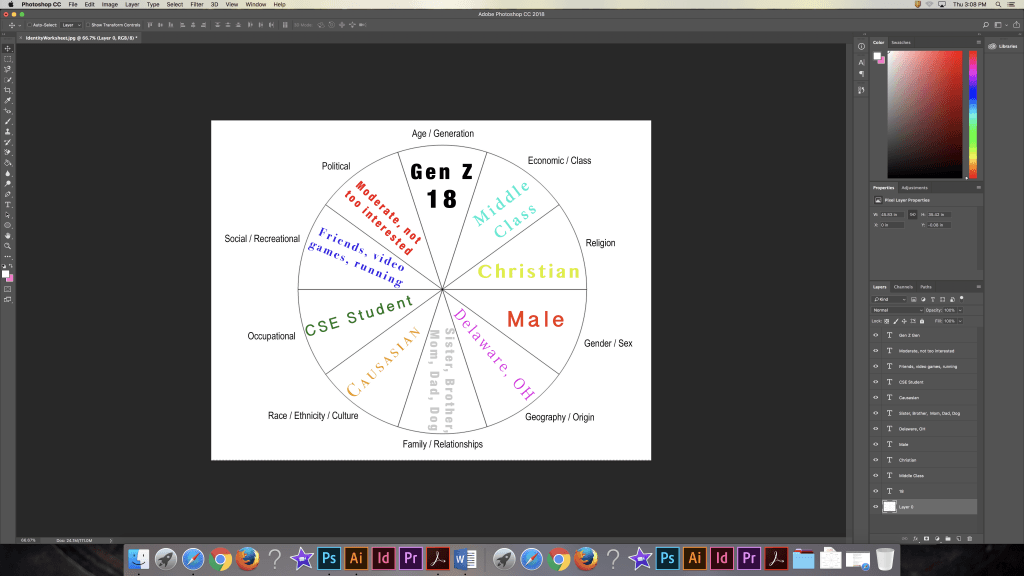
 I chose to face-swap with Jeff Bezos, the CEO of Amazon, because he is very wealthy and I aspire to have the amount of wealth that he has at some point in my life. Jeff Bezos is dedicated, able to think outside of the box, creative and very intelligent in the business world. My image doesn’t exactly communicate these qualities, it is more just a simple face swap.
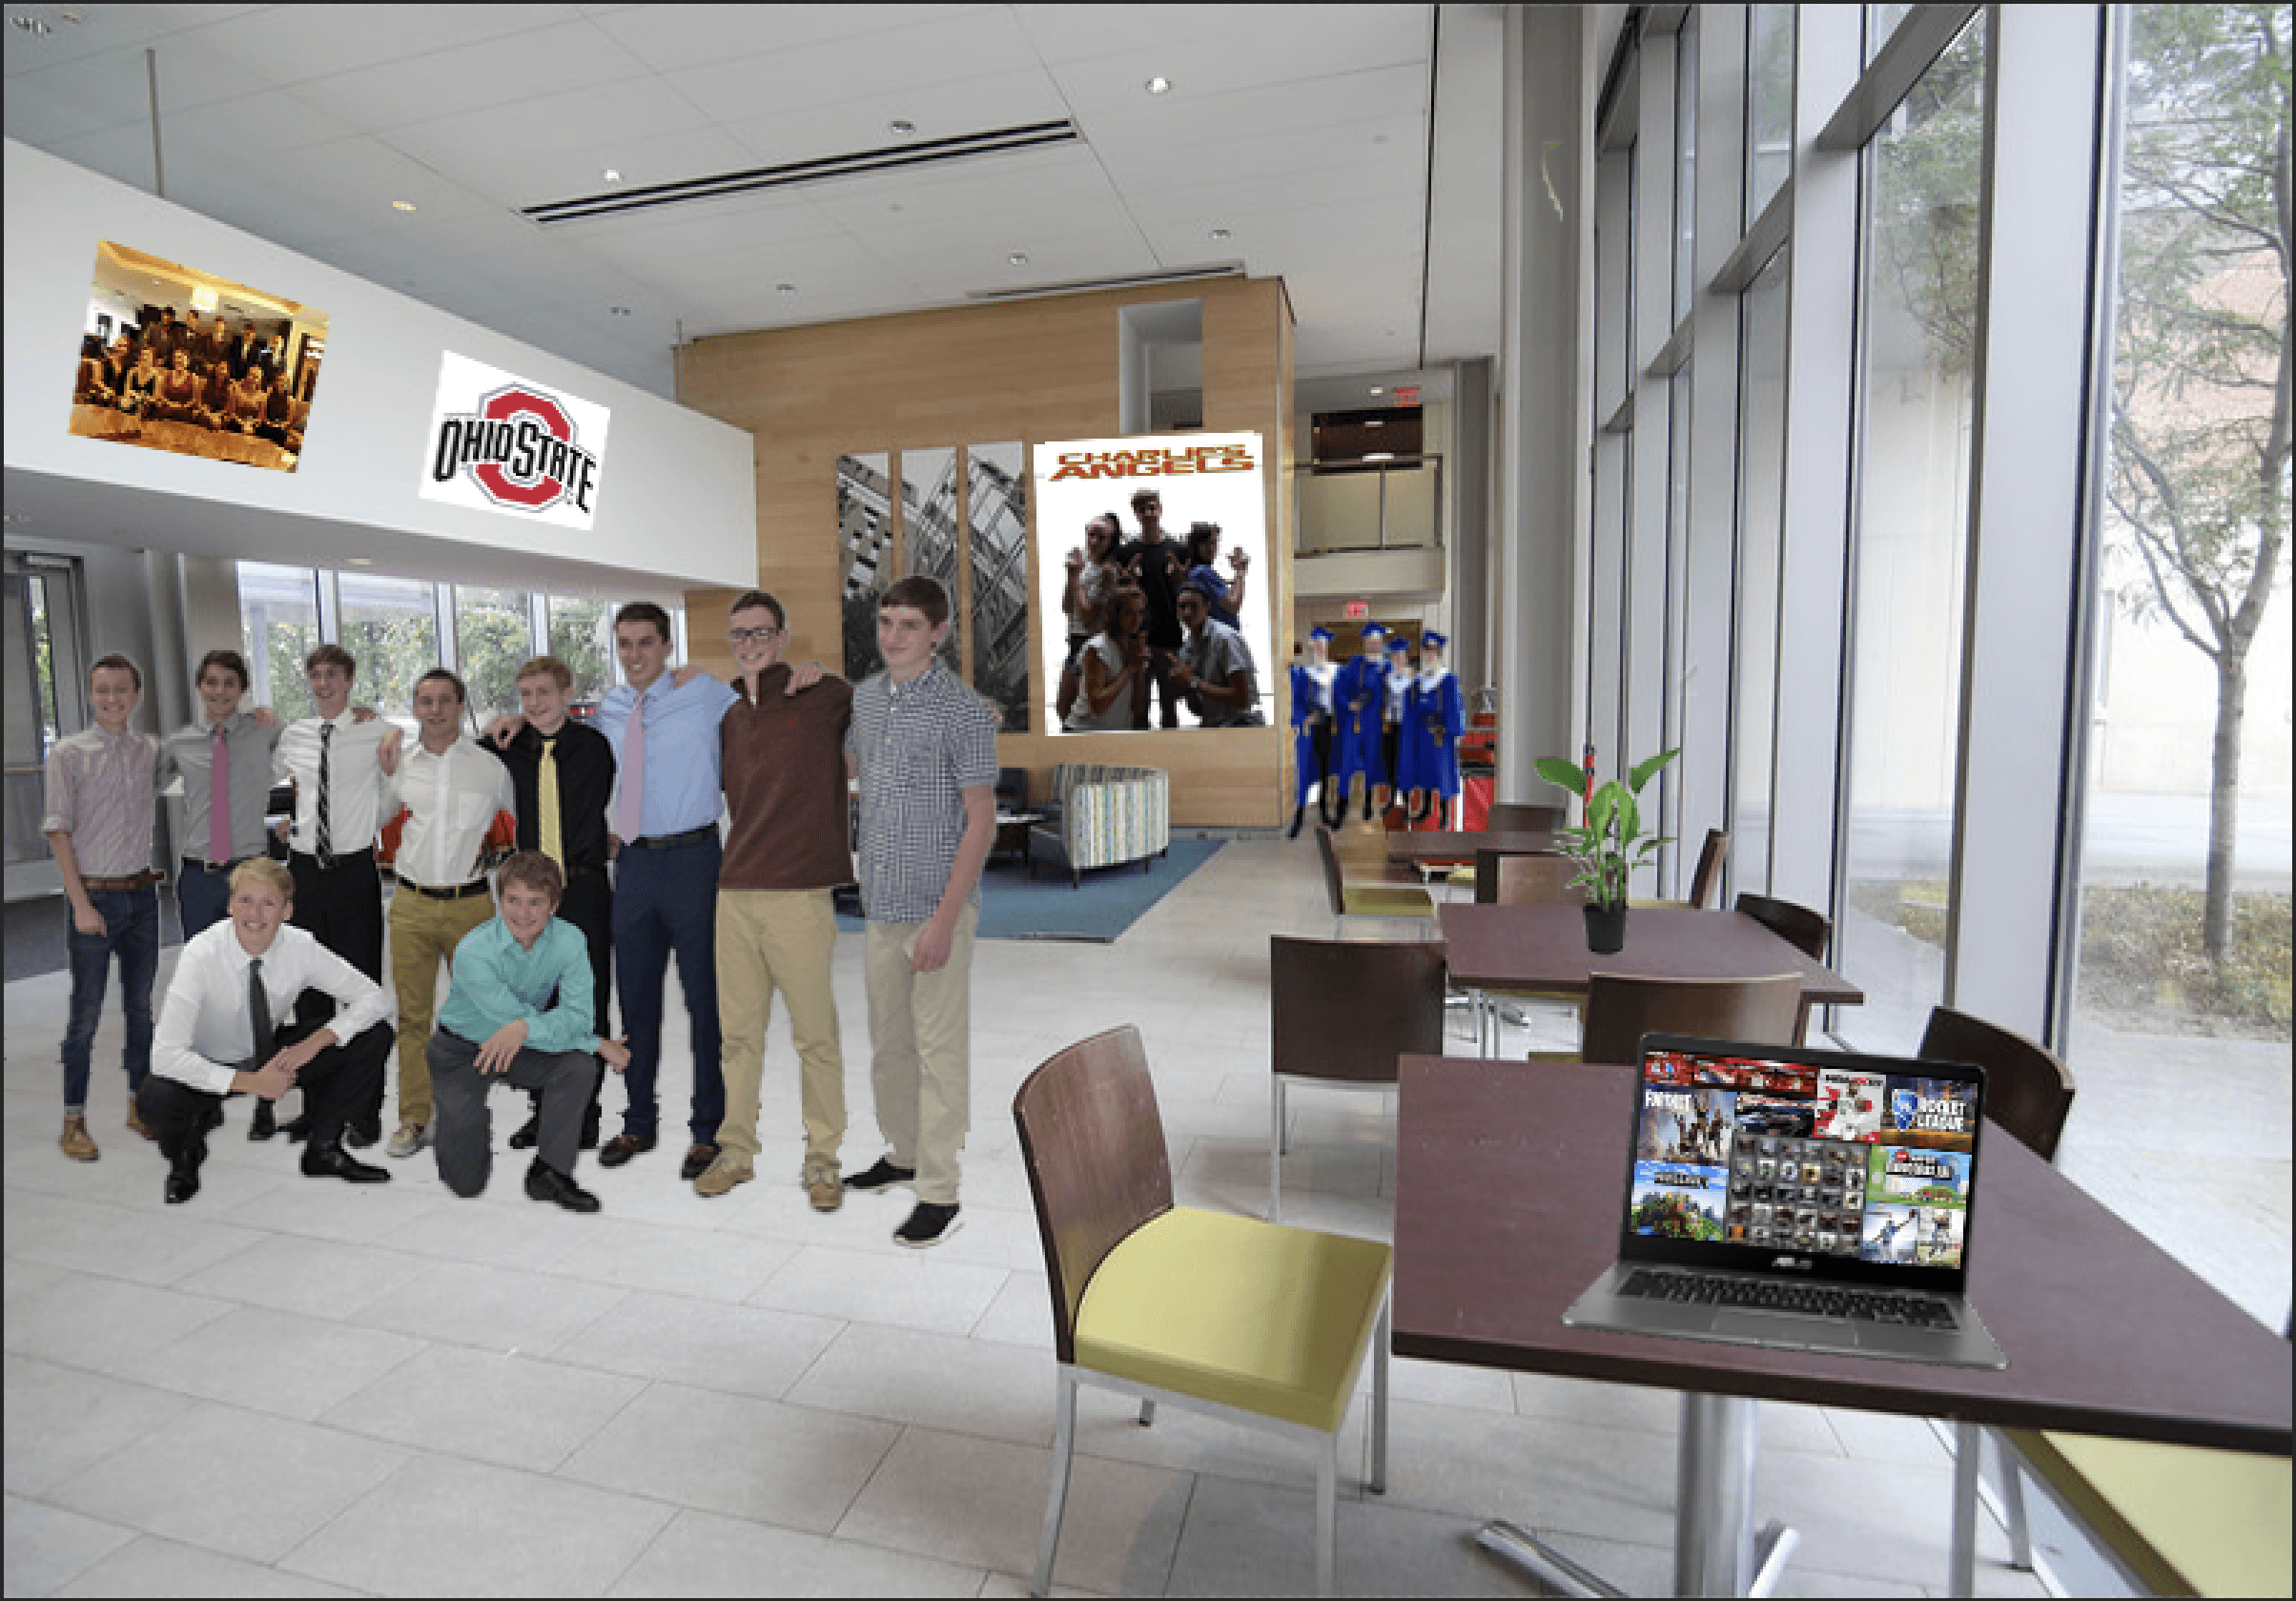


