Sensory Abstraction

MIND MAPS

When I thought of a sensory experience, a concert came to mind.  This one felt the easiest to do and lent itself pretty easily to abstraction because it’s such an overwhelming sensory experience, especially light and sound.  I thought it would be really cool to do the project on, but I didn’t have a strong emotional attachment to it.


On the other hand, I was too emotionally attached to this one.  I volunteer at my local humane society and spend a lot of time building relationships with dogs, but this one was just special.  Her name was Ellie, and she was one of my favorite dogs in the whole world; we just clicked for some reason.  Unfortunately, her story had a sad ending and I knew trying to do a project on her during the stress of finals season would just be too much for me.


This one was the sweet spot.  A couple summers ago, I got to go to Europe and stayed in Antibes, France for a week.  It was my second time being out of the country (the first was Scotland when I was four, so it really doesn’t even count) and I was awestruck at this place.  It is my favorite place in the world and I hope I can visit again someday.  In the mornings, there was a farmers market in this outdoor pavilion with fresh fruits, vegetables, meats, and bread.


I edited and refined my mind map for the outdoor market and turned it into this:


ITERATE

I crossed out a few more items once I began to iterate as well because they didn’t feel as important to the experience that I wanted to illustrate.  Noted by the thumbnails are the elements & principles used.  I made the notes (light purple/blue) during our group sharing; we agreed for the most part on the most successful iterations (salty, the last one for vibrant colors, combining background chatter and busy, considering using soft & fuzzy and separated/enveloped in my own space as effects rather than graphics).  I didn’t get a ton of feedback, which is usually the case when we do mini critiques with our table groups, maybe because we see and talk about each other’s work every day or because we are afraid to criticize the people we are closer with.  I know it can be more time-consuming and less practical sometimes, but I really get a lot more out of critiques when we switch tables and get more perspectives.


IDEATE

Maddie suggested that I try combining my peaceful and salty iterations, so I played with this by making them flow into each other.  I liked the concept, but it just turned out kind of messy.  What I really liked about this one was the background texture I created using the watercolor brush.  I also included an iteration of vibrant colors.


In this one, I wanted to play around with the color circles, using a Van Gogh style.  I also incorporated emphasis from my enveloped in my own space iterations.


This is the one I decided to go with.  I really liked how all the pieces fit together, and the colors worked really well together to create the warm, uplifting mood I intended.


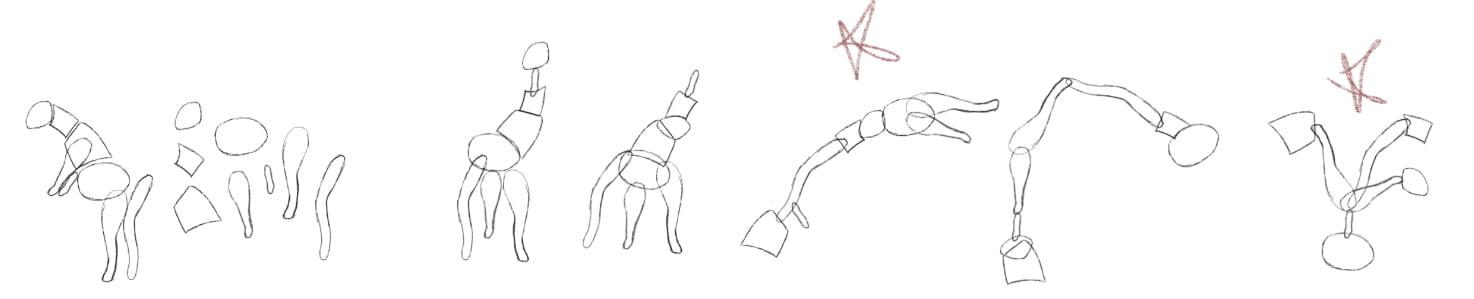
Lazy, meandering stroll: this iteration uses line to illustrate the idea of slowly wandering around the market with no intention, just looking and taking it all in.  In the graphic, I repeated this squiggly line over itself a few times, the same way I went through the market multiple times.  The places where the lines get sort of squeezed together represent slowing down or stopping in a certain place.


Busy/background chatter: The market was a very busy place with lots of other people walking around and background chatter; I used proximity to communicate this.  However, the busyness only takes up part of the graphic because most of it was drowned out and it wasn’t overwhelming at all.  It was noticeable at times, but mostly I was in my own bubble, as illustrated by the next iteration.


Separated/enveloped in my own space: I used line to create shape and emphasis in this iteration.  The idea behind this was to show the focus of my experience, what was right in front of me, and not all of the other things going on at the same time.


Vibrant colors: The market was filled with all kinds of bright colors, and I wanted to illustrate this with many different focal points.  I ended up creating circular, organic shapes since most of the color came from organic fruits and vegetables.


When I printed out my graphic, I chose not to include the circles because I was going to create them physically as part of my 3D element.  I titled the piece Antibes Côte D’Azure after the location.


MOUNTING & CONSTRUCTING

I roughly traced some of the circles on Bristol paper and cut them out, then painted them with watercolor.  When they dried, the paper curled, so I placed them between two pieces of foam board with a heavy object on top to try to flatten them out, which helped a little.  The next day I stacked them using foam and tacky glue and glued them onto the poster.  I used different amounts of foam to stack them in order to vary the heights.  I also glued a piece of twine on top of the right-most squiggly line to add texture and make the overlapping lines look more 3D, adding some movement and dimension.

I am so upset about what looks like bubbles in the lower left corner! I never noticed them when working and even after seeing this photo I looked again and they seem to be extremely slight indents or bubbles that only appear when there is light form a certain angle due to the semi-gloss finish of the paper. They are not noticeable at all in person, but show up every time I take a photo because of the lighting.


DESIGN STATEMENT

This poster represents walking through an open-air market in the coastal French town of Antibes on a summer morning. Both the outer lines that create the circle and the spattering of dots cut off by the squiggling lines illustrate all of the busyness fading away in the background as you are focused on your own space. The overlapping squiggling lines are representative of a lazy, meandering stroll around the market. Warm yellow brings out a sunny, happy feeling, and soft blue reflects calmness and salty seaside breeze. Both the central yellow circle and the cutout circles are organic and imperfect around the edges to bring in an element of realism; the twine resembles the texture of the burlap that covered the tables. The market was full of colorful fruits and vegetables that competed with each other for attention; this was the focus of the 3D element, because they all stood out but there was no single focal point. Finally, using watercolor makes it feel more home-made and real, like the market (versus a grocery store).

Pattern & Scale

ITERATIONS

I was SO confused at the beginning. First of all, it was confusing to differentiate between depth and volume, since they are so interrelated.  I was also confused about the layering and how the 3D design was supposed to be related to the graphic – did it have to look exactly the same as a plan/top view like the 2D to 3D orthographic?  I really didn’t know what I was doing so my initial iterations were not great.

Depth:

Volume:

DEVELOPMENT & DRAFTING

During class I got a better understanding of the project and decided to use my symmetric design instead because the spiral was giving me a ton of issues, mainly that there were just so many details and tiny lines, and it being a spiral rather than concentric circles made it very difficult to create layers since everything was overlapping and there was no clear cutoff of sections.  Switching to the symmetric design made prioritizing depth and volume much easier.  I really wanted to utilize the gradient effect I created with small lines to show depth and it came across very effectively.  My first design for this idea had a bunch of different parts: the outline, the gradient, the vertical lines, and the top section.  Within the gradient stair-step section, I wanted to cut out sections where the vertical lines would be and then add in parts that would also step down (see bottom right).  After practicing a little with the Bristol, I realized that would be really difficult and decided to redesign it so that each layer included all the parts and I wouldn’t have to try to fit them together at the end.  I also chose to convert the curves in my graphic to points for two reasons: first, I wanted to use those shapes to literally point the eye toward the lowest area/focal point; second, creating all those curves, both large and teeny-tiny, was extremely time-consuming and almost impossible to perfect.  I really wanted to put my effort into making sure my design and intent came across and felt that trying to include all those little details would detract from the bigger picture.  I also decided that I wanted to use something to space the layers out, since the 10 layers seen in the right side of the photo added up to about the thickness of one or two pieces of foam.  Instead of using foam or chipboard, I bought some tiny adhesive foam squares that were really helpful so I didn’t have to cut and glue tiny pieces of foam.  For the draft critique, I didn’t get a ton of constructive feedback for several reasons; first, I was sick all weekend and asked for an extension, then spent 8 hours in the studio on Monday and cut out all of the layers for my depth piece but had nothing for volume.  I got a lot of affirming comments about what I did have, which made me very happy and reassured me that my intent was clear and I did a good job prioritizing depth.


CONSTRUCTION

I began by making blueprints on my iPad of each layer and all the measurements, which took quite a while but were really nice to have before I sat down to start cutting.  My depth piece consisted of about 10 layers and took me about 8 hours to complete because of all the tiny measurements and details.  I could’t just make one design and then trace it a bunch of times because each was slightly different from the last.  To connect the layers, I used two foam squares layered because they weren’t very thick.  For the first couple of layers, I used 6 pairs, one on each corner and one in the top and bottom middle.  I’d seen other people stacking, and those who just put support on the outer corners seemed to have trouble with the center caving in a little, so I knew I would need to have support there.  I decided to just put the squares on the top and bottom middle for the rest of the layers instead of all around the border because it didn’t seem necessary.  This caused some unevenness of the layers on the outer sides, but didn’t affect the design as a whole, especially because it’s meant to be viewed from above.

My volume piece was much easier to cut, but more difficult to assemble.  I initially wanted to build this one similar to the way we created the last 3D project because I thought it would take less time than cutting a bunch of the same layer, and I also thought that actually creating a volumetric shape would emphasize volume more than layers would.  I tried this, but it took a while and didn’t line up quite right at the very end.  I decided that building wouldn’t be any faster than layering and would probably end up being much more difficult, so I stuck with the layers.

Drawing and cutting the layers was easy because I could just trace and make duplicates of the same layer.  The bigger two base parts were easy to put together, but I really wish I brought tweezers to layer my 1/8th x 1.5 inch rectangles which took quite a lot of time.  I was diligent about stacking all those tiny pieces, and it paid off very well in the end with a very clean, symmetric piece.

FINAL

I was really happy with these! I think they are very clean and do a really good job of prioritizing depth vs volume.

Imagined Journey

I was super overwhelmed at first with the lack of specificity and all the infinite possibilities, but I think I have a pretty decent idea already (day 1) which surprised me because it usually takes me a while to come up with a solid idea for normal projects, much less this massive, open-ended one.  I want to create a map/model of the section of campus that I went through on my route.  I’ll map out everything flat, but for the buildings that I entered, I want to create models so they stand out.  I also want to include a can, water bottle, and toy police car since those were the main focuses on my original journey and didn’t involve buildings; plus, they can serve as a tactile factor.  I also want to include little notes in certain places to show my thoughts, and if I can find it, a business card about the Book of Mormon from when some girls tried to recruit me while I was sitting to sketch in the south oval.  For the other sensory piece, I think I might play the playlist that I was listening to at the time, or maybe even record my “thoughts” and play them out loud (e.g. “this is so weird, I’m just stopping in random places to take pictures of random things with my phone, people are gonna think I’m so creepy,” “Wait, what bus stop?  Does it really matter, I know the general area I need to get to, it’s not a big deal if I go a little bit off the directions.”)


ANALOGY EXERCISE

Thinking about all the things I have to do in a day and when I’m going to do them is like a puzzle with way too many pieces. Some things are bigger pieces that require more time, like working on studio projects. Some things have to be left out so more important pieces can be used. In this puzzle, I included the pieces that I usually (try to) get done every day, and left out the pieces that often get neglected (don’t worry, I shower most days). Some days, I might swap out pieces, like relaxing instead of reading for my psych class. It’s kind of like that saying where you get to pick two of three options: sleep, social life, and academics. You can’t have everything.


MIND MAP

When I first went on the journey, I wasn’t really focused on sensory aspects, but more so just looking for things that I thought I would be able to draw for the project.  I didn’t want to try to fabricate or imagine what the senses were (e.g. smell of fresh grass) because it didn’t feel authentic, so I focused more on thoughts, feelings, and ideas.

There were a few points that I wanted to focus on:

1) How places are connected/located in relationship to each other.  I took a couple classes at OSU through CC+ last year but because I didn’t live on campus and only visited a few buildings, I’d always take the bus from the Buckeye Lot to whichever stop was closest to my class and didn’t navigate a lot of campus so I really didn’t understand where buildings were in relation to other buildings.  Over the first few weeks of classes and going on this journey, I really started to understand how everything was connected and it was kind of a revelation for me; it made campus feel a lot more familiar and personal.

2) Anxiety/overwhelming qualities.  When I went on this journey, I decided to take pictures of the things that I wanted to draw for the assignment instead of stopping and drawing them right there.  I was very self-conscious about the fact that I was just stopping in random places and taking pictures with my phone and I knew I looked super weird.  I tried to ignore other people and just stay in my own bubble by putting in earphones and listening to music.  It was also a little overwhelming because I had a lot of things to think about at once: reading the directions, navigating, making sure I wasn’t stopping in from of people, looking for things that I thought I would be able to draw, worrying about how creepy I looked, etc.  I can be a pretty high-strung, anxious person and sometimes it feels like my mind is going faster than I can keep up with.  This chaotic, fast-moving quality eventually became something that I really wanted to incorporate into the project, so the high speed and shakiness of the video, although a little off-putting, doesn’t feel like a detriment; I think it helps reinforce the intent and the feelings that I want to evoke.


IDEA DEVELOPMENT

I started shifting more towards the recording aspect and away from the map/model.  I still wanted to have some sort of map to show how things connected and where I was going, but I decided that sketching a really detailed map or physically creating the buildings would take up a lot of time but not add enough substance to the project to warrant the effort; instead, I wanted to focus my energy on creating a video- something I’ve never done before.  A video would help add context about what was going on, rather than just where I was.

Creating the map with something to show where I was on it at any given time was really difficult; I had a bunch of different ideas about how to approach it. I wanted to use the time lapse feature on Procreate, but I needed to use a screenshot from google maps to reference and that would show up in the time lapse which ruled out a few ideas (e.g. drawing the actual map as I went through it – I would draw Hayes, then part of the oval, then Hagerty, the union, etc. as I went through the journey).  Another problem with the time lapse was that it didn’t take a picture every x amount of time, but every stroke.  So, if I drew one long line, even if it took 20 seconds, it would just show that line appearing all at once. Before figuring that out, I tried a screen recording app, but that would record exactly what was on my screen, so I couldn’t zoom in or move the canvas around.  After I figured out how the Procreate time lapse worked, it was a lot easier because I just used very short strokes to create my path instead of only using a few longer ones.  Once I had a good video of the map with the moving path on it, I used an app to overlay it on top of my time lapse; it ended up working pretty well, but during one of the initial critiques someone commented that it was kind of confusing and suggested that I try making the map a thumbnail rather than overlaying it over the whole screen, which I ended up liking better.


The next step was to make the map match where I was in the video, so I had to speed up and slow down parts of the map.  I’ve never used iMovie before, so the first way I tried to do this took forever and wasn’t perfect.  I had the time lapse in iMovie and split it into sections.  I then tried to add the map by selecting teeny tiny little clips from the thumbnail in My Media window, which was obviously pretty difficult.  After I finished doing this, I had an idea that I thought might work better.  I made the map video its own project, marked on my iPad the locations where I needed to split the video, and split it into different clips that I then dragged into iMovie and adjusted the speed.  I used the picture in picture setting to place the map in the lower right corner.  Then I added in background sounds of wind, walking, traffic, etc that I recorded and music from my playlist.  The song that I chose was Life Goes On by Quinn XCII.  I wanted to use a song from the playlist that I was listening to, and I thought this one fit well.  The idea behind the music was that I put earphones in to put myself in my own bubble and not focus so much on other people, and I think this song is something I’d listen to if I was trying to focus on myself.

My next step is to record a voiceover of thoughts and then edit the sound clips to fluctuate the volume and bring different parts forward at different times.

UPDATE – DEC 10

I watched the video all the way through and wrote down notes for the voiceover, then recorded it in VoiceMemos.  Most people don’t like hearing their own voice on recording, but I really hate it which is why I pushed that part off for so long, but I finally did it and added it into the video.  Now there’s a ton of sounds going on at once and a lot of the time you can’t hear my voice at all (great for me, not so much for the viewer).  Before I started to edit the sounds, I met with Emily to get some feedback.  The biggest thing was that there were some parts that were really shaky and some parts where not much going on, so I need to speed up the boring parts and slow down the shaky parts.  It doesn’t sound like too big of a deal, but that means I’ll also have to edit the map and probably redo the voiceover.  Then I can finally get into editing the sounds, which I have no idea how to do. Yay, Google!  Gabe was there and showed me how to save the video and how to make it loop for the gallery on Thursday.  I’ll be able to submit the file for this assignment, but I still need to figure out how to include the final video in my portfolio because it’s too big to upload directly to this site.  I can try YouTube, but there are copyrighted songs in the video so that might be a problem.

UPDATE – DEC 11

I am so happy I talked to Emily and Gabe! My video is looking so much better.  It was a ton of work – I literally had to start over – but totally worth it.  I tried editing what I already had, but changing the speeds got the map and audio off track with the video, and it was super confusing so I decided to start in a new project.  The video that I was using for the time lapse was originally taken in real time (~16 minutes), but I had sped it up in an app on my iPad to about 4 minutes, then sent it to my laptop to edit it with iMovie, so when I tried to slow down certain parts it got all wonky.  I got the original full-length video and started breaking it up into clips and speeding them up various amounts depending on the context and what I said in the voiceover.  Then, instead of breaking the map up into clips in a different project like I did before, I dragged the whole thing into the same project and broke it up and stretched it to fit right there – so much easier!  I had recorded some background sounds just walking between classes which I used in the first video, but I found out that I could separate the audio from my first full-length video.  I chopped out certain sounds that I wanted to use (leaves crunching, footsteps, buses, doors, etc.) and placed them where I wanted so the sounds made more sense in context, rather than just using one long clip of random sounds that might not match the content and had a lot of wind sound.  Finally, I laid in my super-bootlegged music (I played the song from my phone and recorded it on my iPad – credits to Quinn XCII) and broke it into chunks as well so it would be quieter when I was talking and louder to fill gaps.  When I watched the whole thing through, there were some parts that were too fast and shaky, but I had cut the video down to like 3 minutes so I slowed some of them down.  I had to readjust the map and audio but it wasn’t too bad.  There are still some parts that are shaky, but that comes down to the way I initially recorded it and if I tried to slow those parts down any more it would be awkward and too slow.  Again, I don’t mind the shakiness because it works with my intention – lots going on all at once.

My video is by no means perfect, but I am really proud of myself for tackling a whole new media and teaching myself how to use it.

Here’s a link to the video before I met with Emily and Gabe:  https://drive.google.com/file/d/1tNkTmM3FYlF7bUkm3VSkZhh-K0g6MMPr/view?usp=sharing

And here’s the final: https://drive.google.com/file/d/1oC9DJjQpE_CpJkiQ-6aH6N56AkYW9PsL/view?usp=sharing

Song Credits:

Quinn XCII. “Life Must Go On.” Spotify, 15 Feb. 2019, open.spotify.com/track/3vmsnZF4KPLjbDgZEqwTdL?si=JJ-kC-mgTsa8RF_7cOYaPQ.

Abstracted Metamorphosis

This was my favorite project so far in this class, and also the one I am most proud of! There are always more things I’d like to change, but I actually impressed myself.

BREAK DOWN/BUILD UP EXERCISE

I did rush a little on this exercise so my execution was a little lacking, but I think I did a good job with the overall concept and understanding the break down/build up process.


ABSTRACTIONS

I did A LOT – not to be extra, but because I wanted to give myself lots of options to work with later on.  The goats were my on-campus forms (I got to do goat yoga!!) I enjoyed breaking down the forms and found it pretty easy; it would have been relaxing if I didn’t have a million other things to do.  As far as identifying the essential components, I think I did a pretty good job.  One of my strengths was that I chose to overlap certain pieces if I felt like that would provide a better description of both the individual parts and the whole.


ITERATIONS

I chose a goat, a cuttlefish, and a woman holding an umbrella.  From the 15 iterations, I narrowed it down to my 5 favorites – a grabber tool and a lamp from the goat, a spaceship and a recliner from the cuttlefish, and a baby carriage from the woman holding the umbrella.  If I could have made two of my final constructions from the same original form, I probably would have chosen the recliner for ‘supports a person,’ but since the spaceship was the only thing I made that could contain multiple people, I chose not to use the recliner and instead went with the baby carriage.  That left the object for use by one person to come from the goat; I picked the grabber tool over the lamp because it was more unique and interesting, and the forms worked better in this construction.

RECONSTRUCTION

I was pretty scared to start adding detail into these new forms because I had to imagine and create it all myself, something I hadn’t done yet.  It wasn’t too bad once I started, though, and I looked up some reference images to help me understand how certain materials would look.

The following videos are time lapse recordings from Procreate so you can see how I went about building up detail in the objects:


FINAL PIECES

Goat to grabber tool: object for use by one person


Woman with umbrella to baby carriage: object that could support one person


Cuttlefish to spaceship: volumetric structure that could contain more than one person


Overall, I really enjoyed this project and I’m very pleased with my work! I much prefer working digitally, and the whole idea of breaking something down into seemingly arbitrary parts and then creating something new was really cool.  I’m really happy with my final rendered pieces – even though they aren’t perfect (nothing ever is) I keep seeing improvement. Yay for practice makes progress!


REFERENCE IMAGES

Supplier #2252. “Woman Holding Umbrella, Stock Image.” Google Image Result for Https://d2gg9evh47fn9z.Cloudfront.net/800px_COLOURBOX4186128.Jpg, Colourbox, 1 June 2012, images.app.goo.gl/d279ZzaSxQAZRSWr8.


Dasgupta, Ajay. “A Fish with Three Hearts: Cuttlefish.” Google Image Result for Https://Www.pitara.com/Wordpress/Wp-Content/Uploads/2002/03/Cuttlefish.jpg, Pitara, images.app.goo.gl/Tagi7dtR1pQFmcgx5.

Color & Pattern

OK, so I went a little overboard on this one; I was just so excited about all the beautiful, colorful natural patterns.  For the first part of the assignment, I did some research on color theory: analogous and complementary colors, primary, secondary, and tertiary colors, the color wheel, and feelings associated with certain colors.  Then, I searched up a ton of patterns in nature and used Procreate to go in with the eyedropper and pick out the most common colors (this was over break, before the project really started, so it was mostly just for fun).


ANALYSIS

I didn’t start to do the analyses of proportions, individual components, direction, and value & color until we went back to class after break because I was a little confused about how to break them down.


COLOR SCHEMES

I made several different color schemes on Procreate.  For many of them, I chose a main color from an actual image (one of the colors that I had already selected with the eyedropper) and then built a scheme around it using analogous or complementary colors.  For the brighter ones in the bottom corner, I just selected bright, happy, summery colors and organized them into a few different groups.


ITERATION

One difficulty for me was that I loved these natural forms and patterns so much, it was hard in the beginning for me to abstract them away from being representational.  The good news is, I worked on this for so long and did so many iterations, I think I finally got the hang of it.  The first design that I developed was these gorgeous peacock feathers, working from the individual components analysis.  At first, I wanted to do a tessellation, but after some trials I decided to try to create a more abstracted design.

I also did some development with…

lettuce: I used the color and value design and repeated it three times, increasing outward in size.

an orange: this design from the individual components was pretty simple and easy to make, and I had a lot of fun playing with bright, summery colors.

a honeycomb: the first was the individual components design, and the second was direction.

The final symmetric design I decided on was the individual components of bamboo.  Originally, I made the small detail lines a little squiggly, and I also used the gradient tool (which I later found out was not allowed).


I chose to make the detail lines straight to make it feel less like bamboo and more like a pattern.  Instead of using the gradient tool, I used a bunch of lines right next to each other, each slightly different from the next to create that fading effect.

At first, I used neutral browns and greens, but that looked too bamboo-y, so I went completely opposite from realistic and used blue and orange.  I liked the new colors, but they were a bit much, so I toned it down to blue and then teal.  The final color scheme is one I used at the beginning, but I created my own gradient this time.


For my asymmetric design, I used the individual components of the cactus.  Wow. I spent so much time on this one, with so many iterations.  I started out tracing the cactus, but I didn’t go all the way to the edge of the image because I didn’t want anything to be cut off.  Then, I used the pen tool to start filling each “petal” with lines that started and ended in the same place, but became increasingly curved going out.

I realized that this would be really hard to read as a small, repeated pattern, so I decided to go in a different direction.  I traced the cactus again, but instead of tracing the curves of each petal I just made one straight line for each side, resulting in a really cool geometric design.  After this, I played around with other geometric designs on Procreate, but I ended up working with the first one.


Because of the perspective, some of the petals were viewed kind of to the side, which resulted in some very narrow angles around the edge, so I moved them to make them a little more like the center angles.  Then, I added three more lines inside each petal (I wish I did this on separate layers – I had to go back later and select each line to put them on different layers).


At first, I only used two colors: one for the background, and one for the lines.  I really like the way it looked, but I knew it wasn’t enough for this project since color was such a big part of it.


This was the part where I had to go in and separate all the lines into four layers so I could make them each different colors.  I worked with one color palette, but I made five different versions and it was so hard to decide which one I liked.  In the first one, I made all of the lines in one petal the same color, but I made the inner petals lighter than the outer ones to try to show depth, bringing the middle of the design forward.


I really didn’t like the way it turned out, so I tried a different approach: I made the inner lines on each petal lighter than the ones on the outside, creating depth and dimension.

I had a lot of issues with line weight and scale because I made the original design on a 4″x4″ template, and I needed to make it smaller to tile it, but the stroke stayed the same and I had to deal with that.  It led me to the last two patterns, which have thicker line weights, causing the lines to overlap.  My favorites were the middle two; I really like the blue-only design, but I chose the one with the pink-beige accents because I thought it added a nice pop, and because my other design was also monochromatic.


FINAL SELECTIONS

I’m really happy with my final designs; I think the dark blue ties them together well, but they both have very distinct color schemes.  I’m also proud of the way I used intricate line work in both of them to create depth and gradation.

I had so much fun with this project! But I wish I could have submitted more because I just had SO many ideas.  I will probably develop more patterns and add them to my portfolio.

Interpreted Journey

RESPONSE TO SAUNDERS

  1. How do you know when a drawing is done?

There are many different standards by which a drawing could be completed; it often depends on the goal, and who is evaluating it.  From the artist’s perspective, a drawing might be done when they feel they have accurately drawn what they were intending to draw.  Many might say a drawing is never done and can always be improved upon.  In general, a drawing is done when the artist decides that they are satisfied with their work.

  1. What makes a haiku good?

In order for a poem to be a haiku, it must meet several requirements: three lines with five syllables in the first and last lines, and seven syllables in the middle line. There are no such requirements for what constitutes a “good” haiku, because “good” is a relatively subjective term and can mean different things based on each person’s taste.  For me, a good haiku is simple, not too pretentious, and linguistically pleasing.

Create: describe a complex action in way that is as detailed and long as possible, then describe the same action is a few words as possible yet maintaining as much detail as possible.

Retrieve a loaf of sliced bread, a bag or other container of cheese slices, butter or margarine, a plate, a butter knife, a pan, and a flipping spatula.  Place the pan on the stove and set it to medium heat.  Unwind the twist-tie on the bread bag, remove two slices of bread, and place them on the plate.  Open the butter container, use the butter knife to scoop out butter, and spread the butter onto one slice of bread.  Place the bread back on the plate with the buttered side facing down and proceed to the next piece of bread.  Again, use the butter knife to scoop out butter, and spread the butter onto this slice of bread before placing it on the plate next to the first slice, this time with the buttered side facing up.  Place the lid back onto the butter container or otherwise close it and open the cheese. Pick up a slice of cheese and place it on top of the bread slice that is facing butter-down, on the left side; do this again but place the cheese on the right side.  Layer one more slice of cheese on top of each of the first two. Take the other piece of bread and place it on top of the bread and cheese, so that the buttered side is still facing up.  Slowly and gently lay the sandwich down into the pan.  Wait about a minute, then use the edge of the spatula to lift up the corner of the sandwich to see how dark the bread is; do this occasionally until the bread is the desired color.  Then slide the spatula under the entire sandwich, lift, and flip it so that the other side is on the pan.  Check color occasionally until it is approximately the same on both sides and use the spatula to move the sandwich back onto the plate.

Gather bread, cheese, butter, a plate, knife, pan, and spatula.  Put the pan on the stove on low heat. Butter two pieces of bread and put four slices of cheese between them, touching the unbuttered sides.  Place the sandwich in the pan, and flip when it reaches the desired color.  Remove from pan when both sides are the desired color.

MOOD SWINGS 

Exploring how content and composition can influence different moods, such as order & focus, confusing & overwhelming, and exploration and diversity.  I used frame within a frame and angles/diagonals to reinforce the intended moods.


ITERATIONS

I chose to use the perspective of being chased; instead of just focusing on the motion of the images that would come from speed, I wanted to explore the mindset of being chased: what would I be looking for?  I focused on places to hide, escape routes, and anything that could get me help.  Using my iPad definitely made this process a lot easier for me because I could grid out my frame, and move and erase things quickly, as well as draw straight lines.


PROCESS SKETCHES


FINAL SELECTIONS

Location 1: The first location in my new journey was a low stairwell.  The darkness of the stairwell drew my attention as a place to possibly hide.  Compositionally, the golden triangle follows the handrail and draws attention to the shadowy hiding spot.

Location 2: This is a close-up shot of one of the Police-Fire-Medical emergency posts around campus; I thought I might use it to call for help.  Rule of thirds draws the eye to the large HELP button in the lower right.  The most troubling part of this was the bush in the background.  I wanted the focus to be on the emergency button, so I tried to soften the background to make it fade away, but it just ended up looking weirdly soft and fuzzy.  Later, I went back and added more texture which I think definitely helped.

Location 3: In this shot, I am looking over my shoulder to try and see who is chasing me.  I used a canted angle to give the effect of looking over the shoulder (versus straight on) as well as disorientation.  I also used blur and motion lines to show the speed and movement of the scene.  This is my favorite of the six drawings; I think it really shows my improvement in natural, organic textures from the first project.

Location 4: This location inside the Union was difficult to draw because there were so many people in the way, but I worked around it. I really wanted to highlight the diamond pattern on the floor leading to the exit, so I didn’t use too much contrast in other areas in order to bring the focus where I wanted it.  The path and exit are reinforced by the rule of thirds, as the diamonds lead up the left third and meet the exit in the top right corner.  I also used leading lines in the form of chair backs and structural elements to lead the eyes toward the exit.

Location 5: The brick pillar on the left is the same one that was visible in the same location of the first project, but I focused on the long pathway to a door this time.  I used leading lines and shading to show the depth of the corridor, emphasizing how far away escape was.

Location 6: The statue in the background was my subject in the first project; this time around, I focused on a security vehicle sitting on the road that might be able to help me. I used rule of thirds again to bring attention to the car in the bottom right.  I wanted to really focus on that car, so I chose not to add a lot of distracting elements in the buildings in the background.

Overall, I was very pleased with how these drawings turned out, and looking back at the first project I see so much improvement in my drawing skills, especially with organic textures.  I watched some tutorials on tree texture which helped a lot in breaking down the parts of the tree into more manageable pieces, and I practiced creating grass.

Cube Exercise

During Zach’s demonstration, I remembered trying to make a cube out of tissue paper for an experiment in high school chemistry. It was very, very far from perfect, but I hoped the sturdier paper would make this project easier (it did).

I made three cubes.  The first two were in a t-shape and I made them both in one sitting.  On the first one, I didn’t make enough tabs and my cuts were not very straight at all.  On the second one, I added another tab in the planning process but accidentally cut a different one off, so still ended up with too few tabs.  I also used too much pressure when scoring a fold, causing a total separation between the faces. I used a small piece of paper as a brush to apply the tacky glue to the tabs. Since the first two were practice, I didn’t worry so much about smudges, but I brought a rag when making the final cube which helped eliminate smudges and clean up tacky glue.

THE FIRST TWO:

THE FINAL CUBE:

When I made my final cube, I used a different design that I thought would make putting it together easier:

After I began putting it together, I realized that two of the tabs would overlap, so I cut off the one on the middle right and it worked well.

Since I had some issues with scoring on the last cube, I decided to use a scrap piece of paper to practice before I scored the actual cube, and I think it helped. One problem that I had in every cube was the last step, folding the top down, because it never fit quite right and usually had one corner sticking out a little bit.  On the last cube, I was able to fit it in pretty well and wasn’t able to tell at the end.

Designer Bio Update

I finally got around to updating my about me page after receiving feedback! I still wish I had better tools to work with, but maybe I will use a different software to update it in the future.  Also, I got a laptop so I can see what the site looks like on a normal screen instead of the iPad.

Iterations

ORDER

In our critique, my group members pointed out that I included only pyramidal/triangular-based structures and that I could think about other types of forms.  I also realized that iteration #2 was not viable because there were visible face changes that were not present in the original plan view/square design. Design #3 from bold also made me think about inverting some parts of the structure, rather than having everything raised. The design that I ended up using for my order structure (left) was not one of my original iterations.


BOLD

I chose to use the first design, although I also enjoyed design #3.  However, I noticed that my other two pieces involved structures increasing by height, width, and length at the same time and I felt that design #1 would make the overall project more cohesive.


INCREASE

I also did not use one of my original iterations for this design.  After seeing an example in class (left), I really liked the idea of having the shapes protruding from each other and created a new design.

Creating Orthographics

PRACTICE

We practiced orthographic drawing in class with the following exercise:

The “L” shape configuration of the top, front, and left views helped bring everything together and make it easy to visualize because everything lined up.  This was helpful when making my own orthographics because I knew how to set it up, and I knew that the top and front, and front and side views should line up.  Instead of having to remeasure certain proportions, I could just base the front view off of the top view (my original square design), and then the side view off of the front view.


APPLICATION

I used the same “L” configuration as in the the practice worksheets so that everything would line up easily. The first orthographic has many dotted lines because of the asymmetrical arrangement of the cubes, so there are a lot of hidden edges depending on the view.  The other two were much easier to create because they were more symmetrical and lined up better.  I also used these drawings to measure all the dimensions of the structures.  Since the plan views came from the last project and were not made with the intention of building, many of the length and width measurements were not ideal and in 32nds or even 64ths of an inch, which made building rather difficult.

I ended up creating a different design for order and made a new orthographic: