Two Liter Herb Planter Challenge
By: Danielle Combs, OSU Extension Educator, Highland County, 4-H Youth Development
Have you been looking for something new and exciting to do while at home? Making a 2-liter herb planter is a great way to grow herbs for your family to use while practicing your green thumb.

MATERIALS
- 1- 2 Liter bottle (empty and clean) with lid
- X-ACTO® or utility knife or good scissors
- Hammer
- Nail
- Marker
- Potting soil to fill about half of a 2-liter bottle
- Twine
- Water
- Adult supervision
- Herb(s) of your choice
Hypothesis:
What do you think will happen?
DIRECTIONS
OSU Extension Educator, Danielle Combs, walks through the directions of how to make a 2-litter Herb Planter.
Preparing Your Planter:
- Clean and wash the 2-liter bottle.
- Remove label.
- Using a marker, mark about halfway down the bottle, all the way around (this will be your cutting guide).
- With adult supervision: Using an X-ACTO® or utility knife or scissors, cut both the 2-liter bottle in half, short ways.
- Using a hammer and nail, poke holes in the lid of the 2-liter bottle for the wick to feed through.
- Take the upper piece of the bottle (spout end) and turn upside down and place inside the lower half of the bottle. This will create the planter and water basin/reservoir.

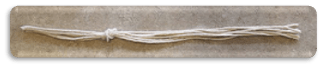
Creating the Wick:
- Cut four pieces of twine. The pieces should be long enough to rest on the bottom of the bottle, enter the spout and go along the sides of the upper half of the 2-liter bottle.
- Halve the four pieces, then tie a knot about two inches from one end.
- The knot should stick/rest in the spout of the 2-liter bottle, with the short ends touching the bottom of the water reservoir.
Assembling Your Planter:
- Feed the wick through the bottle lid and screw back on the bottle.
- Fill the upper piece one-third of the way full of potting soil, while making sure the twine pieces stay away from one another.
- Add your plant(s) to the planter; you may need to move the soil around to get the plants to stay upright.
- Finish filling the upper piece with soil.
- Fill the base with water. Water the plants regularly when needed.
- Make sure to place the planter somewhere with plenty of sunlight.

QUESTIONS
- What do you think the twine is for?
- Observe and record what you see happening. (Daily and weekly)
- Do you see roots?
- Where are the roots going?
- How do the roots compare in size to the plant above the soil?
- How do you plan to use your herb(s)?
Peer-reviewed by Kelly Royalty, Extension Educator, 4-H Youth Development, OSU Extension Clermont County, and Meghan Thoreau, OSU Extension Educator in Community Development programmatic focus on STEM Education and Career Exploration.
References:
Super Simple DIY Self Watering Herb Garden (April 23rd, 2015.) Retrieved from https://www.ithinkwecouldbefriends.com/2015/04/23/self-watering-herb-garden/
How to Make an Indoor Self-Watering Herb Garden (n.d.) Retrieved from: https://www.foodnetwork.com/shows/the-kitchen/articles/indoor-self-watering-herb-garden
Which Plants Can Be Grown in Plastic Bottle? (n.d.) Retrieved from: https://www.slickgarden.com/which-plants-can-be-grown-in-plastic-bottles/
