Cover Crops
Weed Control Using Cover Crops – Winter Rye
I hate weeds. In most gardens they are a nuisance. In my community garden they are overwhelming. I garden in an extremely old Victory Garden remnant that might be the oldest community garden in Ohio.
That means the weeds have been there for so long they have naturalized to the place and the seed bank it unreal. Last year I put a third of it in Sorghum X Sudangrass as an experiment to see how well it would help smother weeds. I did not see a decrease in weed germination after that but I did find the ground easier to work this year in that spot. The plow does spread the soil around so that did not help with weeds.
Here is what I have to deal with. This is the next door plot. The owner has not done any work yet.

cocklebur, bindweed, thistle, lamb’s quarters, morning glory, smartweed, ragweed, etc…….
It is all about two feet tall and going to seed. Here is a better picture to give you an idea of the weeds.

I tilled residue under after mowing last week to make a seedbed.
Normally I would have planted buckwheat in this spot, just like what was done at the Logan Community Garden last year, but I had some winter rye left over from last year and that is what I used.

One patch of thistle in the middle of this pic needs dug out. I will mow the rye to keep it from going to seed through the season.
The rye cover crop will smother weeds and add organic matter to the soil. It will be much easier to manage and frequent mowing will eliminate annual weeds as well.
Planting has started at The Urban Farm
The 2017 growing season is underway. I had started a ton of seedlings to have as teaching tools for the many seed starting workshops that I have done in the last month or so. ( 10 classes on seed starting this season). The first seeds were sown under the lights in my office seed start growing station in January.

Lettuce and Broccoli starts on 1/23, germination occurred two days after sowing.
At about a week or so of age, when the seedlings were at the true leaf stage of one or two leaves, I divided them and transplanted into cell packs.
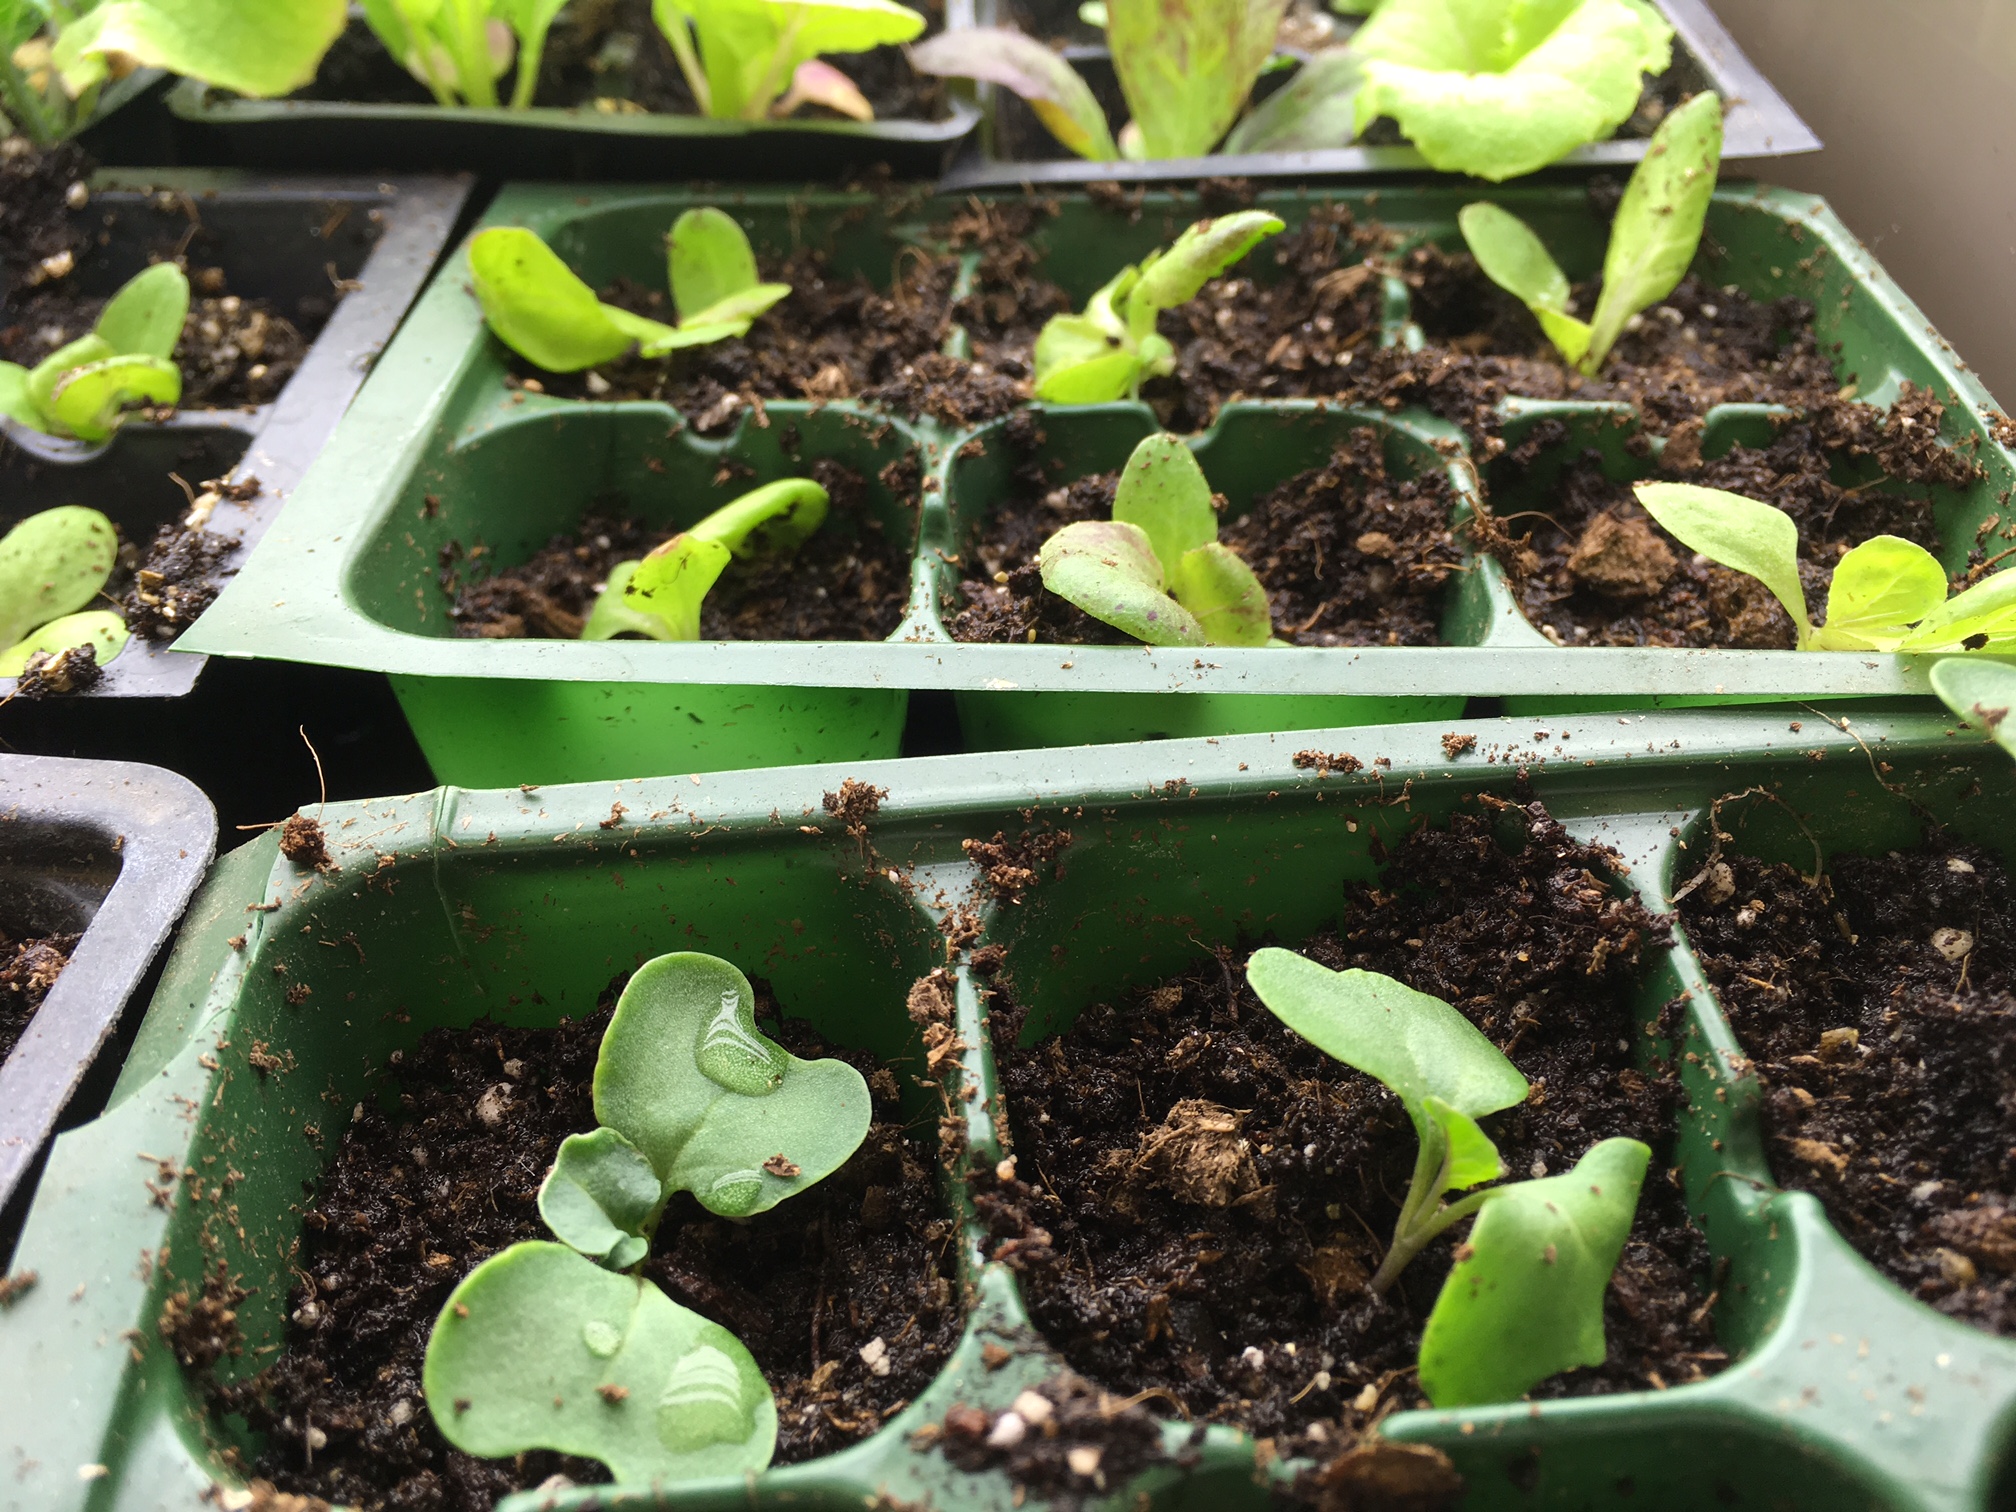
11 days from sowing.
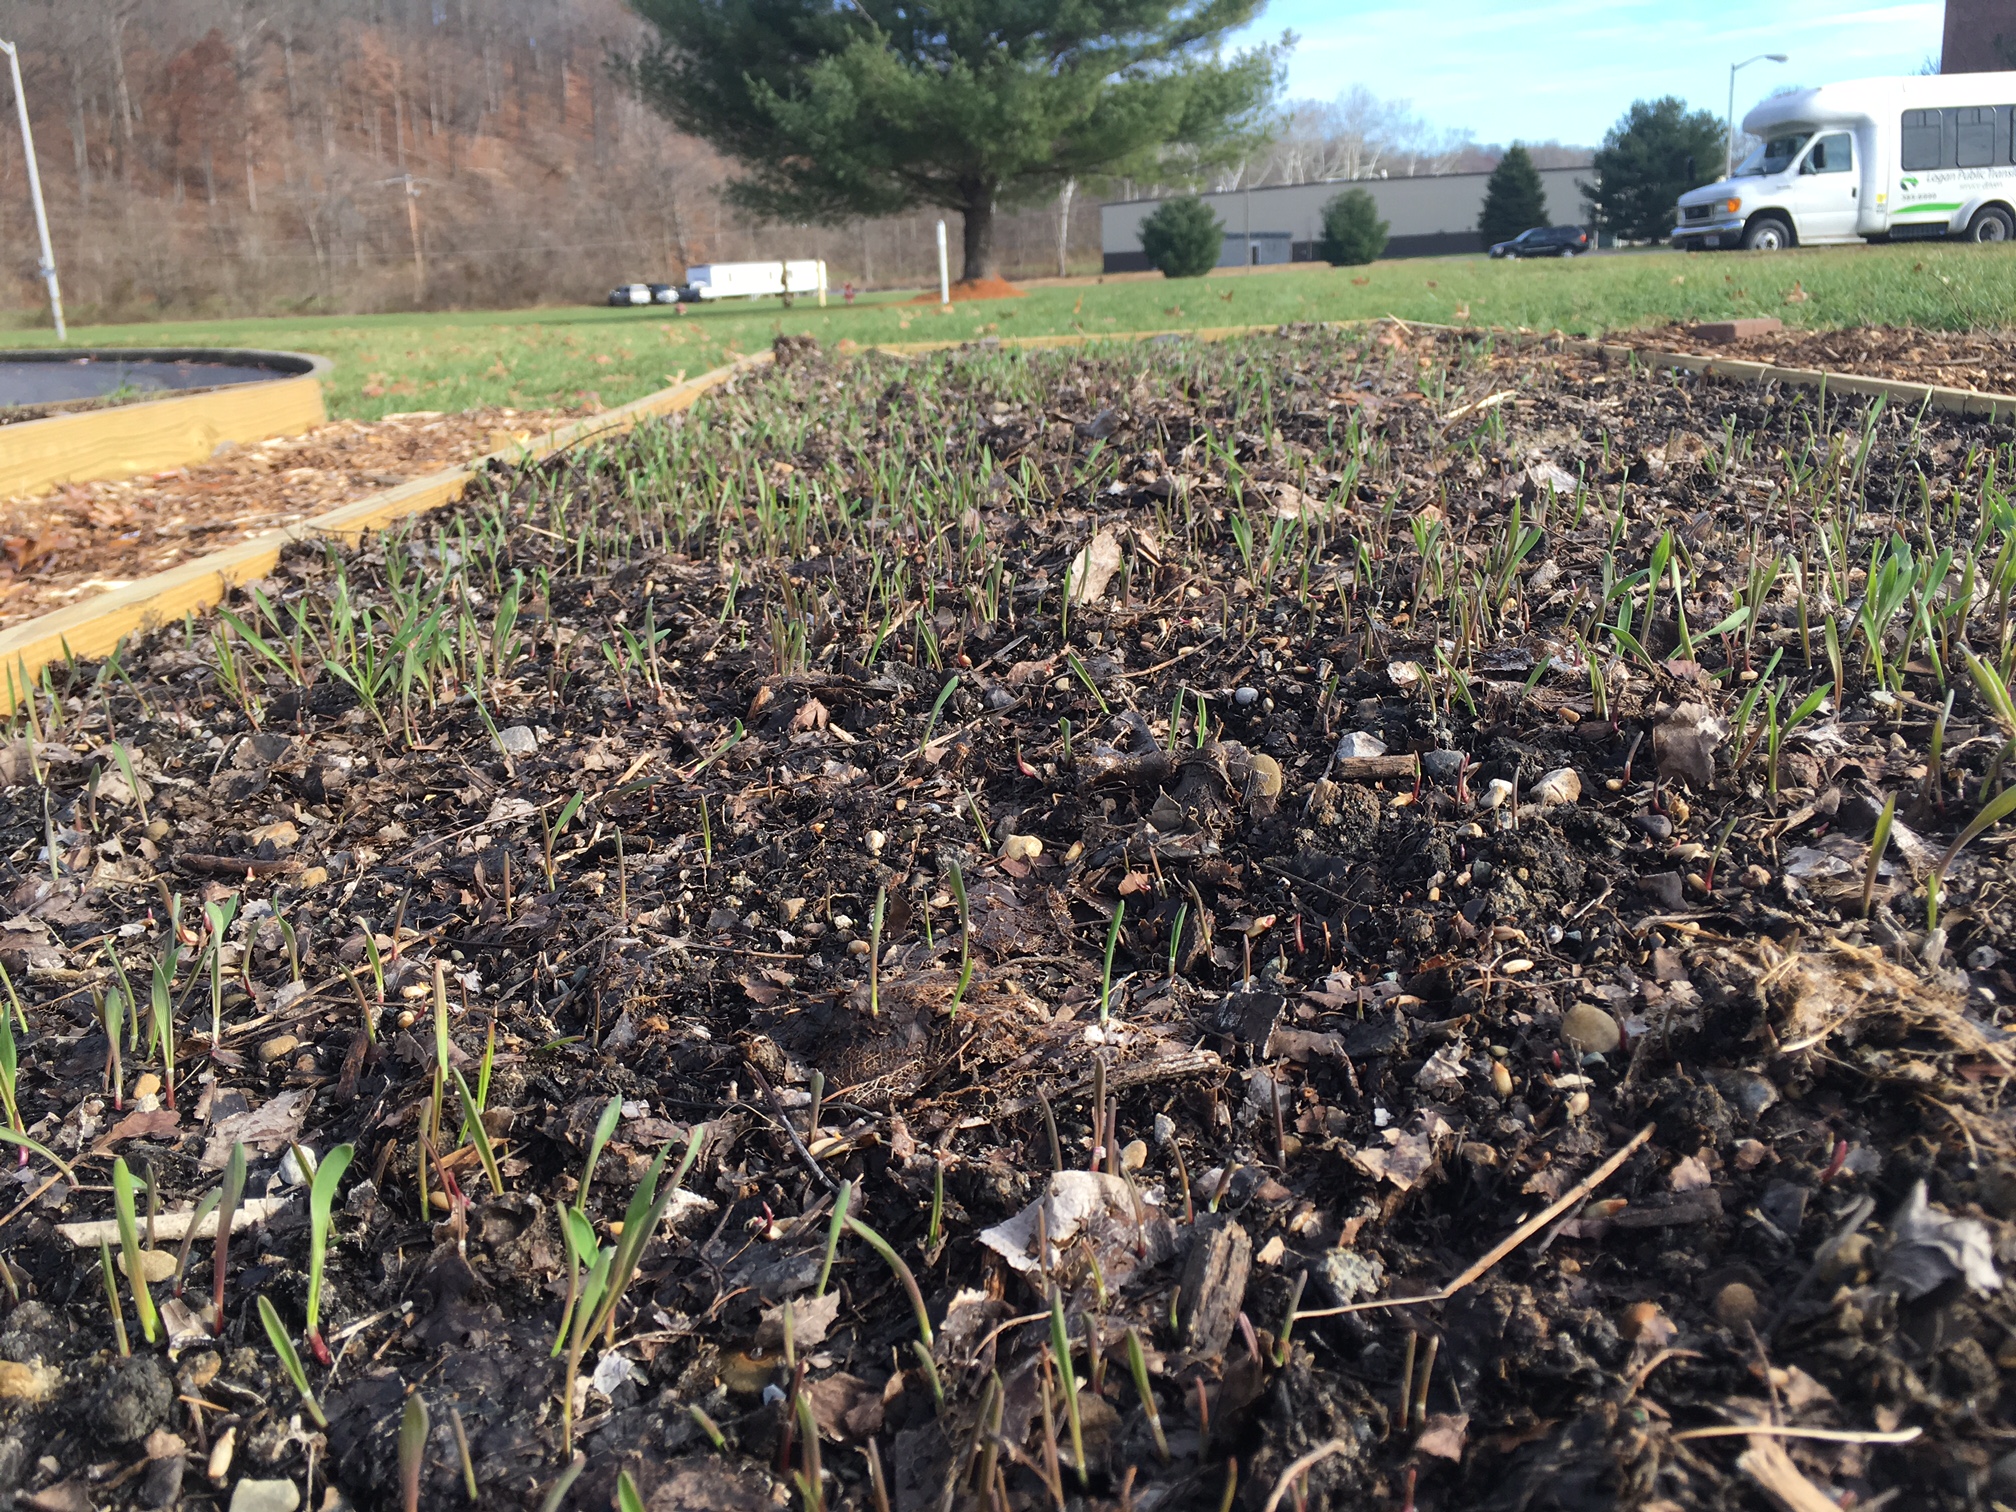
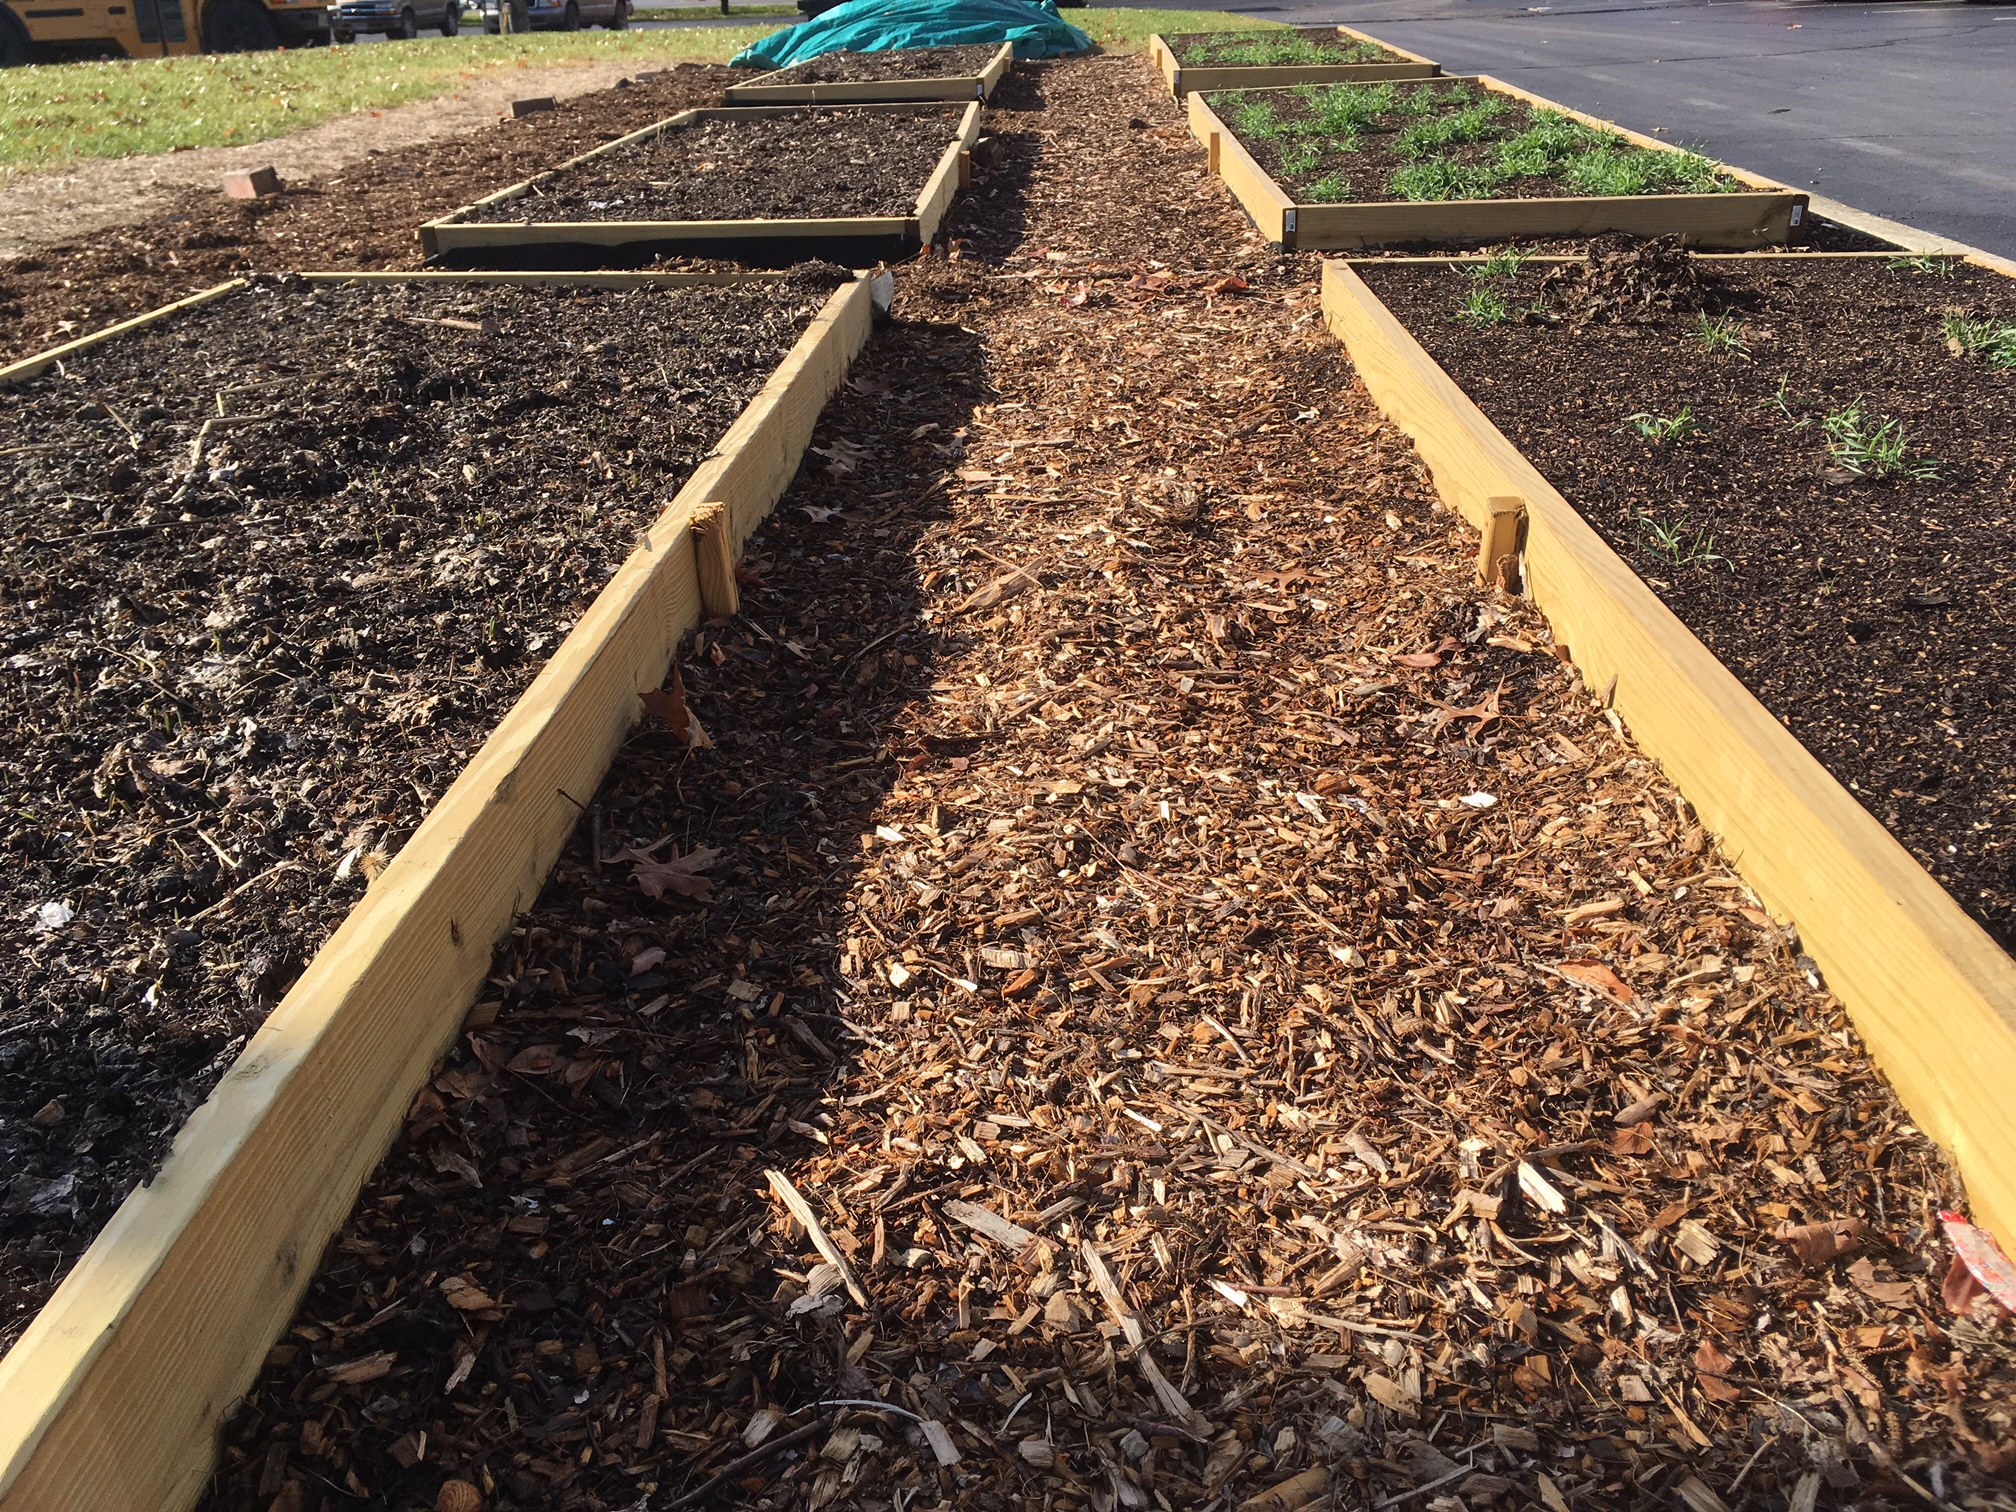
The seedlings were allowed to grow in 1″ cells for another couple weeks. We had a really nice warm up lately and I knew I was going to be out of the office for a while for a conference so I took them to The Urban Farm to transplant. I picked a bed to use that was close to the parking lot to make use of the nice warm microclimate that the blacktop would provide. I had looked at the forecast to see the 60 degrees was going to go back to closer to normal. The first thing to do was terminate the cover crop to get a planting area.

Turned winter rye under with a garden fork. At this stage will provide a nitrogen boost.
The soil was awesome at this point. It had broken down further, was very friable and a nice dark color. Extremely easy to work, I could plant with my fingers and did not need a trowel.

I spaced the plants for planned harvest. The lettuce was on the edge and was on about 7″ centers. The broccoli alternated with lettuce on 10″ centers. As I harvest lettuce every other head, the remaining heads have room to get bigger, and when the lettuce comes out completely the broccoli can have that whole side of the bed to expand. The leaves will quickly make a canopy over the soil making a nice microclimate to shade the soil to conserve moisture and help prevent weed germination. Basic bio-intensive principals.

The whole bed was covered with medium weight row cover. This will allow water, air and 90% of sunlight to penetrate to the plants while providing frost protection as well as predator (deer and rabbit) protection in this time of little forage.
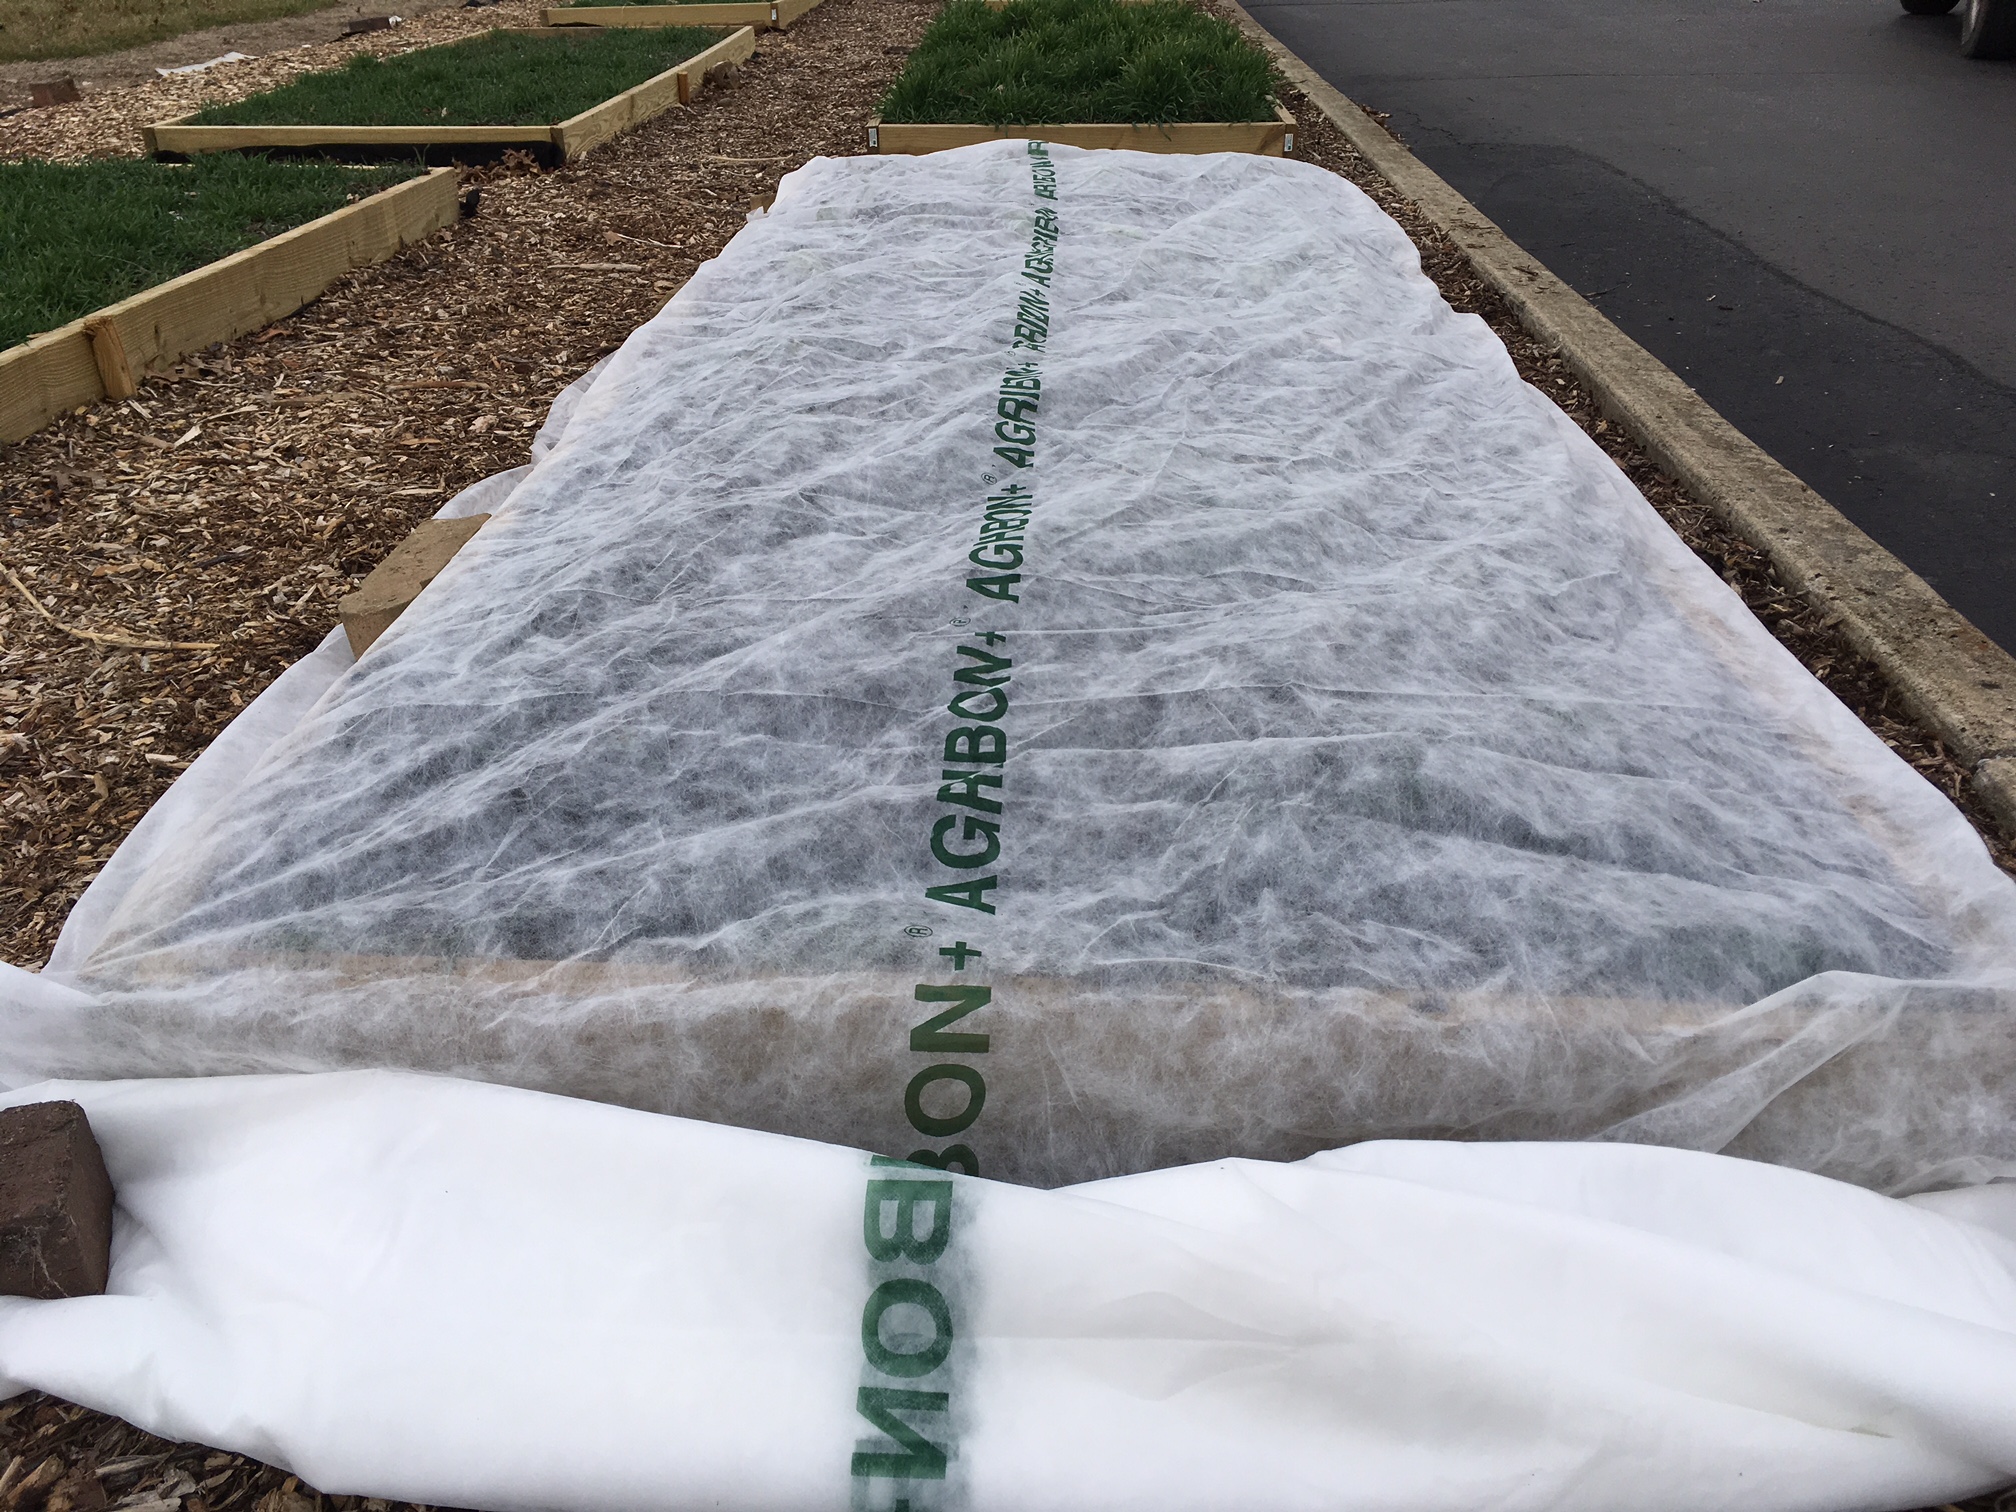
Row cover loose on top of the seedlings. I will raise it up with hoops when I get some free time!
Now I need to see how the seedlings grow. If you remember back when the growing medium was added I had concerns of chlorosis as the pH of the growing medium was a little too sweet. The cover crop and ammonium sulfate should have corrected it, but I want proof before the May 1st target date. If everything goes well we should be able to start private sales of this produce in a few weeks.
The Urban Farm – Winter Update
I know I told you all that The Urban Farm was done for the season, but actually there is something important going on right now that will be critical to our success in 2017. The cover crop seed I planted in November has been slowly growing and helping the overall soil health. It was very fortunate that we lucked out with lots of rain and moderate temps for the first half of winter. I go to the farm and take pics every few weeks or so. Here is the timeline in pictures:

shortly after germination, picture taken on November 29th
picture taken December 7th

some great growth so far. Picture taken January 3rd
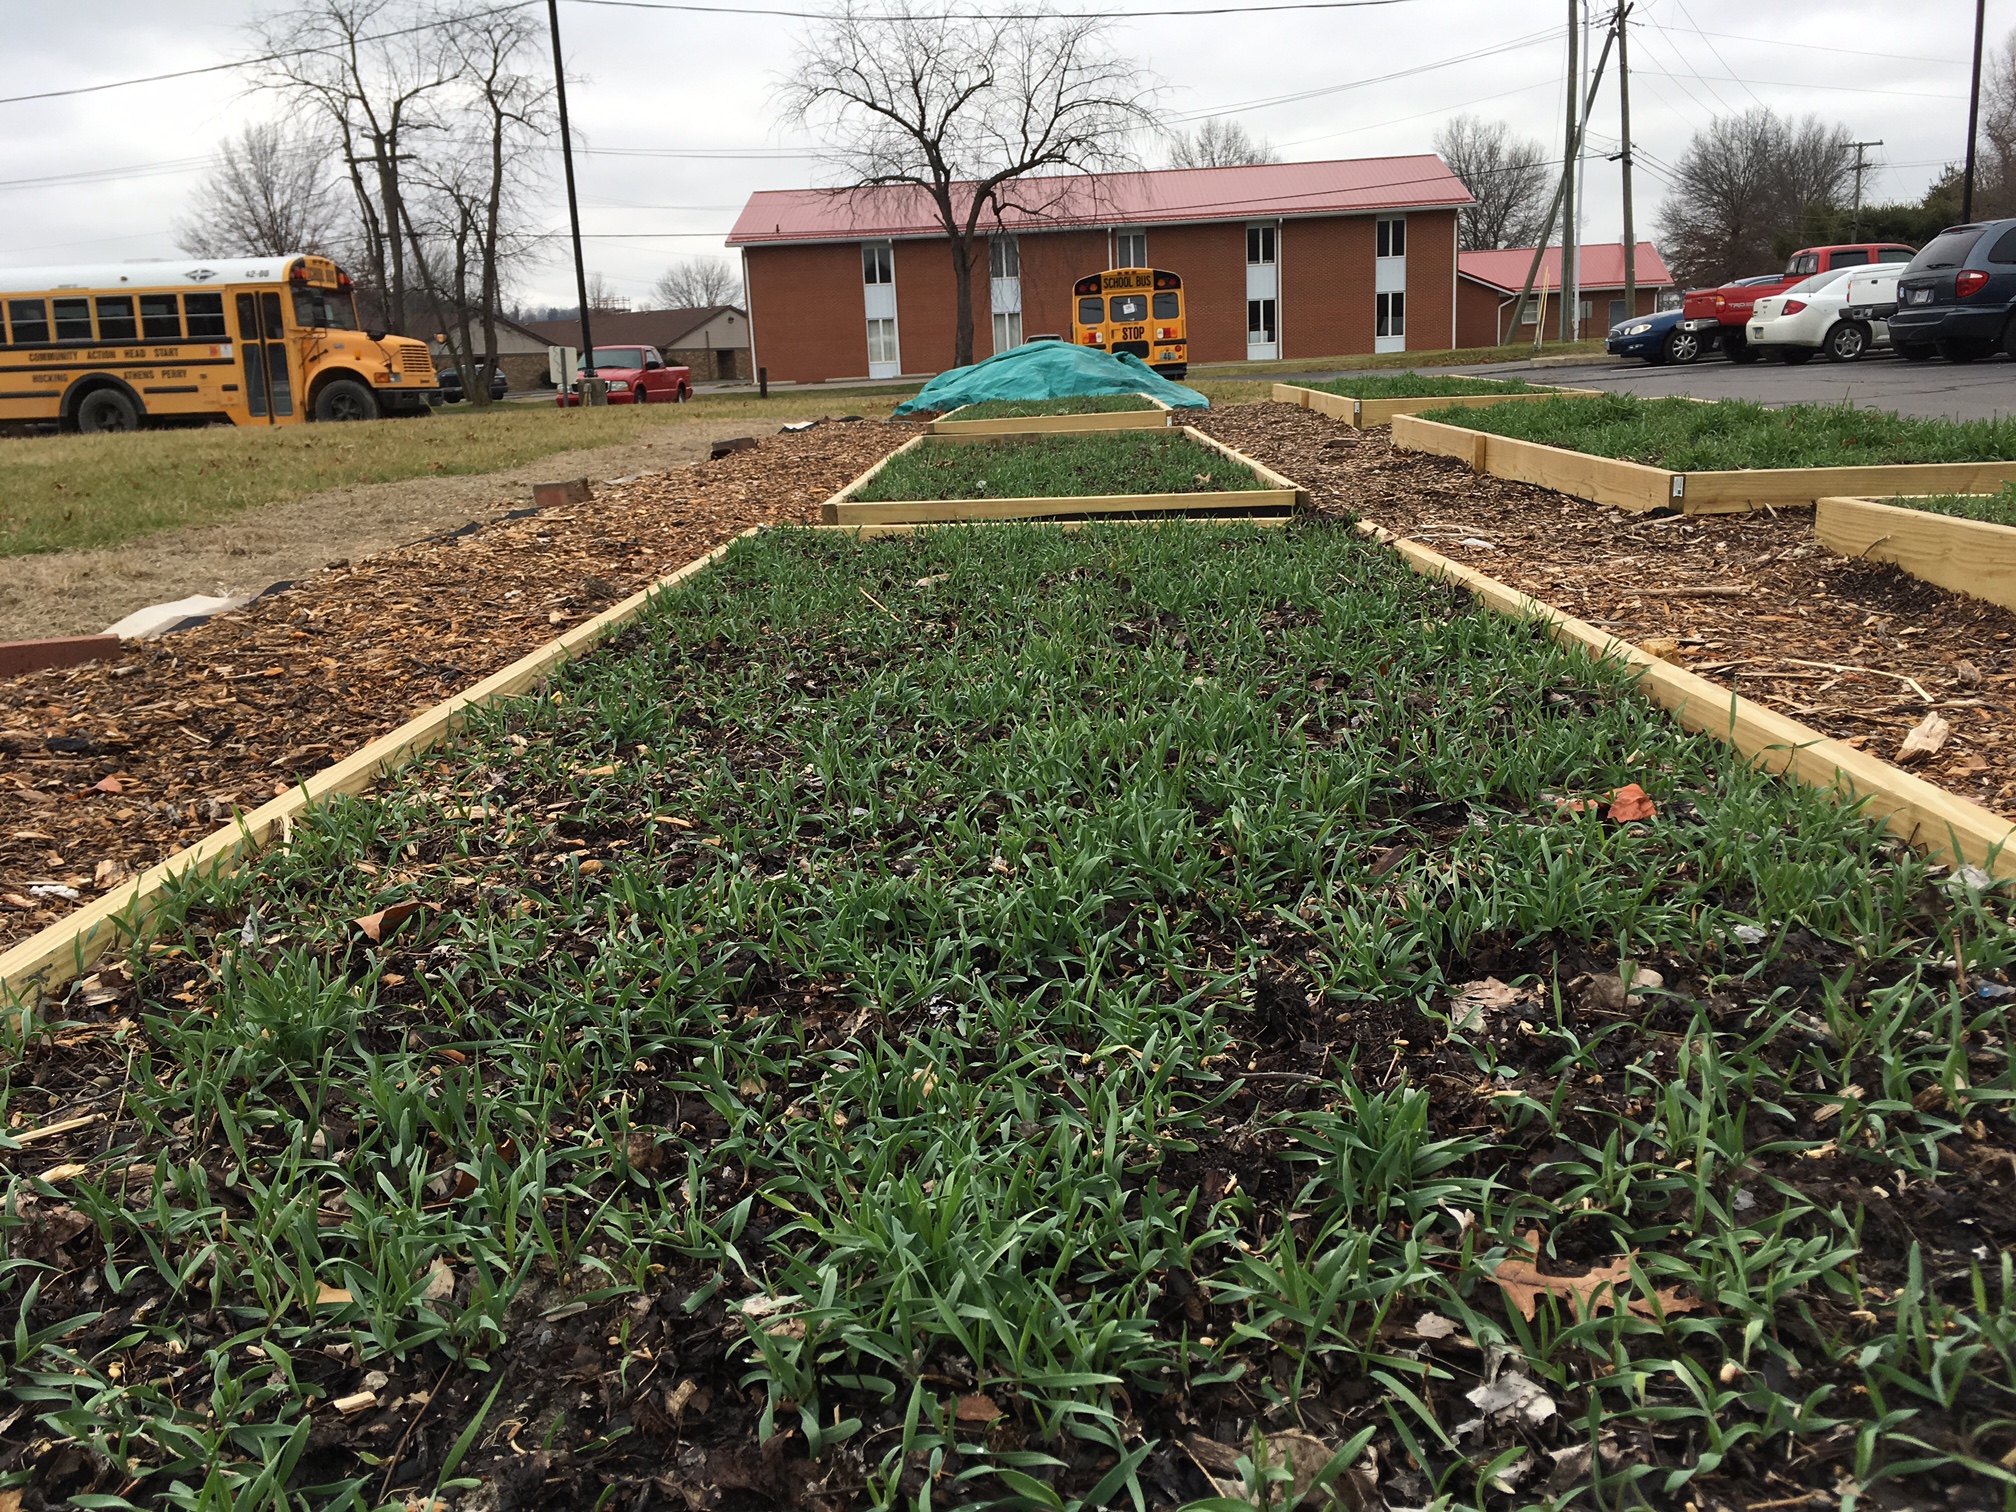
Picture taken January 19th.
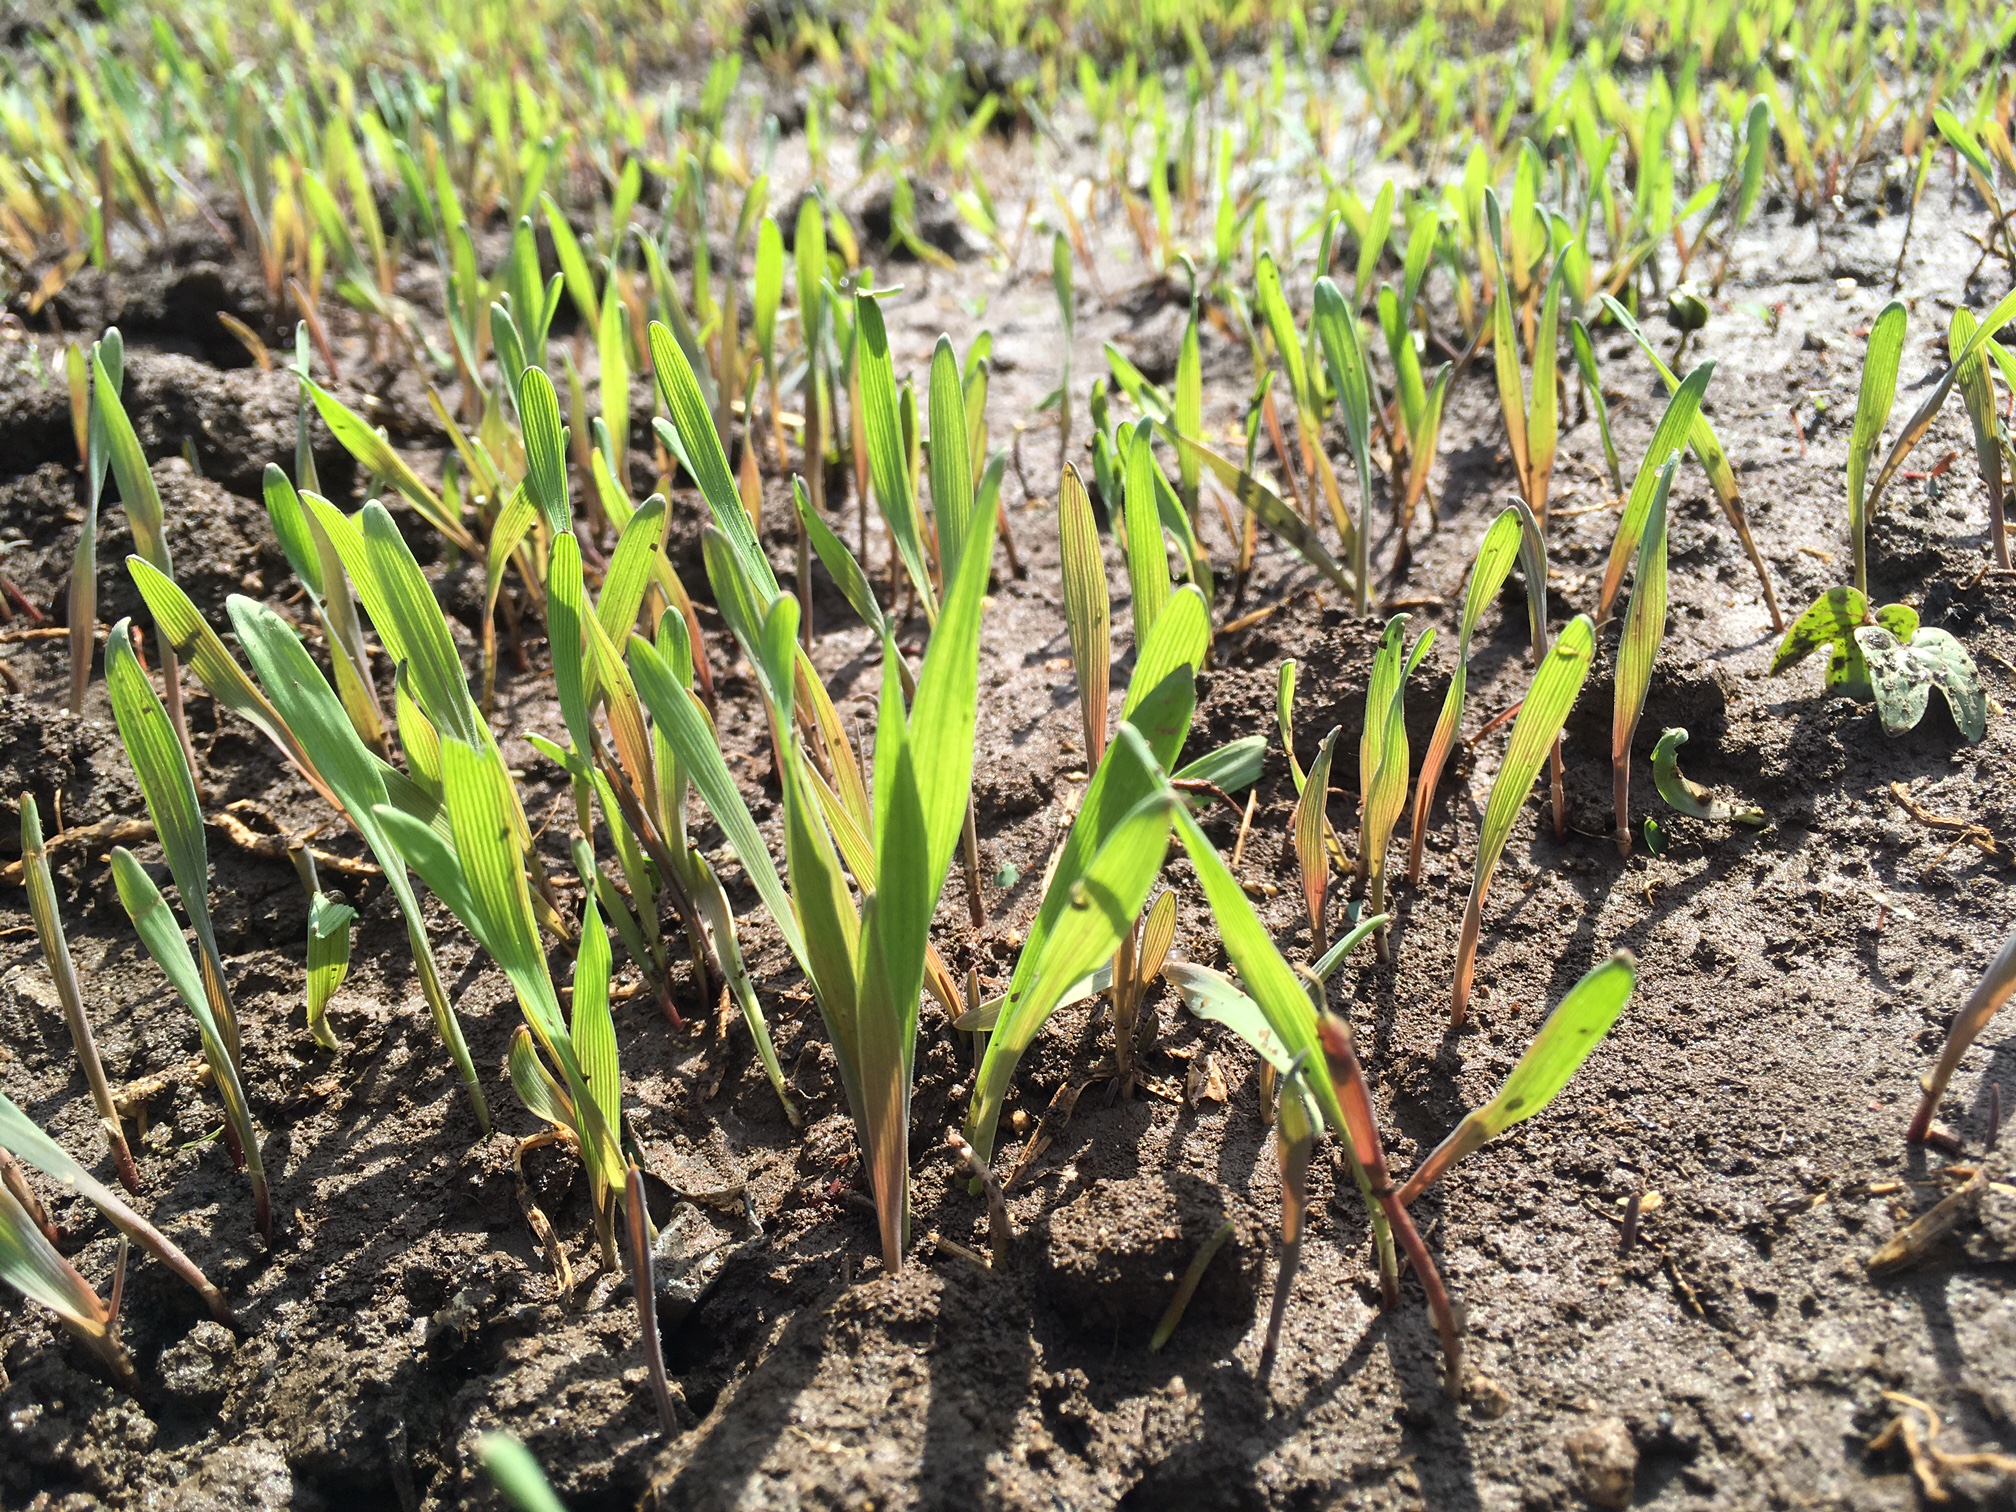
As soon as the daylight hours increase and it gets warmer, the rye will take off like a rocket, easily getting over 3 – 4 feet tall.
The Urban Farm is Done for the Season
So on a sunny 60 degree day in late November (I know, right?), Sam, Brad and I finished the paths around The Urban Farm and are now done with Phase II construction. The target for growing will be to sow some seed like spinach, lettuce, carrots, radishes and peas in March of 2017 to prepare for vegetable sales on May 1 for the Senior Farmer’s Market Voucher Program, and to hopefully have some extra for public sale and inclusion into Meals on Wheels and lunches at the Senior Center.
Special THANKS! to Athens Hocking Recycling Center for some more donated mulch. I took some pics for you all to enjoy.
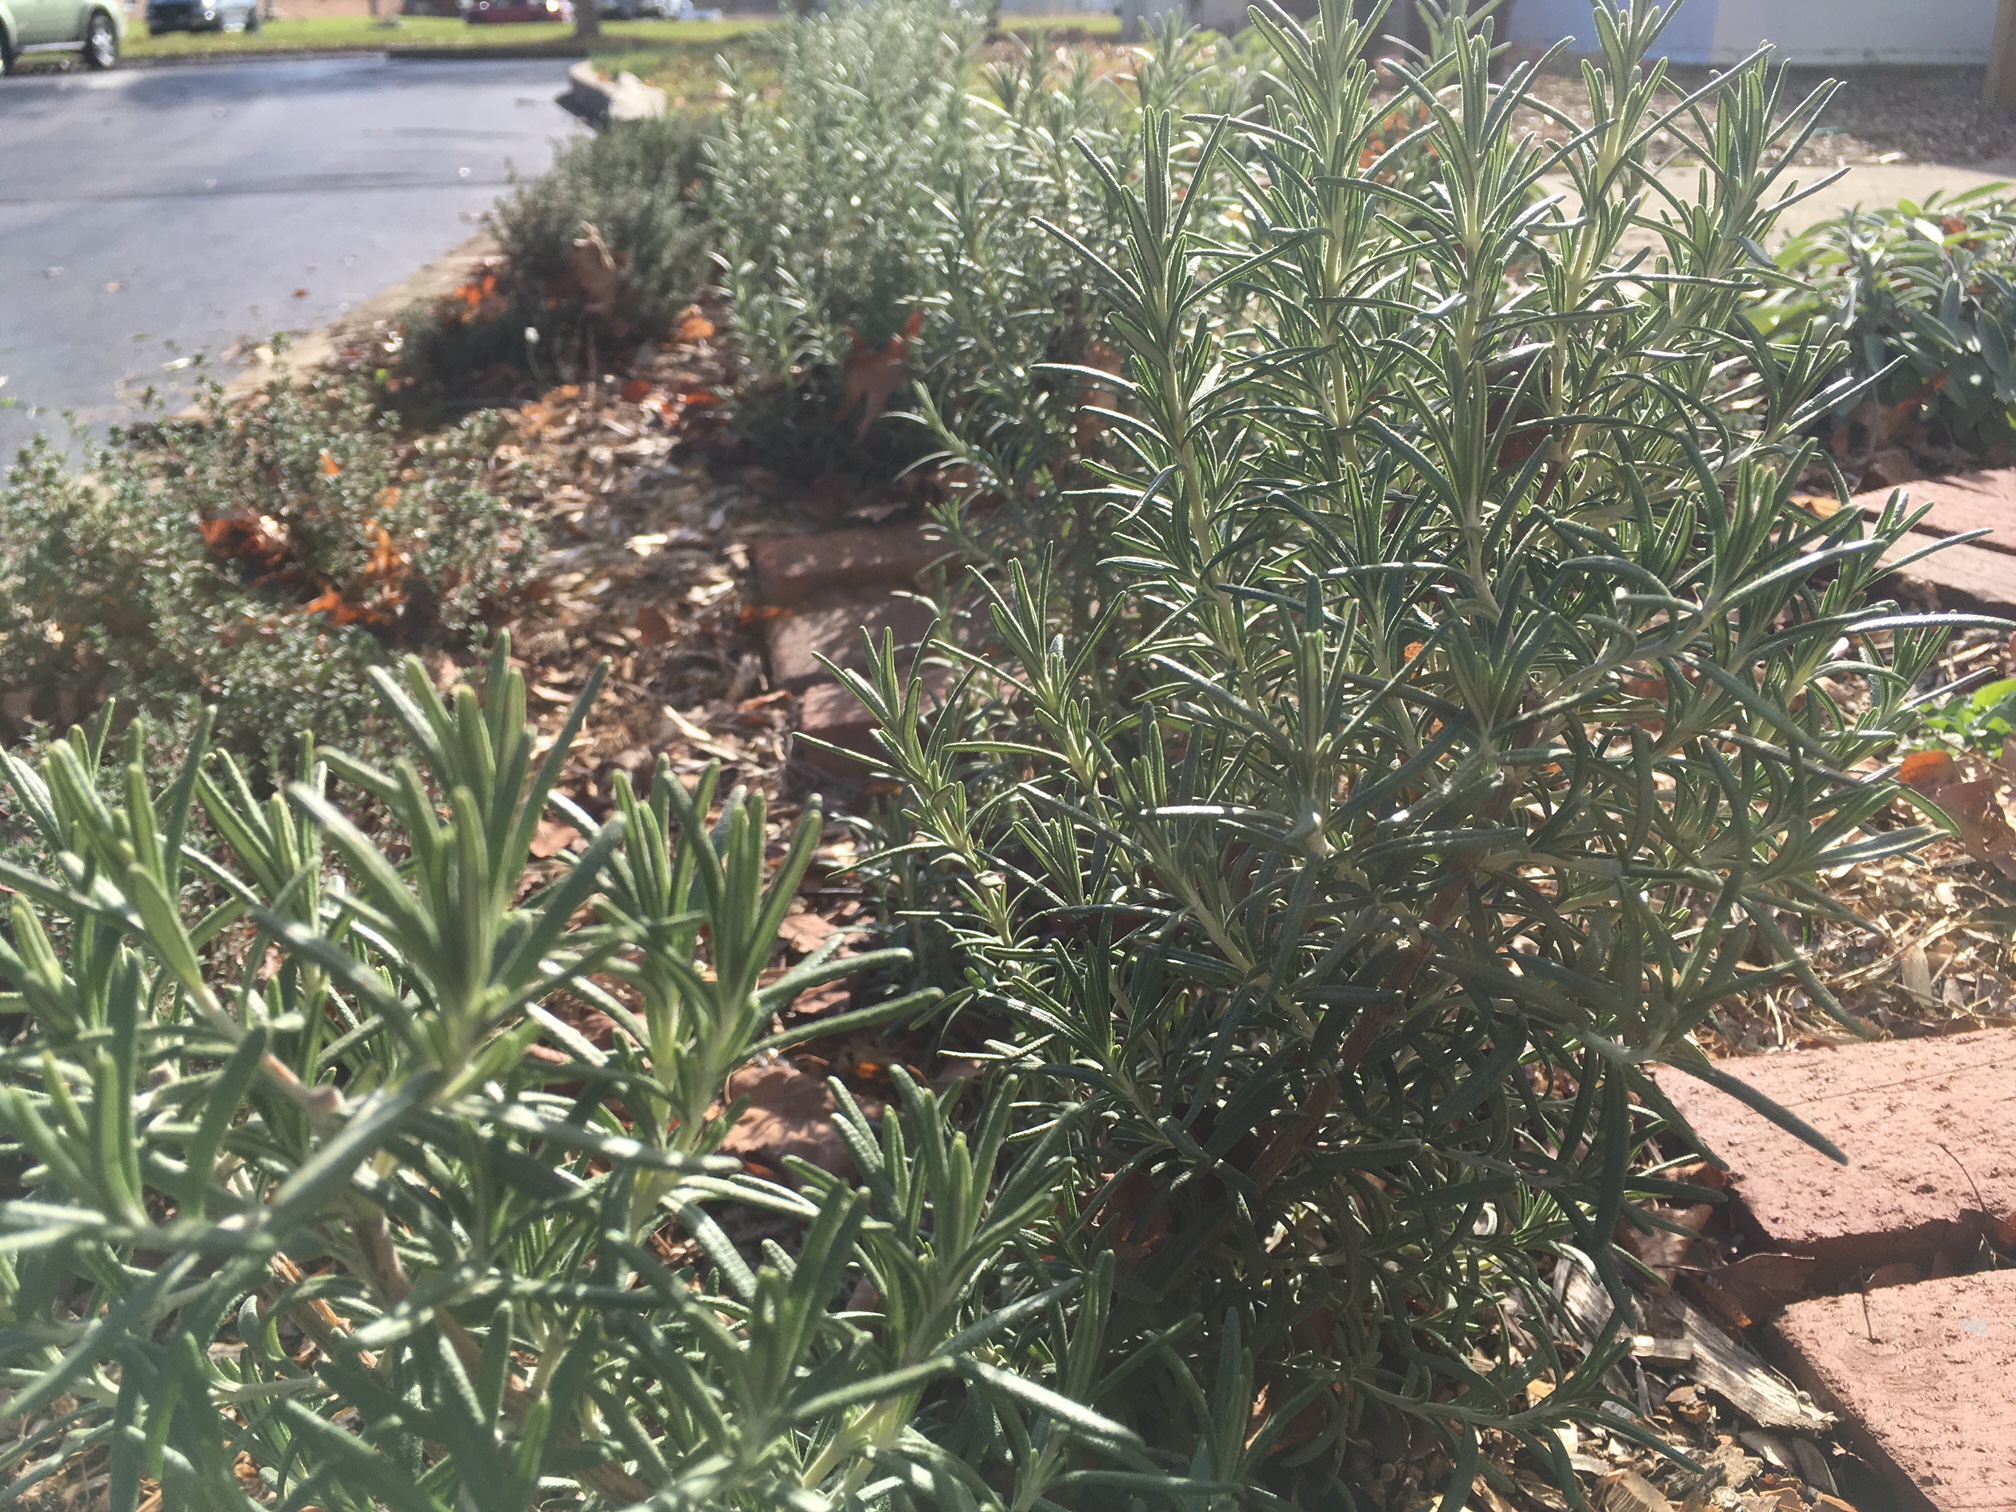
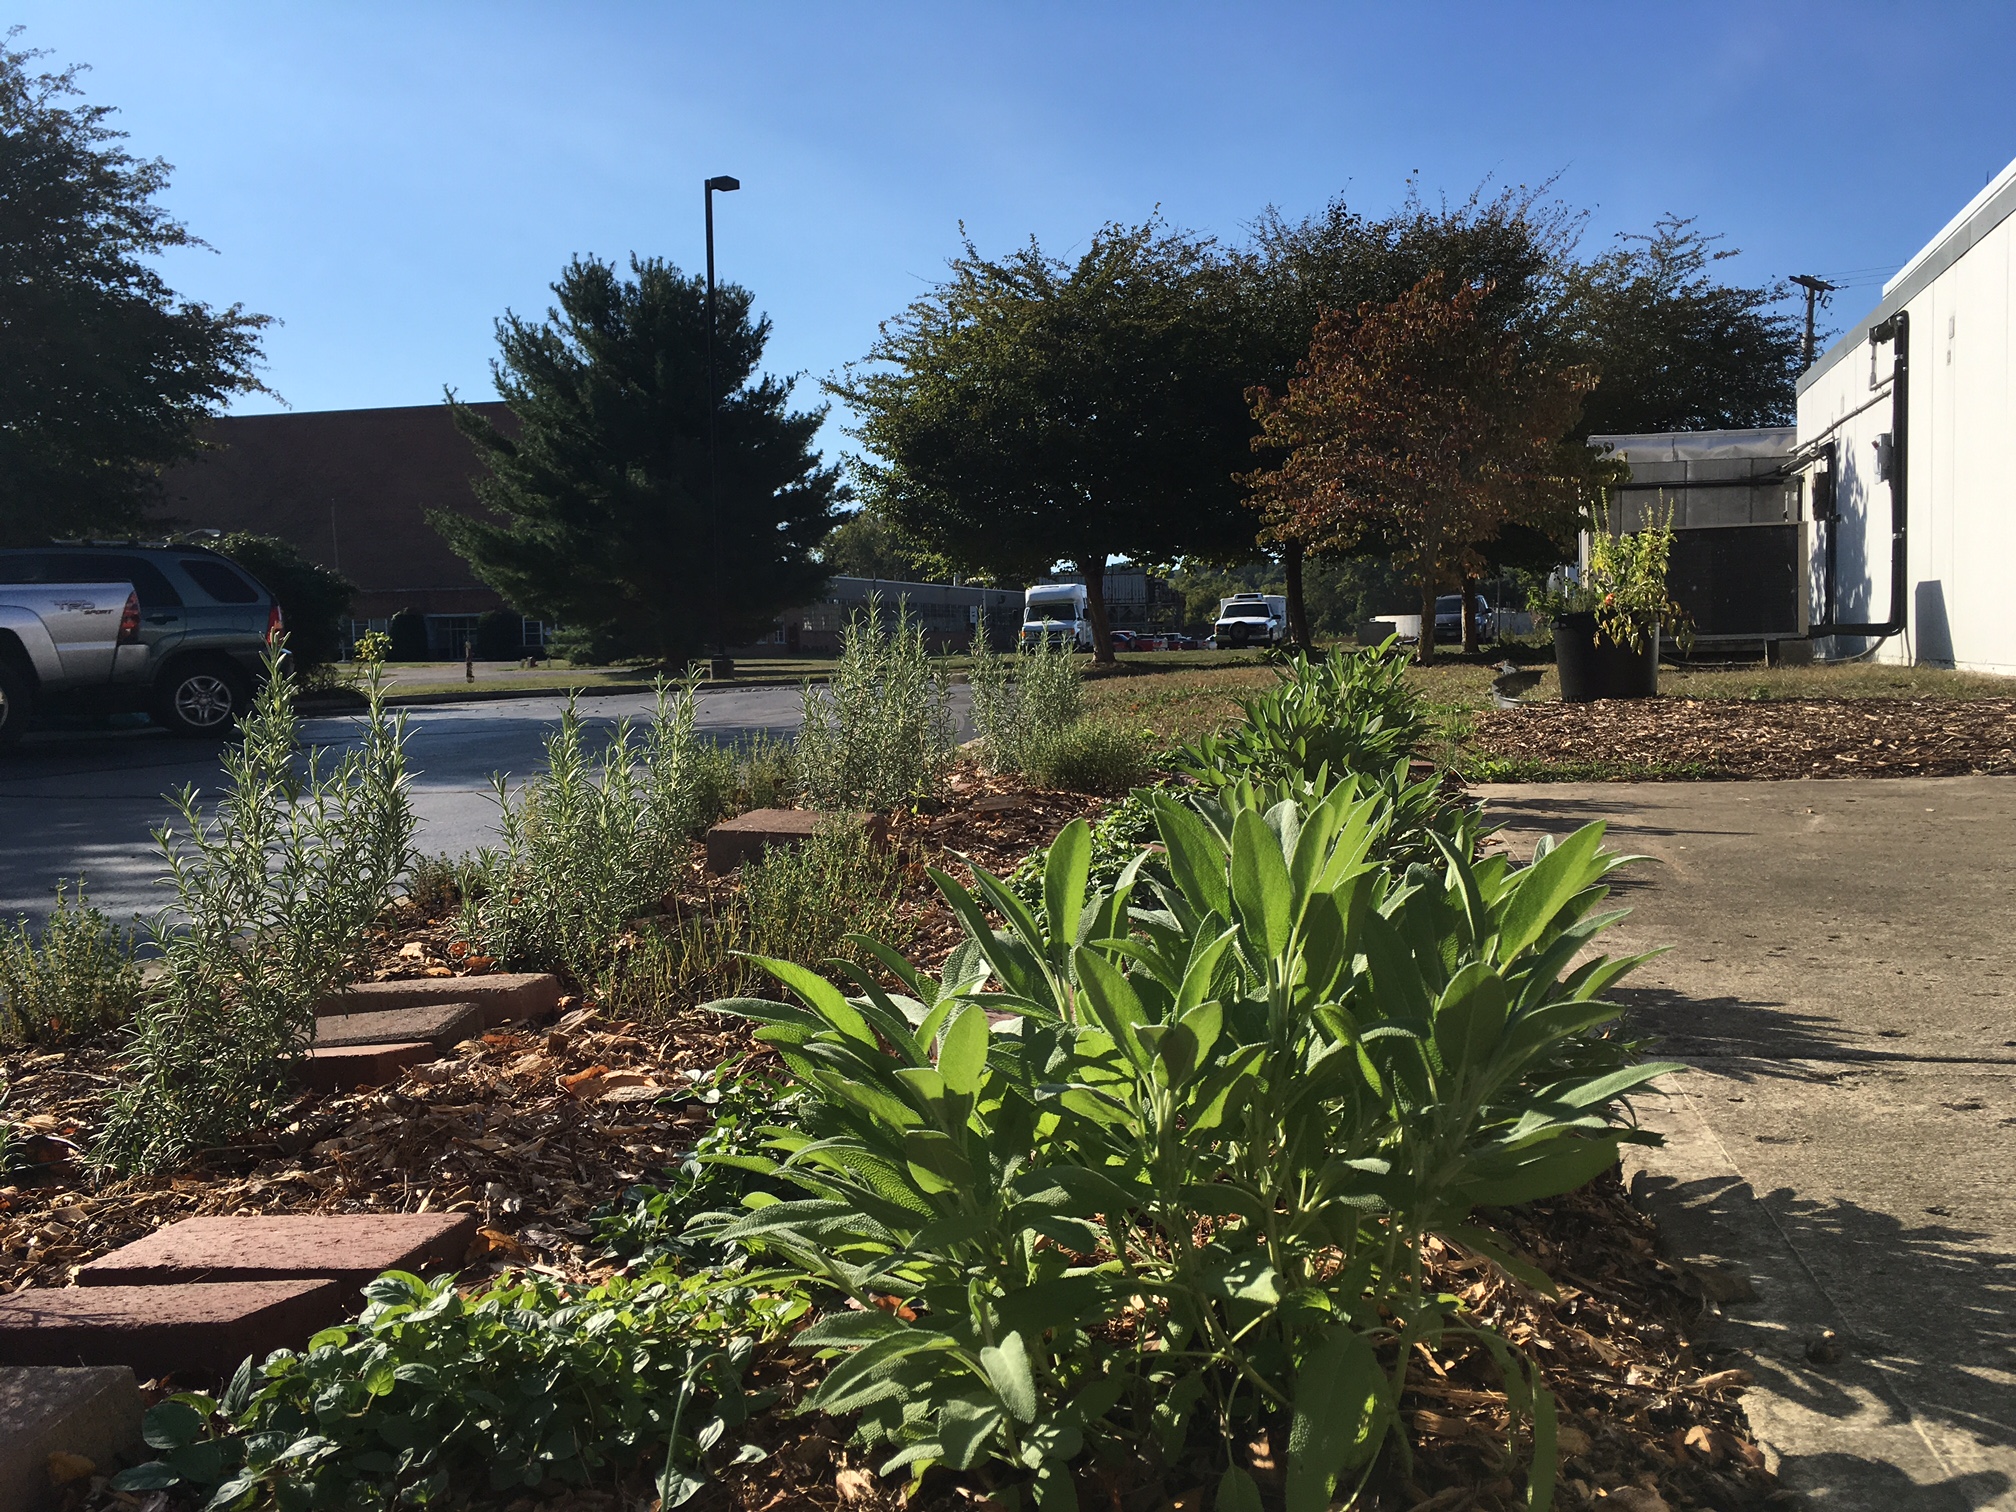
Phase I, the herb bed, is doing great. It is still being harvested for use in the Kitchen

The winter rye cover crop is starting to germinate. Hoping it gets enough root growth to survive the winter
See you all in the spring.
The Urban Farm – Raised Bed Growing Medium
We built six raised beds as our starting point for growing vegetables next spring. Each bed is 4′ x 12′ and 8 inches tall. The math works out to about 32 cubit feet of soil per bed, with a cubic yard being 27 cubic feet, we need over 7 cubic yards of fill material.
I wanted to get a good head start on organic material as increasing soil organic matter over time can take years, but I did not want to put all my eggs in one dirt basket, so I went with two different compost options, one a commercial blend and the other a municipal yard waste blend. We used the municipal blend here at the Children’s Educational Garden at the fairgrounds and while it is a dynamite additive to soil, when I planted into it straight away, some plants did not look happy, showing a symptom called chlorosis, or yellowing of the leaves. That means the product needs something done to it to smooth out any rough edges. That is my main concern, making sure I correct any needed deficiencies before planting season.
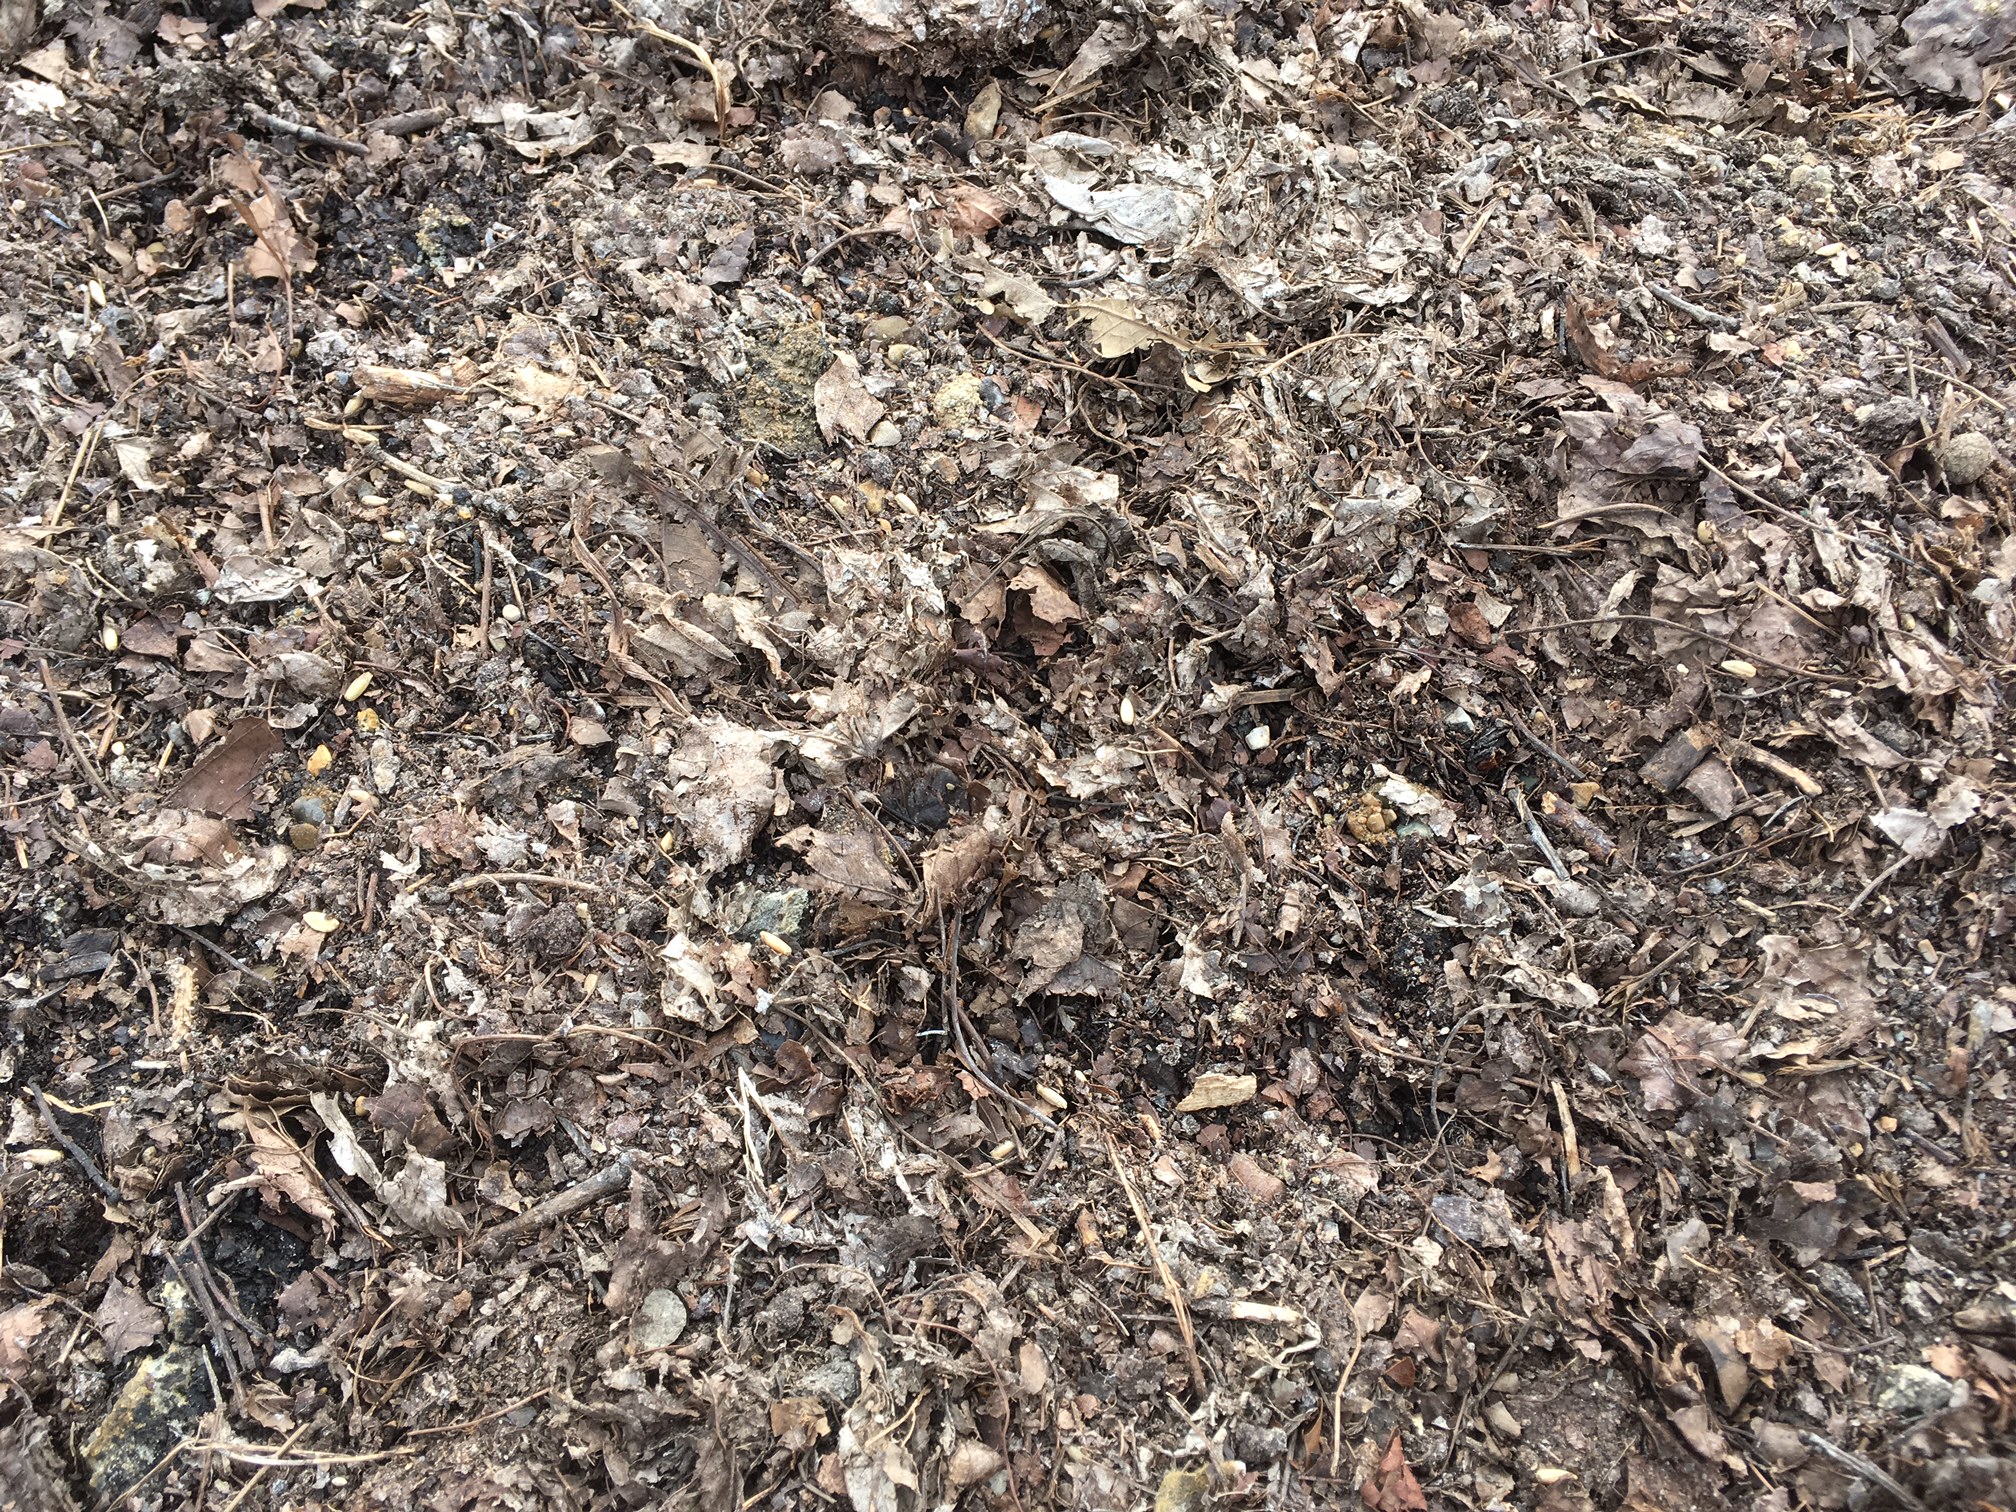
The first was the compost created at Athens-Hocking Recycling Center. Sam and I wanted to purchase from them as they have been so gracious with donations of mulch for this project as well as the What a Waste Project. This material is made from food scraps they collect regionally from homes and businesses that keeps this waste from a landfill and turns it into a salable product by mixing it with wood mulch, turning it, then shredding it down.
Here is a close up of the finished product, some cover crop seeds are visible:

You know me, I have to soil test it:

Pretty impressive numbers. High organic content, lots of nutrients. You can still see some wood pieces as well as some egg shells if you look close. It is an excellent soil amendment The problem with using it straight is the alkaline pH of 7.7 can cause some problems with certain nutrients being available right away. The soil test states to add sulfur to combat that.
Next up is municipal yard waste from the City of Logan. They very graciously donated to this project and Sam and I are grateful. They take collected yard waste and pile it up and it sits there for years, slowly breaking down. Here is a close up:
Not bad looking stuff, still some bits and pieces. The soil test results:

Very similar numbers noted here. High organic matter, lots of nutrients, same alkaline pH. I did the same with both. Added ammonium sulfate fertilizer then sowed cover crop seed.

Ammonium sulfate has both sulfur, to correct the pH and some nitrogen to help both the cover crops grow and help the soil bacteria break down the residual carbon bits. My hope is that the fertilizer, the cover crops and the winter will combine to help both of these growing media get to a good point for vegetables by April.
Sam and I want to say THANKS!!!! to the City of Logan for generously donating a huge dump truck of compost that we will be able to use to grow vegetables for years.
Phase II of The Urban Farm at Southeast Ohio Regional Kitchen
Yesterday was the ground breaking day to get some raised beds built and filled so that we could get cover crops in the ground anticipating rain this week and using the last little bit of nice weather for germination. I had prepared the site a couple weeks prior with some glyphosate. The area we are using to plant had some seriously potent weeds.

The plan was to get six raised beds, 4′ x 12′ by 8″ tall placed in this area with 3 foot paths between them. We had received a donation of lumber from an amazing local partner, Mike’s Lumber LLC on 93N, of all the wood to construct the planting beds. Huge thanks to Mike!!
Our original orientation would be north-south, but we had some last minute questions about property lines, so we placed the beds on an east-west orientation in case we had to move row two.

Next we laid cardboard on the pathways and the bottom of the raised beds. Thick cardboard for the paths, thin stuff that will break down by next year in the beds. We put landscape fabric on top of the paths, and then spread wood chips on top of the fabric. Weeds are a real concern to me and if I get a chance to minimize them I will. A good start on weed control will minimize them potentially for years. Huge thanks to Athens-Hocking Waste Recyclers for a load of wood chips for the pathways.
-

- first layer weed barrier
-

- wood chips mulch as second layer weed barrier
-

- Sam prepping a seed bed
Then once the beds were ready a cover crop mix of rye, vetch and clover was planted and watered in. The cover crop will help the compost we filled the beds with become more bio-active and be ready for spring planting. I am hoping that we get the second row filled and cover cropped as well. We were waiting on permission to plant from the neighbors and thankfully got that permission shortly after this part of Phase II was done.

A huge thanks to the work crew: Sam, Brad, Bob and Robert from HAPCAP. We also had two sponsors contribute materials that Sam and I want to recognize for their generous donations:
- Mike’s Lumber LLC
- Athens-Hocking Waste Recyclers

The Phase II work crew.
Fall Project Updates
As we progress through fall and the growing season slowly comes to an end I thought I would give an update on several projects that I have been working on over the last few months.
First up is the Children’s Educational Garden here at the fairgrounds:
The garden is still doing great. Tons of cherry tomatoes and peppers still. Some shell beans left from the green bean bushes. Parsley and onions as well. Feel free to come down to the fairgrounds and help yourself, especially if your tomatoes are done as we have lots.


In a few weeks when frost has killed most of the leftover summer veggies we will plant cover crops in the raised beds. It is the same blend as last year which turned out great. Rye, clover and vetch from Walnut Creek Seeds.

72.5% Winter Cereal Rye
12% Crimson clover
11.9% Hairy Vetch
Next up is The Urban Farm:
The perennial herb garden is doing great. We finally got some rain and it has cooled off.
The site we have selected for the raised beds could not be much better. South face, full sun, aligns east to west. Perfect.

Last update is the accessible raised beds from the What a Waste project. The veggies did great and they got a major harvest. Fall is definitely a great time to grow vegetables.
I will have a bigger update on The Urban Farm at Southeast Ohio Regional Kitchen in a few weeks.
Preparing the fall garden to benefit a spring garden
It is common to not really want to think about additional work at the end of a gardening season, especially one that had as many heat and water challenges as this season did, but fall is the best time to do many things in the garden that if you wait for spring, you lose your best chance.
The best things to do in Fall to prepare for Spring include:
- Remove the old/dead/unwanted plants
- Amend the soil
- Make a compost pile
- Start a new garden
- Clean your tools
- Plant a cover crop
Lets go over them one at a time.
- Removing the old/dead/unwanted plants is common sense, but I commonly see leftover plants come spring time and that can set you back when you want to plant. Remove all plants that will not be overwintered, pitch any that have disease or seeds or might be a problem in a compost pile(like thistle, dandelion, or bindweed) Most diseases are fungal and produce spores. These spores will become next years disease if left alone. Do yourself and your plants a favor by removing them.
- The next thing to do after you have cleared the garden is to think about what soil amendments you can add will help for next year. Their are several things that can be added:
- Lyme
- Compost
- Leaves
- Wood Ashes
- Fertilizer
- Manure
- The best way to determine what you need is by doing a soil test. I use Spectrum Analytic.
- CLICK HERE TO SEE HOW TO SAMPLE YOUR SOIL
 A soil test shows what you need to add to grow what you need. It is helpful to get accurate amounts by letting them know exactly what you are planting. Some fertilizers are helpful to add at planting, some like Lyme need to be added in advance.
- Soil Testing Factsheet from Ohio State Extension
- Once your soil test results come back let me know and we will sit down and discuss them.
- I am a huge fan of adding leaves and wood ashes in the fall. Adding leaves and wood ashes basically adds the sum total of nutrition from an entire tree over its life of digging deep for minerals. Leaves have 2X the minerals per pound vs. manure.
- Fun Facts about Wood Ashes —>wood-ash-facts
- Start a compost pile
- Composting is easy and fun. It happens two ways. Hot and Cold. Hot composting gets hot enough to kill weeds, seeds and diseases while cold composting takes longer, does not get hot, but requires much less work.
- Penn State Master Gardening has a nice breakdown of hot vs. cold
- It is important for the pile to be just wet enough and have enough carbons(brown things) and nitrogens(green things) to make the magic ratio of about 25 to 1. Click Here for a list of compost item ratios –>compost-materials
- As you can see by my pile I am a cold composter

- Manure is a great addition to a garden or a compost pile. The overwintering time in the soil or in a hot compost pile will speed the breakdown of any potential pathogens in the manure and it makes a great nitrogen addition to offset the carbons like leaves. Here is a table of the C:N ratio’s of common manures –>manure-table
- Composting is easy and fun. It happens two ways. Hot and Cold. Hot composting gets hot enough to kill weeds, seeds and diseases while cold composting takes longer, does not get hot, but requires much less work.
- Fall is the best time to start a new garden. That will allow you to get started planting in spring when everything is at its busiest garden wise. Pick your spot, lay down some newspaper over your new spot or the addition to your current garden and cover with organic matter deep enough to smother anything growing on the surface. After a winter’s worth of time, you will be able to directly plant into your new garden. Consider adding some lyme or fertilizer based on a soil test of your new spot to make sure spring starts off on the right foot.
- Clean your tools. This is self-explanatory although I will be the first to admit I am horrible at this. My hand tools are rusty and look like garbage. They should be cleaned of dirt and lightly covered in oil to prevent rust.
- A neat idea to do this is put old play sand and used motor oil in a five gallon bucket and push tools in and out of that. It will clean and oil them all in one.
- This chore includes running the gas out of mowers and tillers. Those cost money and even I remember to do that on occasion.
- Plant a Cover Crop Regular readers of this website will know I love cover crops and use them in multiple applications. A cover crop can do many things for you like suppress weeds, add biomatter, dig through hardpan and increase fertility. You can pick your crop based on what you need.
- Looking for a summer cover crop to smother weeds, provide pollinator habitat and add biomass? Try Buckwheat:
-

Buckwheat cover crop at the Logan Community Garden
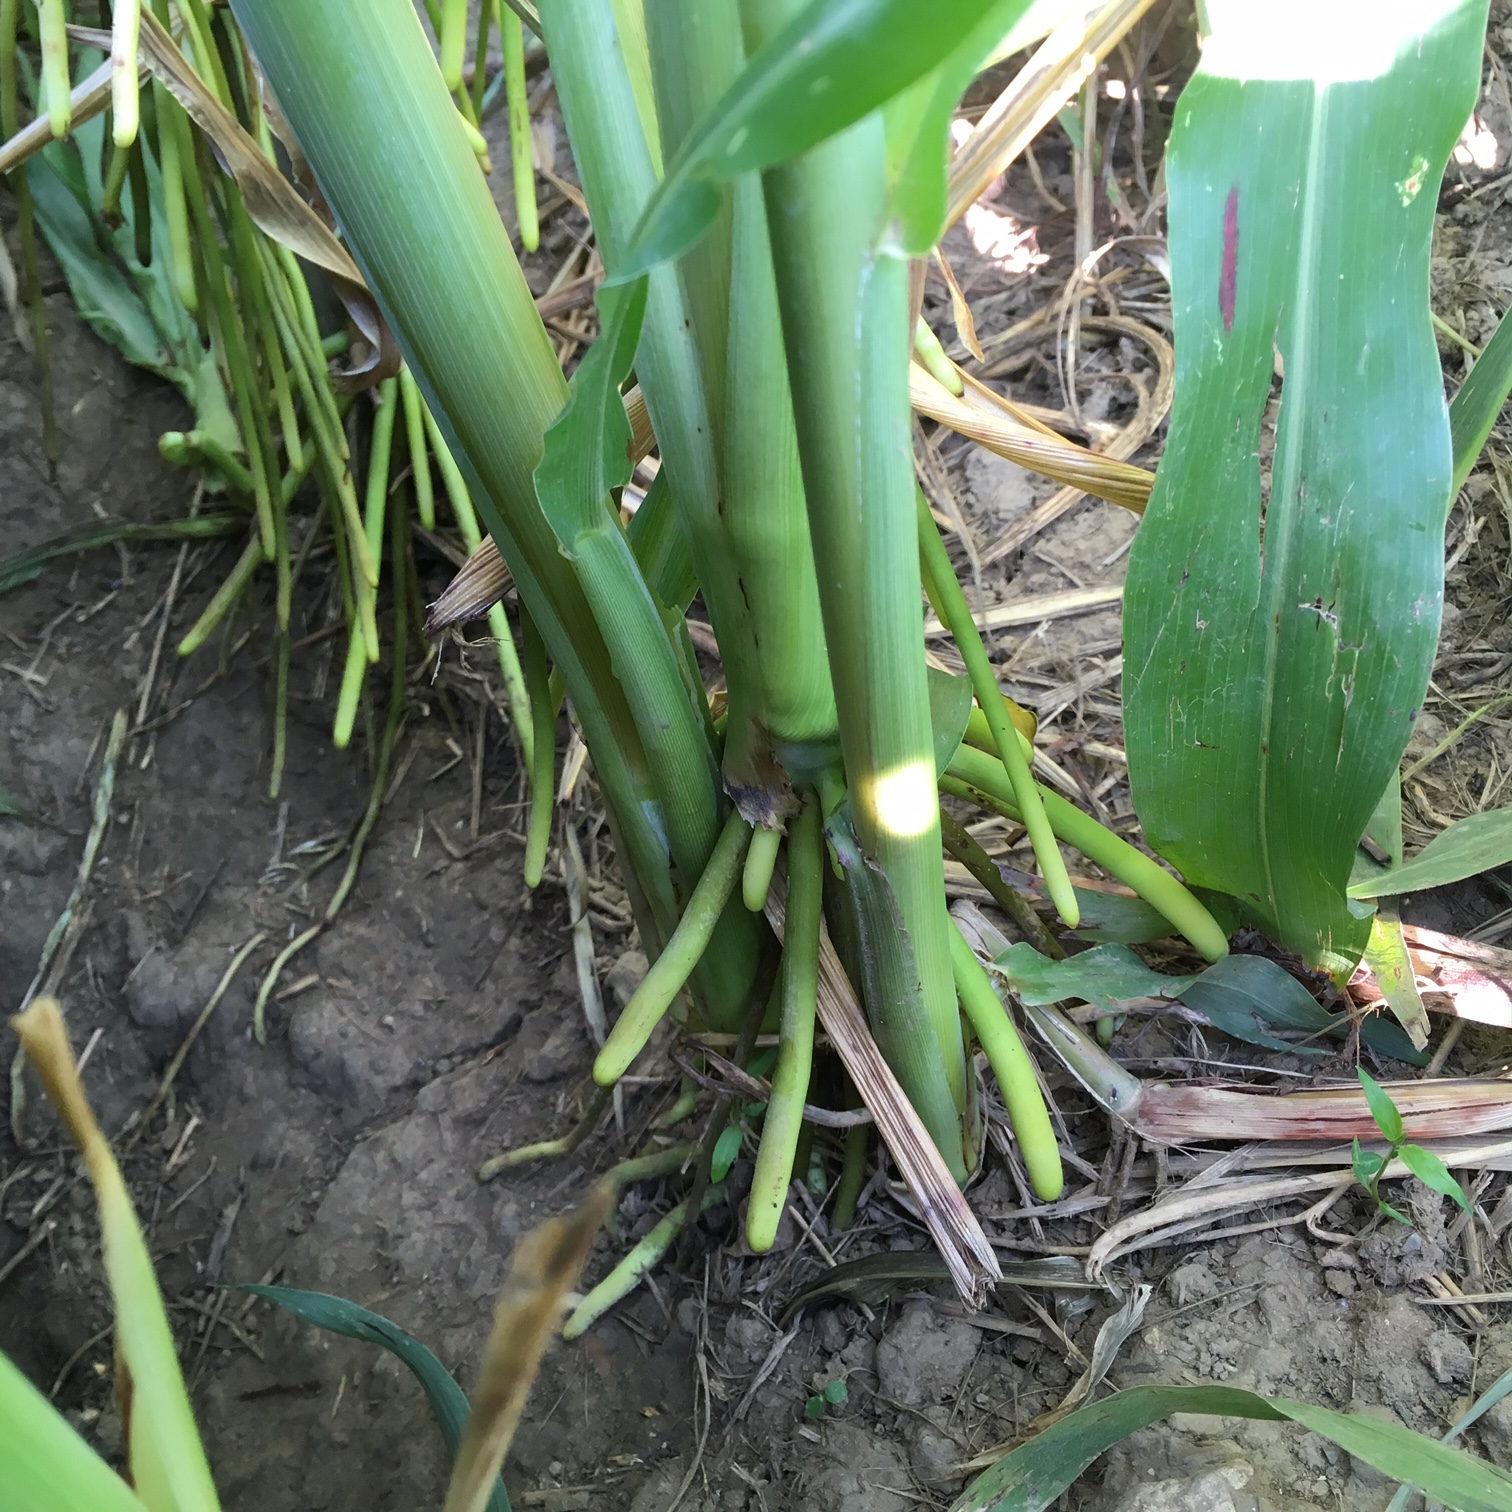
Looking to drill through hardpan, smother weeds and increase fertility by increasing organic matter? Try Sorghum X Sudangrass:
-
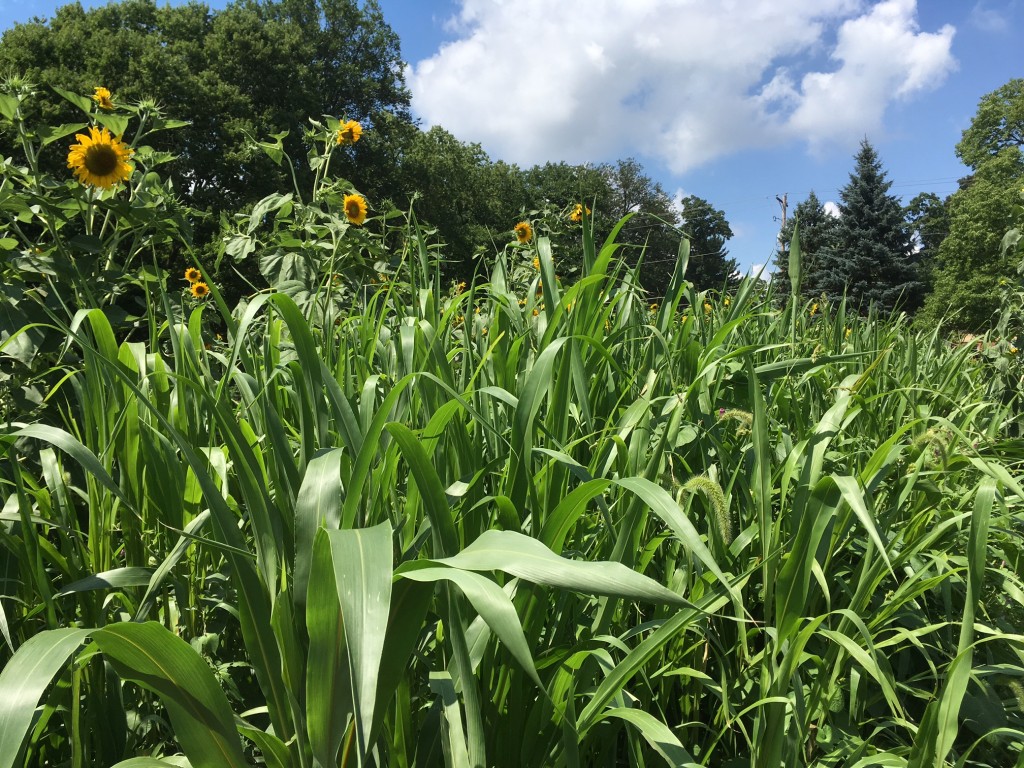
Sorghum X Sudangrass at Wallace Community Garden
Want to prevent erosion, add biomass, add fertility through nitrogen fixing and keep your ground working for you over the winter? Try rye, vetch and crimson clover as a blend:


A great place to read about cover crops is from SARE, Sustainable Agriculture Research and Education. They have a Learning Center Online with great information and free publications.
Try to spend some time this fall working on making your garden better for next year. In spring time when you want to get planting you will be happy to have a new garden with great soil, some compost to add, and clean tools. That way you can start planting right away.
SUPER FUN BONUS SECTION: Want to make an easy cheap compost pile you can move anywhere?

Early September garden update
A few interesting things to note as the gardening season winds down. My community garden is open until November 1st and I will most likely still be harvesting at least a few things until the end of the season such as parsley and leeks.
Speaking of Leeks…….
I know right? Would you like to Know How to Grow Leeks?
I am starting to get some peppers. Mostly chili-types like banana peppers.

I have not gotten a single bell pepper this year and barely have gotten any the last three years. The bell pepper plants have decent size but the leaves are a little curled and brown at the tips and the flowers fall off without being pollinated. I need to spend some time to figure out what the heck is going on before I waste any more time growing bell peppers.
My Sorghum X Sudangrass is coming back with a vengeance. That is its nature and one of the reasons why I chose it for my garden. When it is cut it doubles down on growth. It is now back up to near 6 feet tall. I might have to mow again! I need some cattle I think.

Do not give up on your garden just yet. We are supposed to get relief from the heat with some rain. Plenty of time left before first frost date and most vegetables like fall weather just fine. I am hoping for a late tomato harvest if the plants set flowers. I will be harvesting herbs, peppers, eggplant, leeks, butternuts and tomatoes for hopefully another 4-6 weeks.