Safe Cleaning Practices for a Healthier Home

a bucket of cleaning supplies to depict cleaning products and the topics of safe cleaning

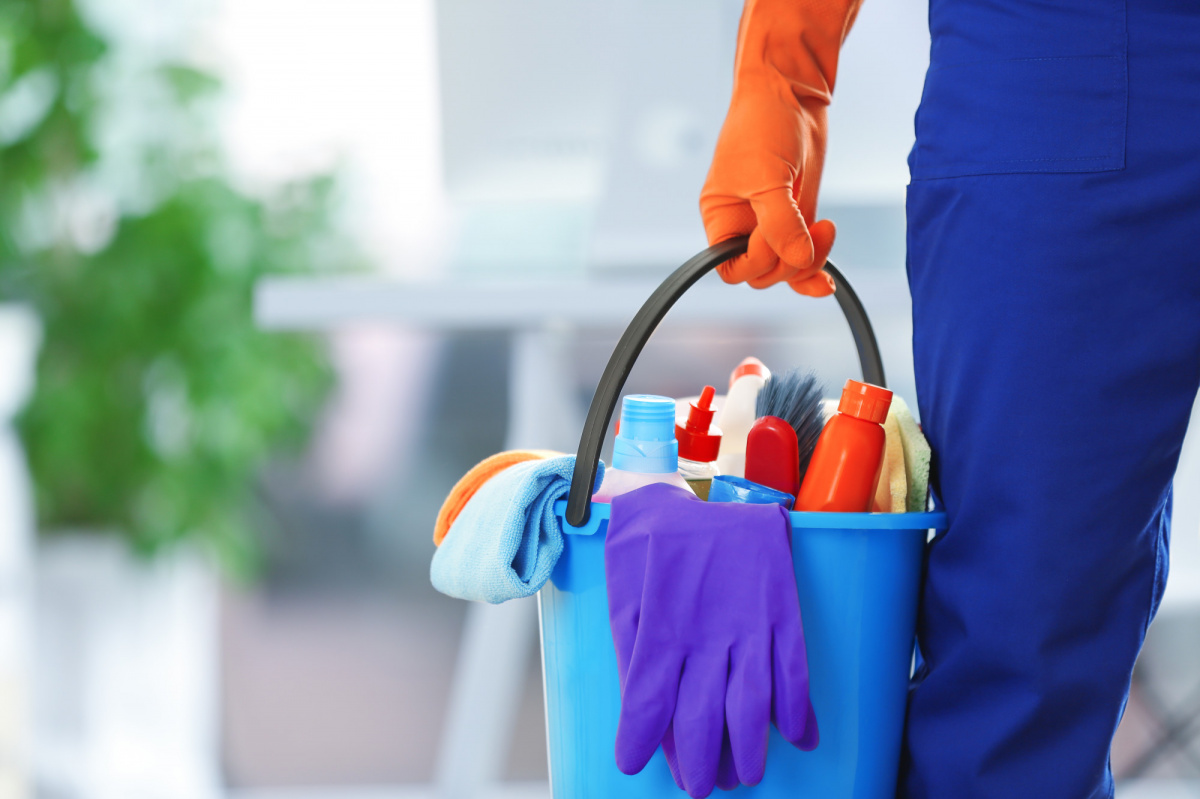
Keeping your home clean is essential for maintaining a healthy environment, but it’s just as important to clean safely. Many household cleaning products contain chemicals that can be harmful if used improperly. To protect your health and the well-being of your family, start by reading product labels carefully. Always follow the instructions, paying close attention to warnings, proper usage, and storage guidelines. One of the most important safety rules is to never mix cleaning products. Combining substances like bleach and ammonia can create toxic gases, and even mixing vinegar with bleach can be dangerous. Stick to one product at a time unless the label specifically says it’s safe to combine. Doing research on what products are safe to mix, after reading the labels is important in making sure that harmful reactions don’t occur.

When using strong cleaners, wear protective gear such as gloves, and consider a mask if you’re working with sprays or powders. Make sure the area is well-ventilated by opening windows or using fans. Choosing safer alternatives can also reduce risk, look for products labeled non-toxic, biodegradable, or fragrance-free, especially if someone in your household has sensitivities. You can also make simple cleaners at home using ingredients like baking soda, vinegar, and lemon juice, but never mix these with commercial cleaners. Cleaning before sanitizing removes visible dirt and germs and is important in high touch areas like doorknobs, light switches, electronics and countertops. The CDC recommends to consider using a wipeable screen protector on electronics to make cleaning and sanitizing easier.

Proper storage is another key to safety. Keep all cleaning supplies in their original containers, locked away from children and pets, and separate from food storage areas. When cleaning, start with dry methods like dusting and vacuuming before using wet cleaners. This reduces the amount of product needed and improves effectiveness. For disinfecting, focus on high-touch surfaces like doorknobs, light switches, and countertops. Use EPA-approved disinfectants and allow them to sit for the recommended time before wiping.

Safe cleaning isn’t just about a sparkling home, it’s about protecting your family’s health. Looking for greener solutions? Check for the Safe Choice label developed by the EPA. This label indicates that the ingredients, pH, performance, and packaging meets their standards to provide your family a piece of mind when the label is on the product. By following these tips, you can reduce exposure to harmful chemicals and create a safer, healthier living environment.

Sources

Center for Disease Control and Prevention. 2025, January 31. When and How to Clean and Disinfect Your Home. CDC Wash, Sanitation, and Environmentally Related Hygiene. https://www.epa.gov/saferchoice/learn-about-safer-choice-label

United States Environmental Protection Agency. 2024, October 2. Learn About the Safer Choice Label. EPA. https://www.epa.gov/saferchoice/learn-about-safer-choice-label

Written by: Alexus Masterson, MPH, FCS Educator, OSU Extension Muskingum County

Reviewed by:

Fork in the Road: Choosing Health at Home and Away

Over the past couple of weeks have you:

  • Eaten a meal in the car
  • Eaten a meal while walking
  • Eaten fast food
  • Eaten a meal while you continued to work
  • Skipped a meal because you were too busy

If you answered yes to any of those, you are not alone. US Foods research has found that the average person eats out 3 times a month and orders delivery 4.5 times a month.

According to USDA reports, consumers are spending more money on eating out than having food at home and the numbers are continuing to climb. Spending money on food at home is at an all-time low in comparison to money spent on food away from home being at an all-time high. I find the chart below very interesting in watching how the numbers were trending until 2020 and then the change that took place with food after the pandemic.

graph title: share of food-away-from-home spending reached record high in 2022. Showing trend of food eaten at home versus food eaten away from home from 1997 to 2022. Graph can be found on USDA at https://www.ers.usda.gov/amber-waves/2023/september/u-s-consumers-spent-more-on-food-in-2022-than-ever-before-even-after-adjusting-for-inflation

When our lives are spent rushing from one location to the next, it takes planning on our part to make sure we are eating nutritious meals, and we aren’t letting rash decisions pick less optimal choices. Poor eating habits can lead to feeling tired, increased stress and a weakened immune system. Let’s explore simple strategies for eating well on the go and building a plan to enjoy more meals at home.

General rule of thumb when making nutritious choices while eating out:

  1. Select menu items with less fat: Baked, braised, broiled, grilled, poached, roasted, steamed
  2. OCCASIONALLY select: Batter-fried, pan-fried, buttered, creamed, crispy, breaded and have them as a side or split with friends
  3. Portion size- order regular or child size, order appetizer in place of main course, split meal or share
  4. Switch out the fried foods for a salad, baked potato, fresh fruit or another vegetable option
  5. Ask for your sauce on the side, request higher fat foods be left off like mayonnaise, bacon or cheese, ask to be prepared with less oil or add more vegetables
  6. You can use apps to check on the nutritional content of your selected food choice. Most restaurant menus will give you the calorie range but by using an app it will also tell you fat, carbohydrates and sodium content. Most restaurants now have their own data showing the nutritional content.

If eating more food at home is your goal, then some strategies are needed.Table setting

  1. Menu Plan: look at your family’s schedule for the upcoming week and plan meals out accordingly. This can be in a notebook, a piece of paper on your fridge or an app.
  2. Kitchen Gadgets: Depending on your work and evening schedules it may be helpful to have something in the crockpot, instant pot, grill, use the griddle or the microwave to warm up leftovers or steam frozen veggies.
  3. Cook Once Eat Twice: batch cook items that can be used in several meals (brown several pounds of ground beef/turkey for tacos, spaghetti sauce, sloppy joes- extra rice for burrito bowls and then fried rice)

Whether you’re dining out or cooking in, every meal is a chance to take the healthier path—because the fork in the road is really the one in your hand.


Written by: Amanda Bohlen, Family and Consumer Sciences Educator, OSU Extension Washington County

Reviewed by: Megan Taylor, Family and Consumer Sciences/4-H Educator, OSU Extension Union County


Back-to School Health and Wellness

While going back to school can be an exciting time, it can also be a source of stress for parents. The back-to-school season brings many challenges and stressors that may feel overwhelming for families. Wellness, defined as being in good health, is crucial during this time. Establishing a foundation for health and wellness for families with students can enhance both health and happiness. Here are some tips to help build this foundation.

Physical, Mental, Social, and Emotional Wellness Tips

Physical Wellness Tips

Physical wellness is essential for students, as it enhances overall health, boosts cognitive function, and contributes to a positive and productive academic experience. Students should:

  • Follow a consistent sleep schedule to ensure invigorating rest, which can lead to better concentration, memory retention, and improved cognitive function.
  • Engage in regular physical activity to enhance cardiovascular health, leading to better overall fitness and increased alertness in school.

Mental Wellness Tips

Learning effective coping strategies for the stressors associated with school and academics can reduce feelings of overwhelm, anxiety, and burnout. Consider:

  • Engaging in self-care activities to recharge, reduce stress, and prevent emotional exhaustion.

Social Wellness Tips

Building strong connections is vital for enhancing a sense of belonging, reducing feelings of isolation, and fostering a supportive environment. Positive relationships contribute to emotional well-being by:

  • Creating a network of friends provides comfort, motivation, and a safe space to share both successes and challenges.
  • Encouraging involvement in extracurricular activities and clubs, which positively impacts social wellness by expanding students’ social circles and interests.

Emotional Wellness Tips

To practice mindfulness and relaxation techniques for anxiety reduction:

  • Find a quiet space to sit or lie down comfortably. Close your eyes and focus on your breath, taking slow, deep breaths in and out.
  • Recognize emotional struggles and seek support from counselors or therapists.

Focusing on self-care, maintaining healthy habits, and seeking support when needed is crucial.

10 Ways to Practice Self-Care as a Parent

As a parent, consider these tips for practicing self-care:

  1. Let go of preconceived notions. Self-care doesn’t have to be lavish, sometimes, it’s as simple as taking a hot shower or calling a friend.
  2. Rediscovering a hobby. Revisit activities you enjoyed before having kids, even if it’s in smaller doses, or try something new.
  3. Move your body. Exercise releases endorphins and provides various health benefits. If you can’t get to the gym, try a quick walk or an at-home yoga class.
  4. Practice deep breathing. Deep breathing can help center you during stressful times, no matter where you are.
  5. Get a sitter. Whether you hire someone or accept help from a family member, take the time to get away for a bit.
  6. Lean on your community. You don’t have to do everything alone. Accept offers of help and don’t hesitate to ask when needed.
  7. Spend time with adults. While your kids are wonderful, make sure you have opportunities to discuss work, politics, or the latest trends, like new music.
  8. Develop a gratitude practice. Focusing on what you’re grateful for can shift your perspective and positively impact your mental health.
  9. Prioritize sleep. Being well-rested helps you be a better version of yourself and, consequently, a better parent.
  10. Seek professional help. If you need assistance, a therapist can help you prioritize your own well-being.

Now is the time to act! Begin implementing these wellness strategies in your family’s routine. Check out this blog on Parental Burnout for more information!

Written by: Megan Taylor, Ohio State University Extension, Family and Consumer Sciences/4-H Youth Development Educator, Union County, taylor.4411@osu.edu

Reviewed by: Amanda Bohlen, Ohio State University Extension, Family and Consumer Sciences Educator, Washington County, Bohlen.19@osu.edu

What to do with Monster Zucchini!

Young boy holding giant zucchini with hand over face.

If you are out and about at farmers markets this summer, don’t be afraid of the monster zucchinis! Finding fresh and unique food for a bargain is always exciting. This weekend at the market, I found a zucchini the size of Texas for .50 cents!  I hesitated to buy it because I had read that the larger zucchinis aren’t as tender and have more seeds. However, I wanted to find out for myself if this were true, plus I was really curious how many dishes I could make from one large zucchini.

Traditional harvesting instruction for zucchini says to pick when they are young and tender, bright green, about 6-8 inches long, and with no signs of bruising or softness.

While “experimenting” with this monster zucchini, I learned a lot, including:

  1. The inside was not as tough as I thought. The inside was very edible and tasted almost as good as smaller ones. However, it did have a giant seed pocket that I removed.
  2. Large zucchini have longer shelf lives.  While smaller zucchinis have skin that is softer, large zucchinis skin may be tougher (think of it like a pumpkin shell) to protect the flesh for a long time and allow it to continue to grow inside without getting soft quickly.  This tougher skin can help keep large zucchini fresh for at least a month after harvesting, instead of 3-5 days. If you find that the skin is too tough to eat, just peel it! Then use the inside to cook and eat as you would normally.
  3. You can save the big seeds for planting next year. One large zucchini could have hundreds of seeds in it! And just like pumpkin seeds, you can dry them out, save, and plant next year…free food!
  4. You can make baked goods with zucchini that can be frozen for later use.  Making zucchini bread is one of my favorite things to do to use up zucchini! If you need some inspiration, try this Zucchini Cheddar Bread recipe that won first place for quick breads at the Ohio State Fair. If you don’t want to freeze baked bread, you can also grate and freeze zucchini, then thaw and use it to bake with later.
  5. You can use large zucchini slices to make zucchini lasagna. Zucchini is the perfect size for making a pan of lasagna, plus a lot of zucchini can be used up. To do this, simply follow your regular lasagna recipe, but instead of using lasagna noodles, use your zucchini.  Cutting the zucchini lengthwise lends itself to the perfect lasagna “noodle” and softens as it cooks. So easy! And there is no mess with boiling a noodle first, plus you get extra veggies in your meal.

In the end, my .50 cent monster zucchini experiment paid off!  I made lasagna that served 10 nurses on my son’s cardiac unit, 2 loaves of zucchini bread, and baked zucchini rounds rolled in egg, bread crumbs, and Parmesan cheese. PLUS, I even saved some of the big seeds to plant for next year! Happy Monster Zucchini Hunting!

Revised: August 2025
Original post: August 2020

Author: Shari Gallup, Family and Consumer Sciences Educator, Ohio State University Extension, Licking County

Reviewer: Laura Halladay, Family and Consumer Sciences Program Specialist, Ohio State University Extension

Keeping It “Fresh” All Year Long

With the summer comes gardens flourishing with fresh produce. It can be difficult to keep up with the harvest, resulting in unpicked veggies going to waste. A wonderful way to prevent such food waste and to enjoy the fruits, or vegetables, of our labor all year long is to preserve them. There are multiple food preservation techniques that are suitable for even the novice. The most important thing to remember when preserving food is that there are certain principles to follow to ensure a safe and quality end product, so it is best to get instructions and recipes from a reliable source. (This is not the situation for trying the latest TikTok trend!). One such resource is the National Center for Home Food Preservation. The Center is home to instructions for a variety of food preservation methods, from canning to fermenting to smoking to freezing, and it also includes a frequently updated blog site addressing current food preservation topics and dispelling unsafe practices which may be promoted on social media, including “dry canning” raw vegetables. Another resource is the Ohio State Extension Food Preservation webpage, which includes links to reliable resources and fact sheets as well as recorded videos demonstrating food preservation techniques.

Let’s explore some of the most popular food preservation techniques, including canning.  This preservation technique can be time-consuming and intimidating, considering the food safety concerns if not done properly. Yet canning has been done for generations and is a way to ensure the hunt and harvest provides nourishment all  year round. The canning process heats the foods to a high temperature and drives air from the product, creating a vacuum seal, killing most of the bacteria and preventing microorganisms from entering and contaminating the food.

There are 2 basic canning methods:

  • Water Bath Canning – appropriate for high-acid foods (pH of 4.6 or less), including pickles, most fruits, jams/jellies, and tomatoes (with appropriate addition of bottled lemon juice or citric acid).
  • Pressure Canning – necessary for low-acid foods (pH higher than 4.6), such as meats, most vegetables, and combination foods, like soups. Such foods require processing at a higher temperature to destroy botulinum bacteria, which can grow within a sealed jar and produce a deadly toxin.

Another common food preservation method is freezing, which requires little equipment and less time overall than canning. Technically, any produce can be frozen, however, some freeze better than others. Vegetables with lower moisture content such as carrots, corn, beans, and broccoli can be frozen and thawed yielding a nice crispy vegetable. Foods with higher moisture content such as tomatoes, cucumbers, and squash don’t maintain texture as well, but may be suited for use in sauces or baked goods.

Ideally most vegetables should be blanched before freezing. This technique involves immersing the vegetable into boiling water or steam, followed by quickly cooling, a process which kills bacteria and deactivates enzymes that would promote further ripening/decomposition. Fruits, on the other hand, are usually treated with a form of ascorbic acid or packed in sugar/syrup to prevent browning, the effects caused by enzymes in fresh fruit.

With any form of food preservation, use appropriate storage containers, label, and date your finished product, and enjoy them all year long. Remember. Your summer harvest will add flavor and nutrition to warm fall soups or holiday dinners.

Written by: Jennifer Little, Extension Educator, Family and Consumer Sciences and Elizabeth Burkhalter, Dietetic Intern, OSU Extension, Hancock County.

Reviewed by: Shari Gallup, Assistant Professor, Family and Consumer Sciences, OSU Extension, Licking County

.

Back-to-School, Back-to-Saving!

Summer break is coming to an end, and parents, grandparents, guardians and children are all preparing for the kiddos’ return to school. Although a new school year stirs excitement, back-to-school spending can really add up, causing stressful financial situations. Is there a way to purchase all of your back-to-school items without breaking the bank? Stress less for school success by considering the following tips and tricks for your next school shopping trip.

A hand putting a coin into a piggy bank in front of a chalkboard and school supplies.

  1. Establish your monthly budget.

Consider your monthly income, as well as all of your monthly expenses, including housing, transportation, food, healthcare, and “other” items, such as clothing, personal care, recreation, life insurance, retirement savings, education, etc. Determine how much money you are willing to spend on school supplies for each child.

What items are needed? Consider clothes, shoes, school supplies, backpacks, lunch boxes, school meals, technology, and extracurricular activities.

  1. Take advantage of coupons, deals, and Back-to-School sales.

Ohio Sale’s Tax Holiday is currently running from August 1st through August 14th, 2025. Goods of any kind priced at $500 or less are exempt from tax during the holiday period.

  1. Check out stores carrying gently used items and thrifting for supplies such as:
  • Textbooks
  • Uniforms
  • Sports equipment
  • Technology
  1. Create a back-to-school nest egg that you can contribute funds to each month to sustain your back-to-school trips annually.

Even contributing $50.00/month will accumulate to $600.00 of back-to-school funds in one year!

  1. Practice financial literacy with your children heading back to school.

Create their back-to-school list as a team, involving your child in the conversation and decision-making process about needs versus wants, allowing them to write the list, reviewing the list together, etc. Have a conversation with your children about money as you shop, highlighting topics such as over-spending, bargain-hunting, price comparison, prioritizing spending, etc. Recap the shopping experience with your child at the end of the trip.

Equip both you and your child for success this school year by practicing financial literacy strategies during your back-to-school shopping adventure. Super savings, super smiles!

Written by: Caitlin Smith, Family and Consumer Sciences Educator, Ohio State University Extension, Guernsey County

Reviewed by: Kate Shumaker, Family and Consumer Sciences Educator, Ohio State University Extension, Holmes County

Ear-resistible Corn Season!

There is no doubt we are in sweet corn season in Ohio!  Every produce stand has a big pile of fresh picked ears waiting for you and every grocery store has corn on sale.  But how do you know this corn will be the highlight of your meal?  What can you make beyond corn on the cob?

We’ve got you covered!  The Selecting, Storing, and Serving Ohio Corn fact sheet shares a variety of helpful tips for all your corn-y needs. Check out the corn and green chili salad recipe in the fact sheet!

Close-up of person husking sweet corn

Depending on which part of the state you are from, sweet corn season can begin as early as July 1 and may last until late September/early October or the first frost.  When corn is fresh from the field, the husks should still be damp, bright green, and tightly wrapped around the ear.  Tassels should be a bit sticky, but not black or crumbly.  The ears should have rows of kernels that are bright-colored, plump and milky.  Kernels with indentations or gumminess are signs of overripe ears. Also, keep an eye out for damage from pests and plant diseases.

Interestingly, the sugar in corn begins converting to starch at harvest making it highly perishable.  The starch conversion can be slowed by keeping corn as cool as possible, preferably under refrigeration, and by using within 1-2 days from harvest.

How will you prepare your ears of gold?  There are so many options!  The first step is to carefully clean the ears under cool running water to remove any dirt.  A quick boil in unsalted water and topped with butter, salt and pepper is classic.  If you don’t want to boil, try steaming or grilling.  Steam ears until corn is tender, about 10 minutes.  To grill, place ears over direct heat to create some marks, then move to a lower heat area to finish cooking.

Ears of yellow sweet corn on a plate with butter

Mix up your seasonings!  Try basil, cayenne pepper, chili powder, lime, paprika, cumin, cilantro, parsley, or seasoning blends.  Traditional “Mexican street corn” might contain chili powder, cilantro, lime juice, cumin, and cheese.  You could also take your fresh corn and add it to something like salsa.  This avocado and corn salsa from MyPlate calls for frozen corn, but why not use fresh corn?  For many more ideas, check out this amazing list of nearly 100 recipes from IowaCorn and food bloggers.  Of course, you could also can, freeze, or dry some summer sweet corn to use later.

Now that you’re all ears on sweet corn, go husk with confidence and serve up smiles—because nothing says summer like corn on the cob!

Written by: Kate Shumaker, Family and Consumer Sciences Educator, Ohio State University Extension, Holmes County.

Reviewed by: Caitlin Mathews-Smith, Family and Consumer Sciences Educator, Ohio State University Extension, Guernsey County.