I was inspired by my mentor’s passion for traveling and mental health. In getting to know my mentor, Abby Giesecke, I learned a lot about her passions for travel and mental health and how they interweave. For my gift, I wanted to give her something related to both of those things, and I made her a compactable tote bag. I sewed the bag entirely by myself using a canvas drop cloth meant for painting, sewing thread, and the sewing machine. The bag is equipped with an extra strap that is used to compact the bag so it can be transported in a small space. I created a personal design for the bag that I cut out of iron-on vinyl using the Cricut and ironing the design on. The design is inspired by a quote that discusses both mental health and travel, and I tailored it to fit her aura and taste. The bag also has a card I designed to fit her aura. Now she can take the bag with her wherever she travels and remind not only herself, but others, to take care of their mental health.
Ideation
Exercises
To start off this project, we first had a lengthy conversation about what a gift really is. When we typically hear the word, we think of something someone gives to someone else for an occasion or just to see them happy. Deb wanted us to expand our idea of what a gift really means and she did so by having us do two things – a reading and an exercise.
We were required to read The Gift by Lewis Hyde and recommended to read chapter ten of the Shape of Design book by Frank Chimero, so I read both. These are just a few of the things I highlighted and took notes on that stood out to me. These readings were really helpful in expanding my understanding of a gift and why they are so important to us as humans and in our culture. As noted in the left image, the true reward of a gift is giving it to someone, not the gift itself. I like how it says, “If the fruits of a gift are gifts themselves, how is the artist to nourish himself…?” The only way the giver of the gift will feel fulfilled is by experiencing the gift giving, not by experiencing the gift himself. The quote on the right stood out to me because it related a lot to the conversations we had about containers and how the context surrounding the gift is more important than the gift itself. A gift without a story or purpose is meaningless.The second thing she had us do was think about the best gift we’d ever received and why it was our favorite. Above are the notes I took during this exercise, the highlighted parts are the most important. I talked about how my dad built me a huge castle bed for my birthday as a surprise and it meant a lot because I now know that we struggled financially during that time but he still wanted to make something special for me.
We also had a lot of conversations about what a container is, as noted above. We began to look at the word as more of a verb than a noun. A container is not just plastic Tupperware or a bottle, but something that holds other things which can really be anything if you think about it. From these conversations, we were really expanding our concept of what the container requirement really meant and how it could play into our concepts naturally, rather than just making a bag or box to put our gift in.
To expand our knowledge and understanding of what a container is, we did an exercise. We were told to select a random object from anywhere in the building and then make a container for it in two hours, keeping a specific audience in mind. For mine, I decided to use a Mike Wasowski key chain my aunt crocheted for me. The top image shows my quick ideation and the concept I came up with, and the bottom row of images shows the process. I made a little locker out of cardboard, and then decorated it using paper, free paint samples, tape, made a shelf with carpet on it, and even created some textbooks for him. I then used a key ring I had in my bag to attach the key chain to the top so he would be suspended in the air. This exercise was really helpful because it helped me realize that a container can really be anything, and can provide a lot of context to the product. It also gave me practice designing for a specific audience which I had never done and would become very crucial to this gift project as we were literally making it for someone else.
Concept Creation
I took seven pages of notes during the process of creating this concept. I don’t know why but I was really having a hard time focusing and coming up with concise ideas, and I just kind of brain dumped for a few days, so there is a lot to look at in these photos. For clarity, I highlighted the parts that were the most important in my process, but I’d argue it’s all important in some way or another.
After all the exercises and readings, it was time to begin thinking about our actual projects. In this period of time, I met with my mentor, Abby Giesecke, just to talk and get to know each other rather than exchanging surface-level text messages. The right image shows the first few things she told me about herself, and the left image shows some things she told me later on. I learned that she loves to travel and is very passionate about mental health. I thought those were things that I could really work with so I started to explore what items could relate to those topics. Above are some of the notes I took during our meeting and over text, and the highlighted bits are the things I focused on the most. I was struggling to come up with ideas, so the left page shows me just jotting down random gift ideas until I came up with a few items that resonated, which were items to do with travel (i.e. passport cover, baggage tag, travel jewelry box, etc.). I really wanted to focus in on why she was so passionate about travel and mental health. When I asked her, it all boiled down to the idea that she connected the two things a lot. She likes to travel because it gives her mind a break and something to focus on other than her mental struggles. She’s very passionate about mental health and expresses to others that they should advocate for their own mental health. With all that being said, I really wanted to focus on those two things in my concept, but I was still unsure of what object to create to represent that idea.
We were told to find a quote and focus on the quote in the process of creating a concept. This is the first “quote” I chose. I ended up not really going with this at all but it really catapulted my ideas to where they ended up so I think it’s important to mention. I liked this because it just really described what I would think of as a passion for travel. But as I got to know my mentor more, I realized this wasn’t really how she looked at it so I changed directions later on.
Here I kind of narrowed down my options. I originally intended this page to be a puzzle research page, but then I saw a picture of a handmade tote bag on Pinterest and immediately loved the idea. Here you can see I began to ideate what the bag could be made out of and wrote down uncertainties and questions I had about the idea. I also tried to come up with different ideas for my puzzle concept, including what it would be, what it could mean, and how I could think outside of the box rather than make a normal puzzle.
Because the inspiration photo of the tote bag I found was crocheted, I considered crocheting my own. Here you can see my explorations of crocheting and attempting to follow different tutorials.I then did some research on tote bags. I decided that I would want the tote bag to be related to travel so I began to look at different types of travel bags, like carry-ons and personal bags that you would take on a plane, what size requirements airlines typically have for those, and chose a size that would satisfy all of the answers I found. I also began to ask what the purpose was behind the materials I was choosing to use. I liked the idea of crocheting it because it would be “cute” but what would be the purpose? What connection would it have had to travel?
I inevitably chose to go with the tote bag idea. The puzzle just wasn’t resonating with me or making sense in my head and I just felt better about the tote bag. I also liked the idea that she could physically use it to do something she enjoys and that was more valuable in my opinion.
The left side kind of shows me having a little bit of a block. I really was struggling to connect my concept to my quote, so I chose a new one. The image on the right just has sketches of things I was considering.
I looked on Pinterest for different quotes related to travel and mental health and I found one that just so beautifully communicated exactly what I wanted. The quote says,
“A mind stretched by new experiences can never go back to it’s old dimensions. Travel. Learn. Grow.” – Oliver Wendell Holmes, Jr.
I just love this quote so much because it not only mentions travel and mental health, but it intertwines them. I personally suffer from mental health issues and I think the most beautiful thing to see is someone growing mentally and spiritually. Once you experience something and grow from it, your mind is just never the same. I think that is what Abby is trying to communicate when she says she likes to travel, that she likes to expand her experiences and mind and grow through them. I just think it’s a beautiful thing to live by.
At this point, I still really wanted to create a set of items to include that all had a “branding” to them, but I realized that it just wasn’t feasible with the material limit. I will not lie, I was frustrated with the material limit, but I know that it was there to keep me grounded and teach me to be really intentional in my materials. We were also required to spend no more than $15 which was a challenge in this economy. But it was best to level the playing field for everyone and again, keep us grounded.
The three materials I finally settled on were
a canvas drop cloth – I chose this because most tote bags are made out of canvas, and the dropcloth was not only significantly cheaper and much more fabric to work with, but also thick, durable, and sturdy to use for travel.
sewing thread – an all-purpose polyester thread
iron-on vinyl – I chose this because I really wanted to be able to incorporate something personal into the bag and use my digital illustration skills.
After purchasing all these materials, the total ended up being roughly $12. My mom has a Cricut at home and conveniently already had the iron-on material so I just borrowed some of those.
Iteration
Testing Materials and Techniques
Learning to Sew
Once I chose my concept and materials, it was time to begin production! Before this project, I had very minimal experience with sewing. I have used a sewing machine before but I remember really struggling to figure out how to use it and jamming it several times. So this was a fairly new technique for me and required practice to understand. The two images on the left side show my very first sewing tests on the sewing machine which are quite rough. It was a lot of trial and error to figure out all the different settings and how to keep the fabric straight as it goes through the machine. Once I was comfortable with the sewing machine, I then tested on the fabric I planned to use for my bag because it was much thicker than my testing material and I wanted to experiment with the different textures. The right two images show that experimentation and how well the thread I chose matched the fabric.Once I was decently comfortable with the sewing machine and fabric, I wanted to make a mini model of the bag and see how it would look in general.
Creating First Iron-On Design To Test
Once I finally chose my general concept, I began to draw up some designs that I could possibly put on the tote bag. At this point, I wasn’t sure which direction I was going to go in with the design, whether that be her name, initials, or something different. Here on the left, is the mood board that I created using her favorite photos that she sent me, and some inspiration photos I found on Pinterest. The middle and right images show digital and drawn ideas for the design, the highlighted ones in the center are the two I decided to further design.I was really aiming to create a cohesive digital design, even if I was no longer creating several different items. Here are some color schemes I played around with on this website: https://coolors.co/?home to get some inspiration for my materials and color scheme. I based these largely off the mood board I created above. Although I didn’t really stick 100% to any of these, the second and last rows are quite similar to what I ended up using. I just wanted to get a feel for what would look good together.This is the first flower I created, the inspiration on the left and my drawing on the right.
Here you can see the process of my first design that I created to be put on the bag. I used the last three words of the quote I chose, and based the colors off of both my color pallets and the colors of vinyl my mom had already.
Learning How To Use Iron-On Material
After creating my digital design, it was time to figure out how to use the iron-on vinyl material. I was lucky enough to be home for Easter the weekend before the project was due so I was able to do a lot of experimenting with my mom’s Cricut and her supplies. I first separated all my different colors into separate layers so they could be cut separately. I then loaded the images into the Cricut Design Space to be cut out using the Cricut.
This was my very first time using iron-on material so it was a big learning curve for me. To start off the process, I didn’t realize I was supposed to invert the image in the Cricut Design Space so I ended up with a backward piece. Once I figured that out though, it was honestly a really easy process. Once I had all my color pieces cut out, I then peeled the surrounding vinyl off the sticky layer, as shown in the top right image. Then, I simply followed the instructions that came with the iron-on material, ironing the fabric first, putting on the piece of material, ironing it with a towel on top, flipping the fabric over to iron on the back, and then peeling the sticky layer off once it’s cooled.Generally speaking, I liked the way this design came out. The only problem I had with it was that the yellow material was see-through so you could see what was going on underneath it. The pink also came out a little wrinkly. I kept both of these in mind when improving the design for my final product.
Creating Final Iron-On Design
In all honesty, I was planning to go with my first design as my final. But I didn’t like the idea of only making one option and going with it so I sketched out some more ideas and ended up coming back to this design that I had sketched earlier in the process. I began by making my flower based on this image I found here: https://stock.adobe.com/search?k=flower&asset_id=238867467 . I loved this flower because it was a little uneven and wonky but created this whimsical effect that I was going for. I then changed the color to match the vinyl I had and added the smiley face I had made previously. I then began the task of creating the words. I really was trying to replicate my own handwriting because I liked how it looked in my sketch but it just wasn’t working out, as shown in the image on the bottom left. I used a font to type out the “g” “r” and “w” and then used the direct selection tool to move the anchor points to make it look more organic and whimsical. I also shaped the parts of the letters that touch the outer ring to move with it. I attempted to do this with the “travel.” and “learn.” but I didn’t like the way it looked. I then just decided to try and make them straight and I liked it much more that way. I played around with a few different fonts until I found the one I liked shown in the bottom right image.
After creating this design, I genuinely was having a difficult time choosing between the two. I was being so indecisive that I posted an Instagram poll on my Instagram story asking my friends which design they liked better. My second design won 33 votes to my first design’s 23 votes. Although that really didn’t solidify my answer by much, I did end up choosing to go with the second design because it just feels more cohesive. I like how the flower is incorporated into the design more and the words sort of take a form in a way that the first design doesn’t.
Production of Bag
Patterning/Prep
This is the pattern I decided to base my pattern off of. I changed my bag dimensions to 17″ wide and 14″ long to fit the size requirements I researched previously for travel bags.
I was originally going to copy this pattern with the indents at the bottom like shown to make the bottom of the bag, but after talking with my professor about the pattern, she recommended I do it a different way that would make things easier – by leaving the section there, sewing it across later, and then cut it off. So when I cut out the piece of fabric I was going to fold and sew to be the main body of the bag, I added 8″ in the center for the bottom section so it could be sewn later on after I had sewn together the outer edges.
To cut the pattern out of my fabric, I cut a large piece of fabric out of the drop cloth and lined it up straight on a cutting map. Then using a ruler and a straight-edged piece of cardstock, I measured and drew out the pattern lightly with a pencil, adding 1/2 an inch on the entire perimeter to account for sewing and folding. I then double-checked everything with a right-angle tool to make sure it was square and cut it out with scissors.
After I cut out the pattern on my fabric, I folded the edges over about 1/2 an inch, ironed it down, and pinned it so it was ready to sew.
Sewing the Body of the Bag
For the top edge of the bag that would be seen, I decided to double-fold and sew the edge so it would be super clean. The image in the middle shows it after the first stitch, and the right-hand image shows it sewed after the second fold.
After double-sewing the bottom and top edges of this piece, I then folded it in half with the raw edge to the outside, and sewed the bottom and sides of that, leaving the top open.
Then it was time to sew the bottom as I discussed before. While the body piece of the bag was still inside out, I took the front and back, pulled them apart, and folded them so the side seams were in the center of the side. I then sewed a straight line across the corner that was 4″ to create the bottom. I then cut off the remainder.
This is quite difficult to explain so I will include a video below – skip to time 6:23 to view what I am attempting to explain.
Creating the Straps
After the bag was sewn, it was time to make the straps. I didn’t really follow any type of pattern or tutorial, I just kind of came up with it myself. I made two strips that were about 24″ inches long by 4.5″ wide. I chose this size after a lot of trial and error to figure out how thick I wanted the final strap to be and add the right amount for sewing. I did the same process of ironing and pinning with them, but I did not end up double-sewing the ends as I originally planned because it would have made it way too thick to sew. Once I sewed the two long sides, I then folded the left side to the center of the strip, and folded the right side over to the left side, until it was about 1/4 inch away from the new left edge. I then used a zigzag stitch to sew that together. I then flipped the strap over and sewed two straight stitches on the back to flatten the strap out. I honestly really like how sturdy and thick these straps ended up being. However, I am not a huge fan of how I sewed the ends, the stitching got a little messy but we won’t have to worry about them fraying at all.Here is just a size comparison to my hand to show the sturdiness and thickness of the strap.
I then also added another, smaller strap to the inside of the bag that can be used to compact the bag for traveling.
I created this strap exactly the same as I did with the other straps, but made it smaller in both width and length so it could be hidden well. Above in the left image, you can see that I sewed one end of the strap into the seam of the bag to hold it in place. I placed the strap in this spot because it needed to be close enough to the top that it could come out easily and wrap around the folded bag, but also to be able to hide away when not in use.
Creating the Pocket
From the very beginning of this idea, I knew I really wanted to add a pocket to the inside of the bag because I personally have tote bags that don’t have pockets and it’s so easy to lose important things in the bag. I added the pocket so she could keep her most important items that she needs easy access to so she won’t have to rummage through her bag while she’s traveling. I followed basically the same exact process to make this pocket as I did for the bag, and just straight stitched it onto the inside of the back panel of the bag.
Ironing on the Design
In order to make the iron-on correctly, this is how I had to format my design. I first split it up into all the colors I was using. I then inverted all the images so they would iron on the correct way, as you see here.
Although I did not take any photos of using the Cricut, I did exactly the same thing as I did with my test earlier in the process, just with my new design.
Ironing on the designThis is what the final iron-on came out looking like. I am not a big fan of how wrinkly the pink came out, and there is a little gap between the pink and yellow. Overall though, I like it.
Creating the Card
I personally felt like the bag was lacking something, or that I could do more with it than I was. I honestly didn’t know what I wanted to do. I began just creating random graphics that went with the theme I was going for, and ended up with this grid of graphics that I honestly really like. I drew a sun, shown on the top left two images, I made a graphic out of her name, used the same flower as I did for the bag, included the quote I was using, and some other patterned pieces. I decided to make a card out of this, and include a little note and explanation on the back of the card, as shown on the bottom right.
Here you can see the final product of my card. I struggled to produce this card, I couldn’t find anywhere to print it back and front so I had to print them separately and then attach them. Although I loved how homemade it turned out, I do wish it wasn’t as wrinkly. I used tacky glue to put them together which was probably not the best choice. I pressed with a heavy object while it was drying but it didn’t seem to help.
Instruction Video
I also created this short video to demonstrate how to fold the bag and use the compact strap, which I turned into a QR code to give to my mentor as well.
Here is a photo I took during our gifting event of my mentor opening the gift. I think by the smile on her face that she liked it!
Reflection
Even though I really struggled a lot at the very beginning, I genuinely loved this project. I loved the challenges it posed for me to overcome while giving me the opportunity to do basically anything I wanted. The limitations were frustrating at times but I’m glad they were in place or I would have gone overboard with my gift. I love giving gifts as it is, but creating gifts that are deep and heartfelt are my absolute favorite. I learned a lot of new things and techniques through this project and I really enjoyed it!
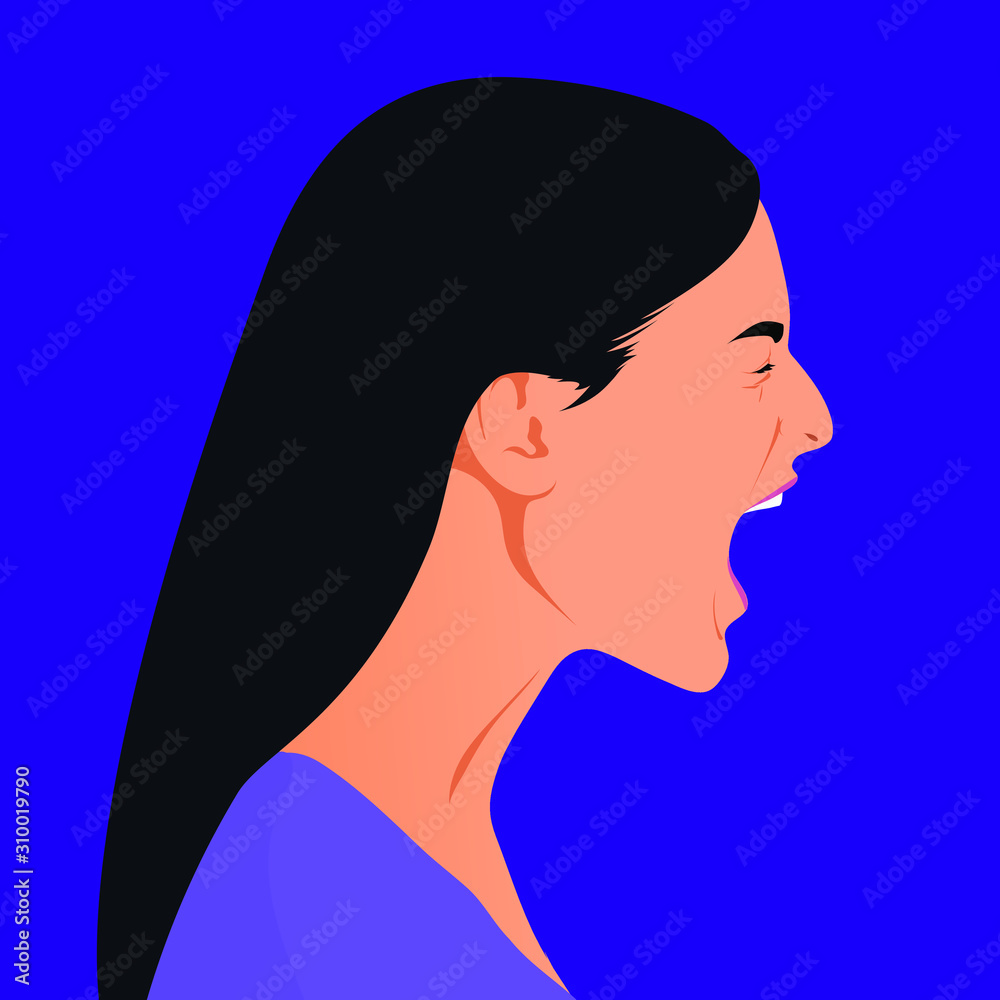
I utilized crafted layers of white Bristol paper and LED light in this composition to create a sense of “deep space” within one’s mind. Although the brain is not a physically deep space, it contains billions of small pieces of information that create its whole being, which are impacted by one’s surroundings. On the outside, or when the light is not shown, one can seem calm and put together. But when attention is brought to the mind, or the light is shown, it is revealed that things are happening inside that we never would’ve known without shifting our attention onto it. These are like the neuron firings, internal dialogue and screaming, and the words that others have said that have been twisted into over-thought-out lies. Through this demonstration, I aim to visually communicate anxiety disorder and portray how it feels to live inside my brain sometimes. I act as though I have it all together, but inside my mind, there are racing thoughts and internal screaming that are difficult to control. The things that people say to me are often played over and over in my mind and add to the chaos that I aim to portray.
Ideation
To begin this project, we did an exercise where we shone our phone flashlights onto objects and came up with drawings based on the shadows that were produced on the paper. This activity was helpful to start to visualize the way light could be used to change and/or move in our final project.In the second exercise we did, we were to take any initial of our name, and inside the negative space already present in the letter, draw an image of something that is personal to us and cleverly fit inside the space. The image on the top left side shows some of my first ideas for this activity, where I took images of mickey mouse ears and music notes and placed them inside the capital E. I did not end up using either of these ideas because the music note idea was not communicating the E anymore, and the mickey mouse just didn’t communicate anything about me and I knew I could do better. I knew that I wanted to use my guinea pigs because they are so important to my life, but I wasn’t sure how to make the image look like a guinea pig without adding details that would violate the three-part maximum rule of the exercise. The image on the top right shows my next idea, which is quite similar to my final. I found that working with a lowercase E opened up a lot more possibilities. In this version, I used an imaged traced guinea pig that I found online, flipped it horizontally, and placed it inside the E. I liked it but I really wanted to use my own guinea pig’s picture. I then decided to hand-trace an image I took of my guinea pig, Twix, which you can see at the bottom left here. I loved the way it came out but his foot was kind of buried in the grass in this picture, so I went to another photo that had his foot in it and hand-traced that as well. I just copied and pasted the foot drawing to the other tracing and adjusted it so it was at the correct angle. I went into DaFont.com and chose a font that I thought matches Twix’s personality, I can’t really explain how it does but the font reminds me of him. I installed that on my computer, put it in illustrator, and then expanded it into a shape so I could divide and delete the guinea pig image from it. Throughout the process of creating this file, we were also learning how to use the laser cutter, which has been such a game-changer in my design projects.
We then began a discussion on concept statements and how crucial they are to our processes. We dove right into creating them, where my professor had us do this exercise that really helped us bring out the most essential elements of our planned composition. She gave us a number of words that we had to write exactly, and timed us so we couldn’t think about it too hard. Here you can see the 50, 20, 10, 5, and 2-word iterations of my initial concept statement. I did not end up going with this concept whatsoever in the end, but it was really useful when writing my real statement in that it helped me weed out the most important things I wanted to portray.Here is an idea/sketch board that I created on Adobe Fresco, where I jotted down my first ideas, my inspiration, and some sketches I made of my first concept.
This is when I decided to change my whole concept. I felt like the forest/cave ideas would be easy to convey my message, but I just felt connected to the idea involving the brain, although I was not exactly sure what I wanted to do with it. I was actually getting quite frustrated at this point because I could not envision the outcome like I normally can. My professor really emphasized the importance of physically testing our work throughout the process of this project. We came into class this day and she told us to just make a really sketchy version of the idea we had in our mind. I just went for it and it helped me a lot to decide what I wanted to do in general and what I wanted to accomplish with and without the light.Here is the very first digital fragmentation of my brain idea on Adobe Illustrator, just to play around and see how I wanted to do the scream and how everything would layer up.
I decided to do a female head to lightly indicate that the brain is supposed to be mine, and I also thought that a bald man was too generic for this piece. This shows the first female side profile I tried out, along with a more detailed brain shape and a different screaming face. At this point, I started to get frustrated because the face wasn’t communicating what I wanted. The scream looked more like a gasp and I ended up changing my approach in the next step.
After a conversation with my professor, she suggested that I take my own photos for reference rather than using stock photos from online. I actually had attempted to do this myself but it’s quite difficult to take side profiles of your own face. Instead, I asked one of my peers, Maya Bitner, to model for me. This collage shows just the normal side profile I took of her, and how it looked after I traced it. After I did so, I went in and moved some things around for a few reasons. The whole side profile of her bun was reminding me of a prairie woman (her bun was cute it just looked prairie-like when I drew it) and I didn’t like it, and I also just felt strange having her face as my project. I simply image-traced this ponytail png I found online (source below), edited it onto her head until I liked it, and adjusted the heights and sizes of her features so they didn’t look exactly like her.
Here you can see the same idea, I asked Maya to make a screaming face, and to look very frustrated. This helped my idea come through so much better in the end because all of the images I could find online looked like gasps to me. They weren’t showing the authentic and real emotions I was attempting to convey in my piece; I wanted the scream to look frustrated and overwhelmed and I think Maya did a very nice job modeling that for me.My professor also suggested I make the brain look more detailed and anatomically correct to make sure it came across as the brain rather than a thought or idea in the head. I simply looked up anatomical brain drawings, found one I thought would do the job, and then traced it on Adobe Illustrator.
These are the Illustrator files that I created for my neuron spinner. I really wanted to create movement in my piece to portray that anxiety is not a static state of being, but rather the complete opposite, especially in terms of the brain. I wanted this to capture the firing of neurons in the brain, and the way they ebb and flow based on how you are feeling or what you are doing in the moment of anxiety. Without the light and without the movement, the piece would look like a brain at ease. The creation of the spinner piece was a doozy. In yet another conversation with my professor, I came to the realization that the original plan I had for the mechanism, a brass brad, was outside the material constraints. She did, however, show me a technique to make one out of bristol that ended up working very well for me with little issues. I first cut out the pieces as shown on the right side, including the spinner, a back (full) piece, a front(shaped around the brain space) piece, and the small circles that are slightly smaller than the hole in the spinner. I then took the small circles and glued them in a small stack at the center of the back piece. Next, I placed the spinner hole around the stack of circles on the back piece, applied glue to the top of the stack, and attached the front piece to it. Finally, I glued the front piece to the back side of the last layer, with the front piece not covering the negative brain-shaped space.
Here is the final outcome of my spinner before I placed it on my layer. I used the laser cutter to get the tiny shapes, and also folded the spin tab at the end to make it easier to grab and spin.
Here is a video demonstration of my spinner: IMG_5328
Moving into cutting and testing out my layers, a lot of tweaking and editing occurred. Firstly, when I was creating the initial Illustrator file, support honestly did not cross my mind. I knew to have the supports all around the sides but I didn’t think about the rest. When I made my first cuts on the Cricut, as you can see on the far left, they did not have any supports so when I placed them into the frames the head flopped over onto the table. I then added these beam-looking figures to the top of the head, as you can see in the center image, to add some stability. I wanted the figures above the head to have more significance than structure, so I turned them into thought bubbles and one speech bubble, as you see on the right side. Second, I realized that the frame was not 7×9 as I was led to believe, but that it was actually more like 6×9, so I resized my whole image. Lastly, I realized my screaming face did not come through when the light was shone on the piece. I originally just had planned to glue the scream onto the back of the front piece so that it would be seen with the light, but the other layers covered it up too much. To combat this, I cut the scream shape out of all the layers except the first one and the light shines through just as I imagined.I decided to add words to the thought/speech bubbles to give the piece more dimensionality. The words in the speech bubble are cut out of the layer to show the words I say to myself when I feel anxiety coming on, so they are visible without the light. The world can see it on the outside without knowing what’s going on and think I have myself under control when in reality, I also have these thought bubbles over my head. The words I put in these bubbles are things I commonly think to myself when I’m having anxiety. I chose a very calming and sophisticated font for the speech bubble because I wanted it to give off the vibe that I knew what I was doing. Meanwhile, the thoughts have this wonky font that visually communicates the twisting and distorting of thoughts that I feel when I’m anxiously dwelling on them.
In class, we had a group presentation/critique where we talked about each other’s pieces while they were still in draft form. I really enjoyed this critique because I was able to actually use the feedback from my peers to better my piece before the due date, rather than just smile and nod and think maybe next time. One of my peers suggested that I do more with the space at the bottom of my design and I agreed that it was quite bare. I decided to put more thoughts inside the body for a few reasons; one, I wanted to portray that anxiety does not only affect the mind, but it affects the body as well. Personally, I usually feel this overwhelming sense of thoughts building up until I can’t contain them anymore, and that is what I aimed to portray with these thoughts that pile up inside her body. On the left side, you can see my shape experimentation for these thoughts. I really struggled with deciding whether to make them sharp or rounded. If they were sharp, they imply this motif of pain and agony as they move around inside you like anxious thoughts. If they were rounded, they would look more like thoughts, and they would better show the warping, twisting, and flowing that I mentioned before. I inevitably ended up making them rounded because I wanted them to match the style of the thoughts above the head. You can see the shapes in the center image, and then the words I put in them on the right. I used the same font as I did for the thoughts and really pushed the letters to fill the whole shape to give that warped and twisted feel. I cut this odd neck shape out of all the layers except the first layer to allow the light to shine bright through to make the words legible.The final craft process was hectic. On the left-most side is my final cut of all my layers, except the first layer, where I was doing a final test of the scream and how it was coming through. The Cricut is not good with small details as you can see by the destroyed letters in the speech bubble, so I had to use the laser cutter to cut out the first layer and all the words. After I cut those out, I glued them to their respective places, as you can see in the second image from the left, and the image on the far right. There is, however, one thought bubble that has its words on the front, and they aren’t the words I originally intended to put there. While I was gluing the words to put on the back of the thought bubble, I put the glue all over the wrong side so I panicked and put it on the front of the layer. I hate the way it looked so I attempted to tear it off, leaving it quite scratched and ripped up. I ended up taking one of the thoughts from the bottom area and just putting it on the front of the layer because in all honesty, the laser cutter is hard to get into and I was not able to recut the front layer again just for the bubble. In the third image you can also see how the light shines through the spinner on the back as well.
Reflection
I have very mixed feelings about this project. At the very beginning, I really didn’t enjoy it because I felt no good ideas coming to me. Once I started to figure things out, I really got into it. I love creating things that are personal to me and that I can really pour into because I know a lot about them, and this was no exception. Anxiety is something that I think is kind of overlooked at this point, a lot of people say they have it but no one talks about what it really feels like and how deep of a hole you sometimes feel like you’re in. The majority of the frustration I had with this project was just the struggle to get time with the laser cutter and Cricut, which the professors did their best to combat and I really appreciate the time they gave up for us.
In this project, I aimed to create an intriguing card/envelope set that could be sold and realistically used/mailed. I aimed to create this card using an abstraction that I designed based on images from nature. I aimed to prioritize movement in both my card design and pattern.
Ideation
Our first assignment for this unit was to find ten images from nature and create four abstractions for each image. These abstractions included things like the direction found within the form, where the form changed color or the prominent shapes found within each form. Here you can see mine arranged in a chart for easy comparison.The first activity we did in class was creating our own wallpaper pattern from some of the abstractions we created. On the far left, you can see the original sketch of my orange that was then cut vertically and horizontally. We then rearranged the pieces according to the tutorial given and filled in the empty space around our original sketch with inspiration from our other abstractions, as seen in the middle. We then took a picture of that final drawing and uploaded it to Illustrator where we repeated the image to create a wallpaper pattern, which is the image on the right.The second activity we did in class was creating our own tessellations. Here you can see that I cut shapes out of the top and bottom of a square, and then taped them to the nearest counter-clockwise side of the square. We could then repeat this and the pieces would all fit together infinitely.The third activity we had in class was one that we did as a table group. We were all to research different tessellation shapes, decide on one as a table, and work together to create the pieces that came together as one at the end. We competed against all the other tables for different categories like the most interesting or intricate tessellation. My group chose to do a tesselation that looked like a puzzle piece and ended up getting third place in the voting.Here you can see the final activity we completed in class. We used Illustrator to digitally draw a tessellation repeatedly, then had the privilege to use the Cricut machine to cut our shapes out. We took our illustrator file and uploaded it to the Cricut app, and learned step-by-step how to use the Cricut machine. This became very useful knowledge to have in the card-making process.
Iteration
After learning basic patterning techniques and principles, it was then time to move into patterning digitally on our own. This is the first one I completed on my own without instruction in Illustrator.It was then time to move into researching patterning methods and grids. This process was difficult for me because I had no idea where I wanted to go with it. I then came across some warped grids and I instantly knew that I was going to utilize the idea in some way. I loved the way it gave a sense of movement to the viewer so I wanted to prioritize movement in my design. I also liked the way the varying sizes of the grid shapes naturally created shading and a contour effect. I drew the orange shape from my abstraction grid and played around with resizing the shape to the individual grid shapes and this was the result.This is a sort of idea board I put together when I first began the iteration process. The top four images are inspiration pictures I found online that had similar designs for the envelope to what I was imagining. I originally planned to have a cut-out on the front of the envelope like the first two images but I decided not to (further explanation below). I liked the left two images because I knew I wanted to connect the card and the envelope in some way. I liked the idea of creating a pattern for the envelope as well. The bottom shows sketches of what I originally planned my card to look like. Sources: https://www.rosapittanga.com.br/produto/convites/convite-casamento/1408 https://www.tipografiafalisca.it/partecipazioni_matrimonio_originali_clic_clac.html https://www.etsy.com/listing/91977047/?ga_order=most_relevant&ga_search_type=all&ga_view_type=gallery&ga_search_query=unique+wedding+invitations&ref=sr_gallery_20&utm_source=affiliate_window&utm_medium=affiliate&utm_campaign=ca_location_buyer&utm_content=229247&awc=6939_1670559968_bbc4e16c4d236befb21a5485cb51d1d3 https://www.freepik.com/premium-vector/wedding-invitation-envelope-template-with-flowers_4375685.htm#page=25&query=envelope%20template%20cut&position=47&from_view=keywordThese images show my “trial run” of the construction of my project. I wasn’t aiming for cleanliness, but for an established sense of what I wanted to do craft-wise. The image on the top left shows my first attempt at the card where I folded an 8.5×11 piece of cardstock in half and tried the warped edge. I then realized the card would be too big for the envelope-making method I was planning to use so I scaled the card down, which you can see on the top right. The bottom two images show rough versions of my envelope design. As you can see on the left, I originally planned to have a cut-out on the front of the envelope, through which you could see the address that would be written on the front of the card. After thinking about this idea for a few days, I decided to not go through with it for several reasons. The first reason was that I wasn’t sure about having the address on the actual card, and the second is that it would be hard to communicate with the user that that was the purpose of the cut-out.In a conversation with my professor, we decided that this small grid was going to be too small and tedious for the card design, so she suggested I make my own larger version. This is what you can see here. On the far left side, you can see the very beginnings of my grid-making. All of this work was done on Illustrator. The next image over shows some of my experimentation with how I was shaping the forms to the grid. I was originally just expanding and rotating them minimally, but then moved into trying out other warping methods. I tried the warp tool on illustrator but it changed the shapes in a way I wasn’t fond of. I then figured out a way to use the direct selection tool to individually reshape every petal and orange slice. This made the drawing process much more tedious but I believe it was worth it. I chose to do it this way because I always planned to take away the grid lines in the final, and I wanted the shapes to still communicate the movement I was going for without needing the lines. I found that just rotating and scaling the shapes wasn’t showing the same movement but rather a random collection of weird shapes. The third image just shows a snippet of what it looked like in progress, and the image on the far right is the two original drawings that I warped into the grid.After I finalized my pattern it was time to put together the designs for the card and envelope. As I said earlier, I really wanted the envelope and card to be tied together in some way, so I did a few things to accomplish that. I first decided to give the envelope a warped edge on the top portion that you open. I then added some abstract shapes to the liner that I planned to place on the inside of the envelope, which you can see in the middle. I created this liner by tracing and scaling down the envelope shape and taking away the tabs and bottom portion. These are the images I either printed or used for the Cricut.Then began the construction process, which was a very “rolling with the punches” experience for me. I originally planned to go to the Union Resource Room and just print and cut everything myself. When I actually went to do it, I messed up the sizing of the envelopes several times on the cardstock I had bought and limited my supply greatly. This is the reason there is only one dark brown envelope which I had originally planned to have instead of the tan color. After that, I headed to Target to buy some more cardstock and they were out of stock. I also tried to cut out the cards myself with my knife and ripped them because my blade had become dull. I then decided to retreat to FedEx and have them re-print the cards I messed up and the envelope liners and I am very glad I did so. After this, the process was much less of a headache. I then cut the envelopes out using the Cricut and it went very well. The images above show the process of the craft. The bottom left image shows the liners and cards in the process of being cut out. The bottom right shows the envelopes and the liners together, and the top two images show the envelopes assembled. During this assembly process, I used rubber cement to secure everything. I also made the decision to cut the liner at the crease of the envelope so that the flap would fold easier and not be so thick.I used double-sided glue tape on the edges of the envelope so the user could just peel off the paper and it would adhere like a normal store-bought card.
Reflection
This project turned out to be one of my favorites in the end. I am really happy with the way my cards came out and I can see major improvement in my crafting skills from the beginning of the semester. Although a large majority of the process felt like a wild goose chase, it was all for reasons that had nothing to do with the actual project. I am proud of myself for not freaking out when things went wrong but instead instantly thinking of how I can fix it. The main thing that I would change about my final is the cut-out in the front of the card. It almost feels a little random and there’s really no clear reason for it to be there. I would maybe add some kind of design to the inside of the card or some other element to give the cut-out more of a purpose.
The main objective I had in mind when creating this project was to do everything with the most accuracy I could. I wanted to master the construction of the cube and my polyhedron, and then build on that mastery to create something intriguing yet precise. I aimed to better my skills of craft, including cutting, scoring, template making, etc.
Ideation
The first exercise we did to begin this project was creating “the perfect cube.” In this process, we learned the basics of what 3d forms look like in a 2d template form, scoring, gluing, and the importance of accuracy of measurements when creating forms.The second exercise we did to begin this project was creating a trapezoidal prism. This introduced us to more complex shape-making in the templates.We were given the challenge to come up with one to two different ideas for each complex project option. This exercise was really beneficial in that it stretched my brain to ideas I wouldn’t have otherwise thought of doing.The next day we were to come to class with five unique ideas for our polyhedron final and these were the five that I sketched up on Adobe Fresco, and I eventually chose to go with a variation of the complex tubing idea.
Production
As I was researching the polyhedron that I wanted to use for this project, I actually changed my mind from the one I initially chose. The top two images show the octahedron shape template – the original vs. the one that I sketched up in Adobe Illustrator. I found this shape to be too simple in that it wouldn’t be able to hold the ideas I had for negative space. I wanted to find a polyhedron that could hold my ideas, but also would add to the overall intrigue just by its natural form. The bottom two images show the shape template I ended up going with, a square trapezohedron, the left being the original and the right being my recreation. I chose this polyhedron over the other because it was interesting enough to accomplish what I was going for but simultaneously simple enough to easily reproduce over and over. My recreation includes a legend and a directions panel. BOTH templates found at https://www.korthalsaltes.com/This group of images shows a few steps in the process of creating my final polyhedron. The image to the left is the template I carefully drew of the repeated shape used in the form. I did so by finding the measurements of the height and width based on my digital template and drawing the lines in the specific locations they intersected in. I made this template so I could easily trace around it to create my full template with less frustration. The middle image is the template all drawn out by hand. The right two images are two productions of my form, the first vs. the last.This shows all of the polyhedrons I created in my exploration. The left form is the octahedron, and the other two are the square trapezohedrons, all increasing in production quality.After I created my main polyhedron, I began to play around with the forms I wanted to put on the inside. This process was much more difficult than I anticipated. The creation of the main part of the tube forms was simple but finding the angles at which the forms intersected with the “shell” was the difficult part. I basically “guess and checked” them as I went – I made the form straight, then held it against the side to get the angle, cut it as many times as necessary to get it right, deconstructed the form, and then used that as a template to create the form again with the correct angles. Both images above show the process of doing this with my angled triangular tube form (the tube on the left side of my final form). The image on the left shows the rough cut version vs. the new version I created from that. The image on the left is my template in process before I accurately achieved the correct angles.These are the final digital templates I drew on Adobe Illustrator for each of my tubes with all the correct angles and cutouts. The image on the left is the L-shaped tube you can see on the right side of my form (the rectangle with the stick figure is the cutout I have on my top right tube where you can see into the tube), the image at the top is the angle triangular tube, and the bottom is the straight rectangular tube you can see at the bottom of my final form. The solid lines are cut lines and the dotted ones are score lines.I then had to line up my tubes to the outer shell in order to make the cuts to see into the ends of the tubes as you can see above. I aimed to make them smaller than the tube just to be sure there were no gaps like in the prototyping shown above. I also completed this process through “guess and check.” I held the tubes inside the form to the most accurate position possible, traced the shape of the end, then carefully cut the shape out of the outer form. I then used tape to secure the tabs so they could easily be deconstructed or moved around. The image on the far left shows this process. After I had secured my tube forms, I then began to play with the surface illusion aspect and how it could play into the dimensionality of my piece. This is also when I decided to add my third tube in which I really wanted to play with depth and make it look like the tube was coming out at you. Overall I aimed to create contrast, between not only the inside and the outside of my tubes but also between the inside of the whole polyhedron and the outside of it. I did so by changing the line direction, the width between the lines, and the line angles. I made the lined versions of the tubes three times, one just to test if I even liked the idea, the second to test widths and direction, and the third for the final product. I also decided to create surface illusion on the outside of the form as well and I aimed to make it seem like it was organized but starting to burst at the seams almost, which I explain in more detail below.These are all of the iterations and templates I created to get to my final product, including forms from very early exploration, line experimentation, and angle discoveries.
Here is a timelapse I captured of me designing the outside of my final polyhedron and gluing the tubes into place.
The main thing I was going for here, as you can see in my final piece, is to create a deeper meaning/narrative for a seemingly average piece. The outside lines are equally spaced and organized but lead you to these openings that you can see inside. These openings only let you see so much of the inside of the form before you see through to the other side. The inside is messy and complicated, and the intersections between the tubing and the outside form are seemingly bleeding out and starting to “break character” from the straight and even lines of the tubes. This, to me, is like humans, the outside world can only see so much of our lives and personality through what we decide to show them. On the inside, though, many of us are breaking and desire to get help but have trouble doing so. The silly little scribble on the bottom of the form says “save me” and provides some kind of inner dialogue that this form may have given its breaking.
Reflection
While this project was enjoyable for my problem-solving brain, I found myself to be quite ambitious in my ideation and struggled to make my ideas a physical reality. I wanted to create things outside my time frame and ability and I think this project gave me the opportunity to be patient with myself and allow myself to explore my boundaries, which included failure and frustration. I was able to come to the conclusion that precision took priority over complexity and that moment of realization changed my whole frame of mind. In the final moments of creating this project, I was frustrated. Things weren’t lining up correctly, my surface illusion didn’t look the way I had planned, and everything just seemed to go wrong. But I put my head down and worked through each problem that came along and produced a final product that I didn’t completely hate and I think that was what was important. This project also taught me a lot of skills that I think will be useful in my future career, including accuracy of measurements, template creation, precise cutting, gluing, etc.
My goal for this project was to create a sense of harmony through the contrast of black and white shapes. Cutting the shapes out and reflecting them was a very particular process in which I had to decide where to reflect those shapes in order to maintain my principle of asymmetry/balance while keeping a sense of wholeness to the piece.
Ideation
These are images of the exercise we did in class where we physically cut out shapes from a square to better understand how this should work digitally, and then my recreation of the composition on Illustrator.This is some of my play and learning how to use the illustrator app tools. I tooled around with option two by trying to make complex shapes, but it seemed like I was focusing too much on creating complex shapes and too little on the overall harmony of my piece. I then decided to move into option one and my creativity really started to show through.
Iteration
These are a few iterations of my final product, and what it looked like in the process. The rectangle piece on the bottom really weighed the piece down so I rotated it up so it wasn’t so heavy. Talking with my professor I also realized the sections that I originally took out of the circle to the far right were disrupting the harmony of the piece and creating an uncomfortable feeling so I decided to remove them and that helped tremendously.
Reflection
This project was overall really enjoyable for me. Learning how to use Illustrator was a really relaxing experience and I think this new knowledge will be useful for me in the future. I loved playing with the shapes and seeing how they could work with each other to create complex shapes, and also how the simplicity of the shapes worked together to provide a feeling of harmony.
My goal for this project was to create two compositions that vary in methods of creation. For both, we were to use a simple shape and any one of the principles discussed in class to create a visual representation of an emotion/state of being of our choice. For my project, I chose to embody movement to create the state of being of wilting. In composition two, we were to use the law of chance to randomly disperse our shapes with the goal of creating the same state of being.
Ideation
Exercise completed in class to clarify principle definitions. This exercise helped to visualize the principles and gave me good foundational ideas for my compositions.These are a few of my first ideations, moving from messy sketched ideas to more accurately drawn sketches that I was considering.
Iteration
Moving into working with physically cut-out shapes, I played around with how I wanted to implement my state of being and principle. I was originally aiming for a sense of losing control, but during a conversation with my professor, I realized my state of being wasn’t concise in a one-word description and decided to move towards a wilting movement, which changed my composition almost completely.These are a few of my iterations for composition 2. My method was to hold all my shapes in my hands above the page and sprinkle them randomly. As I experimented with this, wilting was not coming through almost at all and I decided to use fewer shapes. Using fewer shapes allowed that idea to come through better for the final product.
Reflection
I think this project was challenging in many ways for me. It was difficult to pinpoint a state of being and create that idea to the best of my ability. Composition two was challenging because I found myself trying to recreate composition one but in a random way. It was also difficult for me because it was difficult to only have one singular principle come through dominantly over the others that were naturally being created. I think that through the process of creating both final products, I learned a lot more about what it means to truly ideate, how it’s so beneficial to come up with several separate ideas rather than being stingy on one, and the importance of feedback from others.


