Posts

Gifting Design: Process


Research

There was a lot of research in this project. Here are some links I used for info.

How to glue wood

Sanding Wood

Organization in UI

Beyond that, I also interviewed my mentor, Cali Chiu (formerly Gulan), and learned more about her once I began iterating. I took a lot of notes regarding “gifts” and other things to help me solidify my ideas.


Exercises

Exercise 1 – Best gift

This exercise was a small one. I just thought of the best gifts I’ve ever gotten and wrote about them a little. What isn’t mentioned is how a lot of tangible gifts that I’ve gotten are generally helpful or things I could use every day, which is where my mind typically goes when giving gifts. This becomes evident later on.

Exercise 2 – Container

In this exercise, I took an everyday item and built a container for it. How or what I did with that was up to me so I took some notes.

Then I started working on the locking mechanism and the box itself. The lock works by pushing one L-shaped arm in the opposite direction and then it just pops open to reveal the pencil in its holder and a little card that asks you wear it.

The packaging is supposed to be comedic and appeals more to students and artists with a sense of humor. The card is like one of those “Hello my name is…” cards but it says “honorary nerd” and asks you to write your name with the pencil you now have!


Iterations

Before I began iterating, I took some time to message Cali and get to know her. The screenshots below are the conversations we had.


I wrote some questions to ask Cali regarding her interests and things I could use to begin iterating on personalized gifts.


With that, I took notes and began creating things. In my research notes, I took notes of who, what, where, why, and how. I’ll post those again.

I needed to create a bridge between my quote, Cali, and our shared interest in the VC major with my gift. I began exploring things that combined visual elements as well as focusing on creating a package that connects to it.

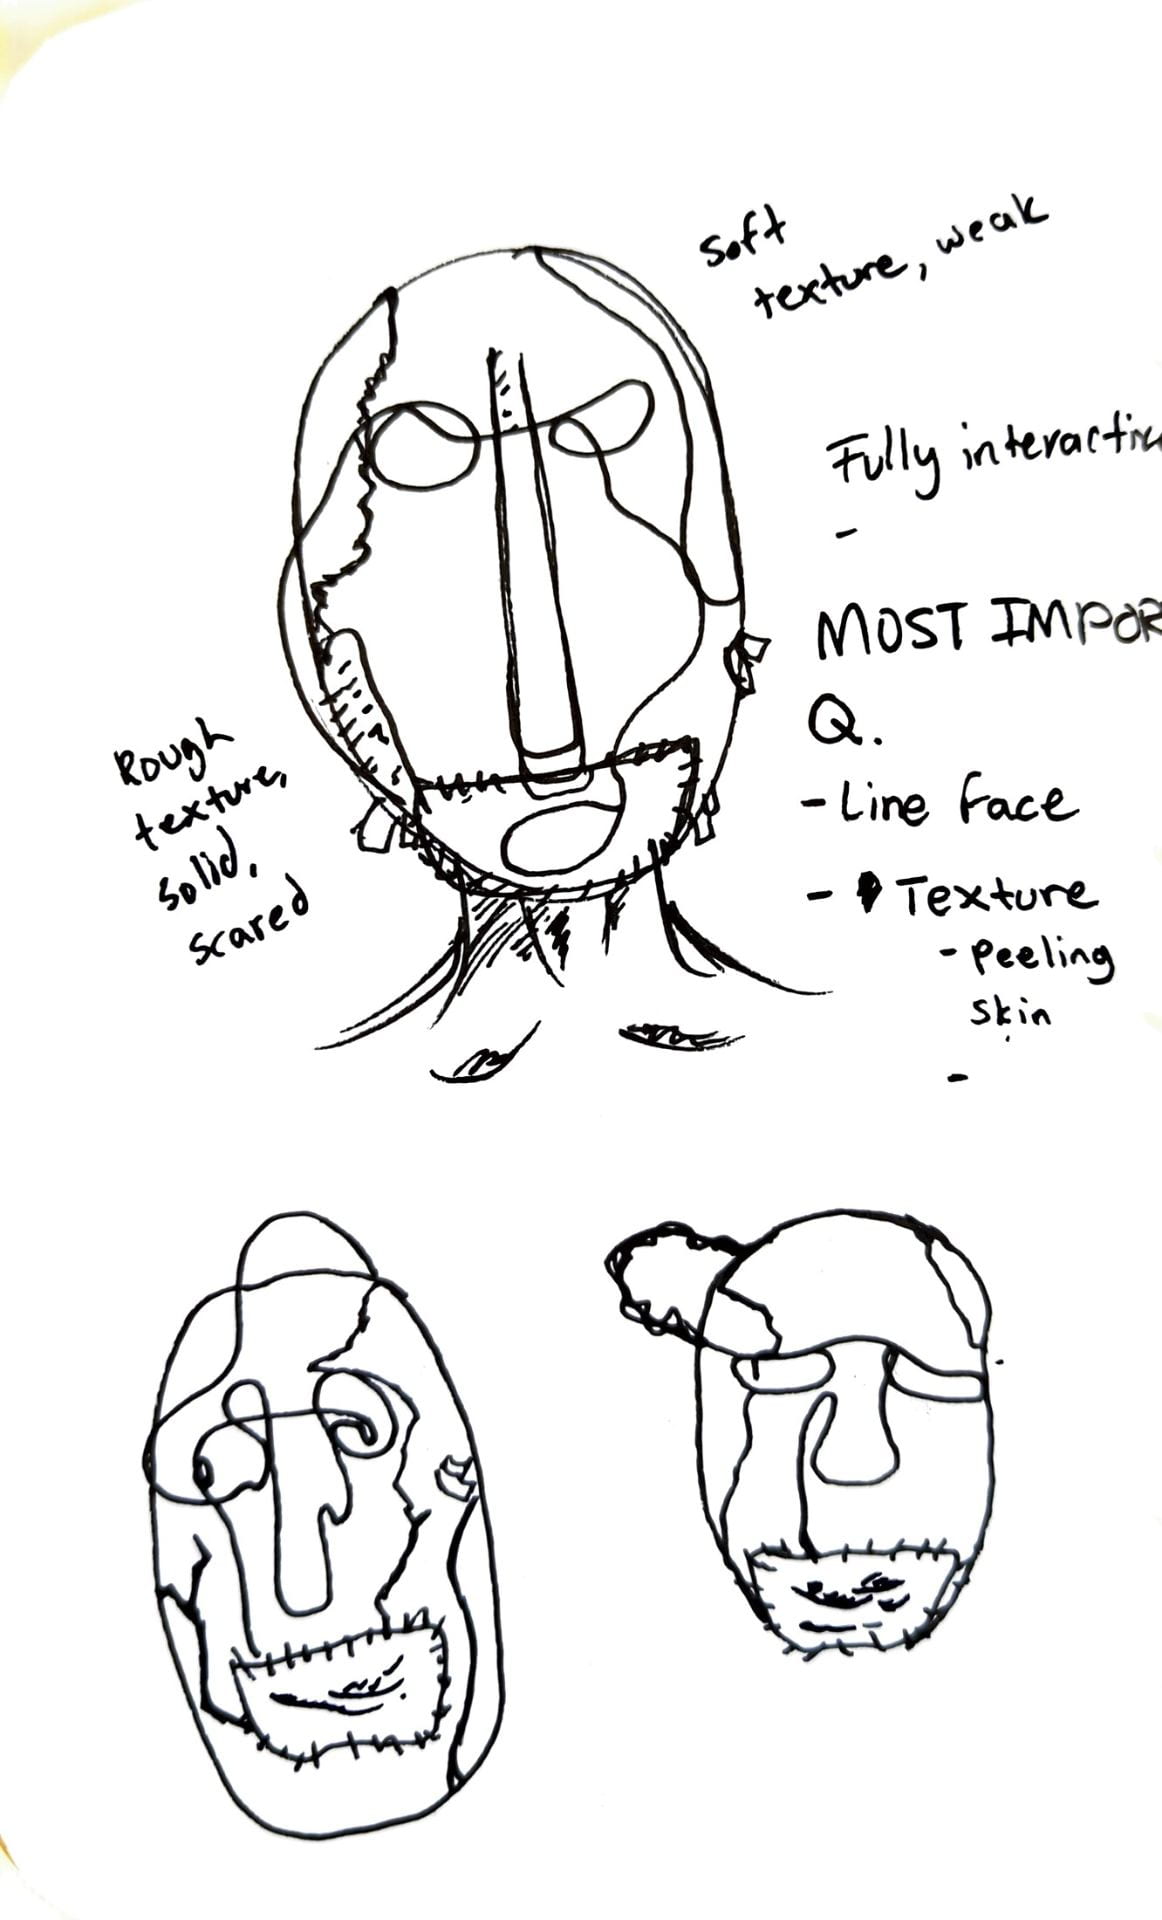
My first idea was to create a box that unfolds into a tool she could use. Here are some notes and drawings as well as a prototype of it.

From my quote and interest in Visual Communication, I wanted to create something helpful and helped Cali in some capacity through organization and function. I designed a lot of my stuff as if it were an interface and each part was just another slice of a big communicative pie. A lot of my focus was on hierarchy and ensuring the biggest and most noticeable elements were the most important such as the calendar and the smaller parts being used for tools or a fun little quote section.

Remembering that I had three material categories to work with, I couldn’t move with this idea due to the abundance of materials it would require for me to do it the way I wanted. I decided to ask Cali some more questions regarding her workflow, hoping to find a better direction to go in. I created a list of priorities to focus on when iterating as well as writing down some new questions.


With this, I began exploring an idea for a planner. Something easy to hold and could be personalized fairly easily. While I was at the store, I took some reference images of different planners to get an idea of how information is organized in the context of a planner. I’ve never used one so I had no idea what to expect.


I jotted down some things I thought were important to make a planner. I then started exploring designs and knowing Cali’s interest in typography, I explored different fonts and ways to design the covers and create an art-deco aesthetic for them. I started working in Adobe CC Express and created a 5×7 page with some fonts and even created a little OSU logo with Ohio state being the leaves (I think it’s clever), but I had no idea how to move forward. I didn’t know how I’d create more pages and I wasn’t familiar with the software so I continued exploring other options.


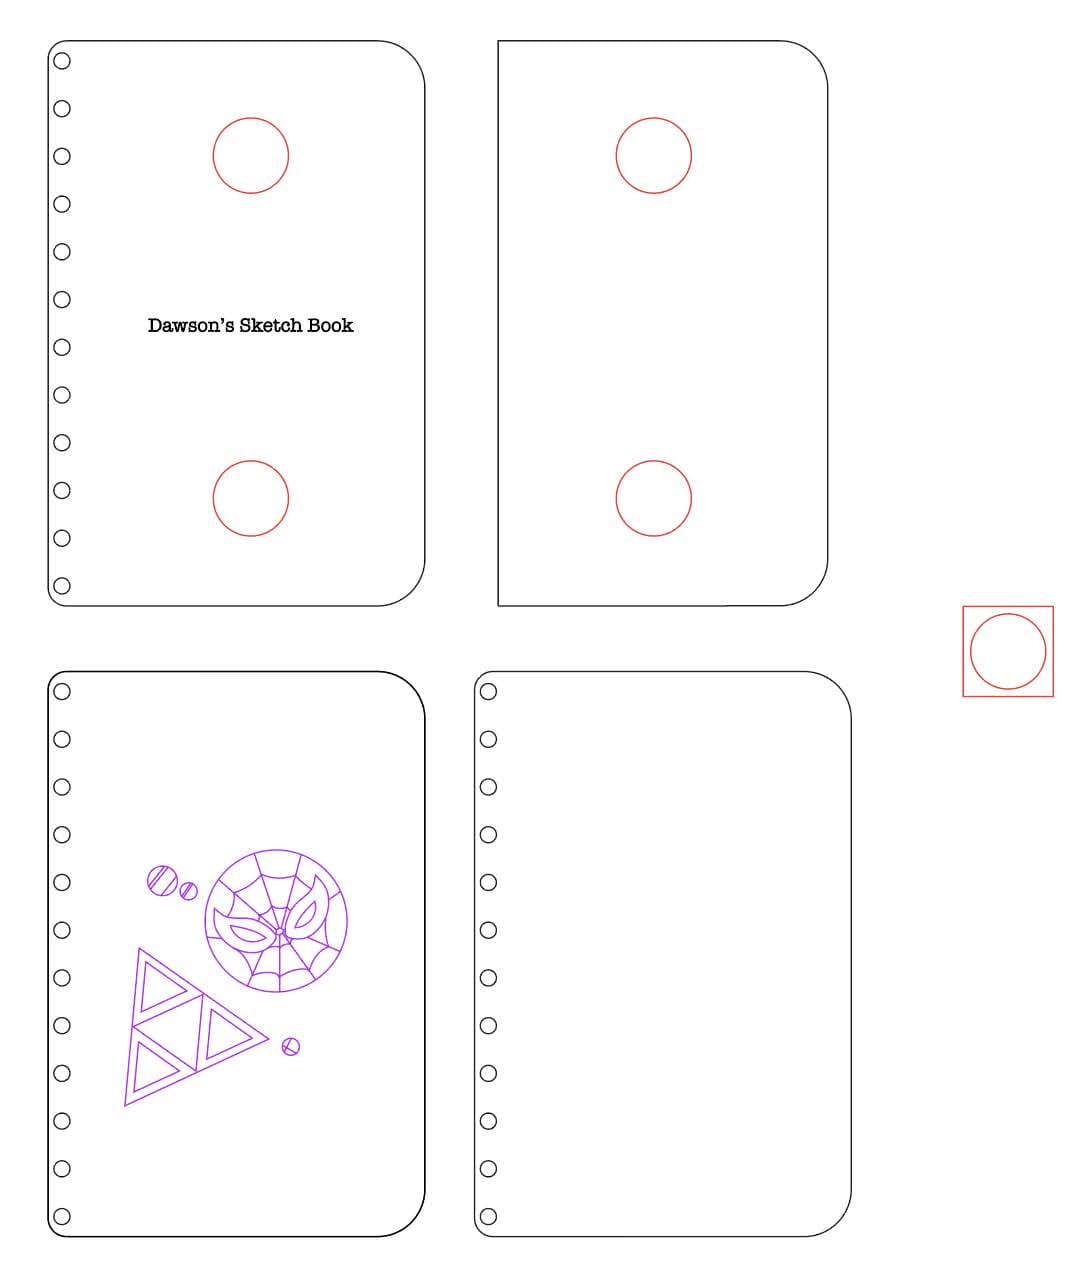
Knowing that Cali plays a variety of videogames, I began exploring things that could organize or aid her gaming. I was thinking about Nintendo Switch cartridge holders because they’re very small and it would be nice to have them in a cute little holder. Remembering her busy schedule and organizational practices, I began drawing up what would be an organizer for a variety of items.

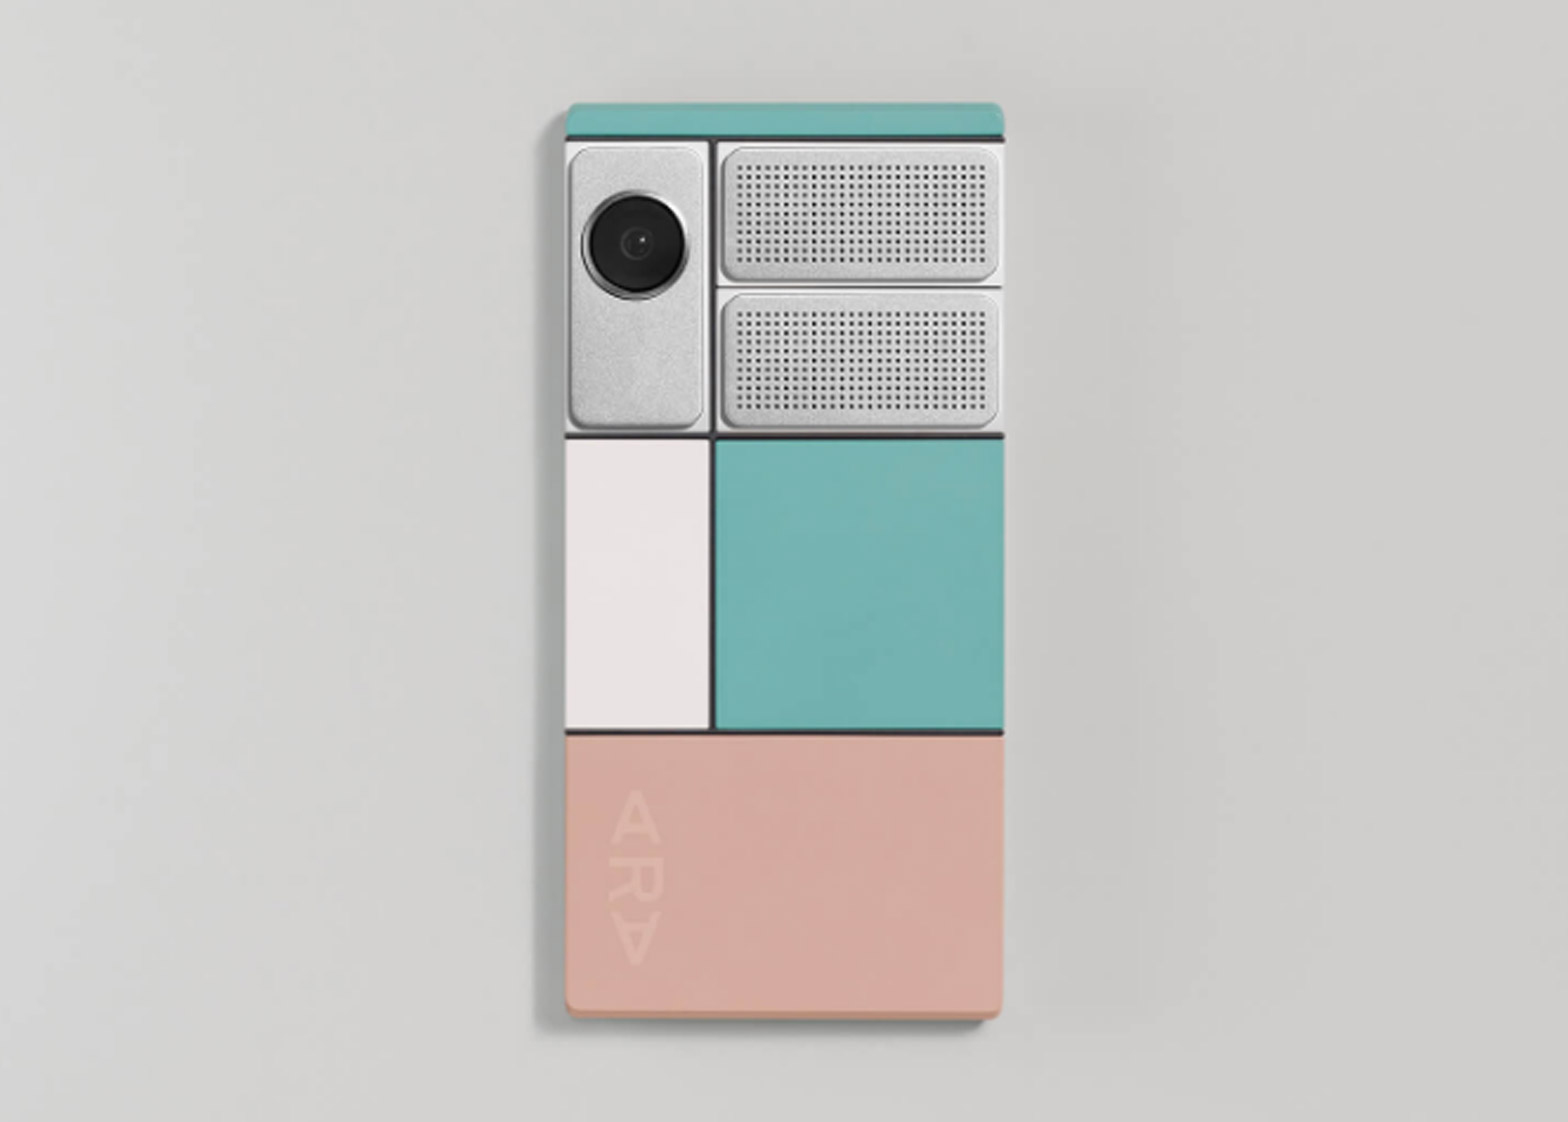
Within the organizer idea, I thought of a couple of ideas. One was a magnetic surface with movable modular cups (the square above with black dots is my imagining of a magnetic surface) and given my experience with magnets already I knew I could make it work among other things.

I continued to solidify a good arrangement for the surface of the organizer.

I chose to create my iterations in illustrator so I could move each part individually with ease. I moved parts around like they were elements on a page or an app and created the following iterations below based on this approach.

This iteration focused on writing utensils of varying sizes and some trays for other items. A smartphone holder is right in the front, but with how vertical a phone can be I opted to move it in other iterations to not block the contents in the trays.

Also at this point, the laser cutter was being used practically all the time and the due date was coming up so I gave up on the magnetic surface idea because of how much would need to be cut and the testing would be a lot as it was back with my sketchbook and its use of magnets.


I started to change the layout of the pencils a bit in the next couple of iterations cause the repetition they provide is cool and it would be interesting to experiment with.

This was a file I prepared to test cut. I just needed to make some other decisions regarding the design.

This was about 6 by 4 but I was only really using it to test out the wood and see how it would look with engravings and some patterns. I continued to change the design of the organizer. I measured out 11.5 by 5 on paper and just threw on my latest idea/arrangement for it.


I ended up combining the two trays above and widening the second tray. My thought was that the two trays of a nice size would be much better than three small (duh). Below are my finished illustrator files.

I also changed the sizes of the writing utensil holders so that they accommodate bigger-sized stuff like sharpies and perhaps even scissors.

In my final design, I made the utensil holders have two large, two medium, and three smaller holes which were good for pencils and pens. I was ready to cut and start assembling the gift. I also prepared a pattern to engrave on top of it which is below. These are two patterns I made initially that were inspired by the art-deco style, but I had to simplify them due to my limited time on the laser cutter.

Below is the design I ended up running with. This would be engraved on top to give the organizer a nice art-deco aesthetic.

Paired with it was the box. Below are some ideas I had for the boxes.


The box was something I hadn’t put more thought into than I should’ve. I had two solid ideas that I felt I could run with but due to the laser cutter access being cut off, for the most part, I went with the paper Animal Crossing box because it’s made of paper and I figured I could use the Cricut more than a laser cutter.


Concept Statement

In the Gifting Design project, I worked to create a gift for my mentor, Cali Chiu, who is majoring in Visual Communication Design. To guide me in my exploration I chose a quote from George Eliot that says, “What do we live for, if not to make life less difficult for each other?”. Cali seemed like a very busy woman. Having as much experience as she has in this field, I knew she’d need something to help her stay organized and clutter-free. In other words, to help her out. What I’ve designed is a desk organizer that is versatile and is designed to keep Cali’s work and gaming spaces free of clutter. From my time talking with Cali and seeing her work, I know she’s a very dedicated and hardworking person as well as a big fan of videogames, so I wanted to create something that appeals to her tastes and helps her keep organized in any setting. In designing the surface, I treated each element of the organizer as something I want a user to interact with. Much like graphic visuals across any medium in conveying information, the scale and proportion of each shape correlate to its message/use and importance. Negative space between slots also ensured to prevent visual clutter and, in this way, I utilized proportion and space as two crucial elements and principles that helped me create an easy and understandable surface for the organizer. Limiting myself only to wood and adhesive for the gift and paper to create a lightweight box, I wanted to create an experience similar to a classic gift-giving but with the visuals from a game she enjoys: Animal Crossing. So, I designed the box in mind with an easy-to-remove lid and sides that fold open, revealing her gift. With wood being durable and least costly, I precisely cut my digitally formatted designs. The line pattern etched into the surface is a minimalist art-deco pattern that speaks to Cali’s appreciation for the style without being too visually complicated to keep the emphasis on the spaces where her items can be placed.


Production

I created an illustrator file for the cutout after I managed to get some time on the laser cutter.


I prepped my files and tested engraving and cutting through the wood. Once I finished the tests, I reenabled my layers and let the laser cutter do its job.


So, unfortunately for me, the laser cutter doesn’t know how to do its job. It didn’t cut all the way through, so the next hour would be dedicated to carefully cutting through the rest of the wood with a heavy cutting tool provided by a friend.

I was liking how it all turned out so far. I just needed to adhere everything together and sand it all down to make it smooth and comfortable to touch as well as assemble and cut the boxes components out.


I went home for the day and prepped my garage for some serious woodworking.


I spread a fair amount of glue on one side of the wood and then used clamps to clamp each corner and the space between really tight. Then, I set a timer for 35 minutes.


While the base was drying, I began clamping two top layers together. The way this all assembled was through stacking multiple layers of wood to build up the thickness and give the slots and holes the depth they need. When glue pushed out, I wiped it down with a wet rag.


While the base dried more, I sanded the insides of the holes and trays to remove the dark scorched wood and to smooth it out. This is one side that’s sanded next to one side that isn’t.


Next, I glued and clamped the entire thing together, the base and the top layers, and waited an hour to ensure it all dried.


I managed to make sure all layers were lined up perfectly. This is a closeup of how precise they all fit together after being glued and slid into place.


I took it home, expecting to sand down and finish the finer details in class (like sanding away some smaller bits of spill-over glue). I took it to my room and tested it out just to see how it would look with stuff in it. Of course, also posted an image on social media because it turned out great.


I hit a bit of a road bump with the box. When I cut out my chess pieces, I realized after the fact that a majority didn’t cut all the way through. I spent about 9 hours working on cutting them out and then assembling them was just as hard given the circumstances. This meant a lot of my time was shifted toward correcting these mistakes and I didn’t get to focus as much time on my box as I wanted. Everything was cut and assembled by hand instead of the Cricut.


I began taking measurements of where I wanted the slips to be that would hold the gift in place. From there, I started getting the measurements I needed for my box, following my illustrations of what I needed to do to achieve the lift and reveal function.


When I started, I also used my organizer to keep my tools organized as I made the box!

These images below show me gluing the flaps down to the base of the box. After that, I started making these little things that will stand up vertically and keep the gift in place right in the middle of the box.


I glued the tabs down after marking where the edges of the gift would be, ensuring it all lines up the way I need it to. After I got it all put in place, I made the rest of the tabs.


The tabs worked perfectly and the gift fit snug in its spot. Next, I made the lid using the same measurements as the box but just smaller and then threw on the only additions I had time to make.


Final Production


Portfolio Post

View the final project at Gifting Design

Checkmate: Process


Research

These are some resources I used for this project.

Chess Game Online

All about Chess Pieces

Capitalism info

US Capitol Free Stock Photo - Public Domain Pictures


Exercises

Exercise 1 – Sliceforms

In this exercise, I practiced making slice forms. Starting with some basic ones, I made a person, a pyramid, and a rectangular prism.


After I got some idea of what I was doing, I needed to start solidifying my narrative with my partner. We worked on something regarding Man versus Nature but then it got a bit more specific and ended up somewhere where we could actually start thinking about the forms.


Pollution versus Plant was super broad, so we started examining the two sides and thinking about how they interact and what else they could be.

We landed on a narrative in which capitalism and all it entails is fighting against the Natural world for territory.


Iterations

I tend to get a little crazy with my notes so I kept everything on one page for a long time. This is my “master” page.

I test cut a model of the pawn to get an idea of what the sizes should be. First I made the files

Then I cut out the shape on the cricut.


Seeing how tall this guy was, I made the pawn smaller and decided the bishop, rook, and knight could sit halfway between this and the new size of the pawn. I also cut out some other shapes for what could be the bishop and a possible king building. This was mostly to see how they could form together, not really the form they create.

Another thing to note is the material and color. Chipboard was sturdy, so my partner and I both planned on using that for our forms. I also wanted to use some shining gold cardstock I found at the store for my capitalist pieces.


My idea was that the shimmering gold was a signifier of wealth and I wanted to give some of the more “important pieces” golden features and keep the pawns void of it, highlighting the wealth gap present in our society.

I went ahead and created a middle-height version of the tall pawn for the use of the bishop, rook, and knight. Then, I created a smaller pawn and readjusted his props.


I had a fairly good idea of what I could do with the Lawyer figure, possibly making him the Rook. Mostly because, in capitalism, it’s always lawyers and the justice system in general that prevents any kind of action towards companies like Nestle who hoards water (click this for a link to an investigation into this exact thing). The law protects the companies, so the lawyer fit the role of the rook.

Gestalt principles are present in a couple of these. Positive and negative space was a focus for these three pieces. They needed to be visually different via different clothing and props so I focused a lot on making them clearly different but similar in height.


For the King, I spent time creating my fictional company and designing the piece. My intention was to print out something that could feature the logo, but I ended up scrapping that later down the road because of the practicality. Here are some of the logos I made to represent the company (king).


For the Queen, I knew it would be modeled after the Government. I just used an image of the U.S Capitol to build my pieces. The Queen is there to support the King at all costs and is very deadly. Government fits that role perfectly.


With all of my pieces finalized, I created some test cuts. Then the scheduling problems hit. I wasn’t able to test cut any of these until the day before the project was due. During that time, I made sure every file and piece is exactly to my liking. I also made a crucial mistake which made it much harder to switch away from chipboard as my main material.

This piece is an earlier model of the Lawyer. It has no slice form marks for the arms. I made the mistake of finalizing everything and then combining the exact width and length of the slices for each part into the shapes themselves. This meant I had to do a lot of extra work whether it be redrawing everything to their exact measurements for a different material (a new material I didn’t have an abundance of) or I had to go through and combine these shapes with, for example, a square to re-seal and then re-implement the correct marks as their own shape.

Thanks to the hardworking instructors in the program, they managed to get everybody onto the machine. I rewrote my concept statement and made these shortcomings work to the advantage of my narrative and approached it with optimism. This is where production starts.


Concept/Narrative Statement

The game of chess is a battle between players through a medium that feels sophisticated while managing to remain just a game. It paints a story far more discomforting, however: warfare and the destruction of either the light or dark side. What Brodie and I have done is examine the subtext of Chess and created our own battle and story to tell. The battle that ensues centers around Capitalism and its conquering of the Natural World. The capitalist side consists of a company called ForNature (King), the Government (Queen), The Lawyer (Rook), The Banker (Bishop), The Landlord (Knight), and The Consumer (Pawn). The blandness and flat artificial nature of the Capitalism side aid in exhibiting the nature of those pieces. Scale and creating a notable hierarchy were crucial in reflecting the reality of a capitalist society where the average consumer is much smaller and more disposable than a Company and the Government that reigns. On the side of nature, hierarchy with scale is also demonstrated but what you also find is a brighter and more texture-filled naturalistic style that reflects that of nature. Those pieces are The Redwood (King), The Rose (Queen), The Hive (Knight), The Cactus (Rook), The Flytrap (Bishop), and The Daisy (Pawn). The battle between Capitalism and the Natural World wages on currently, and we chose this narrative as a modern take on the classicism of the medieval narrative present in Chess as we know it.


Production

I finalized everything and made sure it all looks the way I want it to. I made sure my files were all laser-cut ready and I sent them to an instructor (Taylor) to have him put them on the computer so when I showed up I just had to press “go”. Some small things changed like how many windows the little buildings have and such. I tried to reduce the amount of finer stuff the laser cutter would have to deal with and also reduced the number of things like arms and accessories/props.


The laser cutter didn’t make it through a majority. I had already scrapped my colors due to them simply being more stuff I have to cut out and without the precision of the cutter, it would take forever by hand. I felt like things were only getting worse with this project. I kept a positive attitude though, and immediately began hand cutting them out.


After 8 hours of cutting these out with an Exacto knife, I sanded away some of the torn bits. Most of the pieces had their backs torn off and looked very rough even with sanding.


A lot of pieces had spots like in the image above. I kept going and lined all of my pieces up on a table and began piecing them together.


I cut out the slips for the buildings and put the props in the arms of the pieces. The removal process for these pieces was a nightmare and made some arms and various other parts not fit together by the millimeter, so I glued them.


Final Production


Portfolio Post

View the final project at Checkmate

Dynamic Page: Process


Research

The research I conducted was mostly looking through youtube channels and watching videos such as…


as well as Cut / Fold Templates for the purpose of creating physical prototypes.

For what my project ended up being, “Dots” by Norman McLaren was a huge inspiration in regard to the stop motion approach as was this video on Vimeo by Chris Turner.


Exercises

Exercise 1 – Paper Mechanisms

The first exercise I did was just building very basic paper mechanisms. They weren’t perfect but they were something for sure. One was a practice “sliding” mechanism with a pull tab and the other was a popup flip mechanism. As a kid, I used to actually make my mother’s birthday cards using this pop-up thing cause I saw it in a book once.


Another exercise focused on the music of the project and experimenting with visualizing sound in abstract but understandable ways. I took several notes with abstract shapes and lines that demonstrated various aspects of the songs my partner Brian and I were planning on using for the project. What I was doing mostly was listening to the beat, the tone, and what emotions they make me feel, but a lot of them focused more on the beat of the song and the rhythm.


After the exercises in class, Brian and I started discussing what songs we should be narrowing down to and what medium we want to use for our final version. We both thought stop motion would be interesting since we’ve never done anything with it so we ended up deciding that day to use stop motion. To get a better grip on it, I watched videos from the resources in the Research section and downloaded an app called “Stop Motion Studio”, a free program that helps you capture images in numbered frames. The greatest feature is that it allows you to see your previous image to help you. I crumpled up some paper and tested two animations: one where the paper uncurls and reveals text and then another where hand-drawn elements begin to appear to the beat of one of the songs.


Iterations

Brian and I agreed on some things that would keep our compositions connected. We would both work with monochromatic blue. We both agreed that the somber melody translated to “blues” in our minds so we chose that as a prominent color. To be more specific, I would utilize darker blue backgrounds with lighter, contrasting blue foreground subjects and he would do the opposite. We felt that mine being darker and his being lighter helped represent our opposing themes. As for how our stop motions depicted our themes, he went with some form of upward movement visualization whereas I went with downward movement.

I started storyboarding some stuff when I realized ProCreate allows you to make animations using your layers. This changed the way I started ideating the final animation. A lot of what I did focused around “descent” as a literal thing which lead to some struggles coming up with anything that I could actually work with. I started to think more broadly about “descent” as an abstract thing with no true definition and rather examined all of them. This led to some ideas revolving “madness” such as the descent into it. I created very short glimpses into what the subject matter would look like.

The last one above got me thinking about the feelings of the song (specifically the part I was focusing on which is the beginning of the song). It also made me think about the general emotions of “descent” and what feelings could be roped into that as a theme and how it relates to the song. These are some abstractions of feelings I created thinking about organic and geometric shapes and how their forms communicate emotions. For example, guilt is a spiraling form moving inward towards itself. To me, guilt as a feeling does that. It twists the stomach and the mind. Fear is malleable, impatience is wavering and its shape is an ambiguous back-and-forth, and anger is sharp and jagged and more geometric than the rest.


Another thing I was thinking about with the theme was how descent based on “physics” or just the literal act of falling could still be present in my composition. It’s the most direct way of representing it but only in the action itself, not the subject which is meant to be abstract as per the guidelines of the project. So I started testing this out and animated a little ball to be falling toward a vanishing point.


These are more concepts I created. Spirals appear in two of these (one just demonstrates a back and forth “wave” like animation) as a visualization of the rhythm being very repetitive and winding. The piano moves up and then peaks before coming back down and then it repeats which made me think of a spiral.


Descent slowly became less and less about the depiction of downward movement through something like a staircase moving downward and rather something that was more up for interpretation with visuals to guide what it could be about. That being said, time was ticking and I had to come up with something that I felt was a viable concept. Combining both the use of scale and movement in morphing forms, I created an animation that would then be translated onto paper.


Concept Statement

Music can be a tool for guidance and uplifting one’s spirits, or it can be soothing and evoke emotion. It’s a very broad thing, but music can generate emotional responses from the listener. After examining an instrumental song, I want to capture the themes and emotions that I feel are present in the composing of the song. The song my partner and I chose called “O (Fly On)” by Coldplay, uses a gentle piano rhythm that carries for the entire song as more and more instruments come in later to aid in creating a very somber tune. The very beginning of the song is empty, only a piano carrying the song. It sounds almost cyclical and the repetition of the lonely piano evokes a sense of melancholy and depth. A couple of minutes in, you can hear the bass pickup, the piano rhythm changes and you can feel a sense of a new and uplifting tone as the song begins to end. My partner and I took these two very different themes of downward descent and upwards ascension and created two different stop-motion movies that visualize them. To capture my theme of “descent/descension”, movement plays a huge role in showing the direction in which the forms travel in toward the focal point. Scale helps to create a sense of depth as the forms slowly fall inward toward a vanishing point in the composition illustrating the descent I want to capture. Two differing shades of blue, one darker and one lighter, will help to provide contrast between the background and foreground making the shapes visible and each frame visually consistent.


Production

Production was fairly straightforward with this. I would copy screenshots of each individual frame from ProCreate into illustrator and draw over the forms, separating each. There were about 50 or so frames in this animation so it would take a decent bit.

Frankly, I’m surprised my iPad could handle all the shapes being on one screen. After I got it all cut out, I laser cut the biggest forms first and then did as many of the smaller shapes as I could. Many flew away in the cutter or some were just too small for it to cut without it blackening it so I kept the ones that were easiest for the laser printer to handle and then cut the rest by hand. Once I got everything cut out and situated, I sorted all of the pieces using my files as a reference for quantity.


It was time to shoot the animation. I took my lamp and propped it on a piece of furniture. On the big blue book, I placed my iPad with the animation’s frames up in order and as I placed the pieces together I would snap the image, changed the frame on my iPad, and then used the ghost image left behind in the app to organize the next frame as well as using my iPad for reference.


The very last step was to move the video onto my iPad. Once I got it there, I recorded a snippet of the song I was using and the exact part, inserted the audio into iMovie along with my video, and made the final video. I’m still gonna work on ensuring it retains its quality cause at the moment it is definitely suffering from a little compression being moved from place to place.


Final Production


Portfolio Post

View the final project at Dynamic Page

Mask Up: Process


Research

When it came to research, I relied on my own and my partner’s experiences wearing masks and how we felt regarding the pandemic in the very beginning. I also listened to a podcast about the subject. Most of what we discussed will be shown in my notes, but it centers around what masks are for and dissecting with a mask WAS and IS currently.


Masking for a Friend

With cities on lockdown, animals are finding more room to roam


Exercises

Exercise 1 – Drawing masks

Before our first exercise, we drew roughly 10 “masks” each. These are the ones I drew for practice, applying them onto a drawn model head for scale. Some focus on how eyes play a huge role in the pandemic for expressing emotion whereas it’s normally our entire face that does that job. Some are very jagged and sharp, sort of examining the idea of keeping people away from you “or else”. Lastly, others play into the virus’s nature and are gross such as the “yellow fuzz” one and the “green alien” one. These are about the virus itself and stand to present the wearer as infected.


Exercise 2 –  Making a mask

One of the first exercises we did was to make a make something simple and then my partner and I slowly built off of it. We started with a slice of paper and then it slowly grew into a mask or something to conceal the face. The last step was to make it wearable using paper straps stapled to the front and sides of the mask.


These little exercises helped me think of how I wanted my mask to feel and to be worn. Would it be comfortable and can I see when I wear it? Stuff like that. Moving forward, my partner and I would begin thinking of our narrative. We took a lot of notes, examining what our narrative would be and how our masks would be connected through it. One of the biggest things we began discussing was “texture” and its use in the masks.


Iterations

We started a rough draft of what our narrative could be. Both of us were interested in the mental health and identity affects the pandemic has had on people but wanted to compare these darker realities to something else. Well, if you can remember, there were a lot of stories about animals roaming cities in the year 2020 just as the pandemic forced people inside. We continued to look into these crazy stories and saw that animals in both the ocean and on land were getting comfortable and traveling into locations they generally never went to because of our absence. This idea of Man and Nature was getting discussed which pushed us to start thinking of different themes within that concept. The one we agreed upon was highlighting mankind’s reality as well as nature’s during this isolation period.

I chose the theme of “decay” where my partner’s theme was “growth”. One thing I started working with was making a mask that utilizes texture in a way that causes uneasiness. Masks from classic horror films also inspired me, especially a mask such as Michael Myers who, in one film, has a very rundown and dirty looking mask which shows the wear and tear of the many years he’s been around (opposed to his plain white mask from the original film). These iterations feature eye holes and a mask stitched onto the surface of the mask to represent how masks were becoming a part of us as people in light of the pandemic.

One idea was to use the eye holes as “windows” to the soul. The eyes would have a sliding mechanism that showed multiple expressions our eyes make that the wearer would slide around to express themselves while still being completely concealed. I built the mechanism but the images have been lost, but it was a pretty basic thing. I eventually came around to not like the eye holes. I felt that it conflicted with the idea of “concealed identity”, so I scrapped it and decided that it was entirely conflicting to show any sense of the facial or have any access to it (such as the mask that opens up, super goofy) and started iterating on a more abstract mask in my sketchbook.

As for the textures, they would be the only thing used by the person to express their emotions. The textures would be present as not only an expression of the wearer but to the viewer, something for them to identify with. The ideas I had with texture led me to experiment with paper mache as more than a structural aspect but also another tactile thing the viewers can interact with. Appealing to my theme of “decay”, I felt that it would really play into it by having the mask peel like skin. I practiced the paper mache structure and tearing aspect with multiple paper masks, as well as how to form the face.


These practice masks helped solidify the applications of paper mache in the context of my narrative and also allowed me to rethink how I could make it “tearable” and virtually self-destructive in this way. My solution was to layer different paper on top of the base facial structure which is made of thicker drawing paper. I would use tissue paper going from red paper to white and red mixed, to just plain white. As you tear the paper away from this abstract and lifeless mask, you’ll see the real human features like muscle beneath the skin. To finalize the mask, I also did a little texture testing which consisted of me just finding textures that fit the descriptions I wrote for the two being soft and weak and sturdy and rough.


I needed the fabrics to be planar and also easily or semi-easily conformable to a solid surface. I looked at different blankets and some recycled rugs from my friend’s workplace that I could’ve used. The carpet of my apartment is incredibly discomforting to walk on and very often I think about how much I hate it. Luckily, my landlord left a huge patch of it in my closet for no reason, so I decided to test cut it into patches and I liked how it felt (in this very particular context) so there I found my rough texture.

In class, there were also some recycled fabrics, and one caught my eye.

Another important decision I needed to make was about how it would be worn. I felt an elastic string was easy and in my tests was strong enough and secure enough to be put on quickly. I thought this fit within the narrative, especially considering how natural putting a mask on is nowadays for me, I figured the string would be as well. I continued testing however and even went back to my past sketches which showed many different strings which would secure the mask even more as if to prevent removal. I liked this idea but when I searched for things I could recycle or acquire that would almost “lock” it into place, I had no luck. I decided to just stick with the string because I had a lot of it and I would argue the speed at which this mask can be put on is far more important, basically a quick shield from people who may “stop by” or when you’re walking into a restaurant or public space. In those situations, speed would be crucial in putting the mask on.


At last, the mask was finalized and I’d begin production.


Concept Statement/Narrative

Covid-19, a virus killing mass numbers of people, has impacted all aspects of life. Its effects on human health have been detrimental both physically and mentally due to a call for isolation in an attempt to limit the spread of the virus. The same isolation that left humans reeling has in turn provided the opportunity for nature to turn inward and begin healing itself. Man and nature are equally impacted by the new normal the pandemic has created. Man finds themself broken down, lacking identity and that by which they defined themself.  Instead, they are overcome by confusion, anger, and fear which lead to a desperate need for comfort. Society itself falls apart as familiarity is stripped away, the process of which leaves man emotionally raw. Meanwhile, at the beginning of Covid, nature began to thrive. Heavily polluted waters became clear and animals were found in greater abundance as air and noise pollution decreased, but it wasn’t long before man needed nature again. With the mass production of medical supplies, pollution began to increase. Similarly, destructive actions such as illegal hunting and fishing began taking place to soothe a food shortage, and an increase in hikers and tourists destroyed many habitats. Man turned back to nature in an attempt to heal itself, and nature suffered the consequences.


Production

Production was fairly straightforward. It started with making the main structure on top of a plastic Halloween mask. I chose this mask in particular because it provided the facial contours I wanted: a tight fit for the nose, chin, forehead, and lips. It can be worn by anyone and that’s what appealed to me and my narrative.

I mixed white glue with about a cup of water to create a very liquidy glue that would wet the paper enough to allow it to conform to the mask easily and also stick together. Placing strips of paper on the forehead, sides, and covering the mouth holes and eye holes, I formed the face and allowed it to dry before moving on.


After I got the structure down, I applied the texture patches which were placed on the mask to get a sense of how they’d conform, and then they were outlined with a marker and cut into shape. After I applied the soft blanket, I started putting the red tissue paper on. The carpet patch was very old and stiff, making it difficult to work with. I would apply this later as it was soaking in a bath of diluted cleaning liquid to hopefully get whatever old gunk was on it off and to loosen the dry plater-like material off of the bottom.

Once the red tissue paper was fairly dry, I began layering the white and red-lined paper on top, adding the rough patch, and then layering the white paper on top of everything.

The white and red-lined paper would be really veiny, demonstrating the more life-like human aspects as you got closer to the red part. I continued to layer the paper on, nothing too crazy.


I added the white layers and let them dry a bit before I would take the carpet patch, now dried, and glue it to the surface, using pins and clips to hold it in place as it adhered. In the meantime, I would start making my wire face out of 2mm thick black wire. This wire would be attached to the inside of the mask using my thick drawing paper and more glue to conform to its shape and then dry, keeping it in place. It was difficult making the wire face fit the face of the mask because the mask was in an awkward position due to the clips and other parts drying, so I went through several faces. Another problem I ran into was finding the exact amount of wire. This wasn’t too bad because I had acquired upwards of 50 feet of it so I just went through and made more and more abstractions of my face to use and then I’d just pick the one I liked the most. I didn’t feel this part was as important to have fit the exact shape I drew in my sketches purely because it’s an abstraction of my own face and as long as it “looks” like a face, it serves its purpose. Plus, they were fun to make!


Once the last of the layers were applied, I began attaching the wire face. As the paper holding it in place dried, I also started drilling a hole for one of my eyes. In my tests with the other paper mache masks and on account of the fact that I would be performing a little demonstration with my partner, I needed to see. The hole is small enough to fit just where my eye is but nobody can actually see through it! The mask was pretty much finalized at this point and it just needed to dry before I could put the strings on that would allow it to securely stick to my face.


With the strings attached to the sides, I tried it on for the first time. It fit my face very well, the wire face was secured as were the adhered patches of texture, and I could see right out of the hole. I was very happy with the results. I’ll talk a bit more about what I wasn’t happy with in the reflection but for the most part, I was very pleased!


Final Production


Portfolio Post

View the final project at Mask Up 

Deep Space: Process


Research

My research for the project revolved around different techniques to emphasize depth using different spacing methods and ways to begin practicing layering paper, just to have a better understanding of the craft.


3D PAPER ART

Reference Images

White 3d Paper Art City Skycrapers Abstract Paper Waves Layers Modern Buildings Stock Illustration - Download Image Now - iStock

paper craft and art of cigarette with cityscape concept.Abstract curve wave layer black background,architecture in new york usa. Creative design smoki Stock Vector Image & Art - Alamy


Exercises

Exercise 1 – Gestalt Exercise

This exercise started with a review of the gestalt principles such as closure and figure-ground. I used the negative space in my initials D and E and inserted visuals of things I enjoy! Here is what I created.

I ran with this for quite some time. Spider-Man was absolutely gonna stay. The character is very important to me and I had plenty of ideas for how he could fit into the negative space of the letter D. Moving forward, I started incorporating another very important thing: my family.

I used one of our only family pictures and created a very loose outline. These are what came out of this.


There were a lot of different ways to incorporate these two things together. The one right above this text however was my favorite and it did something the others didn’t. I felt the curve of the letter D was more present and thus allowed for the shape of the letter D to be more noticeable.

I rearranged and altered their proportion to create a visual hierarchy where I am in the front (cause I am the coolest) and everyone else is just hanging back a little. This freed up more room for spidey to breathe and allowed for the shape of the letter D to show a lot more while still allowing for these two visuals to stand out.


I carefully copied everything into illustrator and used that file to laser cut it. Here are the results!


Iterations

My initial concepts revolved around a city. None in particular, but a city nonetheless. I wanted to focus on the everyday people of the city and possibly make a statement about the working class. Since the pandemic, I’ve grown increasingly more frustrated with our current economic class structure and I felt like having the project revolve around America’s class structure using hierarchy and scale would be really interesting.

Other concepts revolved around nostalgia, insecurity, and mental illness. I felt a more personal connection to nostalgia and insecurity so I drew up some concepts for how it would be composed.

Nostalgia would capture an older version of me looking into the past and seeing younger versions further and further back. Deep space would be present in a sort of “time passing” kinda way, looking deep into time (at least that’s where my mind was at about it).

Insecurity started with organic forms closing in on the center where the main subject would be (probably a person or something representing an individual like a heart or a brain). I started with jagged and pointy daggers stabbing toward the center getting closer and closer and then that idea spun into hands. The hands were pointing, reaching, clawing, punching, etc. I continued exploring different forms and ways to represent it.

Frankly, I struggled with the concept part of this but I felt like capturing insecurity or nostalgia in composition was something I could do and had many different ideas of how to do it, so I leaned into it.


I also began exploring how I could frame everything. What the first layer would look like and what it would contain as well as how depth would be perceived and exaggerated. I started by drawing outlines of people and faces to try to see how the layering could look without any detail at all. I also tried creating spirals using displaced circular layers. One concept I had was to create a spiraling illusion inward. In hindsight, I wish I had explored this more and even experimented with creating a human face contour combined with an illusionary layering, I think that would’ve added a lot to the composition.


Also while continuing to formulate ideas, I practiced cutting some small cardstock layers to get an idea of what it would even look like to have paper layers stacked on top. I drew up a quick illustrator file and cut out these small squares. I used cardboard to space them out.

I attempted to make an accordion fold as well to be a spacer for them, but the paper would still be floppy the more real estate I was using up on my cardstock so I opted for cardboard cause it’s cheap and easy to cut.

My method for approaching the final revolved around me using my notes and practice drawings to assemble what I thought would work for the composition layer by layer and then revisiting anything if need be. I started putting together the first couple of layers and practiced cutting them as well. As I continued to assemble the layers, my biggest focus was ensuring that no foreground elements overlapped with the background in a way that took away from their forms OR was big enough to take away from the subject.


Another thing I was thinking about was value. How does the value shift affect the legibility of the shapes in front of them like the hands and faces? I’d continue to make changes to that. With the main subject and hand, I started looking back at my drawings and started playing with the idea of someone being trapped in the center or someone being puppet mastered. This stemmed from how insecurity makes us feel trapped or like we’re not in control of our emotions.


Drawing all of the layers out in Procreate, I could start to get an idea of what everything would look like.


The background felt a little empty so I started thinking of things that could go back there to make it a little more interesting. One thing I thought of was an eye that could be looking at the subject being puppeteered, so I started doodling stuff.


From here, I just moved everything into illustrator and carefully traced everything onto different layers. I took the files to the Cricut and cut everything out. I started cutting out the cardboard based entirely on how well it held the paper up. I Inserted little chunks to ensure everything was firm around the corners and in parts where it was sagging a little and then I just glued everything onto the paper and let each layer dry while I worked on the others.

I found myself exploring more with insecurity and enjoying the results so I moved forward with exploring that.


Concept Statement

For vastly different reasons, everyone can experience feelings of nostalgia or insecurity. Insecurity can control us, cut deep and feel ceaseless. These feelings are natural, but they can last ages. Inspired by my friends and family growing up, I wish to capture these aspects of insecurity that I feel we all have understood and experienced growing up. Visualizing insecurity is a very personal feat, but I hope that it can allow the viewer to relate and perhaps understand their own ideas of this feeling which is ultimately my goal; to evoke a sense of relatability. Scale and proportion play an immense role in the composition to create forms that feel like they’re encroaching on the subject which is centered in a one-point perspective with the vanishing point just behind the main subject. The proportion of some hands and faces to others creates an image that moves inward. The hands decrease in size as it gets deeper. Depth is emphasized through this use of scale and proportion. Contrast is also crucial to these many forms as they will need to be easily seen. By alternating the layers with contrasting values, all of the shapes will be readily visible. These hands are depicted in various poses either pointing or seemingly grasping at the subject which is symbolic of how one can perceive the people around them as if they’re being attacked or judged. These hands are also sprouting from the edges of freely formed and organic shapes. This is because emotion is natural and isn’t felt within reason and calculated logic.


Production


The only complication I ran into was accidentally gluing the wrong layer in the wrong part of the composition so I went through and cut the glue off with my Exacto-knife. It didn’t leave any marks and I was able to do it correctly the next time!

Just as an added bonus, I also extracted the values from my composition and transitioned them into a monochromatic red pallet. These are the colors and their respective values.


Final Production


Portfolio Post

View the final project at Deep Space

Sketchbook: Process


Research

In the initial process of determining what I wanted to do with my sketchbook, I gravitated towards the basic tutorials of binding a book and creating a cover for one just to start somewhere. Most of the things I did, I did via testing and not so much looking at internet-accessible resources. As we’ll see later down the road, this becomes an issue. I should have done more research. I’ll elaborate on that later!


How to Design a Book Cover

Rounded or Sharp-Corner Buttons?

10 Bookbinding Methods You Need To Know


Exercises

Exercise 1 – Tiny Sketchbook

At the very beginning of the project, I created a small sketchbook. Actually, multiple sketchbooks!


Making these little books helped emphasize the usability of something like a sketchbook. The pages on the little books were really annoying to use as they would flap open and opening it like a normal book would open just simply didn’t work, making it a pain to use.

Exercise 2 – Mind Mapping

After this, I did a little mind-mapping exercise with my table group to understand the process of mind-mapping.


Iterations

This part of the project started with me taking my design problems regarding sketchbooks and trying to solve them. Most of the issues I had were with the reusability, versatility, and size. Taking these issues, I started examining how to make a book reusable and long-lasting. I started taking some notes on some broader things I wanted my book to do such as: being comfortable to use, lying flat on surfaces, versatile and lightweight, and reusable. These are some notes I made to record my thoughts.


In this bottom page, I mentioned a two-tone design. This comes up later.


Looking back at the tiny notebooks, there’s a small one with a black cover on it. That’s a notebook I made to experiment with ring binding! My idea was to use rings as binding because I’d be able to easily pop them open and add paper without having to unbind a spiral or bend a metal clip or, even worse, have no choice at all because it’s bound in leather string.

My next move was to start thinking of designs for my book such as the size, shape, and binding specifics.

I started thinking about size first and foremost. I measured with a ruler a general shape of a 5×7 book, realizing that it would be a little smaller than I was looking for. I then moved onto 6×9 and cut out a piece of paper roughly the size and I liked the size of it. It felt big enough to feel comfortable using and small enough to make a lightweight book. From there, I started looking into the shape of my sketchbook.


I didn’t like the idea of a straight-edged rectangular book. I’ve seen too many, and frankly, the sharp edges aren’t appealing to me. I much prefer subtle curves and more organic features especially since the materials I was considering were wood and chipboard. The curves would make it nicer to hold and more appealing and unique.

Taking inspiration from phone cases, I wanted my book to be able to look differently and function in different ways as a part of its design. I also was heavily inspired by an old Google project called “Ara” which was a modular phone design that would’ve allowed for phones to have entirely swappable components and also look amazing!

Google to start shipping modular smartphone Project Ara

Google Project Ara modular smartphone: Everything you need to k

These are all the Pixel 4a cases you can buy from Google right now

From this, I wanted my sketchbook’s covers to be easily swappable to fit any use case I could think of. I play a lot of DND so a book cover that holds my dice and allows for quick access to an erasable surface would be a great addition or something like a cover wrapped in leather that acts as a standard and simple book cover could easily be applied just by pulling one cover off and snapping on the other. At this moment, I had a pretty solid idea of the direction I was heading with my sketchbook.


The production phase started with solidifying the materials and how I would assemble all of the parts. I planned to utilize magnets for the cover. Magnets would allow me to quickly remove and apply a different cover with ease. As for the paper, I would include just basic blank paper from an old sketchbook unused and then some college rule lined paper for writing. Any other drawing paper (isometric, grid, cardstock) could easily be added in the future so I wasn’t too concerned with that. Next after solidifying the assembly process, I began working on my illustrator vector files. I wanted my sketchbook to have curved edges but with varying degrees. A perfectly symmetrical curved book didn’t feel too special. I knew the book would be 6×9 inches, but as for the shape of that book, I had no clue. Taking a rounded rectangle and then experimenting with the way the cover’s edges would flow with the base of the book, I started coming closer to a final design for all of it.

Rounded or Sharp-Corner Buttons?. The Bouba/Kiki Effect & character… | by Taime Koe | UX Planet

This is a helpful little graphic I found on the website UX Planet. I knew I wanted curved edges for the reason of a more easygoing appearance. The rigidness of straight edges wasn’t appealing. My solution was to create an asymmetrical base cover that the attachable cover would compliment. Here’s what it would look like.


This was my way of implementing a two-tone design. The wood is fairly neutral and can work with a variety of different covers. Assembling the files was pretty simple, I just created a front, back, and cover cutout. Combining shapes, I would create curved shapes and combine them with a normal rectangle of the correct size to create the unique shape of the attachable cover.


I measured out the holes and where the magnets should go. All I needed to do was have it cut and glued together. Nothing bad could possibly happen!


Production

I made a very crucial mistake: I underestimated the amount of testing I truly needed to do. With laser access getting cut off at certain points and it not being available outside of class (most of the time), I figured things would be simple and that I would just coast through this. The magnet arrangement was too powerful and the cover was difficult to remove, the materials I chose were actually dangerous to cut so at the last moment I had to switch to recycled wood from the Innovation Studio. This wood added thickness and weight to the book and was frankly hard to work with thus making the assembly process very difficult. My original binding method wasn’t suitable for the book in its current state so I had to frantically choose a new method that added gaps between the front and back covers.


The book was also super difficult to open which only further solidified my mistakes. The project was almost due and my book was in a horrible state and I felt incredibly hopeless that I could achieve my goals with it.


A moment of quick realization occurred when the magnets actually began tearing off the wood as they were too strong for the book and the glue I had used was insufficient in securing them. My book was breaking, weighed 99 lbs, and could protect me from any number of projectiles and it’s because I underestimated the importance of examination and testing. I thought I had the answers, but they fled the moment the walls started buckling.


I took a moment after this and really assessed what needed to be done. My first decision was to rearrange and decrease the magnets from 4 to 2. Two magnets would be placed on the top and bottom as the cover is more likely to bend vertically (bowing from top to bottom) than from side to side.

I revamped my entire approach and decided on new and safe materials that could easily be cut and were solid enough to give me my desired sketchbook. A wooden front and back would be engraved deeply to allow the magnets to sit flush against its surface and would be more durable. I chose basswood for its lightweight properties and thickness. For the covers, I chose chipboard for its sturdiness and lightweight properties. The image below would become my new working vector file.


The adhesive would be epoxy instead of gorilla glue because epoxy could easily encase the magnet and adhere itself to the sides of the wood and not the etched-into part of the wood which is what ripped off the previous iteration. I etched two 1.16 diameter holes for the magnet and added a design for the back and front. I made the epoxy and applied it inside the magnet slots and it adhered within 20 minutes. After that, I simply applied adhesive to the surface of the magnets and put them on the attachable cover.


Here are some images comparing the new final product and the older product. As you can see, my redesign completely addressed all major issues I found with my previous design and it’s a book I look forward to using and making more covers for!


Final Production


Portfolio Post

View the final project at Sketchbook 

MashUp: Process


Research

When I was looking into the word “Strecessary”, I did a little digging into how I could make the word itself induce stress. I ended up finding a research paper about color and how reds and yellows increase stress where green hues can decrease.

Minnesota State University Study

The font I used was from a google image which I traced back to a website called Handmadefont.com


Exercises

Exercise 1 – Orthographic

The project began with some hand-drawn practice, to understand what isometric is and how that’ll apply to our projects. Then we started picking a font and trying to create it in isometric with illustrator. It was pretty annoying, but I managed to understand how I would possibly be doing stuff in Illustrator.


Iterations

I used an online generator and just kinda started spitting words out onto the google sheets. One word I hadn’t used the generator for which was “Strecessary”.


From there, I just compiled 3 of my favorite words onto a drawing board and started exploring ways to organize them in isometric as well as illustrate them.


As a part of an exercise, I picked one word and just ran with it to see what stuff I could do with it in isometric. I picked “Youthenuous”, a word I made about the fragility of youth.


I’m gonna keep things pretty concise from here, however. So here are some other iterations I did around the word Strecessary, which is the word I chose to follow through with. This word was incredibly difficult to come up with ideas for as it wasn’t entirely something I could just draw out, you know? Stress can be illustrated in many ways most of which are abstract but the word NECESSARY just isn’t something I could think of ideas for without them being super lazy like a bunch of drawings of lungs or food. Technically, those are necessary right! Super lazy.


From that research paper I mentioned, I started applying red and yellow as well as crazy patterns to see the effect on the word. I wasn’t a fan of it so I went back to my list of ways I could illustrate stress and necessary. Around the end of class, I started exploring the idea of using narrative to illustrate my word.

After a discussion with my instructor, Zach, I began exploring what would end up leading me to finalizing my project. So let’s go look at that.


Production

I had a bit of an “a-ha” moment after the discussion with my instructor. My idea was to create a narrative centered around a time where I personally experienced what I would define as “strecessary”. That time would be the 2D to 3D Translation Project. How I’d do that would involve me taking my word and creating a sort of “origami” typography to reflect the physical qualities of the project, putting it into isometric, and including some spare folding parts and maybe some craft details like smeared glue or something. I was hopeful and really felt like I was onto something so I kept digging. Here’s what I started out with.

Still using red and yellow for the sort of stress inducing affect. It doesn’t do anything to be honest, but I liked the contrast between the two.


I started thinking about how much I didn’t like how empty everything was and I didn’t feel my intention was being communicated enough. I started experimenting with a free use program called “Isometric Interiors” which I found to help me visualize a literal scene in which I am having a bad time with the 2D and 3D project.

My final idea is to have the text placed above the scene and to depict myself in distress to tell a story visualizing the definition of  “strecessary.


I started in Illustrator, working over the templates I made in the free program.


Here is what the scene looked like when I was finished.


Pretty good! Here’s the thing… it was a complete waste of time. I needed to export these into another program but for some reason, they were incredibly blurry no matter what I did and it was very noticeable. Frantically, I started tracing ProCreate by hand.

Firstly I matched the floor to create an isometric grid that I could follow.


I traced over the variants of myself, coloring everything (mostly) in blue hues to exhibit the horrible suffering I endured emotionally when doing this project. To speed this up, I basically drew everything in the scene, applied some blue hue that I felt contrasted and didn’t blend too harshly into its surroundings, shaded a little with a noise brush to imply lighting, and then duplicated the clocks to surround the scene.


When it came to my variants, I clothed them differently based on what I normally wear to imply the passing of time and create a relation to the clocks. The passing of time was one of the biggest stressors with the project and how small mistakes could take hours to fix or to make up for. I also explored where the definition could fit and how that would affect the composition.


I went through and added shading to smaller bits, separating the color’s layers and altering them accordingly. Then I added some smaller details like the scattered paper and crumpled one as well to illustrate the process of the project being both frustrating and involving a lot of paper.


I started working on the typography and experimented with it being extruded which subtly alluded to the 3D aspects of the fundamentals project. I didn’t like the look of it so I went with making it 2D with spare flaps and bits that created a 3D look to it.


I used a color palette that was cooler and calm, fitting with the cool hues of the scene I illustrated. I shaded and added texture to the text.


Final Production


Portfolio Post

View the final project at MashUp

Patterning and Abstractions: Process


Research

I wanted to learn more about what a Mandala was so I simply did some searching. I found a website that gave me a lot of valuable information about them as well as some good reference images.


Exploring the Mandala | Asia Society


This is a mandala I used as a reference when building my first “illustrator only” iteration.

It’s very complex and lead me to believe mine needed to be


Exercises

Exercise 1 – Abstraction patterns

At the very beginning of this project, we began making abstractions of 10 different organic things and 10 different man-made things.

From there, I moved into Exercise 1 where I used my abstractions in a 3×3 space to create a flat pattern across the composition. What I created at first was not good. I was rushing, not entirely understanding what was expected so I waited until class and then worked on more after class was over.

The first one. Yikes.


The ones below came after I showed mine to the class. Understanding the exercise really helped moving forward, not sure why I couldn’t wrap my head around it at first.


Iterations 

After exercise 1, I moved to creating my own mandala templates and using others I found on google to experiment with. I mostly spent my time learning illustrator’s radial tool and seeing how organizing the patterns in radial would change the composition. Here are some radial patterns I did in the very beginning. In some of my beginning iterations, I leaned more towards movement and rhythm, purposefully making my iterations have more spiral movement around the focal point.


At this point, I was starting to create my own templates and iterate with some other ones. Using procreate, I could actually quickly sketch entire Mandalas using their radial symmetry guides which helped me ideate some patterns and ways to utilize the abstractions in a unique way. Here are some of those templates alongside the Mandalas I created with them.


These two templates were my exploration into scale and proportion, but the very bottom one gave me a lot of trouble and I didn’t know what to do with it. The one directly below this is actually what I end up moving forward with for a time so let’s look at those.


At this stage, I was moving toward finalizing my patterns. Given that my example was an entirely complicated thing, I started combining radial patterns in a template I made in illustrator. Starting with that one template…


I made some changes to it and decided scale wasn’t what I wanted to do. I really wanted symmetry and proportion and I liked my designs previously where proportion was present but not active as the primary principle so I started moving towards iterating with that.


It began to get complicated very quickly.


I began using radial to create patterns surrounding the focal point. I mixed and matched different radial patterns, but most of them used linework rather than form which led to some issues down the road. I was beginning to rethink my Mandala at this point.


The above image is what my Mandala turned into, kind of experimenting with scale and proportion in regard to the multiple smaller focal points placed across from each other. Another detail is the divide between the top left and bottom right and the top right and bottom left. They feature different patterns that separate them while mirroring the segments across the focal point. I thought this created a weirdly unbalanced but symmetrical look that I really enjoyed. However, this was very complicated and very packed with patterns. So I began rethinking how I approached creating the Mandala.


Production

The End – Final Mandala

What I ended up doing was creating the pattern in one segment, compiling abstractions in a way, and then putting it into radial rather than creating radials and combining them into a Mandala. Here’s what I started working on.


I thought this process of combining patterns and then going into radial allowed me to iterate more, to the extent that I blasted through maybe 9 different looking Mandalas, all of which I did not screenshot because it happened in a span of 8 seconds. Because of my experiences with the other principles, I also rethought what principle I wanted to use. Looking at my previous designs (the hand-drawn ones) I liked the ones that were more static and harmonious than the ones with radial movement so I focused mainly on trying to capture that but more solidified. I kept running with this process and began creating what would end up turning into a finalized Mandala.


This abstraction is from the “portal” of a cathedral. I really enjoyed the shape and how value could be applied to change its look so I cleaned up the abstraction a lot and made it smoother and more complete. From there I just created more patterns using it.

I noticed a lot of the values were really dark and wouldn’t help in putting color through so I changed them and overall lightened up everything.


Putting all of this into radial resulted in what would basically be the finalized version.


I made some smaller changes like reversing the window abstraction behind the three pillars to go from dark in the center and lighter on the outside which contrasted with the pillars a lot nicer than I expected.


Finding the colors was a fairly easy process. I went onto Adobe Color and messed around with the little dial, saving color palettes I enjoyed and thought would apply to the Mandala in a meaningful way.


From there, I took three of these and moved them to illustrator where I would create three different 6×6 graphs showing the colors with varying brightness and saturation (HSB).


My main goal with adding color was to ensure that each part of the Mandala didn’t blend into each other and that each part was recognizable. After some feedback in class, someone suggested I play with backgrounds which is something I had actually experimented with prior.


Final Production


Portfolio Post

View the final project at Patterning and Abstractions

Space and Time Walk: Process


Research

I had to do a little research for this one regarding what makes up a map (compass, legend/key, title) as well as what visual style I wanted it to be in. This was pretty easy to find and I’ll link the website I glanced at to give me a good idea of what kinds of things I would include on it for utility. After getting the more pragmatic stuff, I also took some pictures of the trail to get a good idea of the space I’ll be taking people through.

I also took some pictures of my path and utilized both Apple and Google Maps to help me visualize my path in the context of an actual map.


5 Elements of any Map –  Mometrix

“Lord of the Rings – Middle Earth Map”


Before the project really kicked into gear there was some smaller stuff I worked on. An example of this is a brochure I made for my destination, just to get an idea of how to “sell” a spot to somebody and make them want to experience it.


Exercises

Exercise 1 – Slow looking

I started this entire project with a little dive into the concept of “Slow Looking“. To practice, a group of other students and I moved around the basement (dungeon) of Hayes Hall. We wrote down what we observed and discussed what kind of, for lack of a better word, vibe we got from the area.


After I got a good idea of what slow looking was, I started getting more into actually mapping our paths and choosing a destination. This took the form of me riding around my skateboard up and down campus surrounding The Oval. Just to remember where I visited, I snapped some pictures (those are in the research section) to compare later and decide what my path should look like. Using these various images of the areas I wanted to highlight the most, I drew out my pathway and made some notes about the various pathways.


The drawing below was also a little exercise I did, playing around with information that could help the readers find the locations using symbols or contours of landmarks.


Now, we get to the real part of the exercise where I give written instructions on how to get to the destinations from Hayes Hall. One version is very strict and informative and the other use fancier words and more of a story to lay out the land. I think with this exercise, I definitely could’ve added more in expressing the feelings of the trip, something it doesn’t entirely lack but could definitely use more of.

Exercise 2 – Photos

With this exercise, I simply went around campus and took pictures with intent and composed them using various compositional methods which I will detail for each picture.


The repetition of the arches was really interesting to me so I took a close up to


This was taken from a worms-eye view to create the relationship between the paths we walk across and our busy lives.


This was taken really low down to emphasize the great height of the tower


There are a lot of really large structures in the view from the Oval and I wanted to show a relationship between the students and the buildings they inhabit.


This was an interesting spot for me because of how the foliage frames the archway which frames the door to enter. A frame within a frame!


Iterations

I have the destination and I have the pathway and I really want this map to be a fantasy map. The next step was to start prototyping some visuals and experimenting with how the information should be displayed for the reader. I quickly drew out some possible “setups” for the more practical stuff like the compass, legend/key, title, and reserved space for the actual path illustration.


I didn’t have much of an idea as to how big my map was even gonna be so it was a little hard to solidify how much space I would actually need. This was my next step. I got on my iPad and started mapping out my path in different styles just to see how much space it takes up in an area.


I used a random picture of an old map canvas just to get a better idea of what my map could possibly look like if I were to “age” the paper to really give it an old and fantasy feeling in the hands of the reader. Also, given the option of using color, I leaned into using a maroon red color if not just black.

Something I also did was create a collage of the pathway using different cutouts and clips from magazines to mark the trail and its destinations. If you can’t tell, my biggest problem was finding out what information outside of the pathway I should include. I wanted the map to be functional as a map and show an accurate and true-to-life depiction of campus but the surrounding and non-essential stuff was really annoying me (hence why half this map is blank).


I continued working toward what the map should look like. I played with two map styles: one that’s flatter in shape and from an aerial view, and one that was at an angle and would allow me to convey depth with perspective. This first one is the more flat map and the ones below are two 3D maps. Messing around with these two styles I realized that most of my stuff is in the left-most area of the North Oval (if you’re facing south) and most of the stuff I needed to communicate the path didn’t depend on anything more than a couple of buildings. This led me to add more nature and really lean into more detail in the area that’s most important to communicating my path.


So, you’ve probably noticed something already with the 2D map. The VOID in these illustrations is essentially my solution to not really needing to represent anything in the areas without much importance. The map above, without the VOID, could have plenty of detail but it won’t aid the reader and would be entirely for looks. This would take a lot more time for something that wouldn’t really do much for anyone so I literally just created a massive empty space and used line weight and some implied shading to create depth. The goal was to make it look like a completely empty area where the ground had seemingly just disappeared and what lies in place is unknown.

A lot of fantasy maps have empty space whether it be oceans or land coated in trees. However, those maps very rarely show any more detail such as buildings and entire landscapes that are pathed, so I leaned into that on a smaller scale.

There’s a lot of empty space in this map which is something I didn’t want especially because of how small scale my map is compared to this one of Middle Earth.


Production

I started leaning into 2D with certain 3D elements. This is demonstrated in some buildings being 3D to show their importance of them (such as Hayes being the start and Orton being a destination) whereas things like trees and other surrounding buildings are still good landmarks but don’t need more detail than some texture, implied shading, and the shape of the thing. My next step was to experiment with the paper where I would draw everything. Since it’s a fantasy map, I want it to have an old and ancient feeling.

I started with my drawing paper (not bristol) and separated some paper I would use to write my instructions onto and draw my map. Using three black tea bags, I boiled a huge pot of tea and cleaned and plugged my sink to allow my paper to soak in it. I also threw in some coffee just to darken it even more.


After about 23 minutes of soaking in the bath, I pulled them out and hung them with some magnetic clips. While this dried, I finished my digital illustration of the map.


I erased the VOID and of course, wanted to make it look like more than just a black blob on my map. I chose to follow the same steps I did for the VOID with my map iteration that was at an angled view and used it for my 2D map.

Starting with an outline, I gave it a jagged and sometimes smooth shape and included some layers to further illustrate the depth getting lower into it. I added lines and various other small marks to create a texture that was simple and implied a rougher surface. I drew some icons in the Legend to give myself an idea of what kinds of things it should show. As for the texture of the trees, I experimented with

I worked on some ideas for what the texture of the trees could be as it hasn’t been finalized yet at this point.


I tested this more on paper than digital cause I was gonna be drawing this so that’s why it’s not on the digital screenshot above. The next step was to print the digital and start tracing it onto my “aged” paper. I contacted FedEx Office Print & Ship Center. Once I retrieved my digital print, I set up my light board.

My light board setup consisted of an old monitor, a Chromecast, and my coffee table and couch. Laying the TV across my coffee table and couch. From there, I started tracing onto my “aged” paper.


Simply tracing over the outlines, I formed all of the smaller paths first as well as buildings and trees. My biggest concern was the black letter font that I chose for the title. It was the right size and I loved the “old newspaper” look that it had which I also felt worked really well with the fantasy theme.


The only thing I needed to do after the title was to draw out the legend and finish drawing the VOID and a simplified compass (although I don’t think it’ll add much to the navigation factor, it’s not bad to have).


Final Production

Scan of Analog illustration


Portfolio Post

View the final project at Space and Time Walk

2D to 3D Translation: Process


Research

Orthographic practice video

Introduction to Orthographic Projection


Exercises

Exercise 1a – Cube

This exercise was just to practice different methods I’d be using to form a 3D shape with easily foldable parts. Utilizing the “scoring” technique to fold inward various sides of the cube, I created a semi-perfect cube out of Bristol paper. There were some rough spots, but all in all the surfaces were clean and it fit together enough to hold my iPad and then some.


Exercise 2 – Ideating

I began exploring illustrating shapes using an isometric template. Starting with my cube, I simply illustrated the plan view with a front side, top and side. After that, we were given a somewhat more complex shape to craft and then document. It was more identifiable to me as an “F” so I’m gonna refer to it as the “F”. This was a pretty annoying shape to create mostly because, at this point, the only shape I’d created thus far was a cube! This was good practice for precision and getting the idea of how to fold the different sides together with an emphasis on which side to fold first (this is exactly what I did not do very well on. Whoops.)


Digital – Cube Orthographic


Digital – The Big “F” Orthographic


The Big “F”


Iterations

I needed to find a shape to run with for the remainder of this project. I figured I could use some shapes from a past project, such as Shape Grammar, but the L shape seemed pretty basic and I wanted to do something a little more interesting. I went back to the iterations I made from that project and stumbled into a shape I never used in the final composition but served as the geometric option for the Shape Grammar project. From there, I began my first of many ideation sessions.

Digital – My Shape

With the shape picked out, I went straight into ProCreate and sketched out an orthographic view with a plane view to determine how it should all look like a completed 3D shape. Looking at how I created the cube, I began some early sketches of a template I would cut out and fold together to create my shape. It looked like it would all work out just fine!


Nothing worked out fine.


This shape was proving to be very annoying, but I used this scrappy version of the shape in my iteration processes because it was pretty much what I was going for minus a couple of details. After getting a shape down, I started to modify it and think of ways to maintain its shape from a front view, but alter it behind the scene.

I didn’t want to rebuild this thing again so instead, I built little bits that I could sort of Lego-style stick on to the shape in different spots. Sort of mixing the arrangement I came up with a couple of different ideas.


This continued for a while as I thought about what to do for the final modification and what it would mean for the rest of the project. I went home and continued making stuff and finally came up with this.


It’s not perfect, but I really liked the look of the intersecting shapes and how they all fit together. So, I started working on templates for actually making it in one piece. I created a lot of different templates because this shape was a very unique one. It has a lot of weird measurements that vary between simply being a half-inch to 2 inches but made of differently placed 1/2 inches (you get the idea).


This was the first template, and in making it I realized that forming this shape would be a lot harder than I thought because of the little half-inch bits in the dead center and the fact that two triangles need a ton of space to be put together. So then I thought of another way I could approach this.


The only issue I had with this one was that the bottom triangle would be really annoying if I were to have it fold upward as it would’ve. I went along and cut out the shape from this template and of course, it didn’t work out, but then I realized something. I cut my shape up into two parts and arranged the one triangle and its connected body above the other triangle so that it folds downward, swinging into place. This is the contour of it.


I started spiraling and making more changes like adding a second 5-inch vertical stack to serve as the left side piece and thinking of how everything was still going to fold. After extensively rebuilding and marking up the template from above, I found the best possible way to do it.


Using my previous (and bad) template, I make significant changes to it and really polished it. I had finally created the template for my shape and was ready to move on to the next step where I choose 1 option of 4 for making further modifications to my shape.

Of the four options, I chose the one that utilized perspective and illusion of depth and space to create illusions on the planar surface of my shape. There was a lot I could do with this so I ran with a couple of ideas. The first was making a bunch of random tunnels going through my shape.


In hindsight, I wish I did something with this in the final product cause I felt that afterward, it could’ve used more of this. I really enjoyed this outcome, but wanted to keep experimenting. I went online and just started scrolling through pages and pages of different illusions but none were feasible. I started thinking about cubes, however, and how I could utilize them to show the depth that wasn’t really there.


I really liked this idea (minus the ladder, that was just for fun) so I used this in the final product plus some other minor things that played with perspective. I was ready to begin making everything.


Production

It was not easy. I began making my basic shape using the template and measuring out a whole grid of 1-inch squares. After that, I used a triangle to help me dark the outline of the template, using quick little dash lines to represent the dotted “score” lines.


The biggest annoyance with this shape was mostly the triangles. I did find an easy way to draw those, however. Using my big triangle, I was able to slide it around and find a good spot where the triangle could be, and then after measuring it, if it measured correctly, I would use it to outline.


Using a metal ruler, I cut out the shape. Easy peasy, give or take a couple of knicks and rough spots.


I’ll spare you the extra pictures. I did this entire process twice for the two shapes. Folding everything together was a little frustrating because of the center area’s 1/2 inch sections. If something wasn’t exactly precise, it would throw the whole thing off. For the second shape with the illusions drawn on, I needed to draw them before actually assembling them. I flattened out the triangle where the drawings would mostly reside and began mapping it out.


Using 1/2 margins, I created a little grid where I’d draw the squares and put them into perspective using parallel lines and value in shading.


This part was fairly easy, however, the linework could’ve been a tad better. Nonetheless, I like how it turned out. I felt that it was still pretty empty, so I used a one-point perspective to create a little floating cube field. Similarly, I darkened the background and boldened the lines. After this, I folded everything together.


Final Production


Portfolio Post

View the final project at 2D to 3D Translation