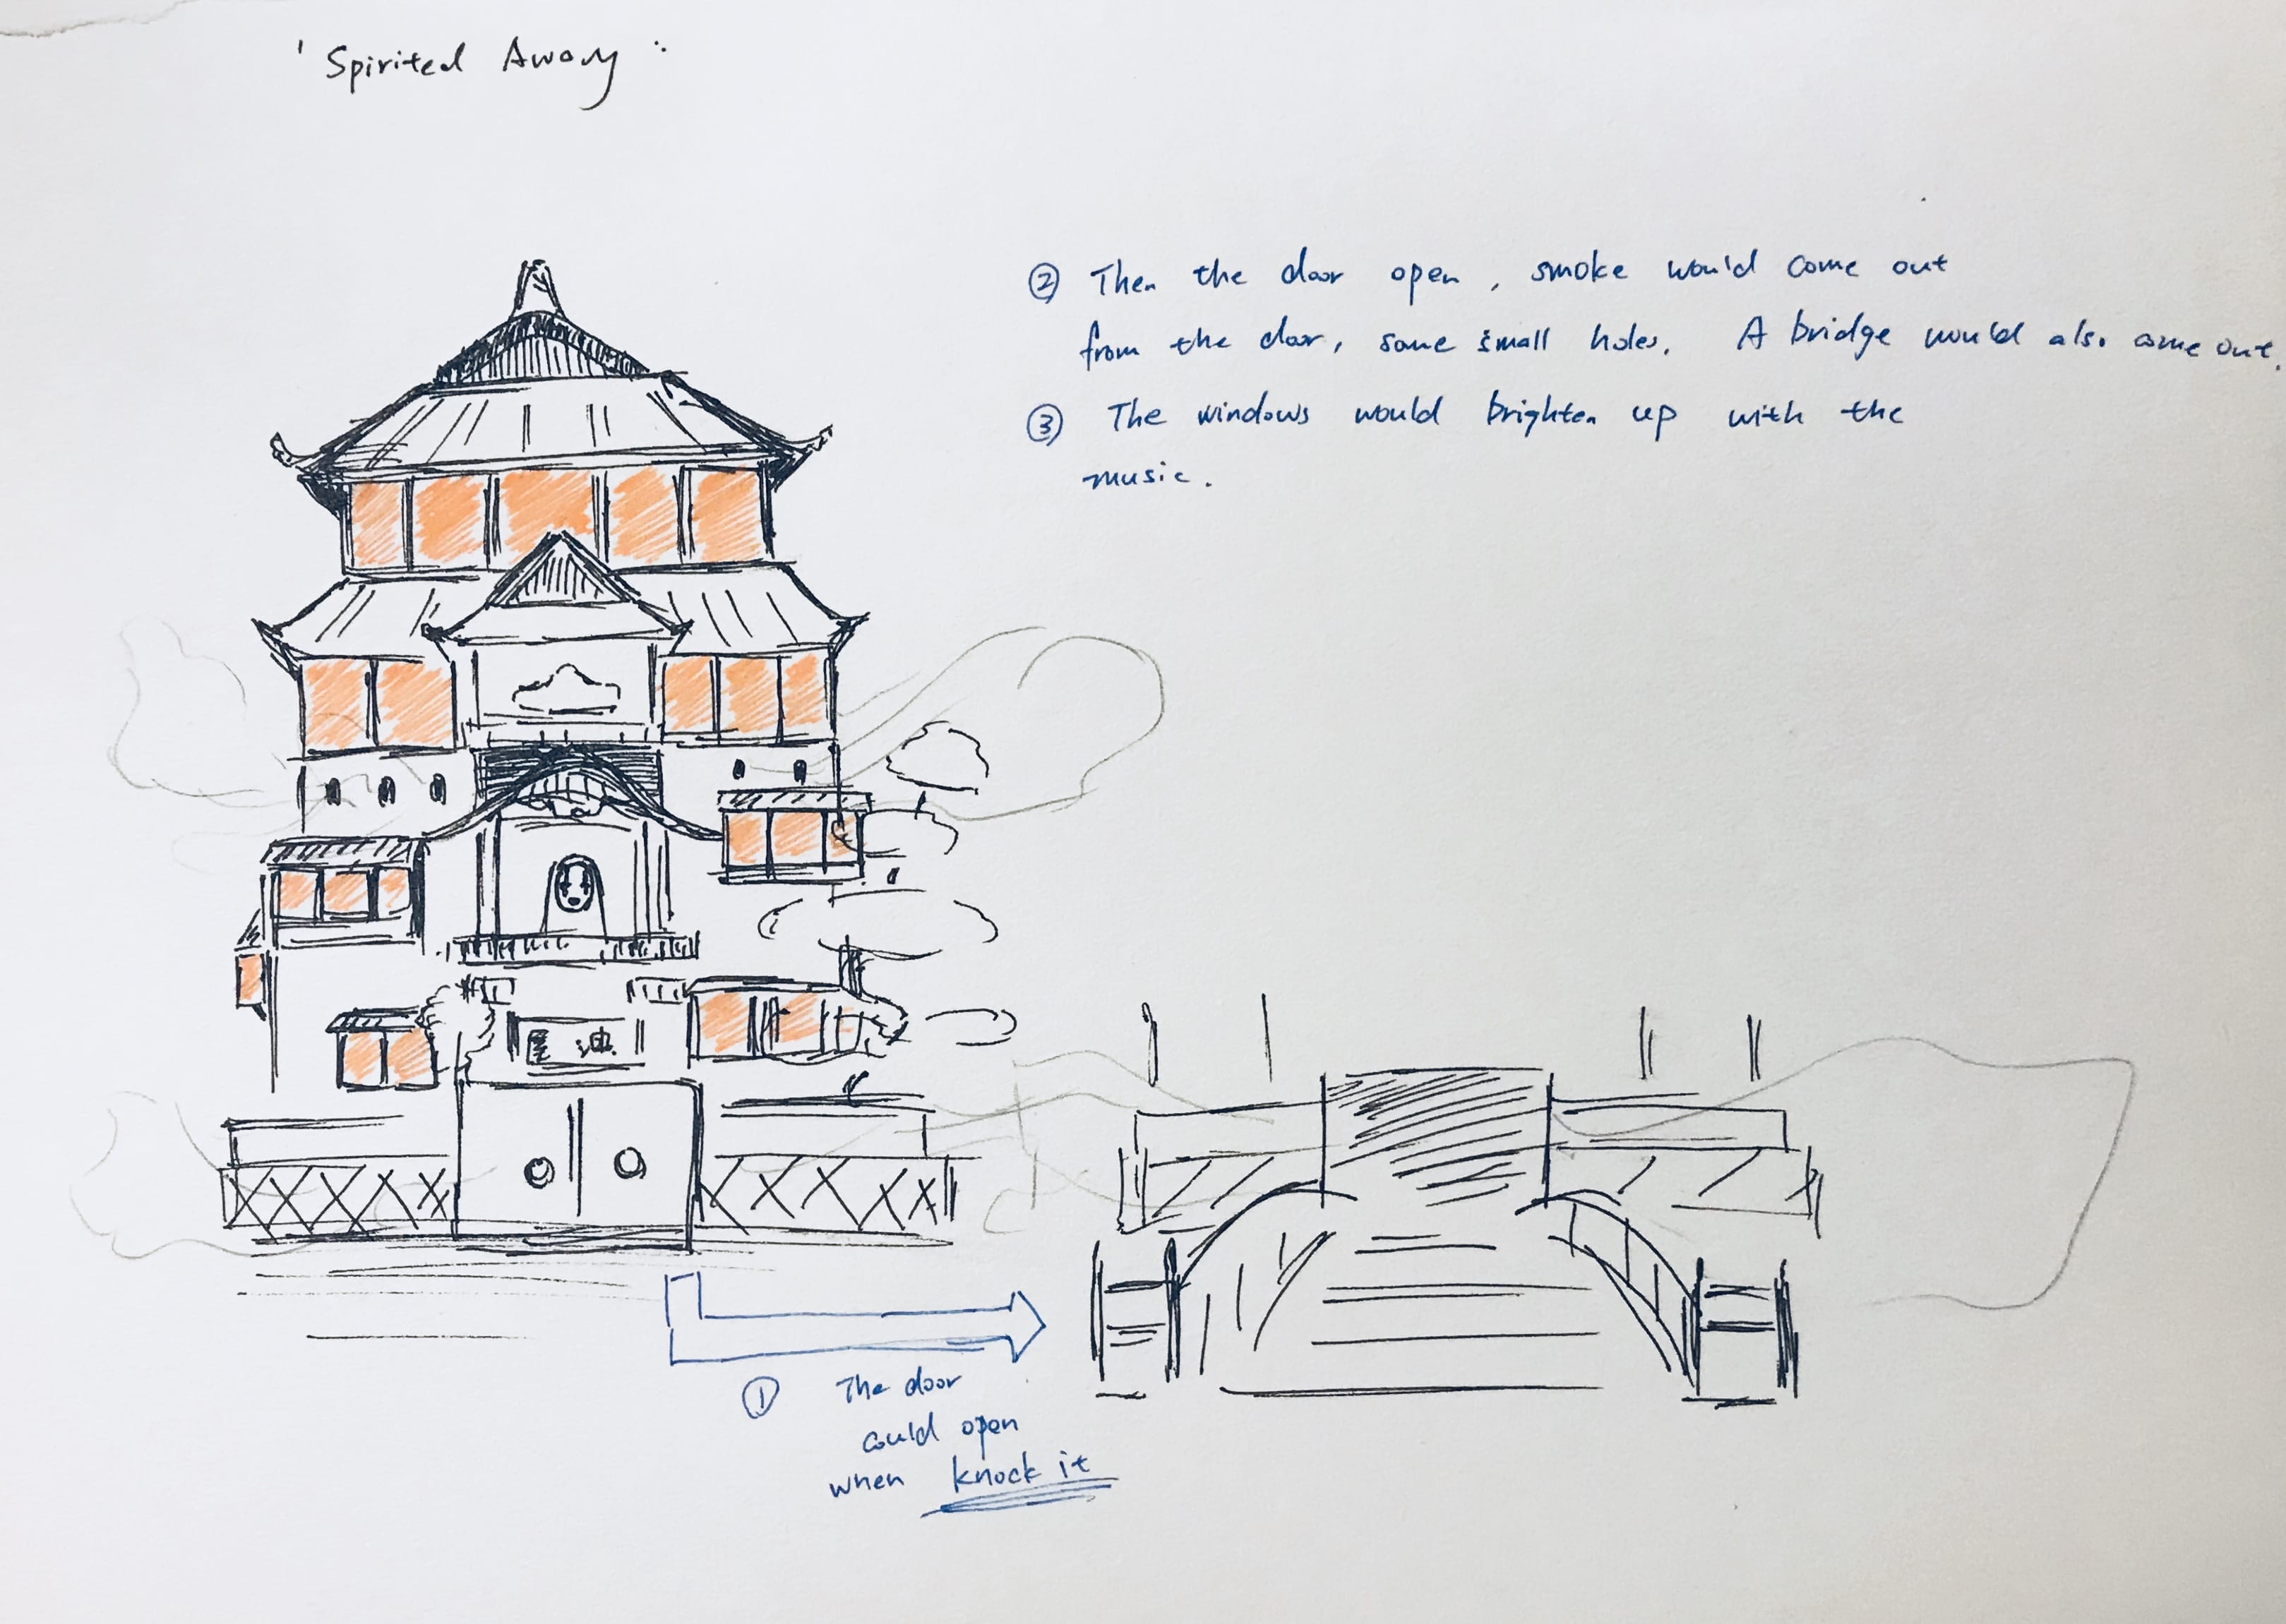
This is inspired by the animation movie “Spirited Away”. The house is the bathhouse, the main scene in the animation.

For this device, when you knock on the door, a bridge would come out, then smoke would also come out. (I could use dry ice to make this). Then, all the window would brighten up. If you speak to the device, the window would light up by following your voice. (I can use Arduino and microphone for this. Guide: https://www.instructables.com/id/How-to-Make-LEDs-Flash-to-Music-with-an-Arduino/)
Goal: I want people to talk their annoyance to the “Spirited Away”. In Japanese legend, “Spirited Away” means to be hidden by the god and go to another world. When people have things to worried, they always want to escape from the reality and go to another world. I want them to talk to the “Spirited Away” and leave their annoyance with this device. Additionally, in the legend, people who come back from “Spirited Away” always forget about all the things in that world. I also want to mean that people could forget all these annoyance.
Processing:
Sound Sensor Code:
int soundSensor = 2;
int LED1 = 3;
int LED2 = 4;
int LED3 = 5;
int LED4 = 6;
int LED5 = 7;
int LED6 = 8;
int LED7 = 9;
int LED8 = 10;
int LED9 = 11;
int LED10 = 12;
void setup()
{
pinMode (soundSensor, INPUT);
pinMode (LED1, OUTPUT);
pinMode (LED2, OUTPUT);
pinMode (LED3, OUTPUT);
pinMode (LED4, OUTPUT);
pinMode (LED5, OUTPUT);
pinMode (LED6, OUTPUT);
pinMode (LED7, OUTPUT);
pinMode (LED8, OUTPUT);
pinMode (LED9, OUTPUT);
pinMode (LED10, OUTPUT);
}
void loop()
{
int statusSensor = digitalRead (soundSensor);
if (statusSensor == 1)
{
digitalWrite(LED1, HIGH);
digitalWrite(LED2, HIGH);
digitalWrite(LED3, HIGH);
digitalWrite(LED4, HIGH);
digitalWrite(LED5, HIGH);
digitalWrite(LED6, HIGH);
digitalWrite(LED7, HIGH);
digitalWrite(LED8, HIGH);
digitalWrite(LED9, HIGH);
digitalWrite(LED10, HIGH);
}
else
{
digitalWrite(LED1, LOW);
digitalWrite(LED2, LOW);
digitalWrite(LED3, LOW);
digitalWrite(LED4, LOW);
digitalWrite(LED5, LOW);
digitalWrite(LED6, LOW);
digitalWrite(LED7, LOW);
digitalWrite(LED8, LOW);
digitalWrite(LED9, LOW);
digitalWrite(LED10, LOW);
}
}
Final Work