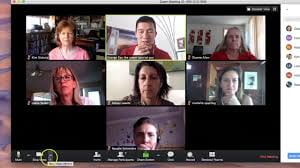
Zoom – Change your background and show your OSU spirit (or a dinosaur)

Does your office look more “Lego showroom” than “business professional”?


Update the look of your home office during an online Zoom meeting and opt for a virtual background !


Or maybe you are in the mood for a little Block O?


Maybe you are missing Cunz?


OSU has a great selection of images you can use:

  1. OSU Zoom backgrounds
  2. OSU Images
  3. OSU University Marketing – Signature Gallery
  4. Or upload your own photos!!!!!

How to set a virtual background in Zoom

  • Click on the background of your choice and save it to your downloads folder.
  • Open your “Zoom Desktop Client” and navigate to your “Settings” screen.
  • Click on the “Virtual Background” tab and then click the “+ button” to select the “Add Image” or “Add Video” option.
  • Choose the background you downloaded from the web.
  • Start Zooming in Ohio State style.

Pro tips

If you want to make sure you aren’t O-I-H-O:

Within the “Settings Virtual Background” tab, check the “Mirror my video” box. The image will look backwards to you but will appear normal to the person viewing your video feed.

If you do not have your Zoom Desktop Client downloaded:

Visit zoom.us/support/download and your download should automatically start within seconds. Simply install and sign in.

If you have never used a virtual background before:

Make sure you log in to your CarmenZoom profile, click “Settings” in the left sidebar, navigate to the “Virtual Background” option on the “Meeting” tab and verify that the setting is enabled.
Note: You must log out of the Zoom Desktop Client and log in to it again for this setting to take effect.

Check your system requirements

If your system does not meet the requirements for enabling Zoom virtual background, consider making one on the cheap by using some green foam board, poster board or fabric .

Student (group and individual) Presentation tools

web conference

Ways to hold virtual presentations

In the last few days I have gotten a lot of questions about strategies and tools for virtual student presentations (both group and individual). Here are some ways you can make this happen.

Question #1 -Can I host a synchronous meeting with students and then allow them (individuals OR groups) to speak?

Yes! Students can share their screens once you promote them to the proper “role” that give them those rights. There are multiple roles available for a meeting: host, co-host, alternative hosts, and participants. The role that you have in a meeting is designated by the host. (Detailed document on features available to each role.)
  • Host: This is you since you are the user who scheduled the meeting. They have full permissions to manage the meeting. There can only be one host of a meeting.
  • Co-hosts: This is what you want to promote your participants to when it’s their turn to present. Shares most of the controls that hosts have, allowing the co-host to manage the administrative side of the meeting, such as managing attendees. The host must assign a co-host during the meeting (maximum of 50 co-hosts per meeting). Co-hosts cannot start a meeting. If a host needs someone else to start the meeting, they can assign an alternative host.
  • Alternative hosts:  This is good for TAs or co-instructors. Shares the same controls as co-hosts, but can also start the meeting. Hosts can assign alternative hosts when they schedule a meeting.

zoom multiple speakers

Using co-host in a meeting

(detailed document here https://support.zoom.us/hc/en-us/articles/206330935-Enabling-and-Adding-a-Co-Host)

There are two ways that you can make a user a co-host. You can assign up to 50 co-hosts in a meeting.

  • In the meeting, the host hovers over the user’s video, clicks on the three dots and chooses Make Co-Host.
    Co-host Zoom
  • Alternatively, the host can make another participant a co-host through the Participants window.
    1. Click on Manage Participants in the meeting controls at the bottom of the Zoom window.
      manage-participants-button
    2. Hover over the name of the participant who is going to be a co-host, and choose More.
    3. Click Make Co-Host.

make-co-host-option-from-participants-list

Once a participant has been made a Co-host, they’ll have access to the co-host controls.

Question #2 – Can students start their own meetings?

large zoom meetingYes. OSU’s instance of Zoom is branded as CarmenZoom and this tool is available to all faculty, students and instructional staff. Our Zoom Pro account permits up to 300 participants in one meeting.

(PS. I do NOT suggest hosting a Zoom meeting with 300 people. Just saying :). )


Question #3 – What assignments would student recordings be helpful for and how can students share recordings?

As stated in my Canvas Commons post, I will be sharing resources you can easily copy into your course. I just added an item called “Sample Video Assignment: Week X [Topic]” – go grab it!

Here’s a great use case: you have a group projects that requires 10 students to work together to create one video but the students are collaborating at a distance. You can either create a meeting room, invite students, make the presenters co-hosts while recording the meeting (as outlined in Question #1) or have one person in the group create a meeting, invite others, and record the meeting. When the students have finished meeting, they can share the recorded meeting with you (or peers) as a URL.

Because I love you I have a detailed documents that you can download and add to your course.

The links are public so you can just go ahead and share them with your students or put directly into your course

  1. Student instructions for class presentations (PDF) https://osu.box.com/v/instructionsforpresentations
  2. Student instructions for class presentations (Word) –https://osu.box.com/v/studentpresentationoptions

How about a Zoom Cheat Sheet??

Happy Canvas-ing!!!!!


via GIPHY