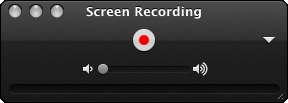
 Most people just use Quicktime Player to watch videos, but did you know it can also make videos?The program comes free on Mac computers, and I just tested out its screen recording capabilities. Easy peasy and exports excellent quality video! Complete instructions are available online under “Record Your Screen.” To record a Powerpoint presentation for instance…
- In Quicktime Player, click File>New Screen Recording.
- Click the down-arrow to the right of the record button, and choose the microphone you’re using to record.
- Open your Powerpoint presentation on fullscreen/slide show mode.
- In Powerpoint, deliver your presentation as normal, flipping slides as necessary.
- When finished delivering, switch back to Quicktime Player to stop the recording.
- In Quicktime Player, click Edit > Trim to cut off the very beginning and end few seconds of your video where you were setting up or mousing up to stop the recording.
- In Quicktime, click File > Export To to create a video (mov or m4v) to share on YouTube, load onto your tablet, or wherever you want.
Here’s an extra step for you overachievers out there: download and install a free program called MPEG Streamclip. Open your mov or m4v file in MPEG Streamclip, and export it as an mp4. This will shave a little off the file size, and convert your video into a file type that’s even more universally excepted everywhere (mp4).

No Mac? No worries! Come to the recording studio in Digital Union Prior Hall or Denney Hall where Quicktime is installed and staff are available to help. Bring a USB drive or set up your free BuckeyeBox account so you have somewhere to save your video.
