Author: Samuel Taylor
Interlude
So after the previous post, I essentially ran out of time to work on the bike that summer. Me and my family took a trip to Tennessee, after which I had to go back to Columbus for school. However, during the year I was able to make a few trips back to Toledo and get some simple stuff done on the bike. I don’t have a lot of pictures from this unfortunately, but I can give a general overview of what I did.
First off, I put on the hand controls. This includes the brake and clutch levers, accelerator, and the electrical controls. I ended up buying new cables for the clutch and accelerator, because the old ones I had were in very poor condition. I also ended up ordering a pair of generic motorcycle controls for the electrical stuff, because the old Honda controls were in bad condition and the OEM parts were extraordinarily expensive. In light of that I had to make some minor modifications to the way controls were wired, but it all ended up working okay in the end.
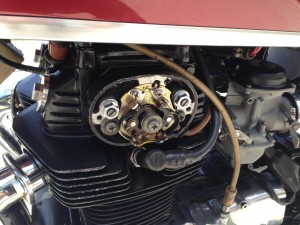
Unfortunately, most of what I did during the school year was discover problems I hadn’t noticed before. Firstly, I realized that the way I had put together the points advance and contactor was incorrect. So I disassembled that with the intention of reassembling it and setting the timing during the summer. Additionally, I had to open up the clutch activator housing, because I was getting a loud metallic snapping noise from the clutch when I attempted to disengage it. This was also something I decided to leave until summer.
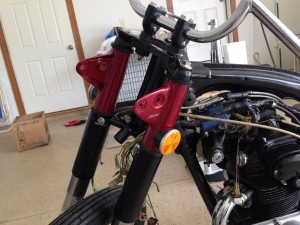
I discovered the biggest problem while attempting to finish installing the front brake assembly. The forks are not symmetrical – there is a left and a right fork. The left fork actually bolts to the brake to prevent it from spinning, making it an integral part of the brake’s functioning. So rather than risk brake failure trying to jerry-rig a solution, I figured I’d do the right thing and swap the forks. This required completely taking apart the front fork and putting it back together again. This was extraordinarily difficult, as I don’t have a winch or any kind of jacks that would work with the bike, and the bike was at that point about 10 times heavier than when I first put the front fork together. In the end I had to get some help. It took three people to put it up on a stand, where we had one person hold the bike while the other two switched out the forks. It was a long and very difficult job, but we got it done.
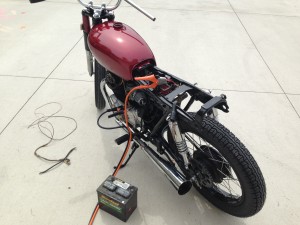
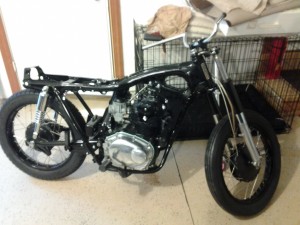
This done however, allowed me to put together the front brake assembly. Also, with this done I am very close to completion of the project. The bike itself is almost entirely rebuilt at this point, and all that really remains is getting the distributor working and the motor running (well, that and mounting the gauges). I have the summer to get it finished.
To-do list:
- Fix distributor
- Set ignition timing
- Set valve clearances
- Install speedo and tach (along with gauge lights)
- Clean up and mount seat
- Install rear lights (brake light and turn signals)
Weeks 10 & 11 – Wiring problems and more
These last two weeks, I’ve been doing my best to get the engine started. However, I’ve been running into small problems that have been making it take much longer than I expected.
The first thing I did this week was clean up the engine. I wiped any access paint off of the engine block with paper towel and touched up the paint in a few places where the gasoline had eaten completely through the paint. I also used mineral spirits to get rid of paint streaks on the polished side covers. I also tried to repair the leaky fuel petcock. I believe the problem was that I lost a spring that kept the valve handle sealed. In the end, I ended up just buying a whole new valve assembly and mounting it in place of the old one.
I tried to charge my battery as well. This didn’t go well. The battery was reading about 3V before I attempted to charge it, and after several hours on a high amperage deep-cycle charge, it was only reading about 4.6V. I just decided to scrap the battery and buy a new one. This was easier said than done, as the battery isn’t apparently very standard, and Autozone didn’t have it. I spent a few days looking, and finally found one at a nearby NAPA. This led to me having the wonderful experience of filling a battery with acid – something that I’m going to be extraordinarily careful about in the future, as I ended up spilling sulfuric acid on my hands and the garage floor.
This done, I went about trying to get the ignition and started motor hooked up. However, when doing final checks on the wiring harness, I noticed something strange. My VOM was reading a ~10VDC charge on the wire between the starter solenoid relay and the starter button (shown below as red with a yellow stripe) when it was disconnected from the solenoid . This is odd, as it should have been entirely disconnected. Upon further analysis, the VOM read a ~3.6MΩ resistance between it and the charged positive lead on the solenoid. This meant there was likely an extremely low current short between the two wires.

Because these two wires were part of the low-current circuit to begin with, I decided to leave the short until after starting the engine. In my mind, the worst case scenario was a little bit of heat at the site of the short. And I was right, but I under estimated how much heat. When I grounded the starter wire, the solenoid activated as expected, and the starter motor turned the engine over… and then the harness caught fire.
I shut it off quickly and determined the general area of the short by feeling wire and finding the place where it was hottest. Then I cut off the melted silicon wrap and put new insulation on the fault wires. After some thorough checks with the multimeter (which now showed no sign of the short), I tested the starter circuit again. This time, the bike turned over and the wires stayed perfectly cool to the touch.
The wiring fixed, all that was left to do was to set the valve clearances. Unfortunately, this requires me to rotate the engine to TDC. The proper way to do this is by rotating the crankshaft using the bolt on the alternator. However, the alternator is in an oil-sealed part of the bike, and I filled the bike with oil earlier this week. Being lazy, I decided to try to rotate the engine by putting it in gear and spinning the rear wheel. This required putting on the chain, which I did. I intend to set the valves tomorrow, and try to officially start the engine on Wednesday (yes, I’ve been setting start dates for the last few weeks).
Alongside of the engine-starting stuff, I’ve been mounting some of the last few major parts of the bike. This includes the turn signals, the headlight, the fenders, the front brake, the hand controls, and the gauges.
- The turn signals mounted, but with interior electrical incomplete
- The completed turn signal internals
- The completed signal
- The headlight bucket mounted
The first thing to go on were the turn signals and headlight. They were fairly easy to install, though I had to fabricate some rubber spacers for the headlight bucket. There’s still a lot of wiring that needs to be done in the area between the forks, and it’s pretty daunting. It should be fairly easy once I get the hand controls installed though.
- Gas cap and latch assembly
- Front brake assembly in progress
- Rear fender painted and mounted
- Rear light wiring through the fender
This morning I received my shipment of a seat and the new hand controls of the bike. I bought a set of some generic motorcycle controls, as they’re way cheaper than the original controls. I’ll have to find a way to wire and mount them. Also, the seat that I got was not meant for the bike. I’m considering shipping it back and demanding a refund, but I’m running short on time for the project. I may just build myself some sort of mounting bracket and make do.
To-do list:
- Set the valve clearances
- Start engine
- Finish installing front brake assembly
- Install speedo and tach (along with gauge lights)
- Get the hand controls mounted
Weeks 8 & 9 – Prepping to start
So this post is going to be a long one. I didn’t get much done last week, so I figured I’d combine my blogs for weeks 8 and 9. During week 8, the majority of what I did was got the bodypaint sorted out.
So my original plan was to take it to Dave Geist Autobody in downtown Whitehouse. But in the end, I ended up taking it to my friend Jake, who did the paint for a few cars I’ve helped restore in the past. I got the body work done well enough that all he had to do was the body color and clear coat. Took him less than a week after I dropped the parts off, ran me about a third of what I had been quoted by other places, and came out looking absolutely awesome.
- All of the bodycolor parts
- How it looks in the sunlight
The color I ended up going with was a GM WA9088 cherry red. It’s got a metallic, almost candy color to it. There are some small imperfections in the coat thanks to some pinholes in my bodyfiller work, but all in all I couldn’t be happier with the way it turned out.
The other thing I did that week was to figure out what I was going to do about the headlight. The headlight bucket I ordered fits a basic sealed beam, but the way my bike is wired, the bulb has to be 12VDC and no draw no more than 40W. Unfortunately the typical sealed beam is 40/60W, and a 23/35W bulb (which stock on the CB350) is hard to find, expensive, and most importantly, extremely dim. My solution to this was to but a sealed beam conversion kit. This way I can install a H4 LED bulb, which will be cheap and draw much less power. This is what I ordered.
It looks pretty similar to your average classic headlight, and should save me a whole lot of money. Plus, it’ll be a lot easier for me to buy an H4 LED in the future than a new sealed beam.
Over the course of week 9, I started to get the wiring loom finished and installed on the bike.
- The wiring diagram I’m using
- The coil packs
- The horn
- The ignition key
- The battery, starter relay, and regulator
- The wiring harness
This involved several steps. First, I did continuity tests with a voltmeter. This was essentially verifying that each wire run had a negligible resistance.
Then, I wrapped the harness in self-adhesive silicon tape. The tape doesn’t look the best, but it gives better protection than electrical tape and is cheaper and easier than the better looking alternatives. The idea is that after 24 hours, it should bond with itself completely, such that it is essentially a solid rubber tube.
Then, I attached the harness according to the diagram. This was probably the easiest part, as I had kept everything together fairly well through the process. It was just a matter of holding the harness up to the frame and figuring out where the wires looked like they should go.
- The petcock valve
- Fuel hose on the carbs
The next step was to attach all of the fuel hoses. This was fairly easy, just ran down to NAPA and bought a few different sizes of rubber vapor hose and cut them to size. I don’t even think I need hose clamps on a lot of the tubing, as they won’t be under much pressure.
Also, before I put gas in the tank, I wanted to put on the fork covers I had painted. I don’t have a jack or any kind of stand of the bike, so when I want to take off one of the wheels, I have call my brother out to help me lift this several-hundred-pound, awkward hunk of metal, and put it down on top of some rickety plastic shelving. So I figured I’d rather not have gas in the tank while I’m trying to lift it.
Anyway, this process was more difficult than expected. It took three people to do – one to hold the rear tire and keep the bike balanced, one to hold the wheel and forks, and one to put the covers on and rebolt the forks. On top of that, a lot of stupid mistakes were made (including but not limited spilling fork oil, dinging up paint, accidentally compressing the forks). But it got done, and now the headlight is pretty much ready for mounting.
All this done, I was ready to start the bike. Unfortunately, the battery was dead. It may actually be bad, I’m not entirely sure. I seem to remember the PO saying it was new, but I may be mistaken. It’s currently charging in my garage. Worst case scenario – it won’t charge or it won’t hold a charge – I’ll just run down to Autozone and buy a new battery. Shouldn’t be any kind of issue, but it slowed me down.
In the meantime, I decided to temporarily use the battery from the family lawnmower. I hooked it up with some jumper cables. I figured the next step would be to put some gas in the tank. This was apparently a bad idea.
- The gas leak
- The culprit
- Paint in the gas under the bike
I noticed that gas was leaking somewhere. I quickly found the culprit was the fuel petcock, which was leaking like a sieve. Now typically, this wouldn’t be a huge problem. I’ll disconnect the petcock, pull it apart, and put new gaskets in it (I’d assume I must have left one out). Even if I can’t fix it, I’ll buy a replacement. The problem comes with the fact that I used oil-based grill paint on the engine. Gasoline basically works as a paint stripper for oil-based paints. Luckily, I put several coats of paint on it and only the top few came off. Also, the paint on the engine is purely aesthetic, as the engine is aluminum and will not rust. However, I’m very unhappy with this, as it left the paint a matte dark grey, as the upper coats of semigloss black were stripped.
This won’t be a huge setback, but I made me a little sad. There goes the awesome engine paint.
Anyways, I’ll pull apart the petcock and try to get the engine running this coming week.
To-do list:
OVERALL GOAL: Get the engine running
- Rebuild and test the fuel petcock / buy a new one if necessary
- Get the hand controls and ignition hooked up – may help with getting the engine started
- Set the valve clearances
- Possibly buy new battery?
Assuming I can get the engine started without too much hassle:
- Install front brake assembly
- Break, shorten, and mount drive chain
- Mount the headlight and turn signals
Week 7 – It’s a roller!
So my wheel bearing finally came in this week, which means I was able to get the front wheel completed, and finally get the bike on two wheels again.
In the pictures above, you can see the spacer that I left out of the front wheel. It holds the bearings apart so that they don’t warp when the front axle is torqued down. With the spacer in and the new bearing installed, I was able to mount the front wheel.
This done, I enlisted the help of my brother and dad in getting the bike out of the basement. It was not a particularly easy job. But after a half of an hour of hard, sweaty work, we got the bike into the garage. We didn’t put too many dings in the paint either!
This done, I started mounting the smaller parts on the bike’s frame.
Got the bike outside where the lighting is a little better. You can see the brake pedal on the ground, it was one of the first parts I installed.
The brand new shiny air filters and battery. I was planning on using the old filter boxes, but the filters in them looked like standard consumer air filters as opposed to automotive filters. New filters for the filter boxes ran at around twice the price as these shiny new ones, so I just went with these. Not OEM, but they’re pretty. I’m halfway tempted to leave the covers off so that they’re visible.
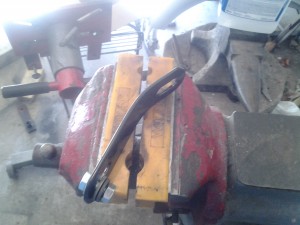
In my attempt to attach the exhaust pipes, I noticed that the pipes I bought miiiiight not have been intended for this bike. On the left hand side, the pipes were pressed up against the rear axle, such that they would have been severely messed up by the suspension had I installed them as they were. My way of dealing with this was to just stick the mount in a vice and bend it. You can see the final product above – out of the box, the mount was straight.
The bent mount now gives an acceptable clearance between the exhaust and the rear axle.
A better view of the installed exhaust pipe. I’m starting to really like the way the bike is looking.
- Clean-ish ignition coils
- The newly lined tank
Other things I did this week are finish up the last of the body work, clean the wiring loom and electrical systems, and get the tank sealed.
I had originally not planned to line the gas tank, but I was starting to get some surface rust from my phosphoric acid treatment. Before the acid treatment, there had been some parts of the tank where there was no rust, meaning the they weren’t coated in iron phosphate. The oil covering didn’t seem to do much to prevent the rust, so I ordered a ” Kreem” sealer kit and “Kreemed” the tank. Honestly, I didn’t have a good experience with it. The kit didn’t come with enough volume of the prep solution, and the coating itself was not particularly easy to work with. I think in the future I’ll go with a different kind of sealant.
In terms of the wiring, I’ve decided not to rebuild the loom. I’m going to test all of the connections and, assuming they all are functioning, simply re-wrap the loom. I’m thinking that I’ll use self-fusing silicon tape instead of heat-shrink like I planned. I’m told the heat-shrink is often difficult to work with.
I will also be taking the tank, filter covers, and fork covers to be painted on Monday. Still haven’t really decided what color I’m going with though, so I guess it’s going to be a spur of the moment decision.
To-do list:
- Set the valve clearances
- Set the points and advance
- Clean and install the hand controls
- Re-wrap the wiring loom
- Get the engine started
Week 6 – Wiring and more body work
Much like last week, I didn’t get a lot done. I’m still waiting on the last couple of parts to get the bike on two wheels again. I ran into a snag this week when I realized I forgot to put in a spacer that goes between the two wheel bearings on the front wheel. Before I can put the wheel on, I have to remove one of the bearings and put the spacer in. Unfortunately, removing a wheel bearing renders it unusable. This means I had to order a new bearing, which I am currently waiting on.
In the mean time, I found a painter for my project. Downside is, it turns out my bodywork wasn’t quite up to par – specifically the tank. Soooo back to the old drawing board. I started by coating the entire tank in a thin layer of paint called a guide coat. I then block sanded the tank. Most of the paint is removed in the process, but the paint in low spots on the tank (dents or ripples in the metal) are left with paint in them, giving me a better idea of where I needed to coat in bodyfiller.
Then I coated the low areas with body filler, and sanded it until smooth. You can see the results in the two pictures on the right below. It has a kind of patchwork look to it, but it’s much smoother now, and hopefully it’ll be good enough not to look bad with a metallic or candy paint on it. Like I mentioned before, the shinier a coat of paint is, the more it shows any imperfections in the metal. And besides pearlescent, metallic and candy are the shiniest it gets.
- Guide coat
- After bodyfiller
- After bodyfiller
I also finally got around to painting those handlebar mounts. Didn’t take me much time, and it isn’t a big change, but I’m very glad I did it. I think it looks much better.
The other big thing I did this week – besides body work on the gas tank – is start restoring the wiring harness. I’m honestly not sure yet if I’ll replace it entirely. I have a bunch of brand new wire sitting around (and this is one of the simplest wiring looms there are), but I don’t know if it’s worth the effort. I may just rewrap it.
Anyway, the wrapping on the harness was pretty gross. It was covered in dirt, falling apart, and very difficult to remove. After I got each section unwrapped, I grouped it together with masking tape and tagged it. Hopefully this will make it a lot easier for me in the future. I intend to buy myself some heat shrink tubing to cover the loom.
- The whole harness
- The headlight run
- The headlight run disrobed
To-do list:
- Complete and mount the front wheel
- Get the bike out of the basement
- Mount the brake pedal, kickstand, and exhaust pipes
- Set the valve clearances
- Set the points and advance
- Get the engine started
Week 5 – Body work
There isn’t a lot to see this week.
For the most part, I’ve just been waiting to get my wheels and forks back. I took them over to Homer’s Cycles in Toledo to have the rear wheel trued, to have new tires put on and balanced, and to have the fork tubes restored. In the end, I decided to buy a whole new pair of tires, even though the rear tire was already mounted. This was because the front tire from the pair the PO bought were slightly too wide to fit into the bike’s front fork. I originally was only going to replace the front tire, but I couldn’t find anything that would match the rear…
But in the mean time, I decided to get some of the body work done.
First, I cleaned up the smaller bodycolor pieces – the fork covers and air filter covers. This involved cleaning the pieces, soaking them in paint thinner, then sanding them. The air filter covers were in great condition, but the fork covers had been pretty well dented from whatever accident the bike was in before I bought it. Luckily, most of the dents were shallow, so I just filled them with primer (coat in primer, sand until fairly smooth, repeat). There was one nasty dent that I had to fill with body filler.
- Rippling on the rear fender
- The dolly I used to hammer the metal smooth
- A more visible image of the ripples
- Slathered in bodyfiller
Next I started the massive job of repairing the rear fender. I’ve honestly been tempted to completely replace the rear fender, or maybe just radically restructure it, because of how messed up it was. Whatever accident the bike was in left the entire rear fender massively rippled. This is the main reason that I chose not to chrome plate the fenders. Chrome – and any kind of metallic, candy, or gloss paint, for that matter – really brings out the imperfections in a smooth piece of metal. So I intend to paint the fenders a nice veiling shade of semi-gloss black.
Even using semi-gloss paint, the fender needed serious work. I started smoothing out the metal using a hammer and dolly. Let me say, it was a long, difficult, and tiring job. And in the end, I know I didn’t do a great job. Unfortunately, I didn’t have much time to spend, considering the amount of work I have left to do before the summer is over. So I got it as close as I could to smooth, and then slathered the whole fender in body filler. Once that hardens, I’ll be able to sand it down to fill the dents in the fender and hopefully make the fender smooth enough that it won’t look too bad.
- My workspace for cleaning the tank
- The muriatic acid I had (used for lowering the pH of pools)
- Some phosphoric acid I had that was too old
Lastly, I cleaned up the gas tank. The entire inside of the tank was coated in rust, and I didn’t have the budget or time to get it professionally dipped and coated. So I decided to make do with a homemade acid wash to get rid of the rust. I was originally going to use muriatic acid to clean the tank because I had some sitting around, but I figured it would be too caustic. Chances are it would clean the tank too well, such that the bare metal surface left inside of the tank would immediately begin to rust.
Instead, I decided on phosphoric acid, having found a few gallons of it in the garage. I’m very glad I decided to do this, because phosphoric acid has the added benefit of creating it’s own rust resistant coating. See, when muriatic acid (HCl) reacts with rust (primarily Fe2O3), you get this reaction:
6 HCl + Fe2O3 –> 2 FeCl3 + 3 H2O
When phosphoric acid (H3PO4) reacts with rust, you get this reaction:
2H3PO4 + Fe2O3 –> 2FePO4 + 3H2O
The difference being that phosphoric acid produces iron (III) phosphate, which bonds to the surface of the tank and prevents the metal from oxidizing. The muriatic acid produces iron (III) chloride, which just floats around in the solution and makes it more difficult to dispose of.
Science stuff aside, I bought the acid in the form of “milk stone remover” from Tractor Supply Co, and diluted it with water at about a 1:1 ratio. Then I filled the tank with the solution and let it soak for an hour or so. After soaking, I drained the acid wash into a bucket. I then rinsed the tank with a sodium bicarbonate solution to neutralize the acid – this was also drained into the waste solution bucket. I then coated the inside of the tank in oil to further guarantee that there will be no rusting before I can attach the tank to the bike.
I’ll upload a picture of the cleaned tank next week, I didn’t have my camera with me when I did this.
All this done, I neutralized the acid wash with sodium bicarbonate, turning it into a harmless salt water solution.
So now everything that needs to be done for the bike to be painted is pretty much done. I’ll be looking into finding someone to paint it this coming week.
To-do list:
- Restore the hand controls
- Remount the rear wheel
- Complete and mount the front wheel
- Find a way to get the bike out of the basement………
- Mount the brake pedal, kickstand, and exhaust pipes
- Set the valve clearances
- Set the points and advance
- Get the engine started
- Find someone to paint the body-color parts
Week 4 – Half a roller
My parts arrived!
My massive order came in the mail on Wednesday. Now that it’s here, I can begin work on finishing the installation of the steering stem, and eventually, begin the process of building the front fork. Here’s a list of what I received:
Beautiful shiny new exhaust pipes (the PO sold the originals)- Exhaust gaskets and brackets
- A new drive chain
- Wheel bearings for the front wheel
- A new headlight (the original headlight bucket was cracked in half)
- Brake shoes for the front drum brake
- Hand grips
- O-rings for the front fork bolts
- Valve tappet covers
- A gas tank cap
- A throttle tube
- A nut for the steering stem
There were a few issues with the order though. First of all ( because I’m an idiot -_- ) I ordered a bottom mount headlight instead of a side mount headlight. I’m going to have to return the headlight I bought and replace it. Additionally, the fork o-rings I bought seemed to be too big. They were only like 99 cents a-piece though, I just drove to O’Reilly’s and bought myself a new pair that fit.
Here’s a picture of the shiny, new, un-mutilated valve tappet covers. Also, note that the camera I’m using isn’t that great. Everything is much cleaner and shinier in real life.
Now to the real stuff: My number one achievement for this week? I got the rear wheel on!
Honestly, that was probably the least impressive thing I got done this week. I’ve had the rear brake panel completed and sitting on a table since spring break. Now that I’ve got the bike on a makeshift stand it wasn’t difficult – just stick the brake panel into the open side of the drum and slide the axle through both it and the drum. But one way or another, it’s half-a-roller now. Give me a week or so and it’ll be on two wheels again for the first time in years!
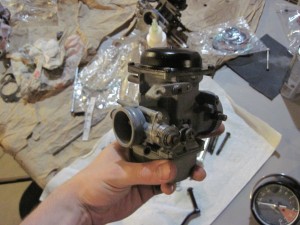
Also, as you can see from the picture, I got both of the carbs attached to the bike.
- Carbs attached
- Installed the throttle cables
- Better view of the throttle connection
As of now, they aren’t completely installed – they’re missing a few nuts and bolts for attachment, and I haven’t started to adjust them. I’m going to worry about that,the valve clearances, and the points advance once it’s on both wheels.
For the real event of this week, I got the steering stem installed. And let me tell you, I completely botched it. So, a week or so ago, I pressed the steering bearing races into the neck stem. The problem is, I didn’t get the bottom race completely seated, as it is actually recessed into the neck stem.

The way I had it installed is on the left, the way it should be installed is on the right. But that wasn’t the big mistake. The big mistake was that I thought I could use the triple tree as a press. I figured that if I put the triple tree in place and tightened the steering stem bolt, it would compress the stem and seat the bottom bearing. The issue is, the thread on the tree is very fine, and instead of pressing the bearings, I stripped the threads on the tree.
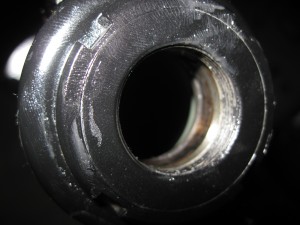
You can see how mangled the threads are. So I spent several hours this week on a wild goose chase trying to find a thread chaser or a die that with a big enough diameter and a fine enough pitch. Unfortunately, out of the many machinists I got in touch with, no one did. In the end, I managed to fix it by sitting down and working on it with a thread file for an hour. Then I used a bearing driver (like I should have in the beginning) to seat the bearing. Thanks to Mike Seegert for the advice and tools!
BUT in the process, I knocked the TOP bearing out of its race, and a bunch of ball bearings were lost into the dark abyss of the frame.
So then I had to go buy more ball bearings. All in all the process turned what should have been a 15 minute job into half of a week. =/
I learned a valuable lesson this week about patience. If I had taken my time and done things the right way the first time, I could have saved a lot of time, effort, and money. I doubt this will be my last big blunder in the project, but man was it frustrating.
Anyway, having finally seated the bearing race properly, I was able to install the steering stem.
After which, I was able to attach the handlebars.
I may take them back off and paint the mounting brackets though. They’re aluminum, so rust isn’t a problem, but I think they’d look better in the same black as the frame. That aside, with the stem mounted, I’m ready to start working on the front fork.
Speaking of the fork, I was able to finish up the front brake panel now that my shipment of parts arrived.
So now all I have to do to finish up the wheel is to get it trued and have a tire put on. I intend to take it to Homer’s Cycles in Toledo on Tuesday for truing. They may be able to order me a tire as well.
With the rest of my time this week, I attached several of the smaller parts that I’ve restored. I attached the clutch cable and passenger footpegs.
- Clutch cable
- Passenger footpeg
I also restored and attached the air filters. Each filter box had a bare steel side that was rusted out. I cleaned up the rust and painted it. They don’t look very pretty, seeing as I left the old paint on one side of each filter box, but they’re going to be covered when the bike is done.
And attached:
All in all, despite the mistakes, I got a lot of work done this week.
To-do list:
- Get the front fork restored
- Have the front wheel trued
- Acid dip and seal the gas tank
- Restore the hand controls
- Attach the chain
- Ask around and get quotes on body paint
- Find a new front tire to replace the oversized ones the PO bought
Week 3 – Engine mounting and painting
This week wasn’t the most exciting. I spent a good three hours every day after work painting various parts. On the plus side, the paint looks good and I’m ready to start putting things back together…
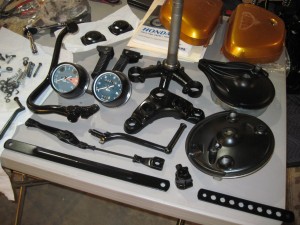
The things I cleaned, painted, and generally restored are:
- The tach and speedo gauges
- The main footpegs and passenger footpegs
- The triple tree and complete steering stem assembly
- The brake pedal
- The kickstarter
- The shifter pedal and assembly
- The front and rear brake covers
- Several mounting brackets and struts
I also did some prep work on the carbs, such that they should be ready to attach next week.
But the biggest success of the week: I got the engine mounted. It took a lot of time and effort to figure out how it fit into the frame, and unfortunately I dinged up some of the frame’s paint in the process. But it’s in, and the paint shouldn’t be hard to get patched up.
The bike is starting to take shape!
Along with mounting the engine, I moved the frame onto a makeshift stand. This should make it easier as I move forward. Specifically, it’ll be much easier to get the front fork and wheels mounted. I also still haven’t set the points advance or the valve clearances on the engine, which will be a job for this week.
Speaking of wheels, the rear wheel is completely rebuilt and ready to be attached. I decided that I won’t be replacing the rear tire, just the front, so the rear tire will be slightly bigger than the front. It shouldn’t cause any significant performance changes, and it might even look kinda cool. I have to do some minor clean-up of the spacers that go on the axle between the wheel and the frame, but I have all of the parts for the wheel laid out and major pieces painted, so it’ll definitely be attached sometime this week.
Another thing I was able to get done was to press fit the steering bearings and install the steering stem into the frame.
The down side is, it seems I didn’t get the bottom bearing completely installed, so I can’t fit the top portion of the triple tree into place. I’m thinking that I’m going to try to use the nut at the top of the stem to press fit the bottom bearing completely into place. One way or another, I intend to have the tree installed by the end of this next week.
Lastly, and most uninteresting of all, I spent a lot of time making a shopping list. There were a lot of parts that were badly damaged (headlight bucket, handgrips) or just needed replacement (drivechain, front brake shoes). So I spent some time and put together a massive order of parts which should hopefully be arriving this week.
As one final note, I’m considering restoring the gas tank this upcoming week. I hate to do it, seeing as the tank is in surprisingly good condition. I’m concerned though, as there is a fine layer of dust forming in the tank that could pollute the fuel. I’m thinking I’m going to clean and etch the tank with muriatic acid, and then buy some kind of generic tank sealer to coat the inside. That done, the bike will probably be ready for body paint.
To do list:
- Finish installing the triple tree and steering stem assembly
- Attach the rear wheel
- Install the handlebars
- Clean and coat the gas tank
- Install and set the carbs
- Get quotes on body painting
- Ask around and get some quotes on body paint
- Find a new front tire to replace the oversized ones the PO bought
Week 2 – Finishing the engine
The goal this week was to finish up as much of the engine as I could. The first step, now that the head was rebuilt, was to rebuild the cam case. The process for this can be seen below.
- The cam case with the cam shaft and cam sprocket installed.
- After the cam shaft was in, the end caps and rocker arms were installed.
- A better view of the rocker arms and the inside of the cam case
This part of the build took a long time, as I had to figure out how to set the valve timings, which is maybe the most important part of building the engine. For anyone who doesn’t have a basic understanding of how an engine works, here’s a basic idea of what this means:
My engine is a four-stroke. This means that there are four stages to it’s running:
- Intake – As the piston goes down (creating suction), the intake valve opens and aerosolized fuel is pulled into the cylinder
- Compression – The intake valve closes and the piston goes up, compressing the mixture in the cylinder
- Power – At the top of the compression stroke, the spark plug ignites the fuel, pushing the piston downwards
- Exhaust – The exhaust valve opens and the piston moves up, pushing the exhaust out of the cylinder
Below is a gif that shows how this works.
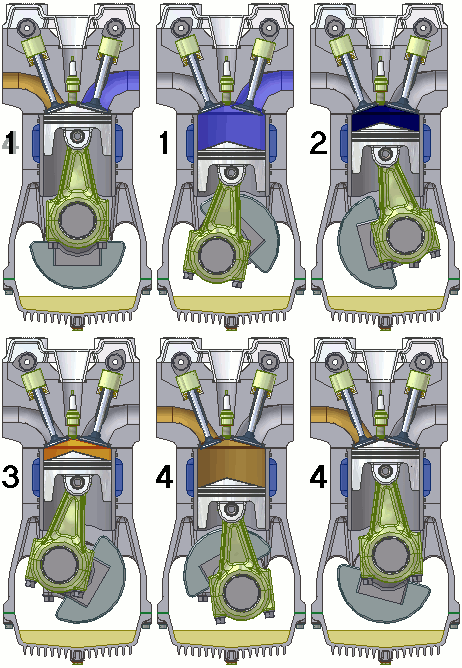
This way, once the engine is rotated a few times (by an electric starter motor or a kickstarter), a self-perpetuating motion is created, which provides enough power to run the bike. Now, setting the timing on the valves basically means making sure the valves open at the right times to create this motion. In my case, this involved making sure that the cam chain was in the right sprocket on the cam gear, as well as tightening the rocker arms to the values specified in the Clymer manual.
After this was done, I closed up the upper engine. I also installed the points advancer into the left end cap. The points advance is a assembly the changes the timing on the spark plug ignition depending on how fast the engine is running.
- The closed upper engine
- A close up view of the points advancer, attached to the end of the cam shaft
After this, the engine was ready to be painted. I masked off all of the areas I didn’t want to get paint in, and then mounted it on a stand for painting. Also, while installing the starter motor, I cracked and dented its backing plate. Aesthetically, I didn’t have any kind of problem with this, so I just coated the cracks in some JB Weld prior to painting to keep it from breaking further with use.
- Engine with masking completed
- Cutting threaded rod to build an engine stand
- The engine mounted to the engine stand for painting
- JB Weld on the backing plate of the starter motor
With that done, the engine was ready for painting. I didn’t take any pictures of the painting as I was doing it, but here’s the finished product:
- Right side before
- Right side after
- Left side before
- Left side after
As of now, the engine is ready to be mounted on the bike! All I have to do is get the engine mounts painted. I would’ve liked to do that this week, but it got too cold today to paint the mounts. Either way, that’s a job for next week.
Also, during the week I was able to get a few minor things done. Firstly, I started doing some body work on the chain guard and the gas tank, getting rid of dents and prepping them for painting. I got rid of the dents and smoothed out curves using a mix of beating on them with a hammer and the careful application of body filler. The chain guard had some pretty nasty dents in it, but the tank didn’t seem too bad, as the PO had done some work on it. There are a few small areas on the tank which could use some work, but I may just ignore them and paint over it instead of sanding off the primer and using body filler.
- The chain guard, primer sanded
- The gas tank, prepping for body work (left)
- Gas tank (right)
I also did some repainting of the emblems that go on the gas tank, generator, and filter covers. The filter cover emblems turned out well, but I debating redoing the gas tank emblems (the ones that say Honda on them) as they didn’t turn out very well.
To do list:
- Get the engine mounts, triple tree, chain guard, and foot pegs painted
- Mount the engine in the frame
- Install the steering bearings
- Install the triple tree and steering assembly
- Order my massive shipment of replacement parts
- Ask around and get some quotes on body paint
- Find a new set of tires to replace the oversized ones the PO bought


