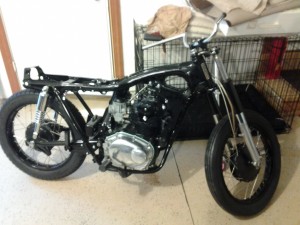
So my wheel bearing finally came in this week, which means I was able to get the front wheel completed, and finally get the bike on two wheels again.
In the pictures above, you can see the spacer that I left out of the front wheel. It holds the bearings apart so that they don’t warp when the front axle is torqued down. With the spacer in and the new bearing installed, I was able to mount the front wheel.
This done, I enlisted the help of my brother and dad in getting the bike out of the basement. It was not a particularly easy job. But after a half of an hour of hard, sweaty work, we got the bike into the garage. We didn’t put too many dings in the paint either!
This done, I started mounting the smaller parts on the bike’s frame.
Got the bike outside where the lighting is a little better. You can see the brake pedal on the ground, it was one of the first parts I installed.
The brand new shiny air filters and battery. I was planning on using the old filter boxes, but the filters in them looked like standard consumer air filters as opposed to automotive filters. New filters for the filter boxes ran at around twice the price as these shiny new ones, so I just went with these. Not OEM, but they’re pretty. I’m halfway tempted to leave the covers off so that they’re visible.
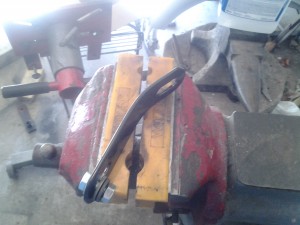
In my attempt to attach the exhaust pipes, I noticed that the pipes I bought miiiiight not have been intended for this bike. On the left hand side, the pipes were pressed up against the rear axle, such that they would have been severely messed up by the suspension had I installed them as they were. My way of dealing with this was to just stick the mount in a vice and bend it. You can see the final product above – out of the box, the mount was straight.
The bent mount now gives an acceptable clearance between the exhaust and the rear axle.
A better view of the installed exhaust pipe. I’m starting to really like the way the bike is looking.
- Clean-ish ignition coils
- The newly lined tank
Other things I did this week are finish up the last of the body work, clean the wiring loom and electrical systems, and get the tank sealed.
I had originally not planned to line the gas tank, but I was starting to get some surface rust from my phosphoric acid treatment. Before the acid treatment, there had been some parts of the tank where there was no rust, meaning the they weren’t coated in iron phosphate. The oil covering didn’t seem to do much to prevent the rust, so I ordered a ” Kreem” sealer kit and “Kreemed” the tank. Honestly, I didn’t have a good experience with it. The kit didn’t come with enough volume of the prep solution, and the coating itself was not particularly easy to work with. I think in the future I’ll go with a different kind of sealant.
In terms of the wiring, I’ve decided not to rebuild the loom. I’m going to test all of the connections and, assuming they all are functioning, simply re-wrap the loom. I’m thinking that I’ll use self-fusing silicon tape instead of heat-shrink like I planned. I’m told the heat-shrink is often difficult to work with.
I will also be taking the tank, filter covers, and fork covers to be painted on Monday. Still haven’t really decided what color I’m going with though, so I guess it’s going to be a spur of the moment decision.
To-do list:
- Set the valve clearances
- Set the points and advance
- Clean and install the hand controls
- Re-wrap the wiring loom
- Get the engine started


