Studio 339 Renovation, Featuring the Cobra Crane

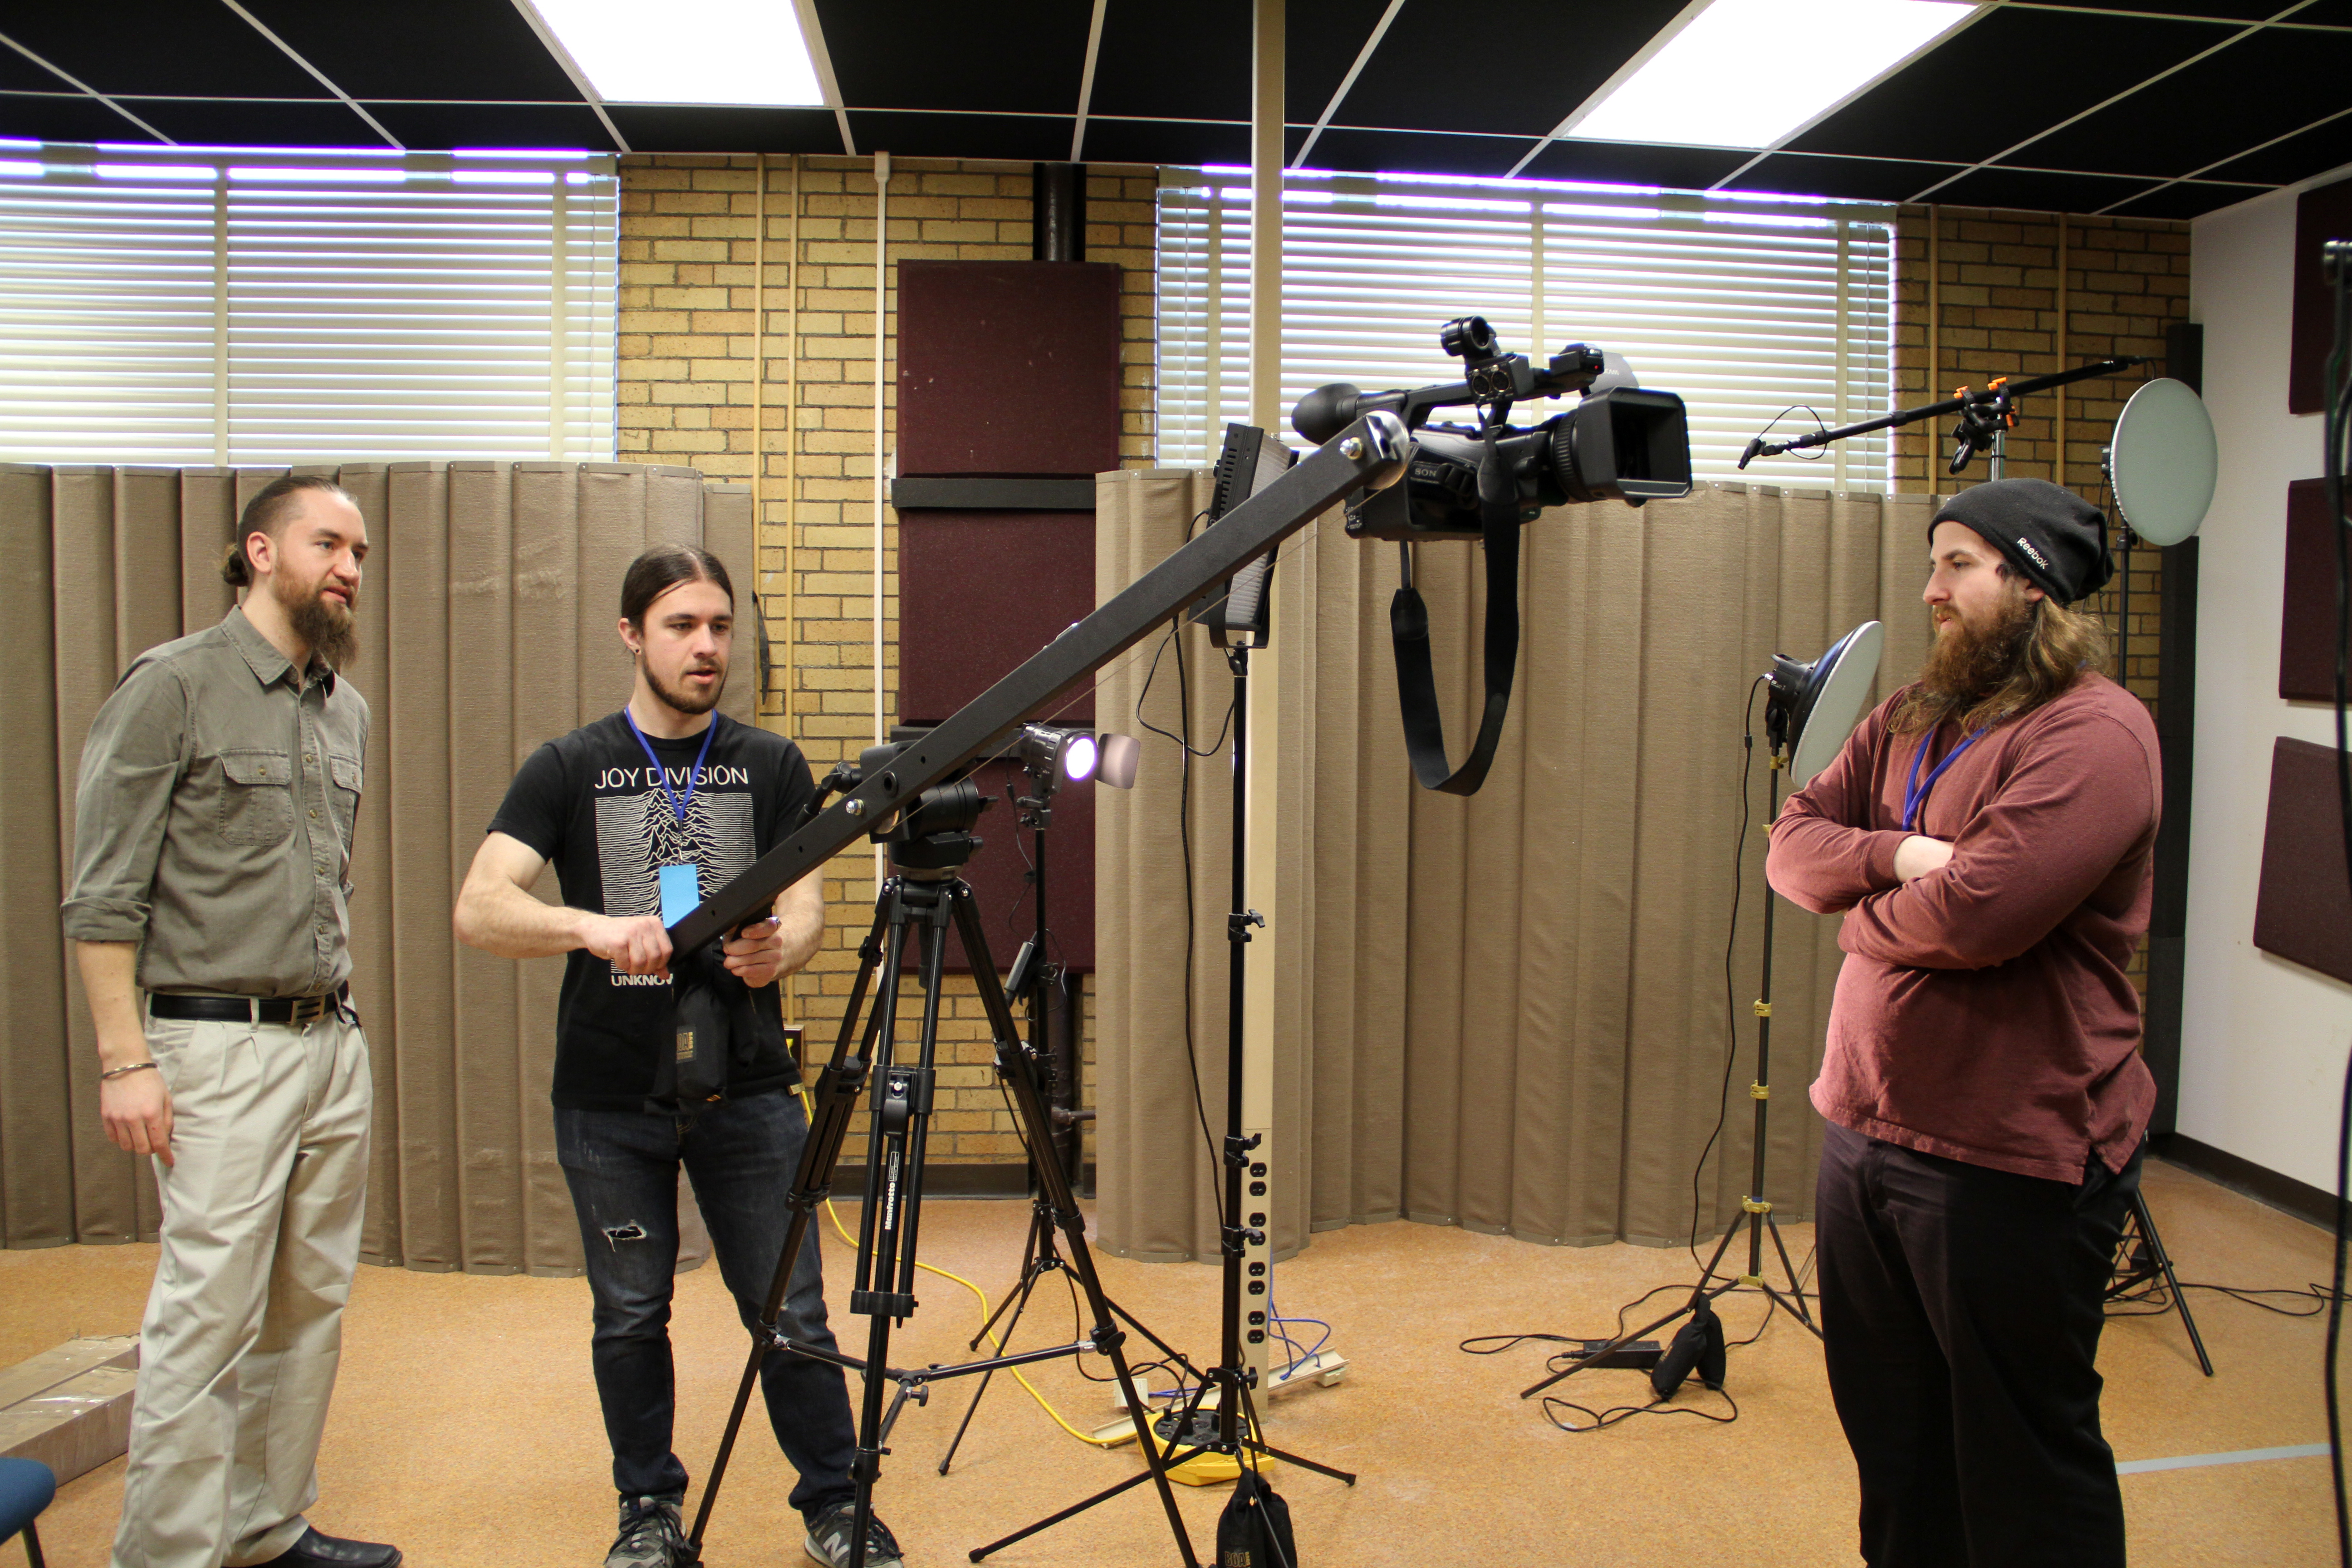
Left to Right: Alex Everett, Nikolai Elencovf and Michael Garrett, testing out our new Cobra Crane

The EHE EdTech Multimedia team has been hard at work updating their three studio spaces: The Commons Whisper Room, The EHE One Button Studio , and Studio 339 (housed in Ramseyer room 260, 360A, and 339 respectively).  While the Whisper Room and One Button are fully operational, Studio 339 (pictured above) is currently undergoing major changes.  The largest upgrade in this space, to date, is the brand new soundproof drop ceiling.  Composed of Real Traps’ ceiling tiles, this ceiling will help improve the sound quality of our recordings tremendously by providing both base trapping, and sound reflection control.  In addition we will soon be adding new carpeting, sound proofing curtains, wall traps, a motorized backdrop system, and many new pieces of equipment.

Above you will see Alex Everett, The EdTech Media Services’ Manger,  and two of our Media Services’ student assistants, Nikolai Elencovf and Michael Garrett, testing out our new Cobra Crane.  This relatively inexpensive jib is allowing us to get amazing, simultaneous pan and tilt shots, giving us the potential to gather a lot of engaging dynamic footage in our video production.

Stay tuned for more studio updates, and EHE EdTech news!

Helpful Links: 

  • Cobra Crane Setup Demo: (https://www.youtube.com/watch?v=8qievAVPmGc
  • Real Traps’ ceiling tiles: http://realtraps.com/p_ceiling.htm).


Jumping Copyright Hurdles

If this is your first time producing an online course, you probably have been told something rather frustrating: You can’t use all of those perfect images that you found on Google, and subsequently placed in your PowerPoint slides!  This is quite confusing, as you though that you were protected under that warm and fuzzy blanket known as “Fair Use.”  The problem with fair use, in the online environment, is that the distribution model has changed.  Instead of showing material to a single group of students one time – you now have a video, PowerPoint presentation, or some combination that is being published over the web for multiple classes, and quite possibly a much wider audience than the students enrolled in your course.  For at least a brief moment you might wonder if you could just ignore copyright, and only find new materials if you get caught.  This is a very dangerous game to play.  You are representing a University, and it is a personal and professional nightmare to be caught stealing media.

The Good News:  Ohio State has resources to help you to find out if your images are copyright free “in the public domain” and can help point you towards resources that will lead you to acceptable free images/media.

Here is a link to OSU’s Copyright Services: http://library.osu.edu/projects-initiatives/copyright-resources-center/

Here is a Video on Fair Use: http://go.osu.edu/fairuse

Here is a Checklist to Determine Fair Use: http://hsl.osu.edu/copyright/fair-use-checklist

Here are a few copyright free image banks that they suggest:

  1. American Memory collection: http://memory.loc.gov/ammem/index.html
  2. Wikimedia Commons: http://commons.wikimedia.org/
  3. Library of Congress: http://www.loc.gov/pictures/
  4. Flickr Commons: https://www.flickr.com/commons/
  5. Welcome Images (historical images): http://wellcomeimages.org/

Here is a really cool tool that allows you to upload any image, and it will tell you were you can locate that image on the web to find information about it: https://www.tineye.com/search


Emotional Intelligence 2.0

51GrNfPt6mLI would highly recommend this book for anyone.  I am including it on this blog because I think it can help online educators as they deal with the stress of learning a new skill, and in working with other creatives/educators in accomplishing their video/multimedia projects.

Find it on Amazon

Book Overview: In today’s fast-paced world of competitive workplaces and turbulent economic conditions, each of us is searching for effective tools that can help us to manage, adapt, and strike out ahead of the pack. By now, emotional intelligence (EQ) needs little introduction—it’s no secret that EQ is critical to your success. But knowing what EQ is and knowing how to use it to improve your life are two very different things.

Emotional Intelligence 2.0 delivers a step-by-step program for increasing your EQ via four, core EQ skills that enable you to achieve your fullest potential:

1) Self-Awareness
2) Self-Management
3) Social Awareness
4) Relationship Management

Here’s what people are saying about it:
Emotional Intelligence 2.0 succinctly explains how to deal with emotions creatively and employ our intelligence in a beneficial way.”
—The Dalai Lama
“A fast read with compelling anecdotes and good context in which to understand and improve.”
Newsweek
“Gives abundant, practical findings and insights with emphasis on how to develop EQ. Research shows convincingly that EQ is more important than IQ.”
–Stephen R. Covey, author, The 7 Habits of Highly Effective People
“This book can drastically change the way you think about success…read it twice.”
–Patrick Lencioni, author, The Five Dysfunctions of a Team

New Position, Same Focus

Recently I took the position of Educational Technology Specialist with The College of Education and Human Ecology.  For this reason my future posts will incorporate material from both The Office of Distance Education & eLearning and The College of Education and Human Ecology.  My primary blog focus will remain the same “Video Tips and Tricks for The Online Educator.”

What Not to Wear (for video)

You may be familiar with TLC’s reality television show “What Not to Wear” which first aired in early 2003, and stared fashion stylists Stacy London and Clinton Kelly.  In each episode Stacy and Clinton would select an unknowing candidate, guilty of extreme fashion neglect, and give them a much needed style makeover.

Don’t worry.  You’re 1980’s Led Zeppelin t-shirt collection is safe with me🙂, but did you know that a video camera actually prefers some fashion choices over others?  The next time you are examining your wardrobe for a camera ready selection, please feel free to use these suggestions:

The Don’ts:

  1. Pinstripes, herringbone, or Scottish tweed. 
    • While dapper in person, small tight patterns on camera will render the Moiré effect.
  2. Saturated red.
    • Unless you have a pro-grade camera this color will bleed in your shot. 
  3. Creating high contrast with your complexion.
    • The camera will have trouble exposing if:
      • You have a very dark complexion and wear solid white
      • or if you have a very  pale complexion and wear solid black
  4. Fabrics that make noise when they move, or are pressed against a microphone
    • Wind suits and other crinkly materials
    • Wool suits when wearing a lapel.
  5. Clothes that have no place to clip a microphone/ no pockets to hide the microphone pack.
  6. Green clothes if you will be using a green screen.

The Do’s

  1. Mid-range solids or subtle patterns
    • Navy blue always works. 
  2. A collar or neckline where you can clip a microphone
  3. A pocket for the microphone pack
  4. Soft non-textured fabrics
  5. Something that makes you feel comfortable and confident

Best of luck!  You are now camera ready. 

Media Services produces award wining video for The Young Scholars Program

25 years ago, the Young Scholars Program (YSP) began its mission to prepare low income, first-generation students for success in college. Recently, the program was selected to compete for the prestigious C. Peter Margrath Award, and enlisted the expertise of Media Services to prepare their video submission for the competition. With the guidance of Dr. Curtis Austin and other key leaders of the program, we were able to distill a central narrative out of a quarter of a century’s worth of success stories.  Interviewees were then chosen to represent each of the subsets of the community population in which YSP is having an impact.

When the shooting was finished, we had over four hours of footage filled with wonderfully unique perspectives and truly touching stories. The maximum length of the video, however, was to be no more than two minutes, per the submission guidelines. After a week of painstaking editing, careful selection and placement of illustrative picture overlays, and the application of other refinements, we had our final product, which in the end helped YSP win the competition and its $20,000 award.

Looking back, what made this video stand out from the other entries was how we conveyed the truly holistic approach the program uses within the nine urban communities to which they belong. Student success was major component of our narrative, but we also showcased the tremendously positive effects this organization has had on everyone involved; students, their families, and their communities at-large are flourishing thanks to the improved skills and spirit that has been developed within the Young Scholars Program.

Given the positive impact that YSP has had on so many lives, production of this video was a highly rewarding endeavor.  It reminds us of the greater good that can be accomplished with our work at the university, and motivates us to do even more to help those around us, to share the knowledge and goodwill that is abundant within ODEE and the university as a whole.

Leave the Script at Home!

If you are an educator, you know that you should never get up in front of a class without first preparing a word-for-word script.  You must make sure that everything in your lecture is grammatically correct, that the vocabulary is impressively academic, and that no detail is left unmentioned.  You should spend as much time as it takes to memorize this presentation, because you know what messing up means!  The class will expect you to start over again from the very beginning, and keep repeating this process until everything is absolutely perfect.

Assuming the above assertion sounds completely ridiculous, why do so many of us default to this behavior in front of camera?  We prepare this script, look into the camera, and try our very best to recite it from beginning to end without missing a beat.  If we do mess up we stop, apologize to the camera operator, and start over from the beginning.  With this method it can take as much as an hour to get out a one to two minute course introduction.

This happens because it is completely normal to be nervous at the thought of being recorded, especially if you are new to the medium.  It is important to realize that students, and viewers in general, do not expect the online educator to be a Shakespearean actor or actress.  In fact, I would argue, that many of them are hoping that this will not be the case.  (Sorry English instructors 🙂 )  They don’t want a script!  They want someone like you, who knows what they are talking about, and who presents the material in the same conversational way that they would in a classroom setting.  Be real with them, and know that your tiny mistakes are indeed tiny.  If you don’t draw attention to them they will fall below the level of cognitive perception.

So next time you get in front of that camera, leave the script at home.  Have an outline of talking points, and maybe a few notes in the margin, but remember above all else to be yourself!  You are engaging, reciting a memorized speech is not.

Introduction

Camera in Sketch StyleThe time has come. You have been asked to teach an online course. You are the instructor, the expert in your field. You have a tremendous gift of relaying your knowledge to a classroom full of students, but now it is you alone with an intimidating video camera, and you’re not quite sure what to do next. If this sounds like you, or perhaps a faculty member you are supporting, then IN FRAME is just the blog resource for you!

My articles will explore:

  • Pre-Production Activities, including: constructing your narrative, choosing an appropriate location for recording, and selecting required equipment.
  • Production Challenges, such as: ensuring appropriate sound and lighting, basic shot composition, and overcoming camera shyness.
  • Post-Production Essential Understandings: what can and can’t be done on the editing floor, the usefulness of B-roll, and selecting the best file settings for export.
  • I will also give highlights of major video projects, completed here in The Office of Distance Education and e Learning.
  • I openly welcome suggestions and requests for topics, and look forward to taking this journey with you!

Meet The Author:

My name is Jennifer Cooke.   I grew up Circleville, Ohio, home of the world famous Pumpkin Show:).  I graduated from The Ohio State University in 2008 with a Bachelors of Fine Arts in the field of Art and Technology.  Starting out as a freelance graphic and web designer, I joined Ohio State’s Learning Technologies team as a Video Producer/Director in 2009.  Working with multiple departments across campus, I have led the video production for numerous online course offerings, as well as the creation of video and animation based marketing materials for my department: The Office of Distance Education and e Learning, and our strategic partners.  In my free time I enjoy the art of glass blowing, and take advantage of the wonderful hot glass shop located in Ohio State’s Sherman Studio Art Center.  Recently I have gained acceptance to Fisher’s MBA for the Working Professional graduate degree program and look forward to adding strategic planning and operational skills to my creative pallet.