2018 Fruit Production

Wow… it’s almost February already! As we have progressed past the harshest part of winter (hopefully), it’s time to think more about fruit production and items necessary to promote good plant growth. Grapes, brambles, blueberries, apples, peaches, pears, etc., all need pruned in the next few weeks if you haven’t already finished them.  I’ve added some pictures below to help determine what the finished product might look like. Good pruning for sunlight, air penetration and spray coverage is a key to good fruit production.


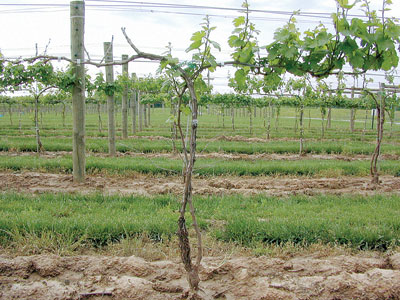
Grapes before pruning                             Grapes after pruning


Blackberries before pruning                    Blackberries after pruning


Blueberry before pruning                             Blueberry after pruning


Apple or Pear pruning cuts              Peach or Cherry pruning for open center


Tree fruit producers should also be thinking about dormant oil sprays and/or copper applications if fire blight was severe last year in your trees. Oils…only apply when temperatures are above 40°F, never during freezing weather (read the label). Timely applications of any insecticide or fungicide is necessary if you want to get the full benefit of using them, so plan now and have the correct products ready to use as needed.  Also remember, pesticide resistance management is something we all need to guard against. Read the labels of any pesticides being used and rotate to other products as listed on the labels.

Black Rot in Grapes– I have many homeowners who contact me each year, as fall approaches, saying their grapes are turning black and shriveling up just about the time they start to ripen. This is a problem that must be controlled in the spring as the new vines are growing. The period from immediate pre-bloom through 3 to 4 weeks after bloom is the most critical period for controlling black rot. New growth, no larger than seen in the picture below, is the time to start spraying.  Two fungicides, Mancozeb (ex. Bonide Mancozeb 37%) or Mycobutanil (ex. Immunox Fungicide) are products that control black rot. Be sure to read the label for proper application rate, preharvest interval and timing between sprays. If sprays are not made (missed), an improper rate applied or complete coverage is not obtained, you cannot expect to get satisfactory disease control of black rot.

A great resource for home growing fruit producers is OSU Bulletin 780, Controlling Diseases and Insects in the Home Fruit Plantings. Pick one up from your local OSU Extension Office.

2018 is well underway. Are you ready for a productive fruit growing season? Let’s get ready to prune!


IPM- Crop Rotations

In Extension, we often talk about integrated pest management, a way to control a pest from various angles. These angles are cultural, mechanical, and biological options for managing pests.  A pest is simply something unwanted in a particular area.  Pests could be plants, insects, or even mammals at times.  The thought process is that there is no one perfect solution to a problem.  Easy come easy go, some would say.  I guess in this case it would be; easy go, easy come back!

A cultural way to break the cycle of many pests is to plan a crop rotation that involves crops from different plant families. Families in the sense of phylogenies or grouping according to similarities.  For instance, the following plants: tomatoes, eggplants, peppers and even potatoes are all in the Solanaceae family.  As you can tell, many of our garden crop favorites share a lot with one another.

One of the biggest mistakes in crop rotations is to rotate between unrelated plants/crops. This is important because pests can share similar crops and over winter in that specific crop residue.  Take for instance the cucumber beetle; this pest will over winter on cucurbit residue and be ready to re-infect that crop, whether it is a cucumber, pumpkin or zucchini.  This bug will also spread bacterial wilt that can cause a loss of an entire crop with a systemic infection.

The cucumber beetle will not damage tomatoes so planting a Solanaceae crop in an area that a Cucurbitaceae was growing would break that pest cycle. Pests can also be fungal.  A fungus called Alternaria tomatophila causes early blight in tomatoes.  The fungus can over winter in certain cultivars of potato and eggplant, both of which are in the Solanaceae family.

A good crop rotation starts with careful planning and can be successful by utilizing crops with complementary planting and harvest dates. A good rotation for May plantings would be to start with sweet corn (Poaceae).  Sweet corn can be harvested around August and into September.  A crop rotation will prevent certain cutworms and corn borers from being problematic in a specific area.  A good follow-up crop in that area would be garlic (Alliaceae) planted in September/October and harvested in July.  Once July comes, planting a legume (Fabaceae) will help remediate the soil and get the soil ready for the following season, hairy vetch for instance.

There are many rotations that work well in a crop rotation system, utilizing soybeans for a food plot can also be done. Just remember to rotate crops that are unrelated and replenish the soil at times.  This can be accomplished through the use of legumes or fertilizers.  A rotation only needs to be more than one crop; two is good, but three is great!  Get your garden plans in place and dig right in.

Transplanting Into the Home Garden

It is that time of the year when the soil is warming up and people are starting to put in their garden starter plugs that they grew indoors. Starting plants indoors is a great way to get a “head start” on things and be safe from some late frosts that occur in April and May.  When you are transplanting some of these plants, be sure to check the frost tolerance and make sure you put them out during the proper times.

Besides the frost, plants have to acclimate or “harden” from indoor conditions to outdoor conditions. When a plant grows indoors the light conditions can be as much as 40 times less intense than the full sun, and exposure time can be less than half of what it will be outside.  Plants will generally grow thicker leaves and produce more chlorophyll to make better usage of the light energy provided to the plant when they are grown in low light conditions (indoors).  This is actually one reason why lettuce is grown in partial shade.

Low Light vs High

(Plant Physiology 3rd ed.)

Taking this idea a bit deeper (down to the roots); it is important to remember that the water and nutrient uptake is essentially all done through very fine and tender root hairs. When a plant is moved many of these hairs are damaged and water uptake can become insufficient for the plant’s needs.

Seedling

So let’s combine the problems now: A plant is moved to 12 times the sun, with increased chlorophyll and 2 times the light exposure that it is used to.  On top of that the plant cannot get the water to support the increased photosynthesis demand in that direct sunlight.  That could set the plant back, and all the sudden that “head start” might not be so advantages anymore.


Some tips from OSU Extension:

  1. Slowly transition the plant from indoors to outdoors by bringing it out for a few hours at a time without damaging the root hairs during the move (keep it in the original container).
  2. Don’t put out frost sensitive plants too early.
  3. Wait for the soil temperatures to warm up nicely (60 degrees or greater).
  4. When transplanting the starter plant, don’t let it get too big and don’t shake off too much soil from the root mass (root hair damage).
  5. Be sure to actively water the plant during the first week especially. This will compensate for the decreased water uptake ability of the plant.
  6. If you are utilizing weed control, make sure the pesticide doesn’t have a long residual period (refer to the label).

These tips will work for both gardening and landscaping; so when you buy a plant from a nursery, ask about the growing conditions. Things like: “Has the plant been growing indoors or outside?”  And “How long has it been out and how much sun is it getting here?”

Anticipation of Asparagus

This article originally appeared in the March 28, 2016 issue of The Journal-Leader.

Asparagus is one of the first spring vegetables ready to harvest in Ohio. The enticing green stalks begin to pop out of the ground in early April and asparagus lovers start to get excited. Harvest time typically stretches through June. Did you know that a successful patch of asparagus can produce a crop for up to (and beyond) 20 years? However, getting it established can be tricky.

Asparagus is picky about the soil it grows in. It does not tolerate soils that are acidic and it prefers well-drained sites. Planting crowns (which are segments of plant roots and emerging stems) in your garden is quicker and easier than starting asparagus from seed. It is important to give the crowns or seedlings time to establish before harvesting the stalks. One-year old crowns should not be harvested until they have been in the garden bed for at least a year and seedlings need two years. The reason they need this time is that the stalks, which we eat, will grow out into a fern and make energy to send down to the roots. When you harvest the stalks, energy is lost from the roots and if this happens too early the asparagus will not produce in subsequent years.

Asparagus is diecious (which means it has separate male and female plants). After the female plants growing out into a fern they will produce flowers and eventually seeds. Removing the seed stalks from the plant before the seeds form helps save energy in the roots for the next year. Seed production can be avoided by specifically purchasing crowns of only male plants.

After the asparagus has had time to get used to its new home and harvest time comes, pick it when the stalks are about the length of your hand (7-9 in). You can snap the stalks off at the soil, or to avoid cutting the tough part of the stalk off later, leave an inch or two sticking out. Harvest every week or two until 75% of the stalks are about the circumference of a pencil. To store fresh asparagus, place the ends upright in a shallow tray of water to keep them sweet and tender (if you buy fresh asparagus at a market, look for bunches that have been stored this way to get the best taste and texture). Once the harvest period has passed, let the remaining stalks grow out into ferns again to store energy for next year.

If you’re not a fan of asparagus (like me), maybe it is time to give it another try. The spring issue of OSU Extension’s Chop Chop Magazine features a recipe for Cheesy Roasted Asparagus that I plan to make with dinner sometime this month:

Ingredients: 1 bunch of fresh asparagus, 2 tbs. olive oil, ¼ tsp. salt, ½ cup grated parmesan cheese, and ½ of a lemon

Directions: Preheat oven to 450°F. Spread asparagus on a baking sheet, drizzle with oil, sprinkle with salt, coating the asparagus. Roast in the oven for 5-10 minutes, until bright green. Sprinkle asparagus evenly with cheese and return to the oven until the cheese melts and turns golden (about 2 min). Remove from the oven, squeeze the lemon juice over the roasted asparagus, and serve.

Happy Tasting!